I was confined to an exhibition hall because a monsoon had descended on Peterborough Arena and the rest of the show I was at was rained off. Not exactly conducive to photography but hey, I like a challenge and that challenge came from ‘Maxxis babe’ Sarah. Something like “Go on then, come up with an idea!” “Give me an hour” was my reply.
I walked the hall but came up with nothing interesting. The place was rammed as a some of the outside parts of Modified National had squeezed inside. The atmosphere was great with everyone trying to make the best of it but there was barely room to move.
The only real option for a location was the Maxxis VW van but just shooting the girls with it in front of the Maxxis truck under the orange hall lighting wasn’t going to cut it. So I came up with the concept of the girls traveling the UK with this as their tour bus in a sixties, Summer Holiday style.
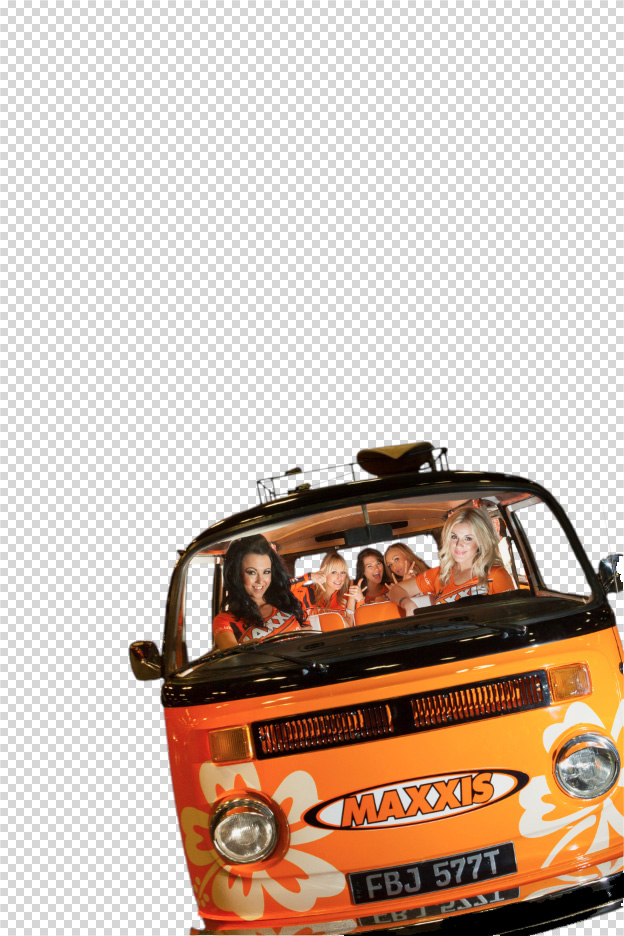
So here’s the original image. Everything but the bus is underexposed almost making it look like a composite already. Ideally I’d have preferred the bus on a plain or at least a simpler background but I had to work with what I had.
Obviously there was going to be a fair bit of compositing involved but the first job was to get the lighting right. The only light in the hall was coming from the high ceiling lights so the inside of the bus was dark and gloomy. If I dropped that onto a bright sunny background it was going to look very wrong. So, with the idea explained to the girls, out came the flashes.
The first is tucked away in the glovebox in front of Amy, camera right. It was set to a wide angle and feathered over towards Sarah on the left to even out the exposure. It’s not perfect but it’s close enough to pull back in post production.
Lana, Nickie and Danni in the back (seriously rocking the 60’s vibe by the way!) were lit with the second flash. It’s sat on the floor firing up towards the panel behind the front seats to make a nice big light source. Being a heavily modified van, this panel was covered in orange audio amplifiers so there was a MacGuver moment when some of the sticker sheets the girls were giving out we’re used to cover the amps and make a white reflector. Without this, the colour cast would have been very strong, especially with the amount of orange Lycra in the shot!
After a few test shots I knew I had the interior lit just right but the front of the bus was far too dark so a third flash is sat on the floor facing upwards hitting the front with just a wink of fill.
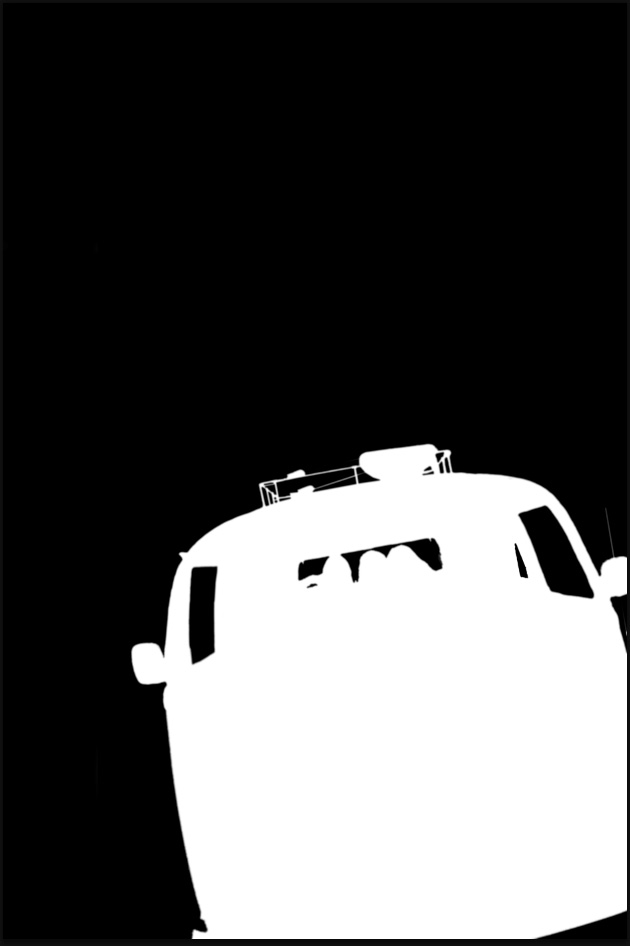
After using almost every Photoshop selection technique I know I had a finished layer mask.
Applying that to the original shot gave me a nicely lit, floating bus, ready to drop onto a suitably sunny background found on a stock library.
A quick Google for an Austin Powers font and a touch of the Warp tool and the image was done.
Yes, it’s ridiculous, cheesy and hammy but it shows the sun can still shine in an exhibition hall in rainy Peterborough.
Today’s Photo of the Week is dedicated to Stephen Dowset who sent me a message on Facebook asking how this image was made. In camera or in Photoshop?
The answer is: Both.
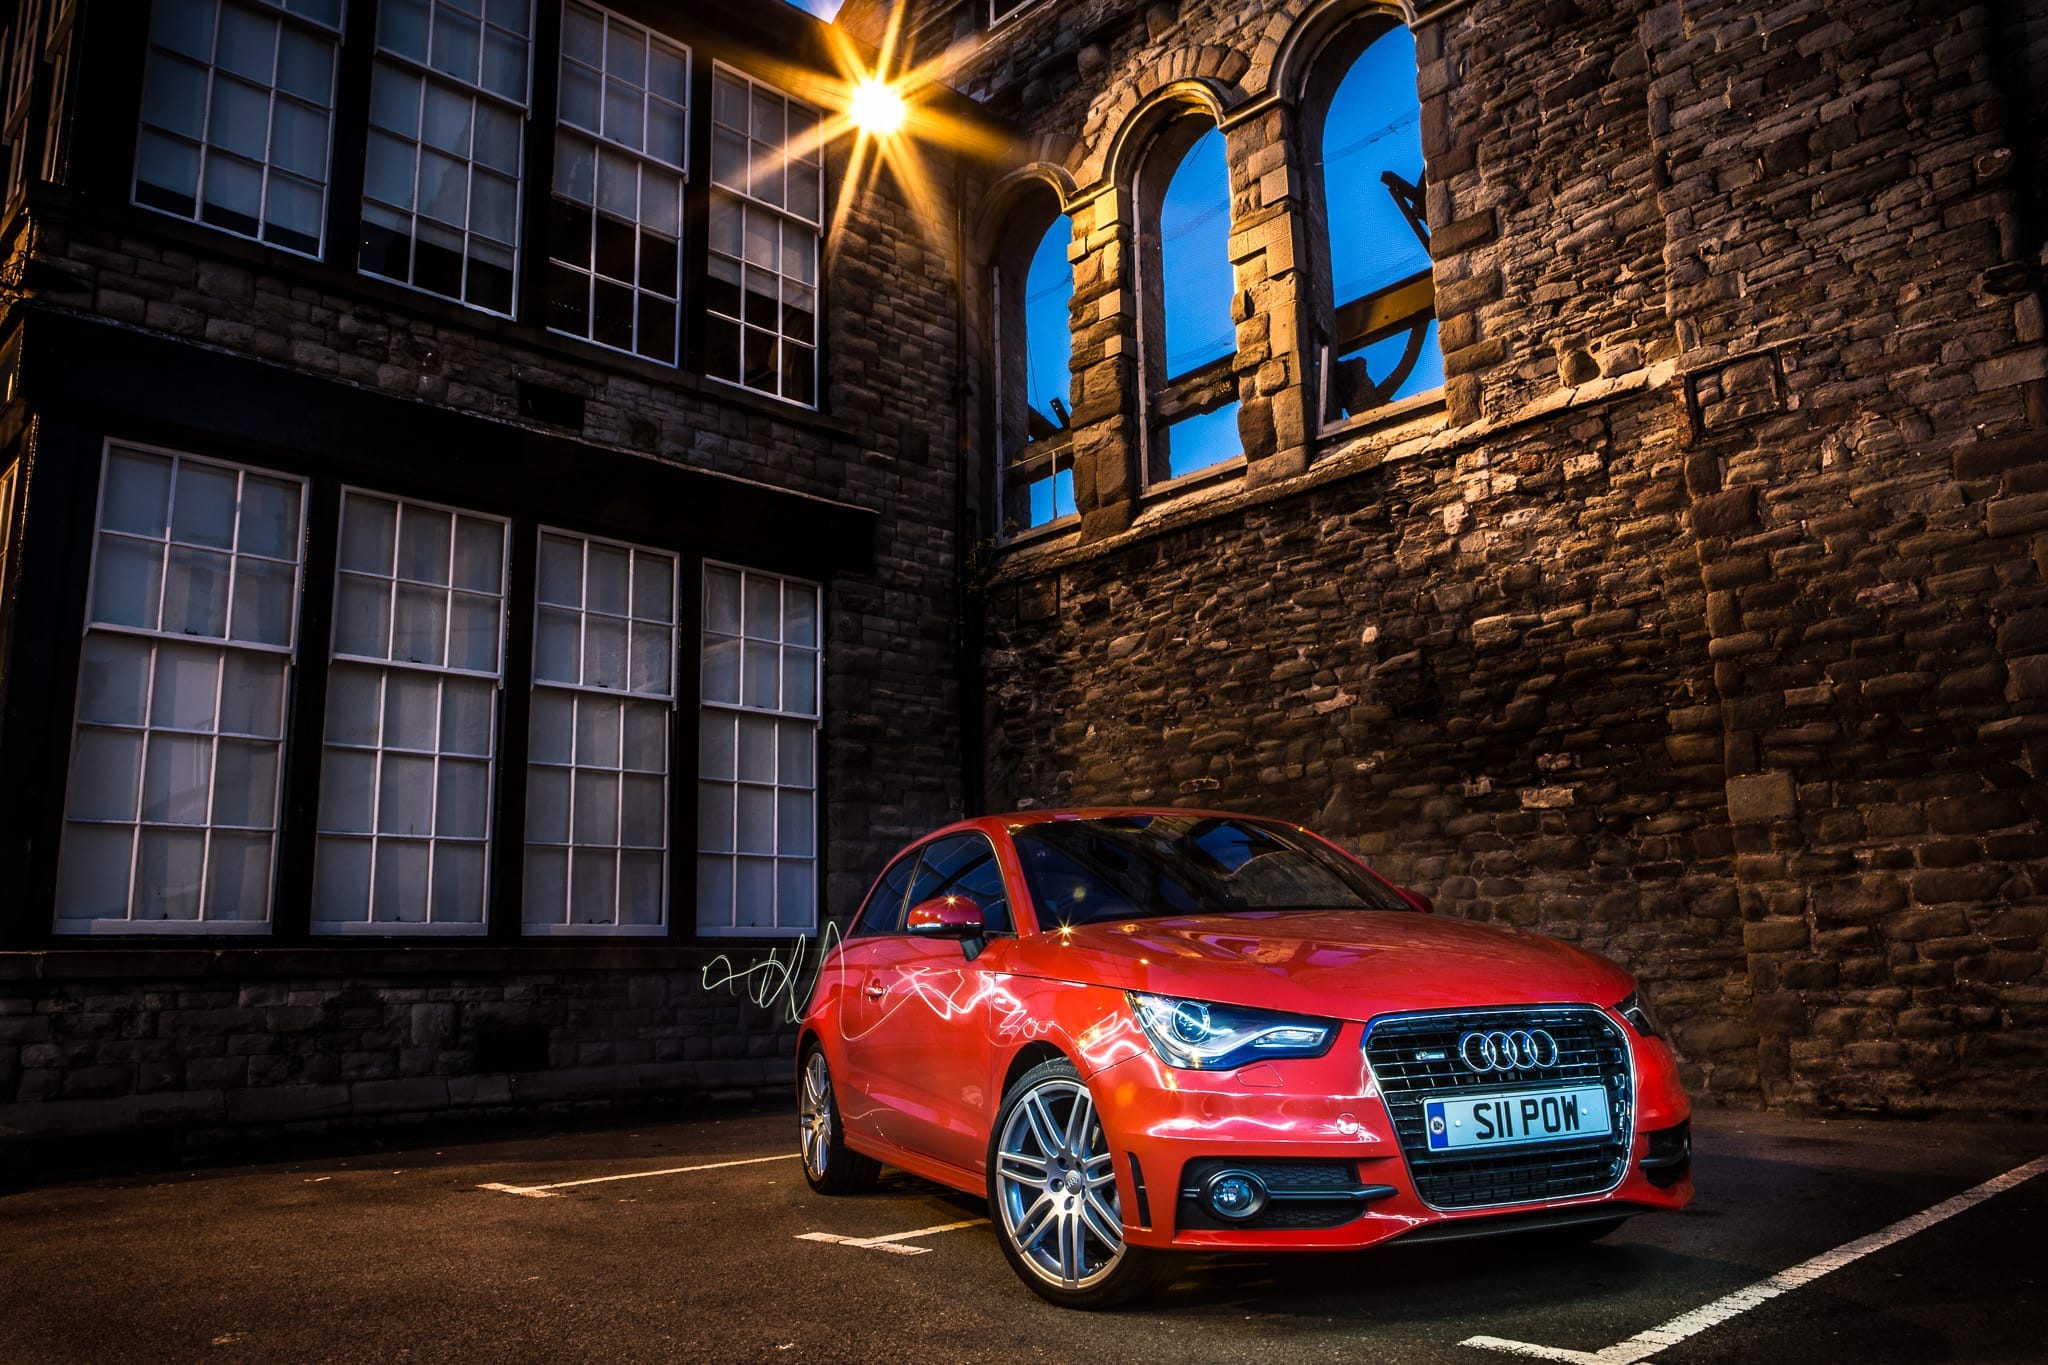
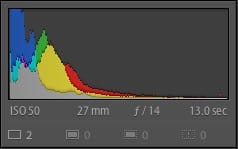
I have a more detailed write up on light painting cars and to be honest, the technique on this one is pretty much the same. The only real difference was the ambient light in the scene which dictated my shutter speed. 13 seconds at f/14 was the sweet spot and gave me time to cover about a quarter of the car per exposure. The main thing to remember is that you need to need to light the roof of the car from behind to stop it blending in with the darker background and to take more images than you think you need so you have plenty to chose from in post production. So after many clicks of the shutter and lots of running around waving a Quadra head (with modelling light on) I was left with a selection of images to sort through in Lightroom and layer up in Photoshop.
In this case I was shooting from a tripod so the images were already aligned but Photoshop is very good at auto-aligning layers if you are working freehand and have an assistant to move your lightsource.
Once in Photoshop, it was simply a case of switching all but the bottom layer to ‘Lighten’ blend mode (so only areas that are lighter than the layer below show up) and adding a few layer masks to cover up where my light, rather than it’s reflection in the car, had been captured. You’ll notice I left one of those “mistakes” in as I like how the light trail seems to come off the car and drift away.
The final contrast tweaks on the brickwork and the car were added in Lightroom.
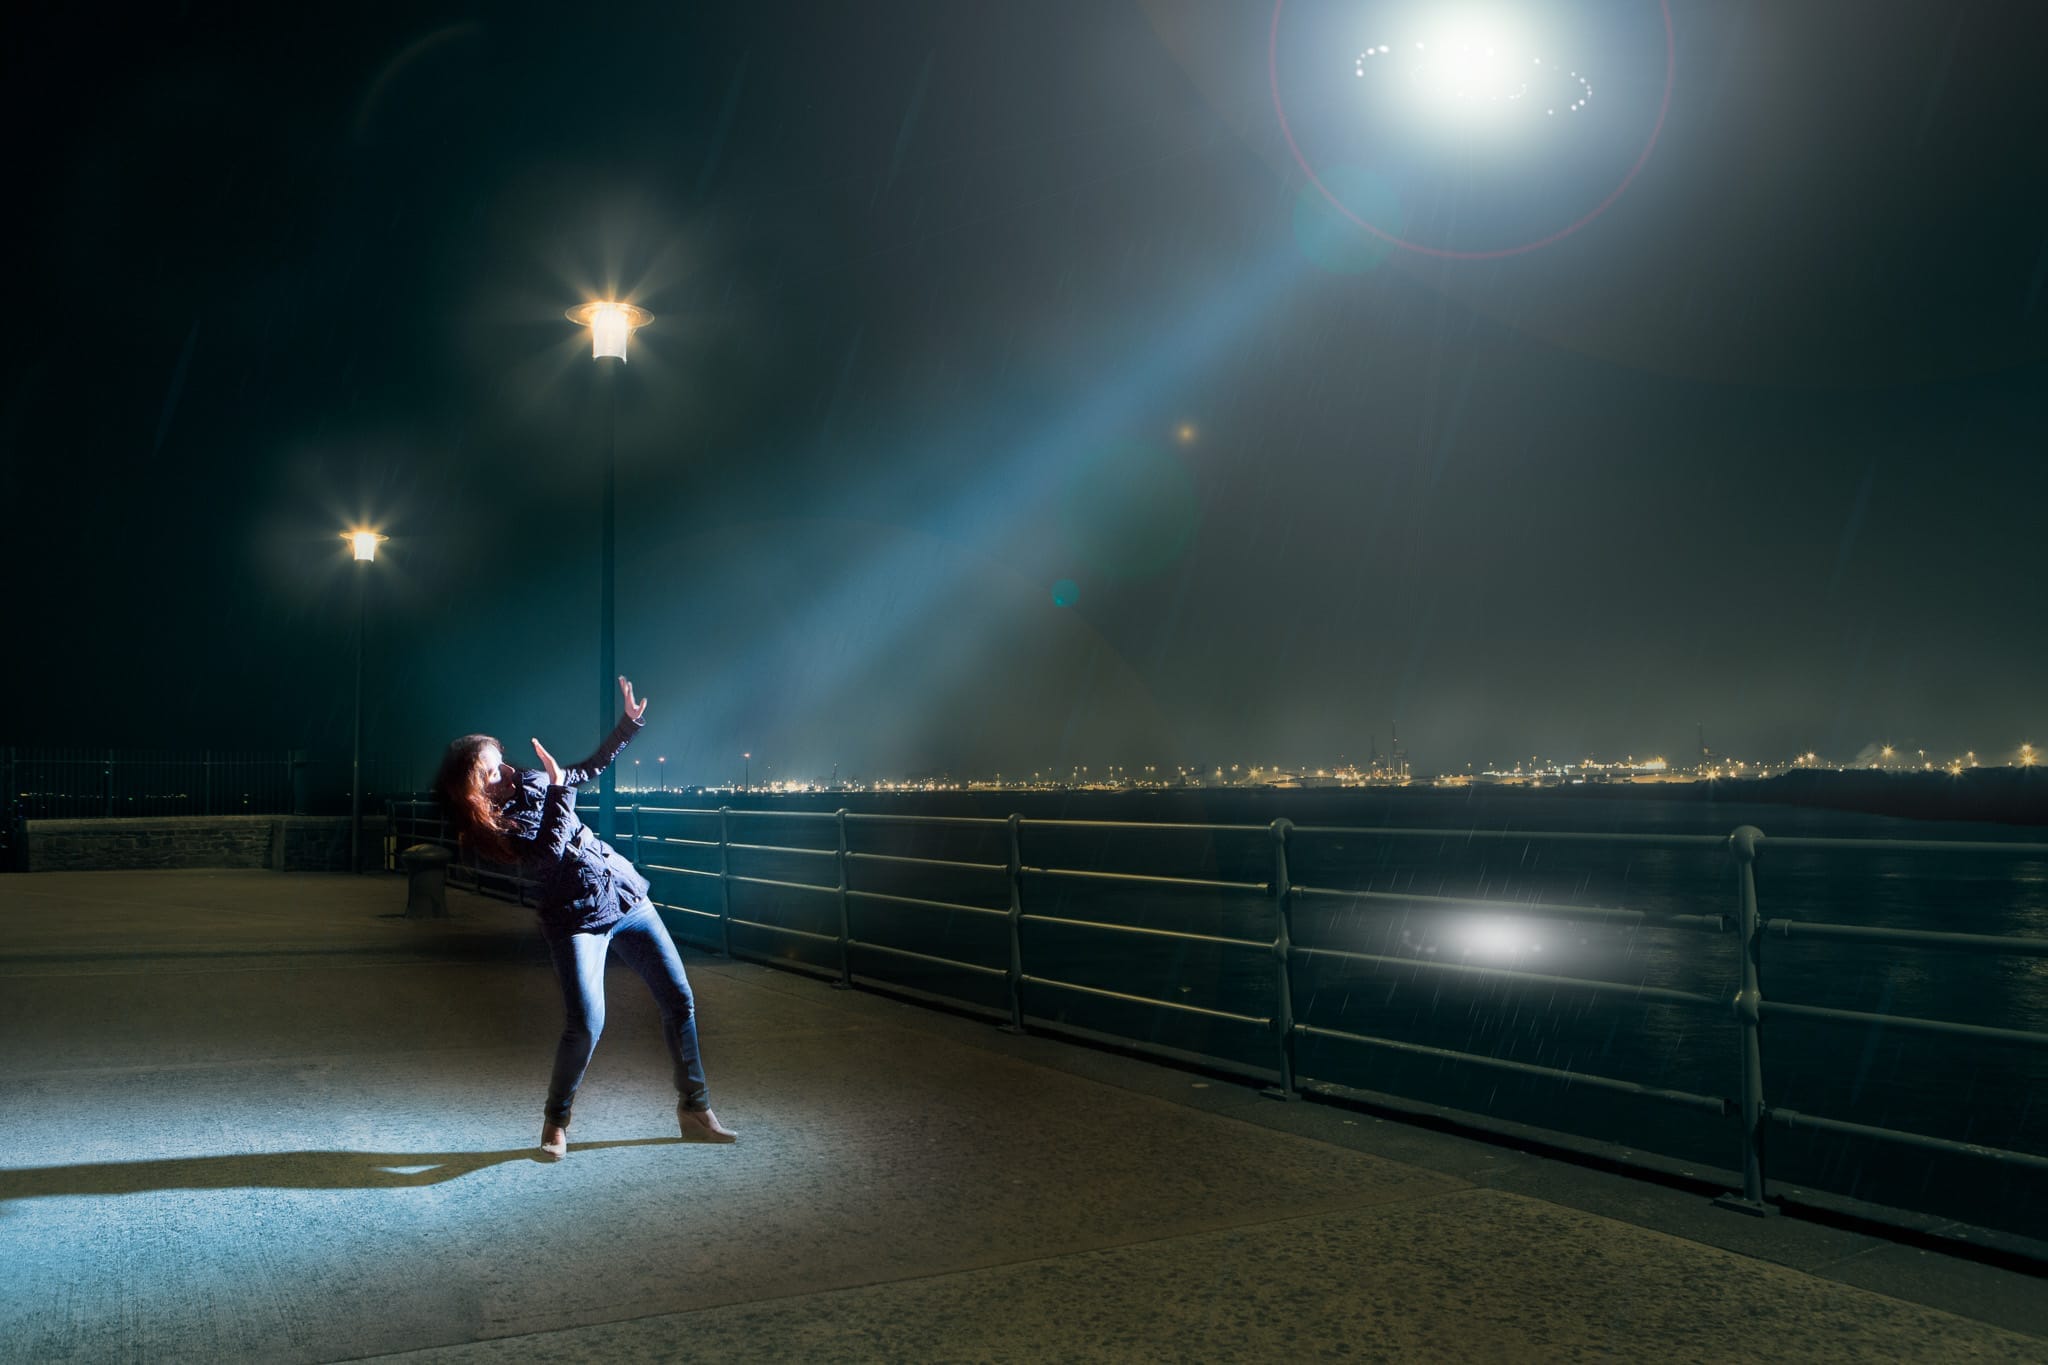
I have been watching a lot of the free YouTube videos created by Aaron Nace and the Phlearn.com team recently and I’ve been feeling inspired to push what I do in Photoshop a bit further. My goal with this shot, taken this weekend, was to go full-on Hollywood sci-fi blockbuster.
Just down the road from me is this view, where the marina ends and the Severn Estuary begins with a huge industrial area making a suitably dystopian background. This is the scene as is, shot at 2.5 seconds with an aperture of f/7.1 to add a subtle starburst effect to each light source. Because of the low light I was locked down on a tripod to avoid any motion blur.
With a few different exposures of the same composition in the can to chose from later, it was time to bring my ever-patient other half Helen into the scene. Despite the life boat keeping station just offshore she got into the role and threw a few “Oh my God! Aliens!” poses.
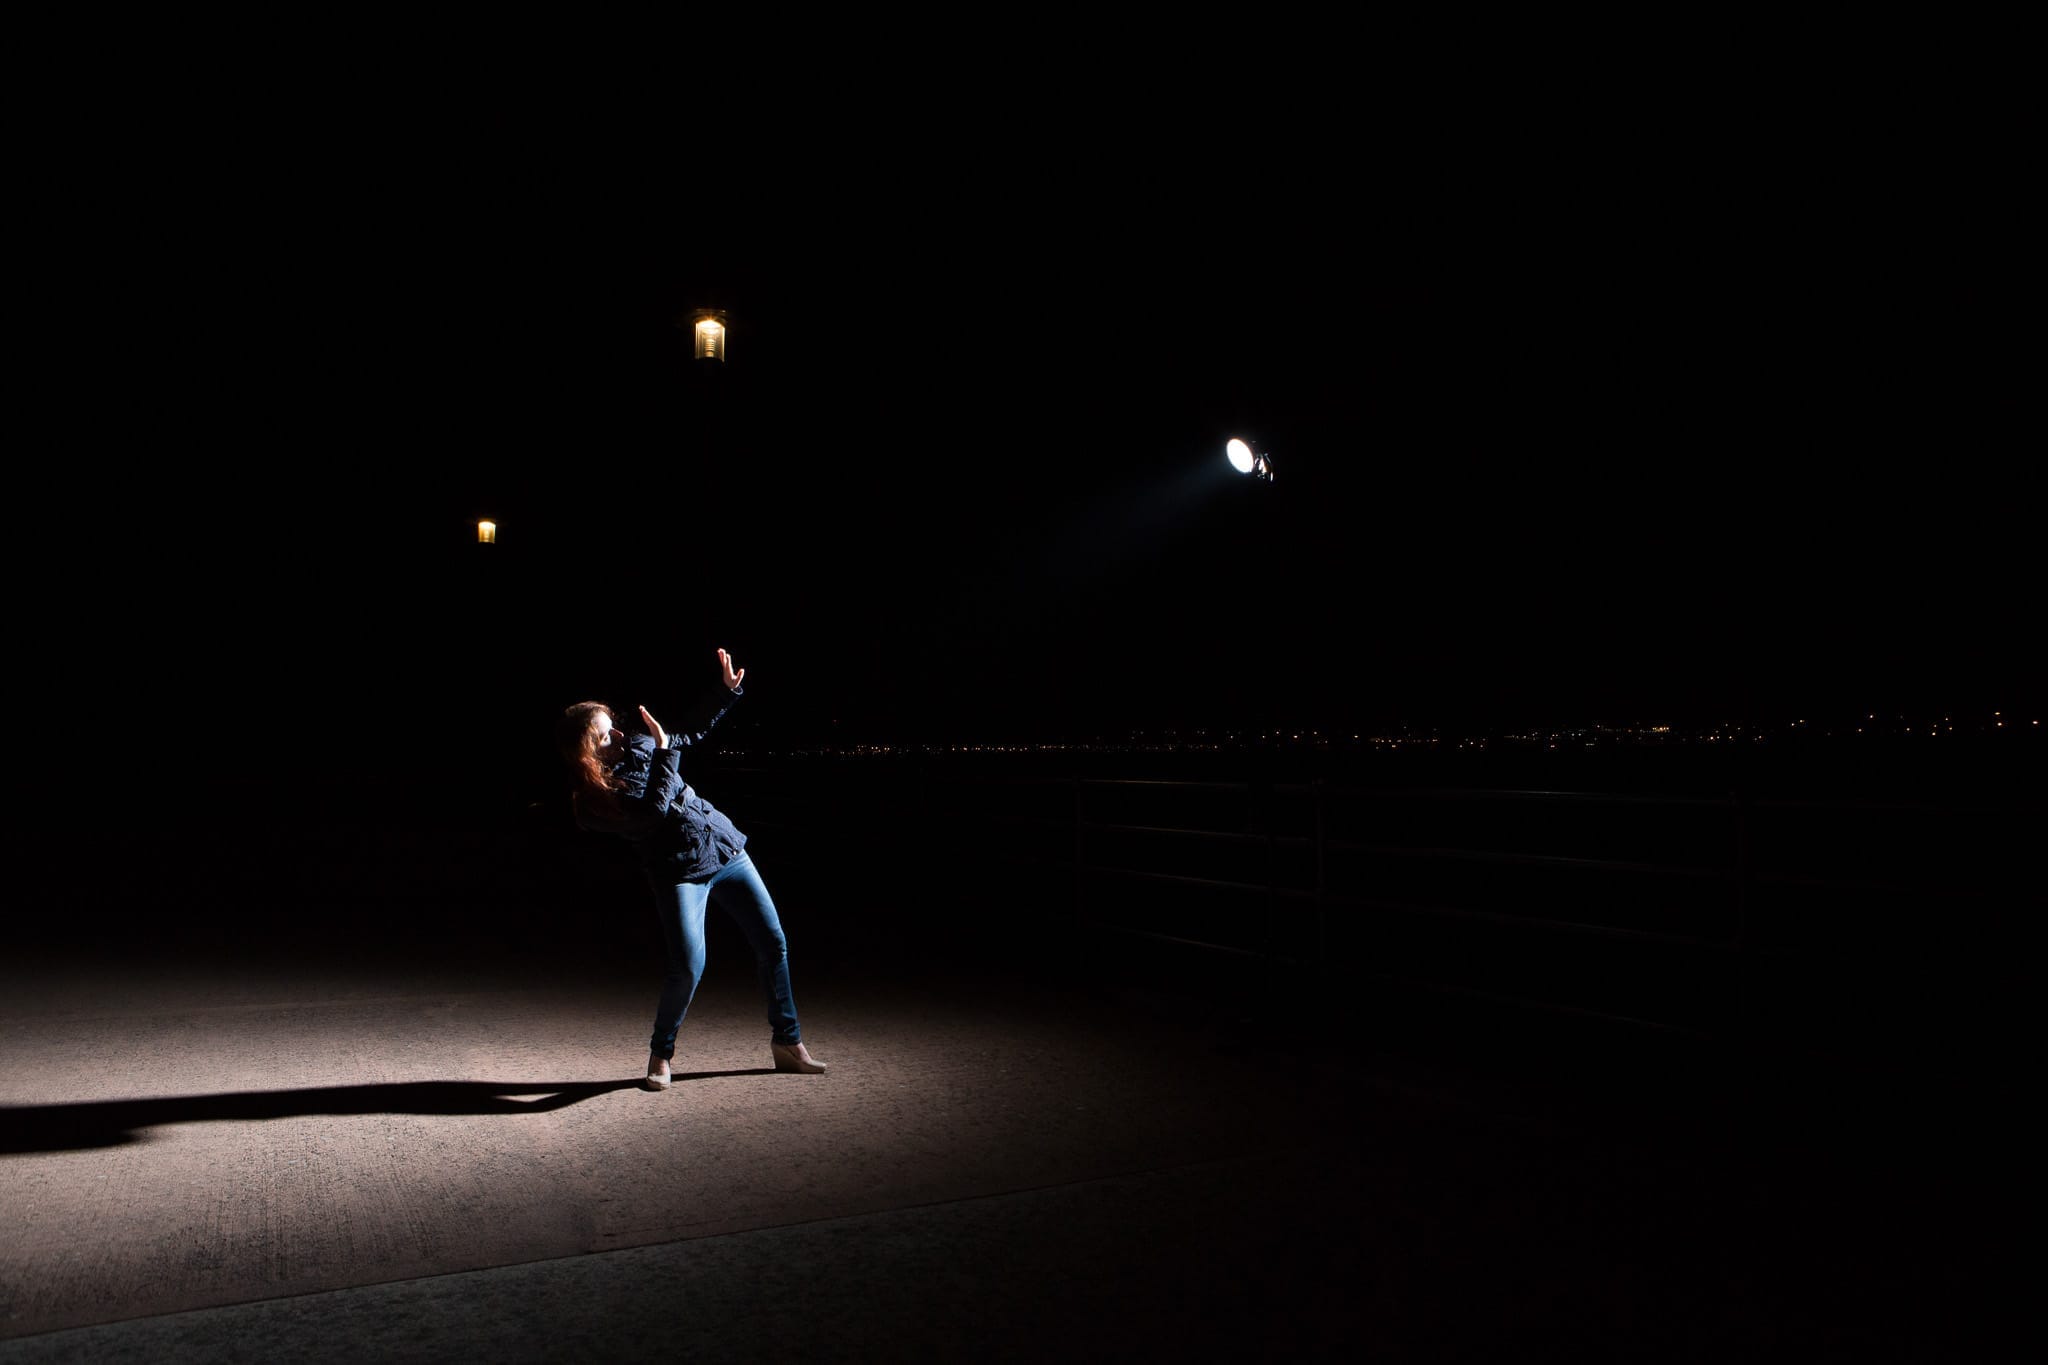
Lighting was about as basic as it gets. I was using an Elinchrom Quadra with a 7″ reflector and a 30° grid but it was on such low power I could have easily achieved the look with a speed light and a Honl grid or even something a little more Strobist. You can see the light in the above image, about nine feet in the air to camera right. One of the beauties of shooting from a tripod is you can easily remove things like light stands from an image by shooting multiple exposures and using layer masks in Photoshop.
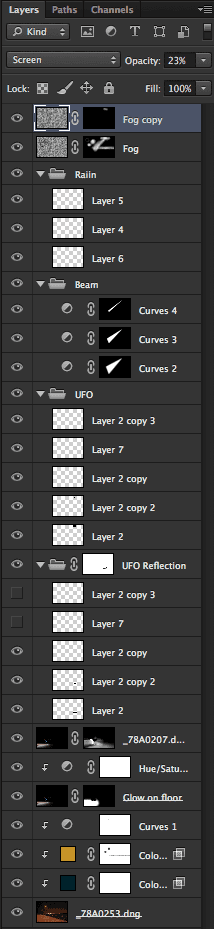
Speaking of Photoshop, this is where the real heavy lifting with this image was done. As planned. This wasn’t a case of fixing what I could, and should, have got right in camera. This was about adding a specific look and this is where the techniques I picked up from Aaron came in.
There are three main Photoshop edits here.
I won’t make this into a full tutorial as Phlearn have already done a fantastic job but I’ll give a quick outline of each step.
Step 1: Colour Grading
Until recently I have done any split toning of my images in Lightroom. Split toning means adding a different colour to you shadows and highlights. In this case I went for a cool greeny blue in the dark areas of the image and a warm yellowy orange in the highlights using Solid Colour adjustment layers and the Blend If options in Photoshop’s Layer Styles.
Step 2: Beam of light
This is just a selection drawn with the polygonal lasso tool on a new layer, filled with white and Gaussian blurred. The thing that that makes it more believable is the fact it done on three layers, each is a slightly narrower, slightly brighter, slightly less blurred beam.
Step 3: Clouds around the light sources
Light is invisible. You only see it when in interacts with something else and when talking about alien tractor beams over water this is going to be mist. I created this with Photoshop’s Render Clouds feature, Gaussian blurred them a little then painted them in around each source of light with a layer mask to make the beam a little more solid and convincing.
So all in all, about 10 minutes to set up, another 10 to shoot and a couple of hours in Photoshop but the majority of the work went in to planning and pre-visualising the image before even leaving the house.
I’d love to hear what you think of the final image. Am I wielding Photoshop like a scalpel or a sledgehammer?
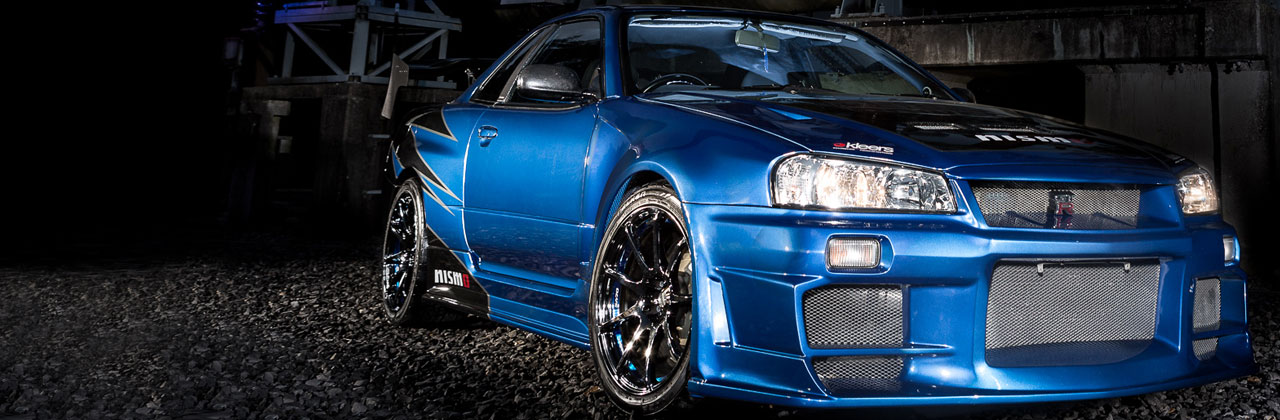
Tuesday’s Photo of the Week involved adding a skyline as a finishing touch. For this image, the Skyline was the centre of attention.
This is The Sextons Skyline, aka SKY101, aka The Heff’s car and if you have spent any time at car shows around the UK, you will have seen it before. I’ve known Chris, the owner, for a few years and when he called me and told me about a location he had in mind I was heading south the next weekend.
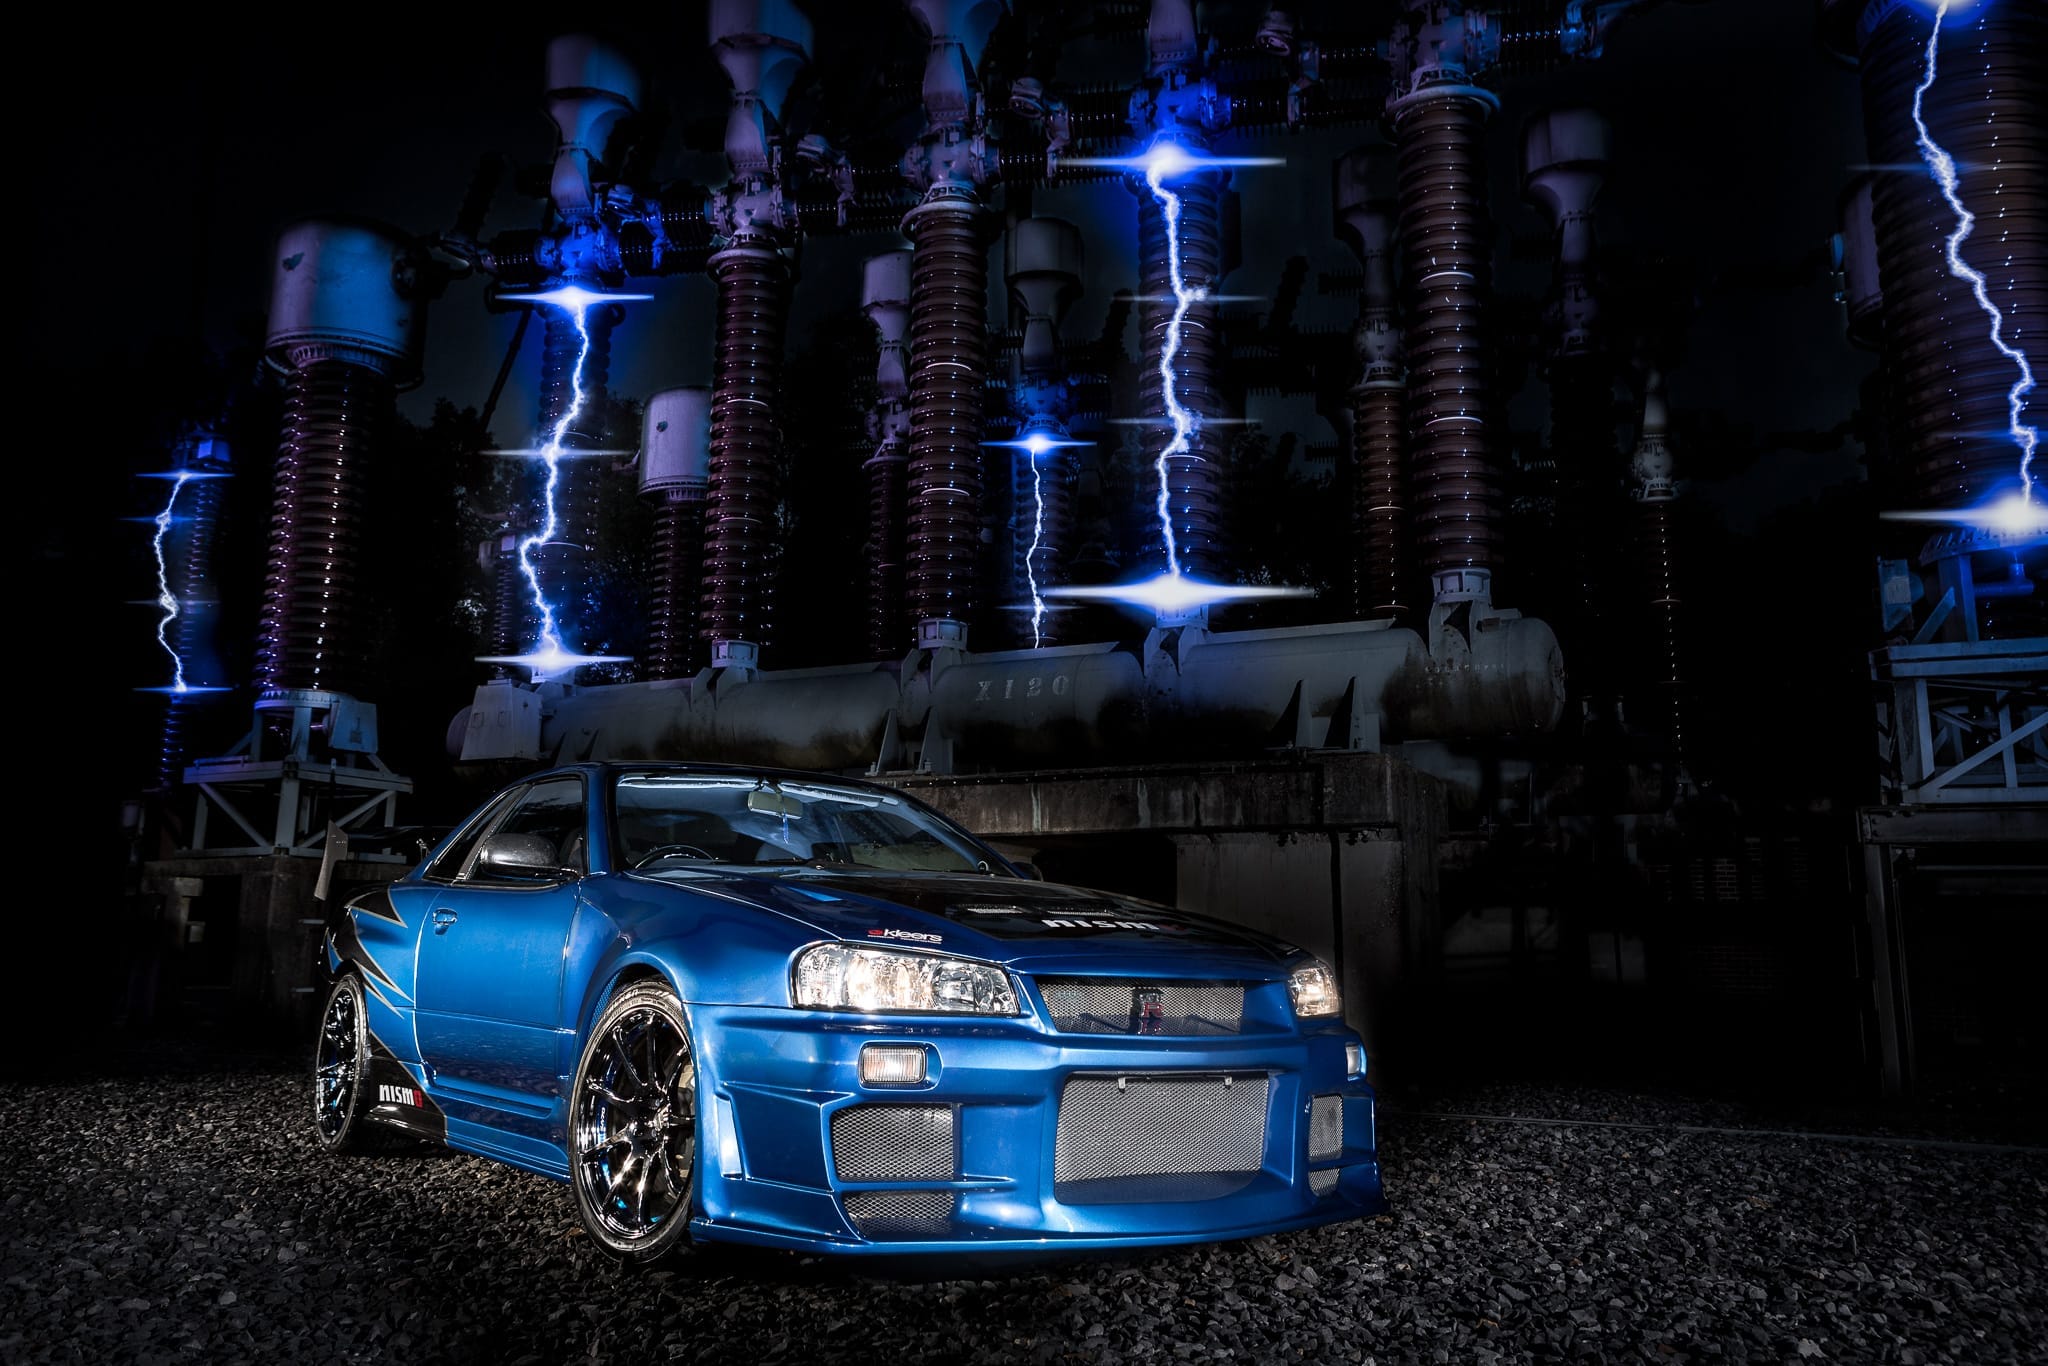
With a car this aggressive looking and a location so dramatic, it would have been wrong not to go all out and make the shoot quite theatrical. Because of the location I was working with as little kit as possible so this whole shot was lit with a single strobe and even though my SkyPort radio triggers worked flawlessly, if I raised my Elinchrom Quadra any higher than 2.5 metres, it started to flash uncontrollably. A little scary! Considering the substation typically handles 400,000 volts of electricity, I was impressed I didn’t have to fall back to the old flash sync cable I’d packed just in case.
Despite the huge amounts of electricity involved, the substation handles it in a very understated way. You can hear the crackle and feel it in the air but photographically speaking, there not much to see, so I hammed things up a little. OK… a lot!
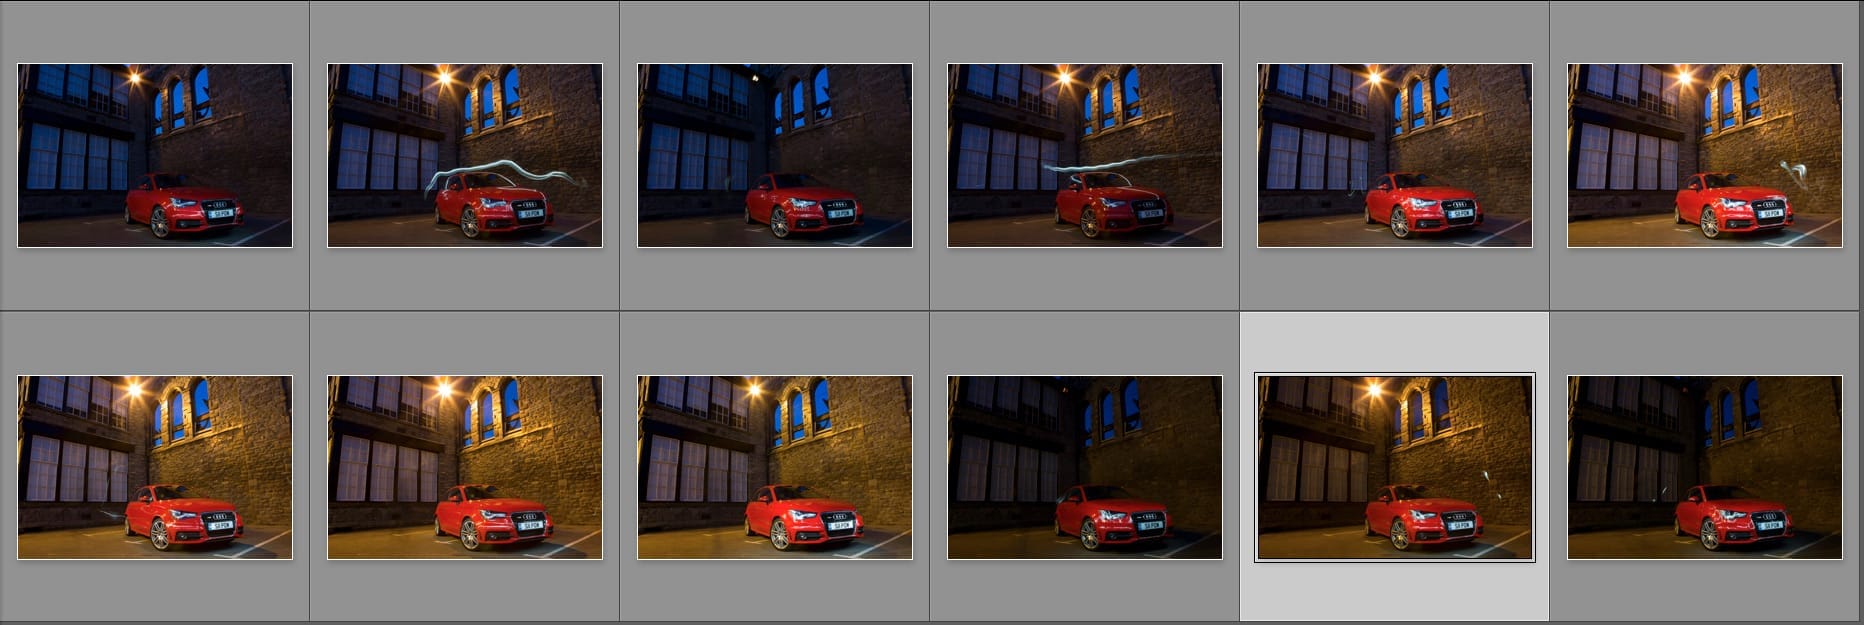
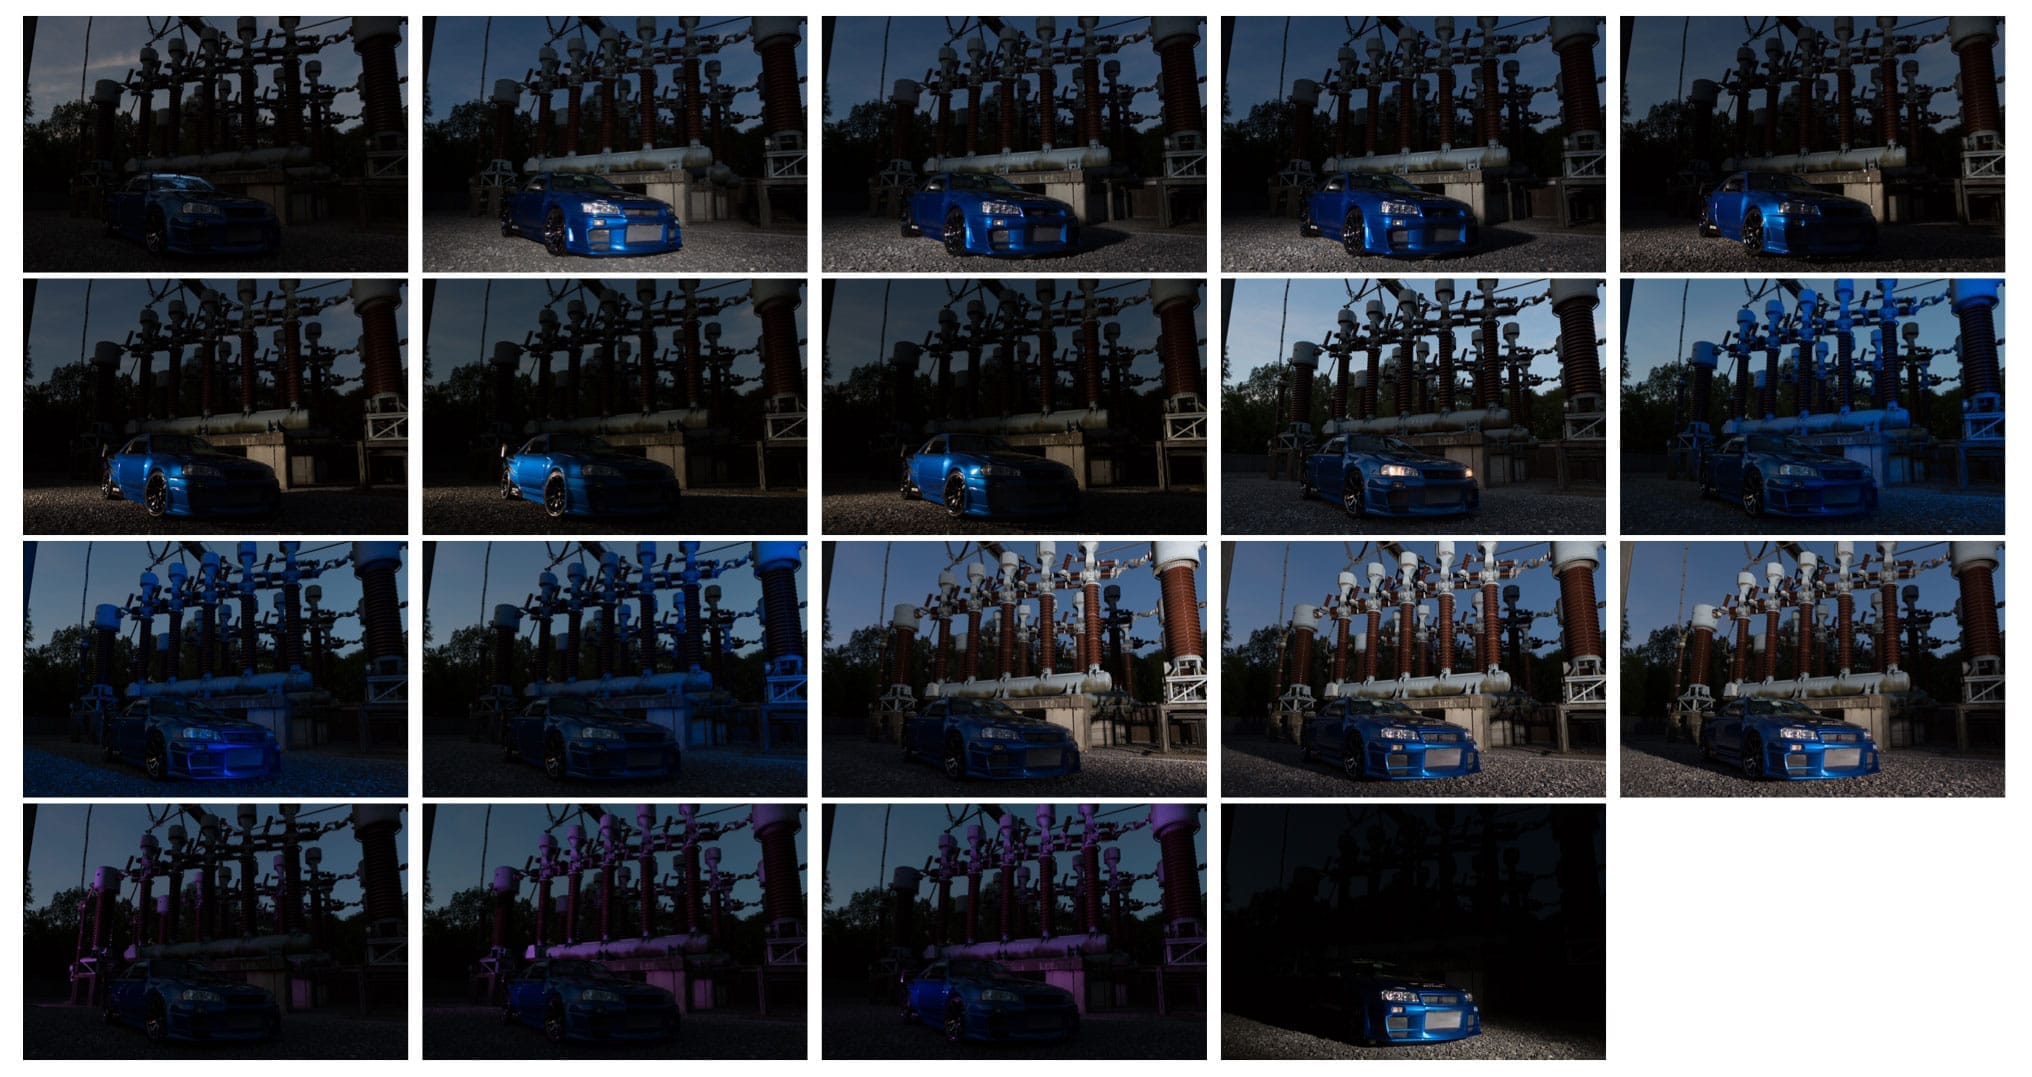
Because I was working with just one strobe, I had the camera locked in position on a tripod as I walked around the car lighting each panel individually with a fairly tight beam of light from a Maxi Spot reflector. The plan was always to shot lots of individual images and then layer them in Photoshop afterwards. To save me walking back and forth between the camera and the light I was using a wireless shutter release to speed things along.
As for camera settings, if you look at the selection of images below you can see I was under exposing the ambient light by about 3 stops and letting the flash do its work. I also shot an exposure just for the headlights and another one with more ambient light in case I needed some fill for the deeper shadows. Then finally I lit the background, gelled purple from the left and blue from the right to give a little theatre.
Once I knew I had all everything I could possible need in the camera, off to Photoshop I went. I painted in the lit areas of of the using layer masks and then went to town on a Frankenstein style background. Here’s a screen capture of the final build up.
I talk a lot of about being different on this blog. If you are just shooting and sharing the same images as everyone else , you’re are never going to elevate yourself above the background noise.
That’s all well and good if you are driving the shoot. If you have creative control and some sort of exclusivity. But what if you’re covering an event, in this case, for a magazine or website? Is it still possible to produce something that differentiates you from everyone else there with a camera?
Yes!
This is Candice Collyer working on the Victory Bikes stand during Motorcycle Live at the National Exhibition Centre. Nice motorbike, pretty girl posing for photos. Click. Job done. Picture in the can. Move on? Only if you want your image to disappear into the sea of literally thousands of similar images.
Now I am not saying this this is a unique idea. It’s not. Rebekka Guðleifsdóttir has been very successful with this type of ‘multiplicity’ image and her work has a much stronger story telling element. But is is different, certainly under these circumstances.
It may have taken some time in Photoshop (see the video below), but I’d rather spend an hour on a single standout image than post 100 unremarkable ones that could have been taken by anyone.


Recent Comments