It’s advice you’ll see over and over again, not just from photographers but from people in all walks of life: If you want to stand out from the crowd, do something different.
Now while I am not lauding this as the great photograph ever taken, but I like to think it’s a good example of “different”.
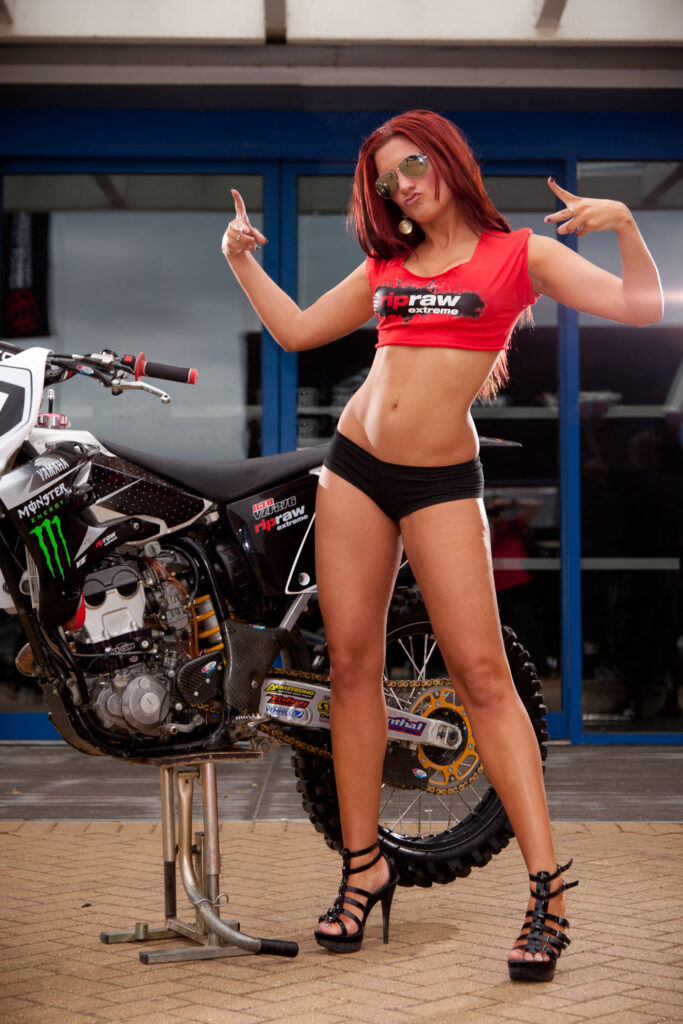
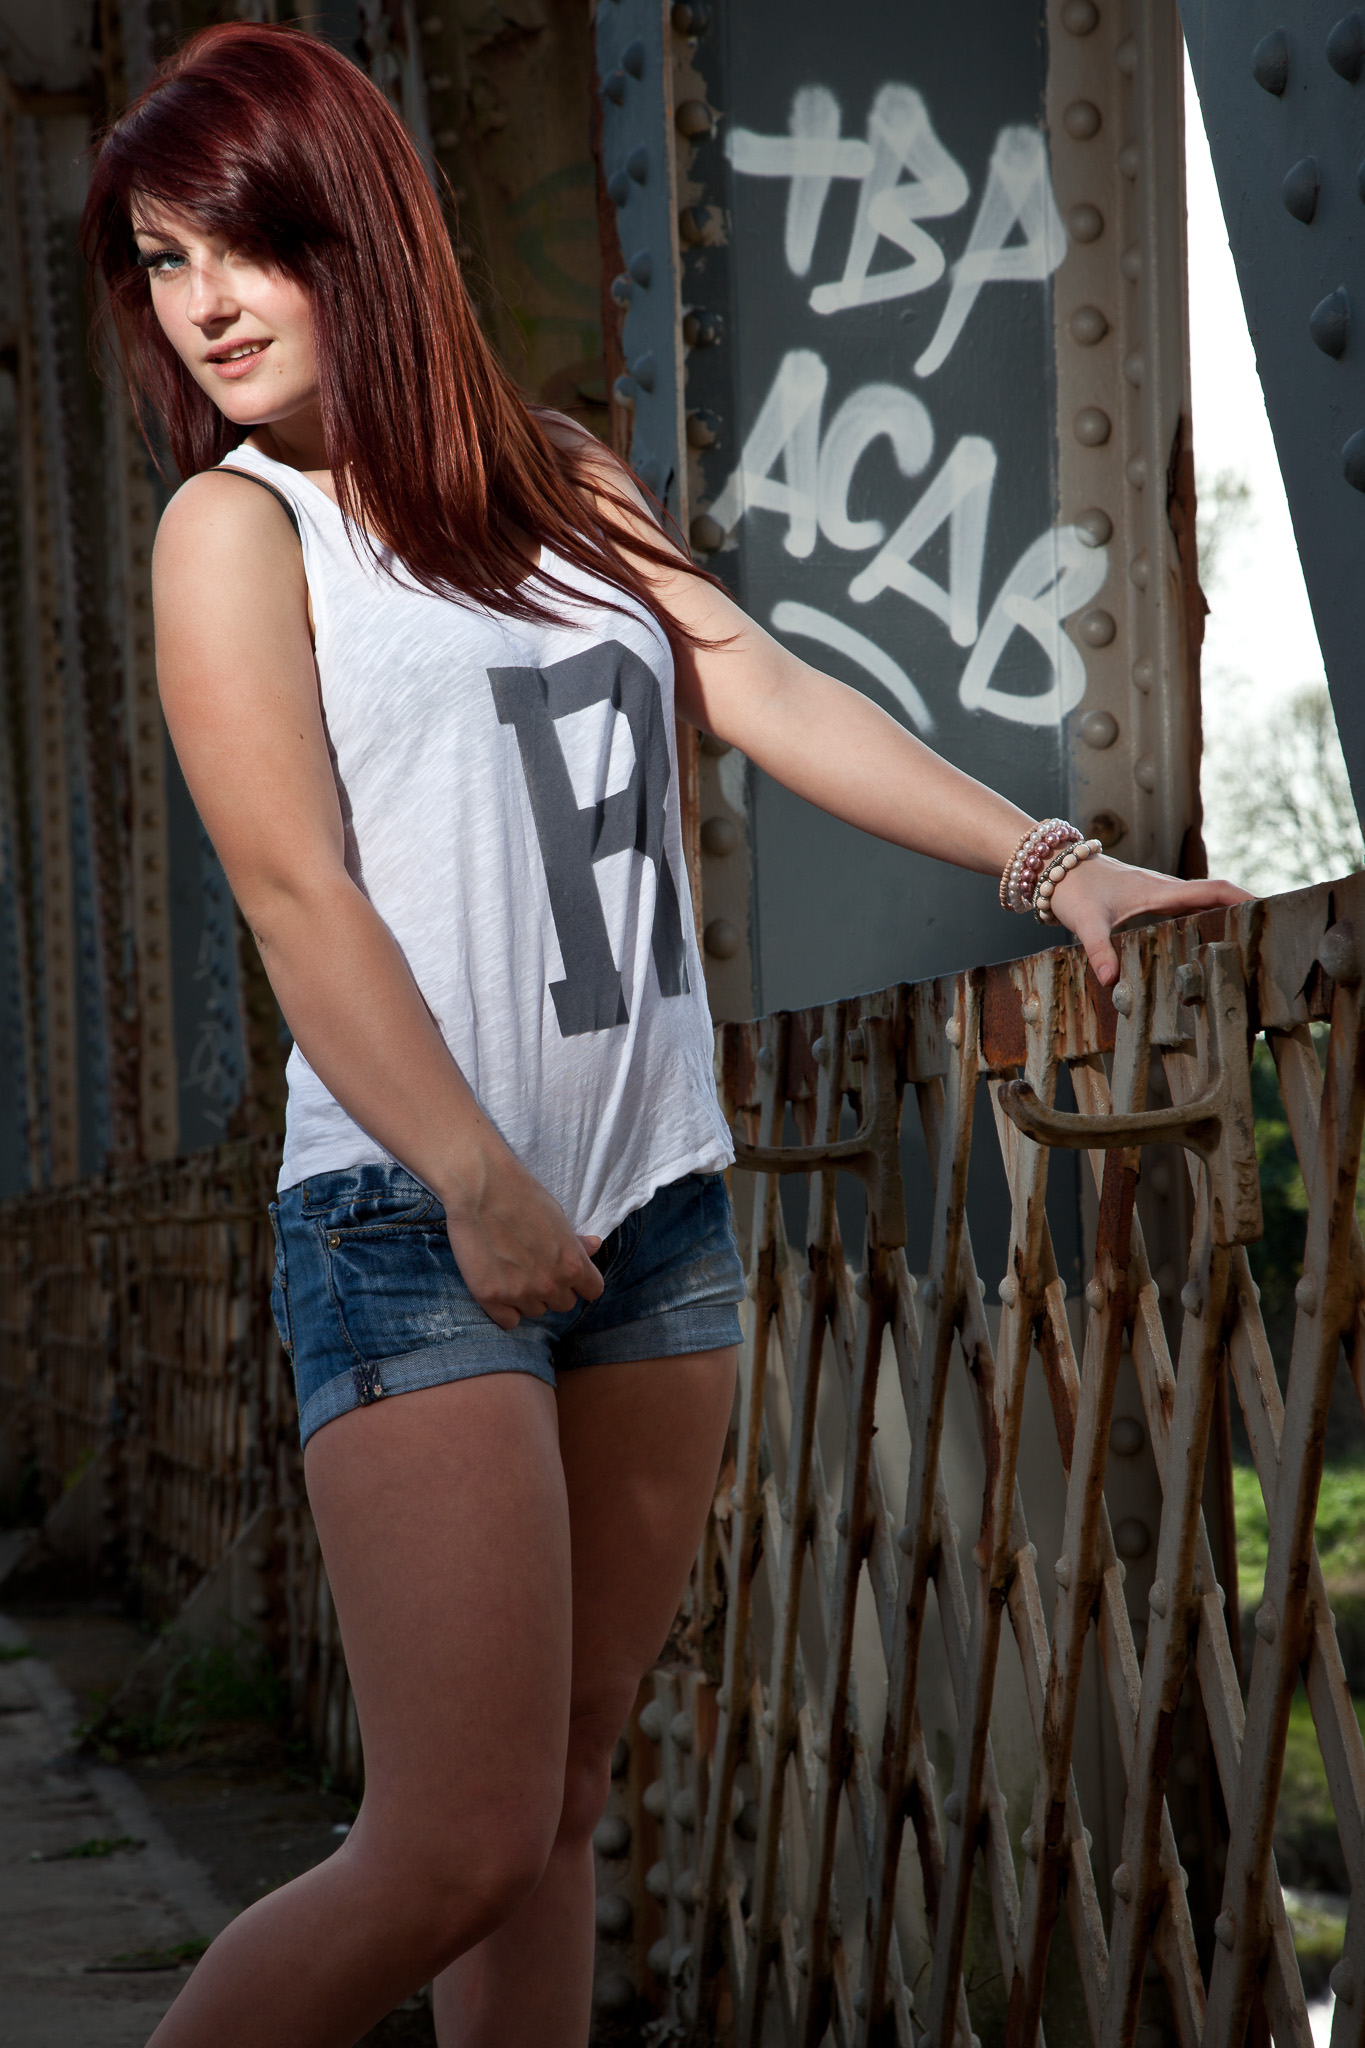
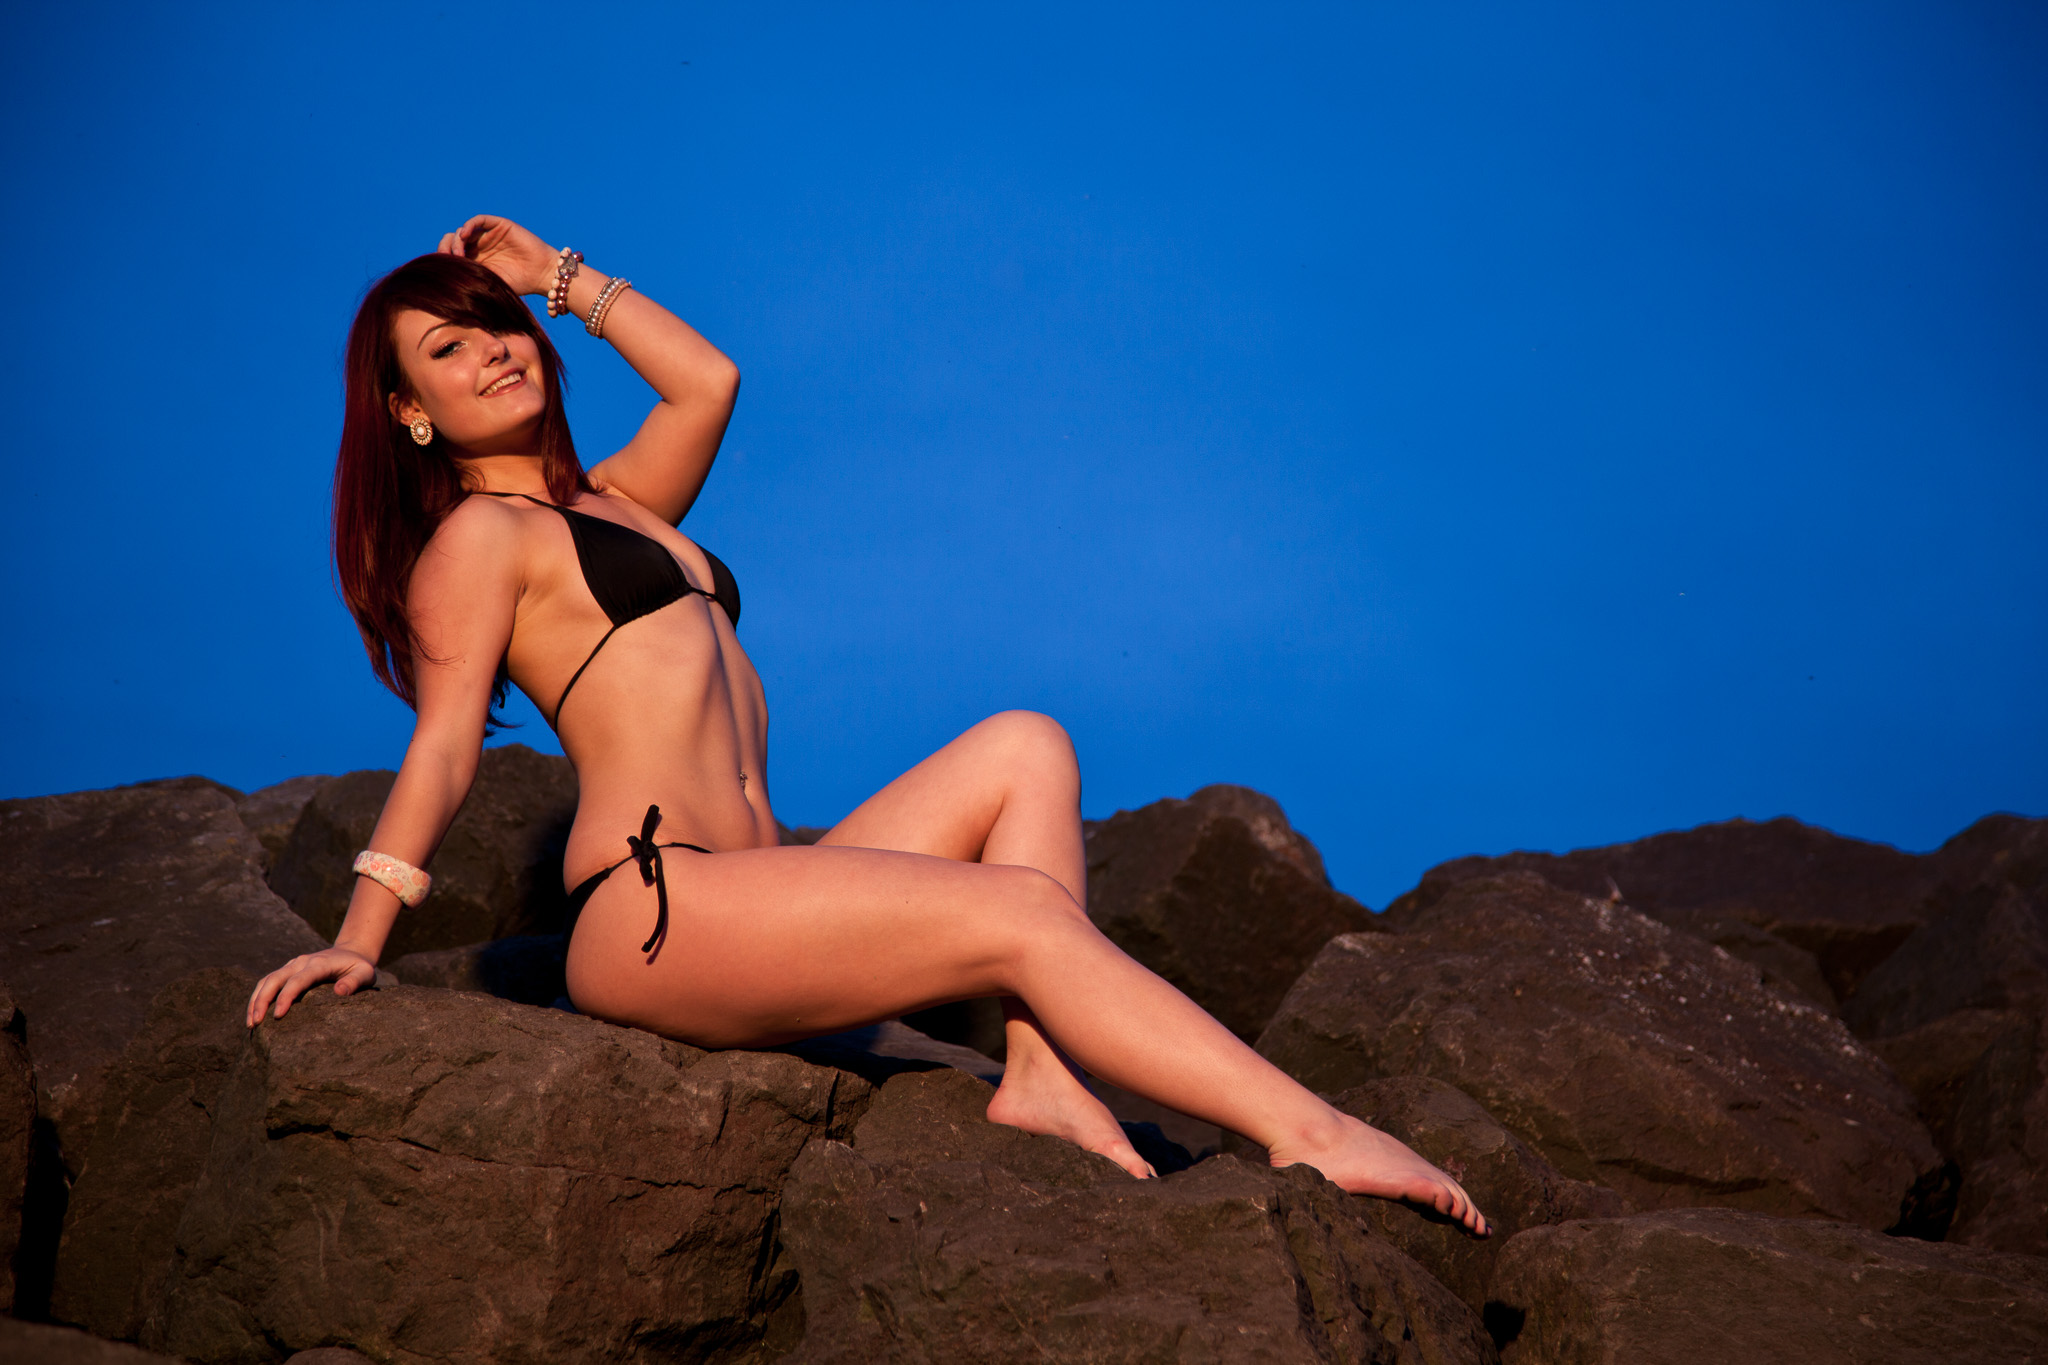
The “Paparazzi” Image
Michelle, owner of this particular drift project S14, was proud to have her car on a stand at Modified Nationals and asked me to take a photo. Unfortunately the car was indoors with no chance of moving it so I had to work with what I had.
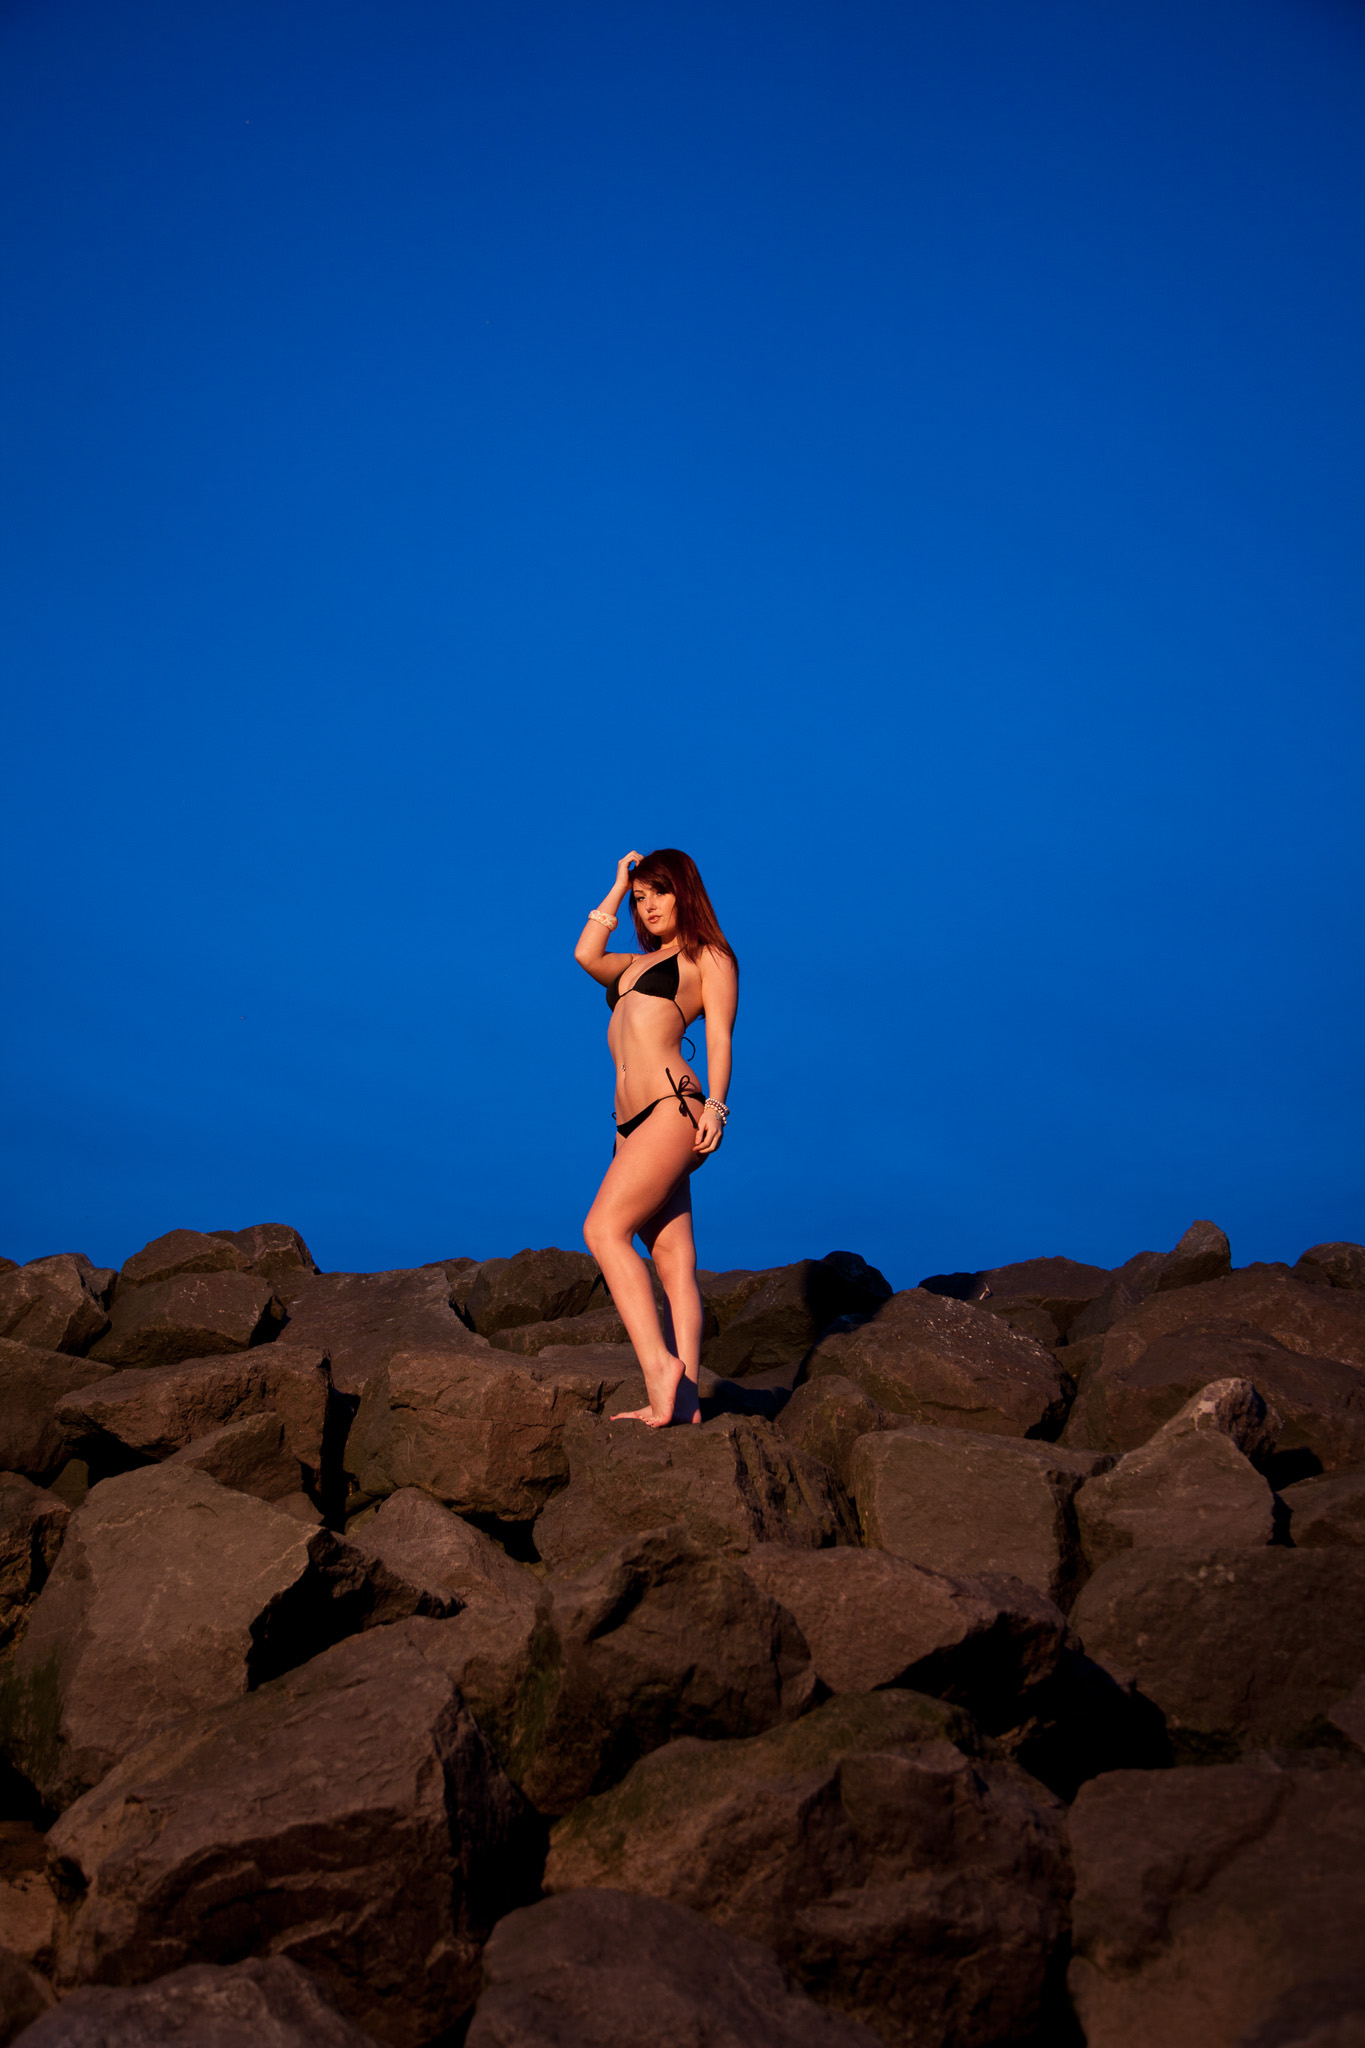
The scene as it was – Photo courtesy of Steven ‘Jonesy’ Jones
At some point during the weekend, an image taken by David Hobby during the shoot out at last years Gulf Photo Plus popped into my head. The idea being to make the car look like a celebrity by surrounding it with ‘paparazzi’. Normally I work with manual flash and simple radio triggers but only having two with me meant I chose to use my 580EXII as an ETTL commander to trigger any available Canon flashes… of which I had only one! So the first challenge was to approach as many Canon toting photographers as possible, explain the idea, and get them in position. (Something I wouldn’t have done a year ago, but thanks to photography I’ve been gradually making my comfort zone larger.) There are even a few Nikonian friends in the final shot with flares from Canon flashes cloned over their non-firing strobes in post.
On the technical side, I had my 580EXII on camera running the show and providing fill flash at minus 1 stop. All the slave flashes we’re set as ETTL slaves in the same group and set to +1 flash exposure compensation to give a nice bright rim effect to separate the black car from the black curtain behind and to light the roof and bonnet.
What could I have done better? Looking back on the image now I can see I should have had more light on the nose and the door and a smaller aperture would have made better star bursts from the flashes and highlights. But all in all, as it was a spur of the moment shot, I’m pretty pleased, and I have learnt what to look out for if I ever do it again.
Last weekend saw Modified Nationals at Peterborough Showground roll around again and with it, a chance to see how far my photography had progressed since last year. It was a similar situation to last time – a case of shoot when you can where you can, make the best of the gale-force wind and hopefully come away with something that stands out.
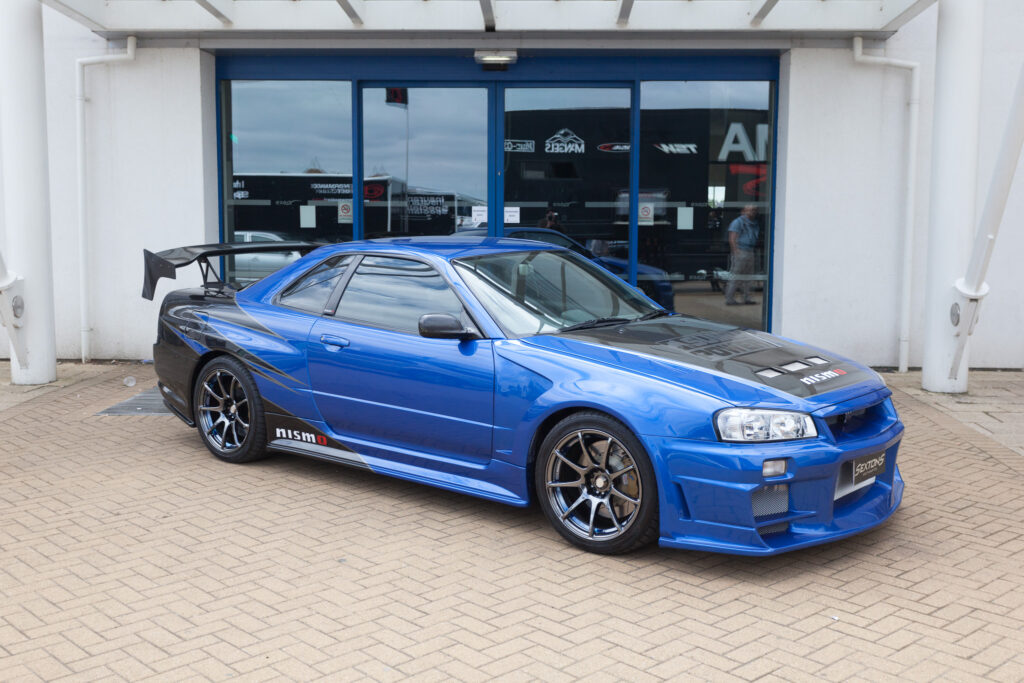
This is time our glamourous location was the back of the Exec building with its sandy coloured walls bouncing the intermittent sunshine around making the scene pretty even and flat.
Just out of the frame in that image is a sky full of bright cloud that I wanted to keep some detail in for wider compositions and that meant that at my sync speed of 1/200th I had to stop down to around f/11. Too much for my speedlights to act as main lights so out came the Elinchrom Quadras – one lighting the front of the car, the other hitting it broadside. The speedlights were cranked up to full power, zoomed to 70mm and pressed into action as rim lights to stop the black and blue car blending into the blue and black background and to add a little sculpting to the girls.
A few test shots later (and a little post production for this image) I had the lights dialed in and giving results like this:
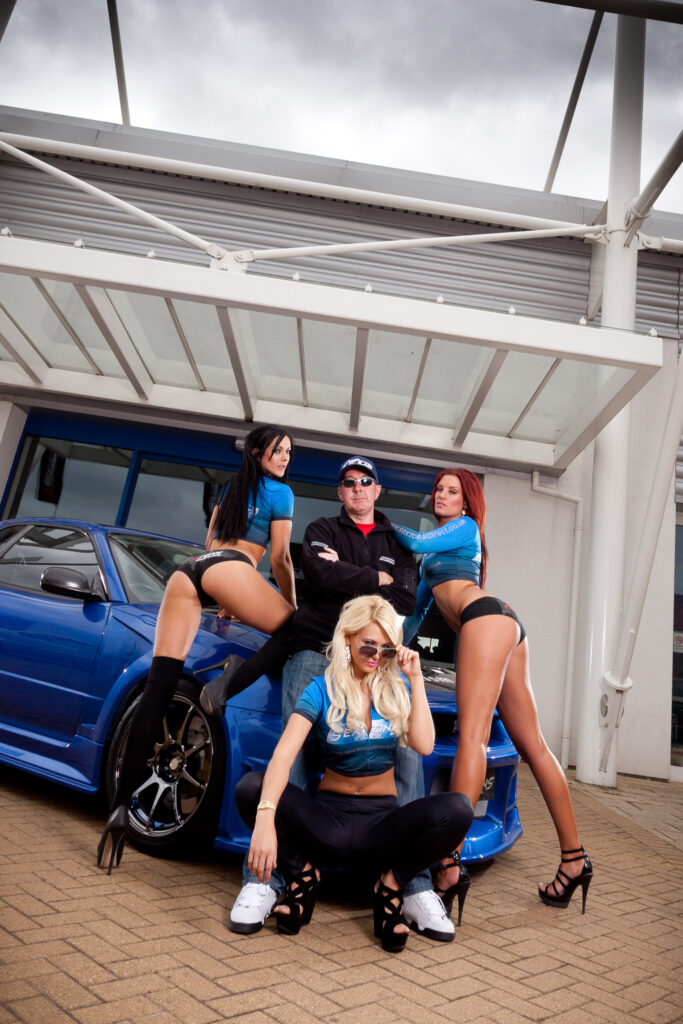
Time to bring on the girls… and “camera shy” Chris the owner. For these shots the flash that was lighting the front of the car is now being fired through a shoot through umbrella.
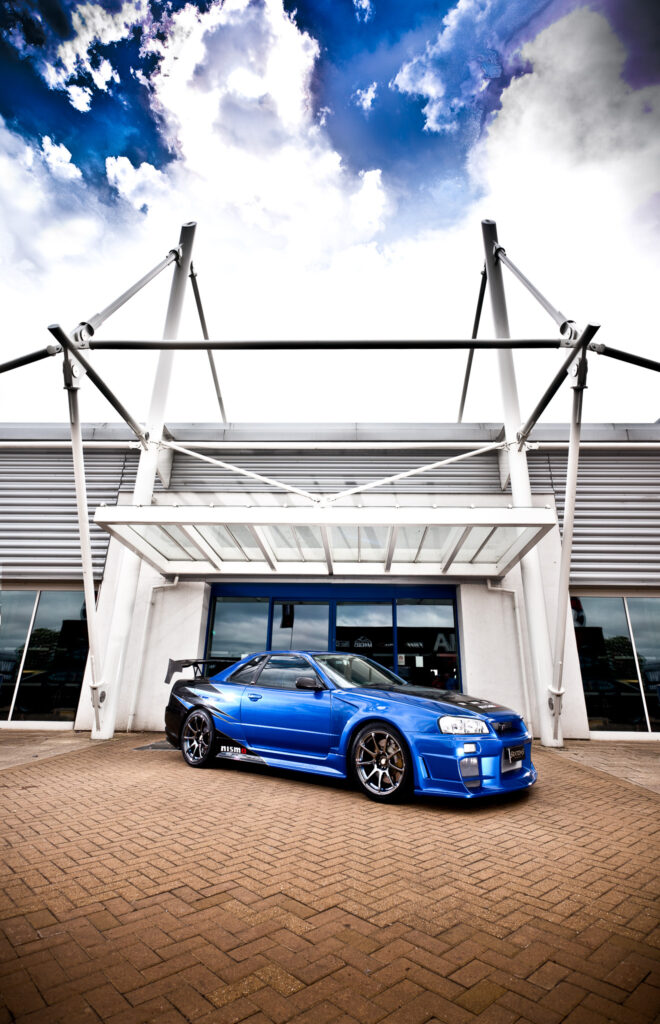
And a wider composition to show the position of the rim lights.
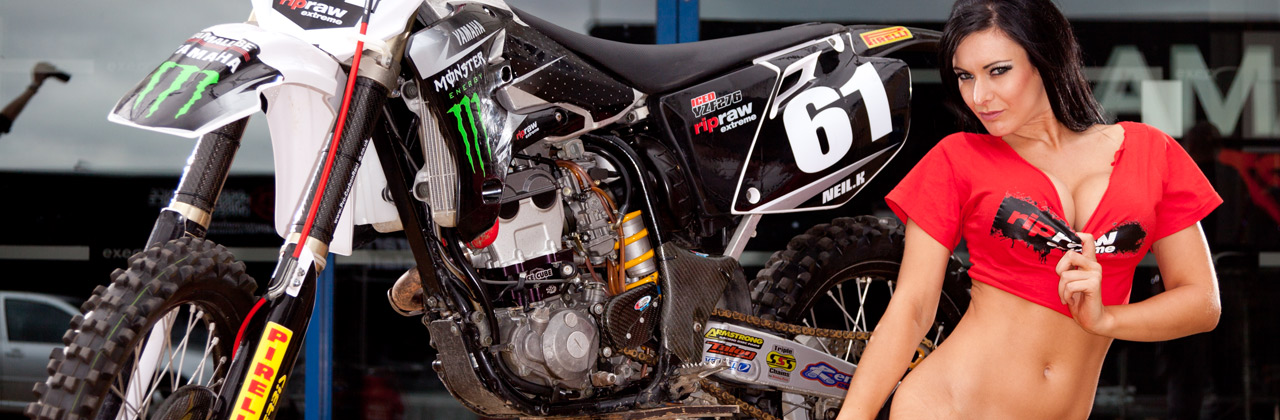
By this time then Quadras were flagging and had put themselves into slow recycle mode to preserve what little battery life they had left so for the next set up I scaled down and went ETTL for the first time! Shooting a bike this time meant I didn’t need to light such a large area and my on camera 580EXII, and working in ETTL meant I could keep my aperture down to f/4 and bump my shutter speed up to 1/640th. I had my 580 dialed down to -1 2/3 stop of flash exposure compensation acting as on axis full while two 430EXII’s set at +1 stop provided rim light again.
I’ve known Emma for a few years and while we’ve done a few things at car shows, we have never shot together properly. Last weekend we put that right.
Not only did Emma make the trek up from the Portsmouth but I was lucky enough to have my long suffering assistant/producer/gopher/other-half Helen on hand to help as well as good friend and fellow photographer Darren “Skids” Skidmore to shoot some behind the scenes video and stills. Quite a crew!
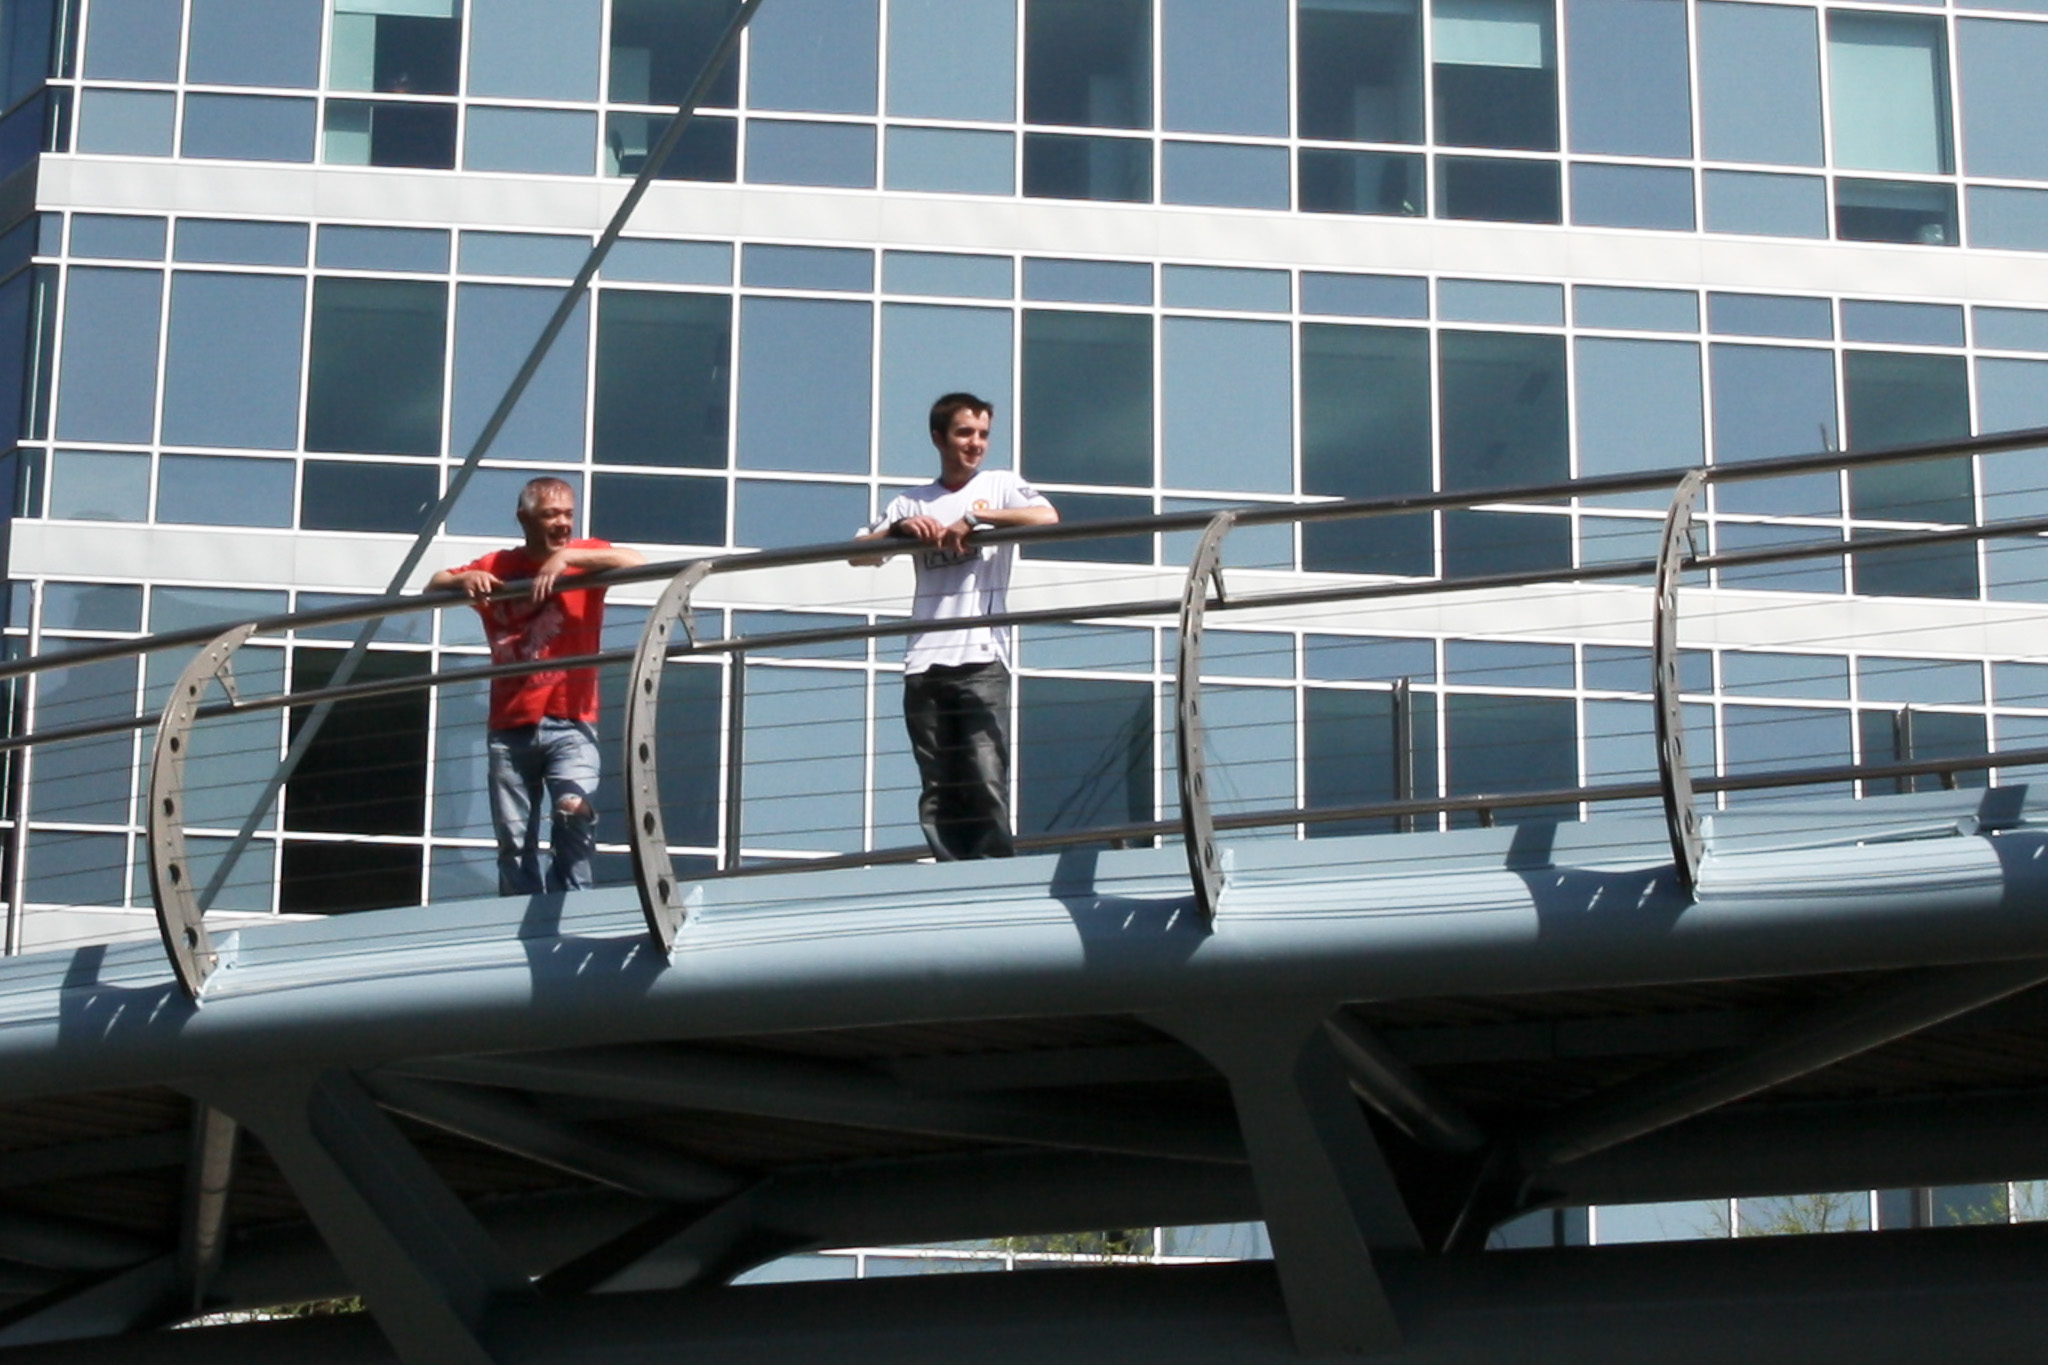
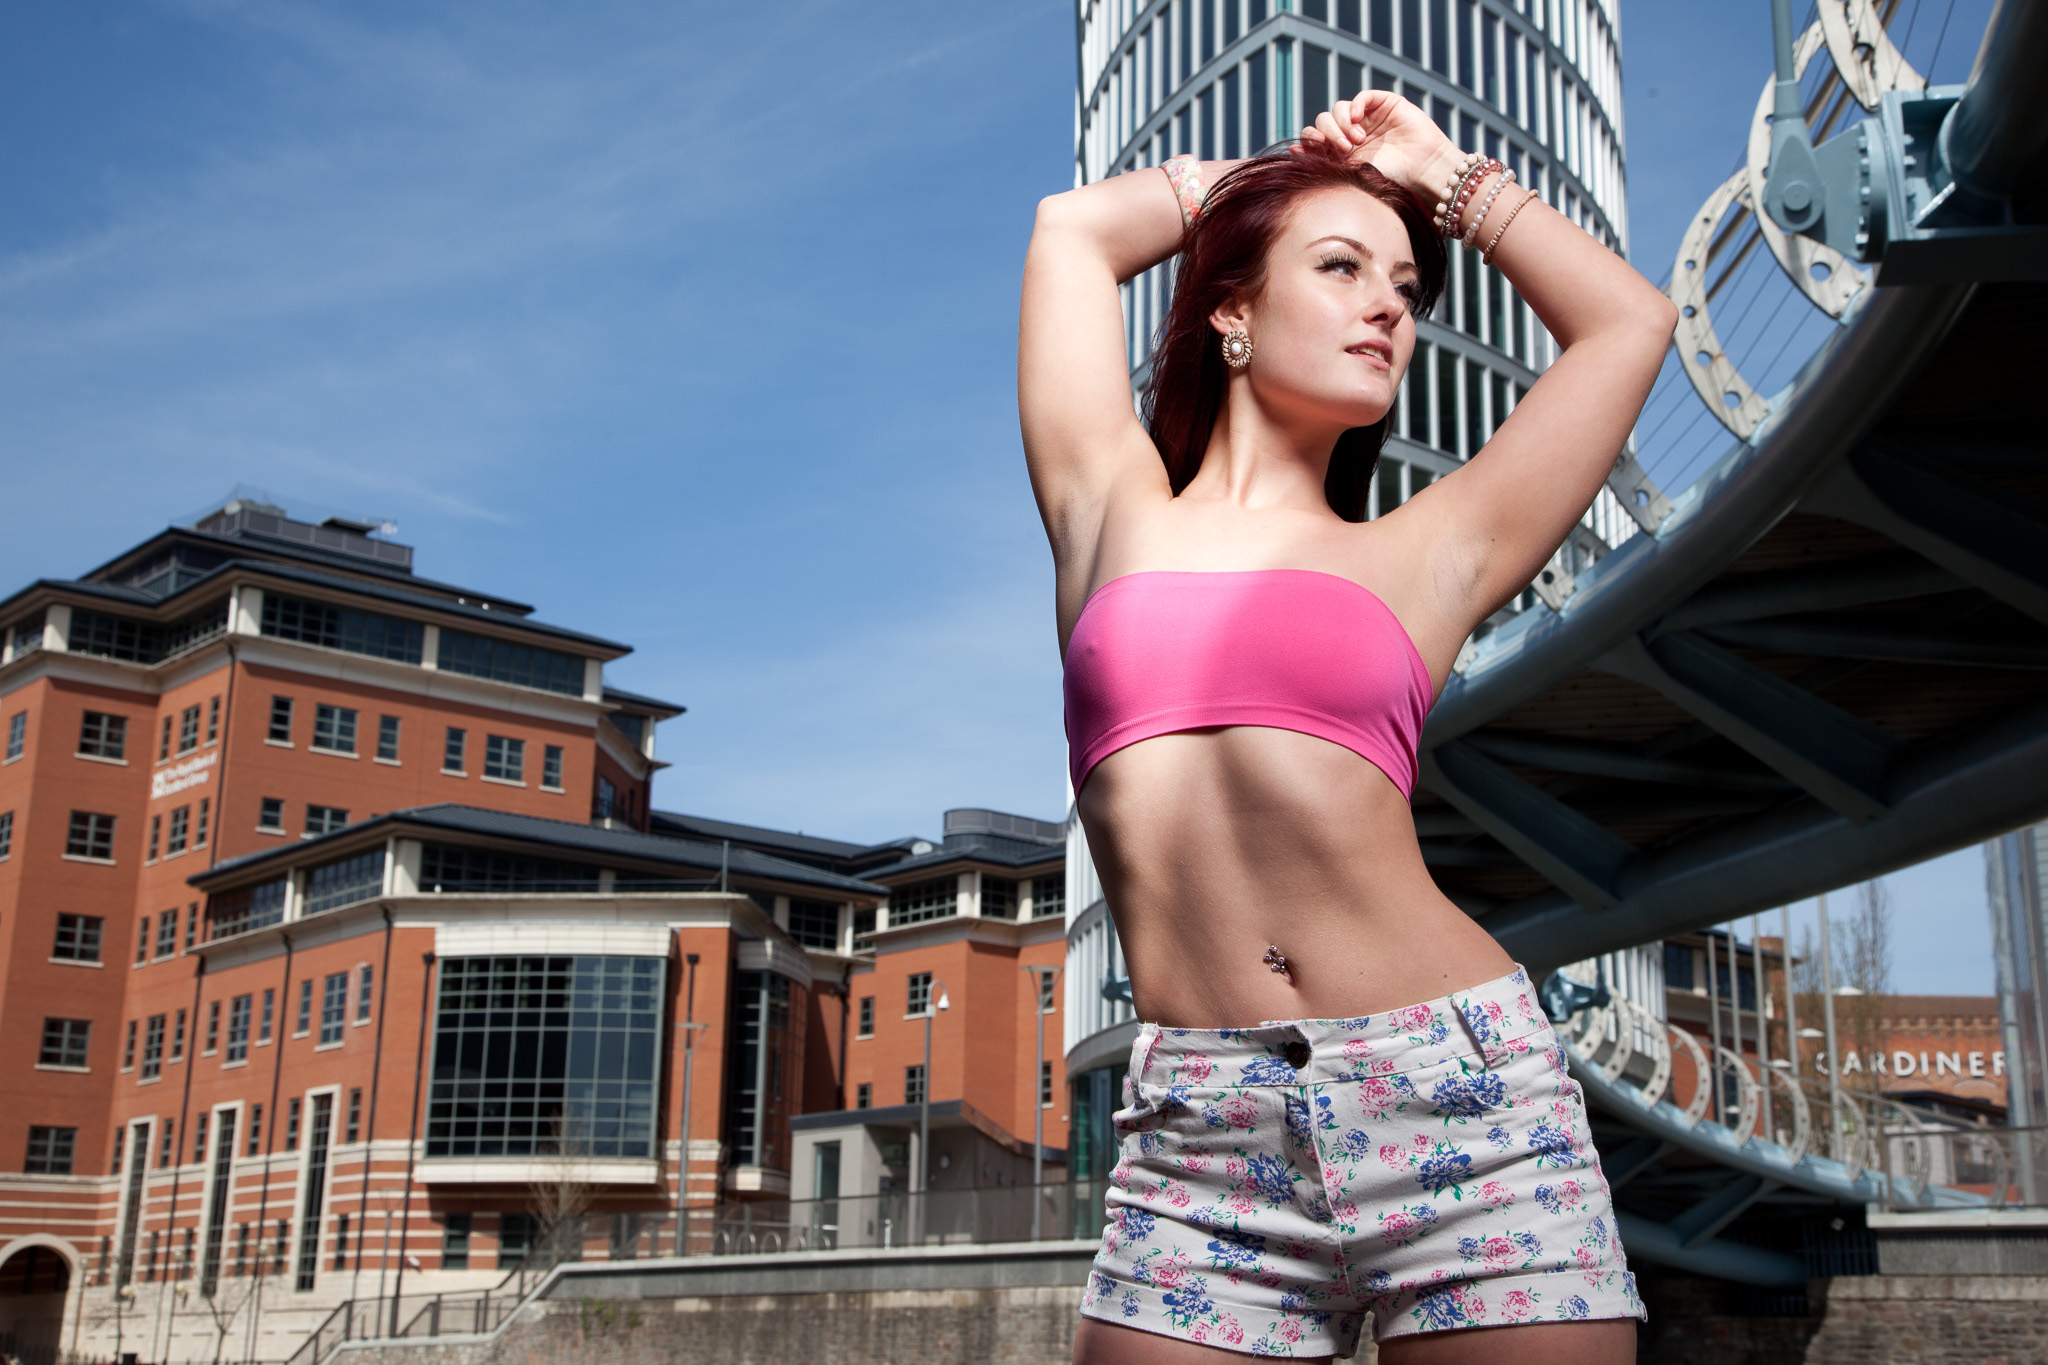
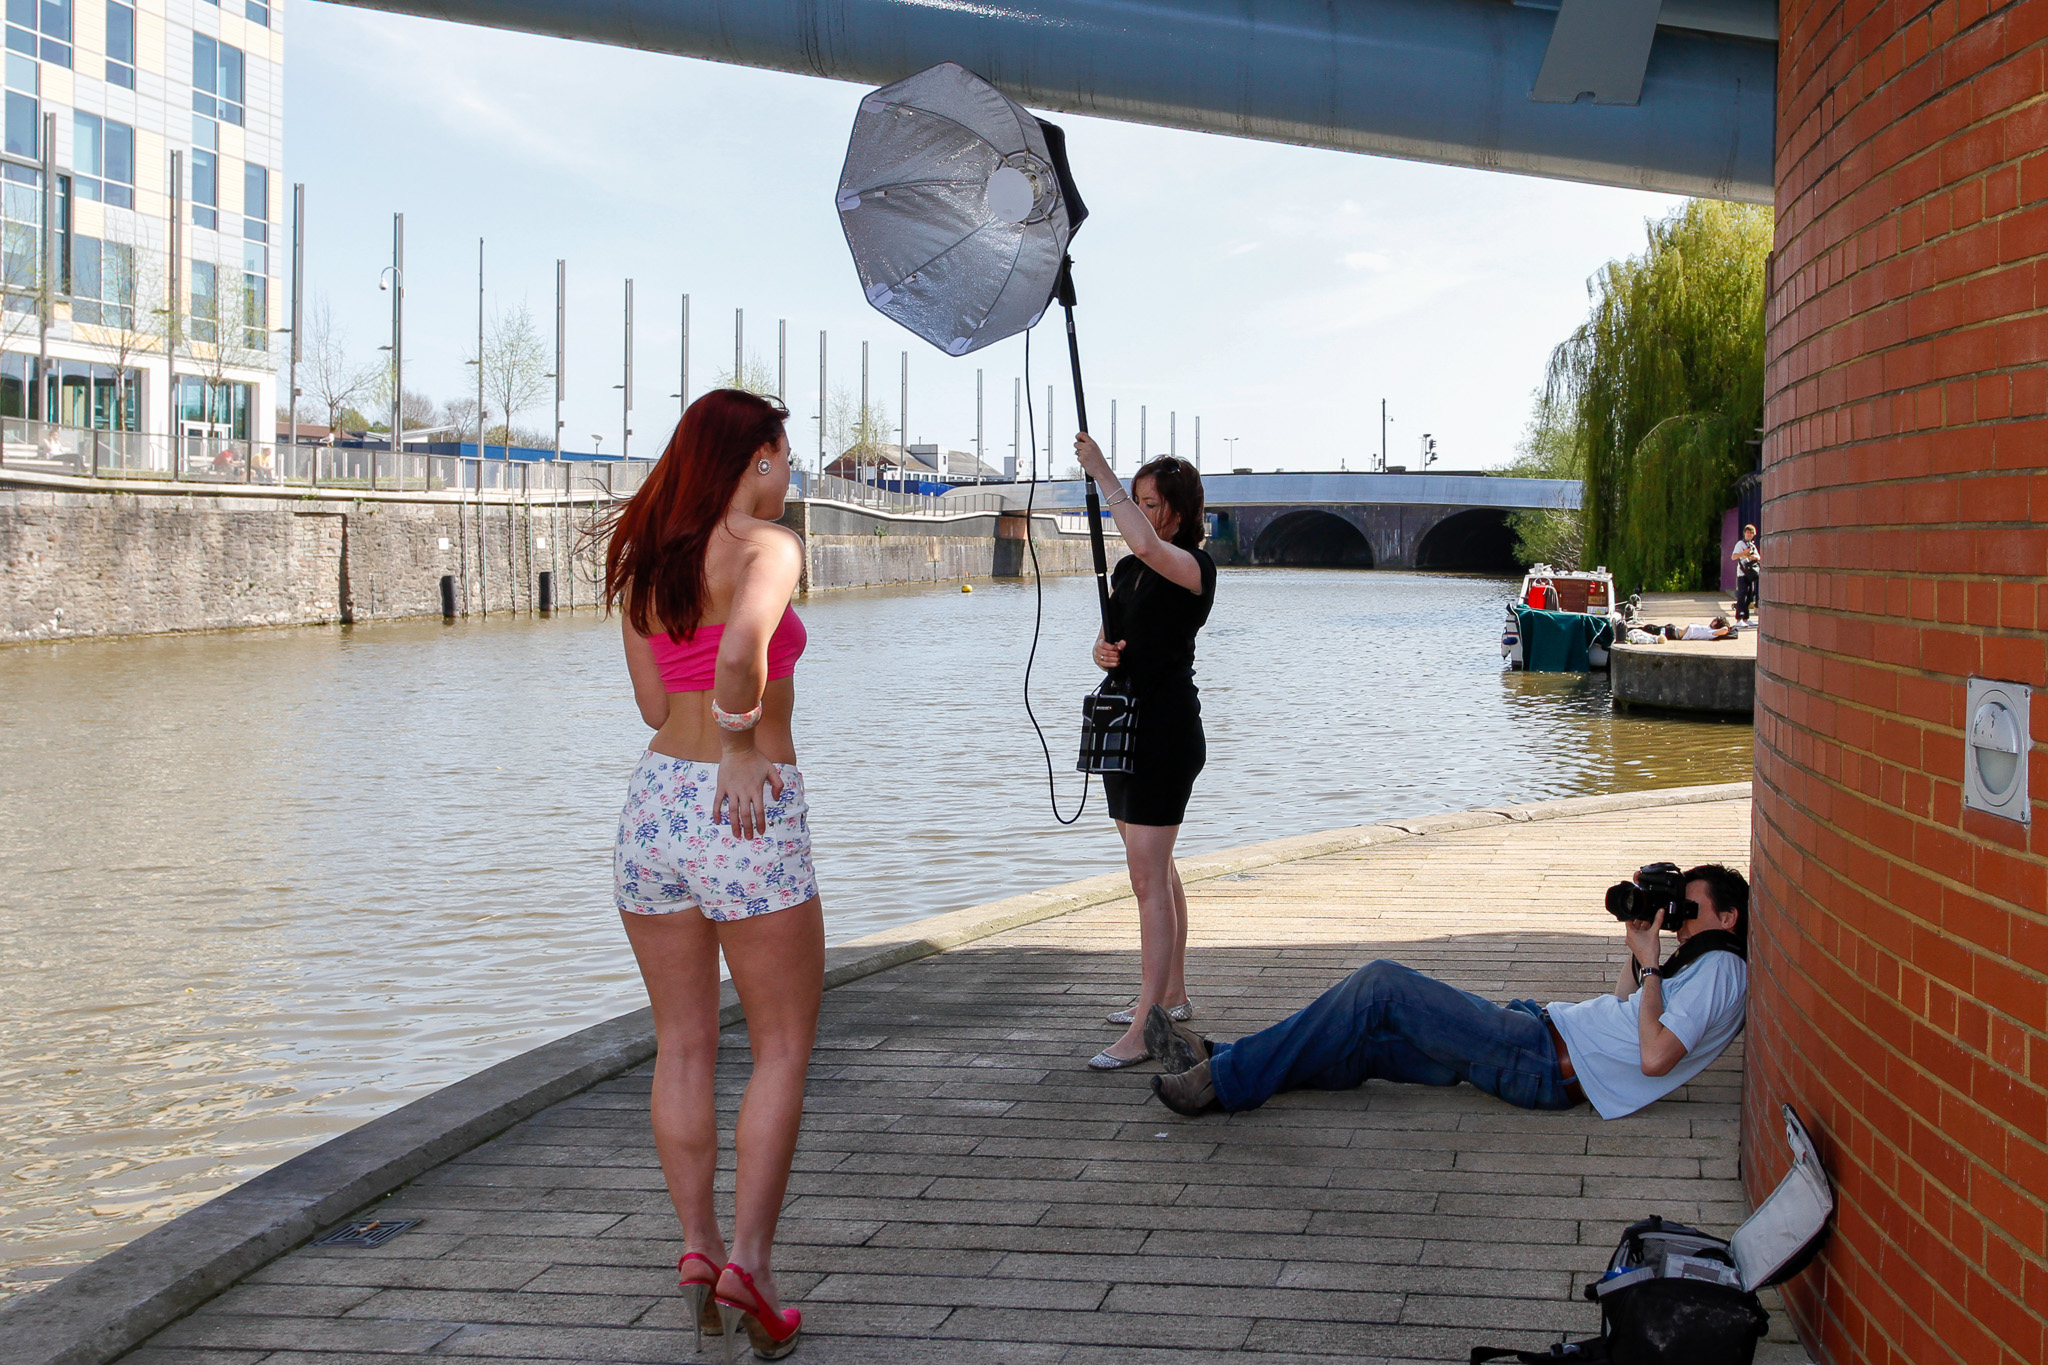
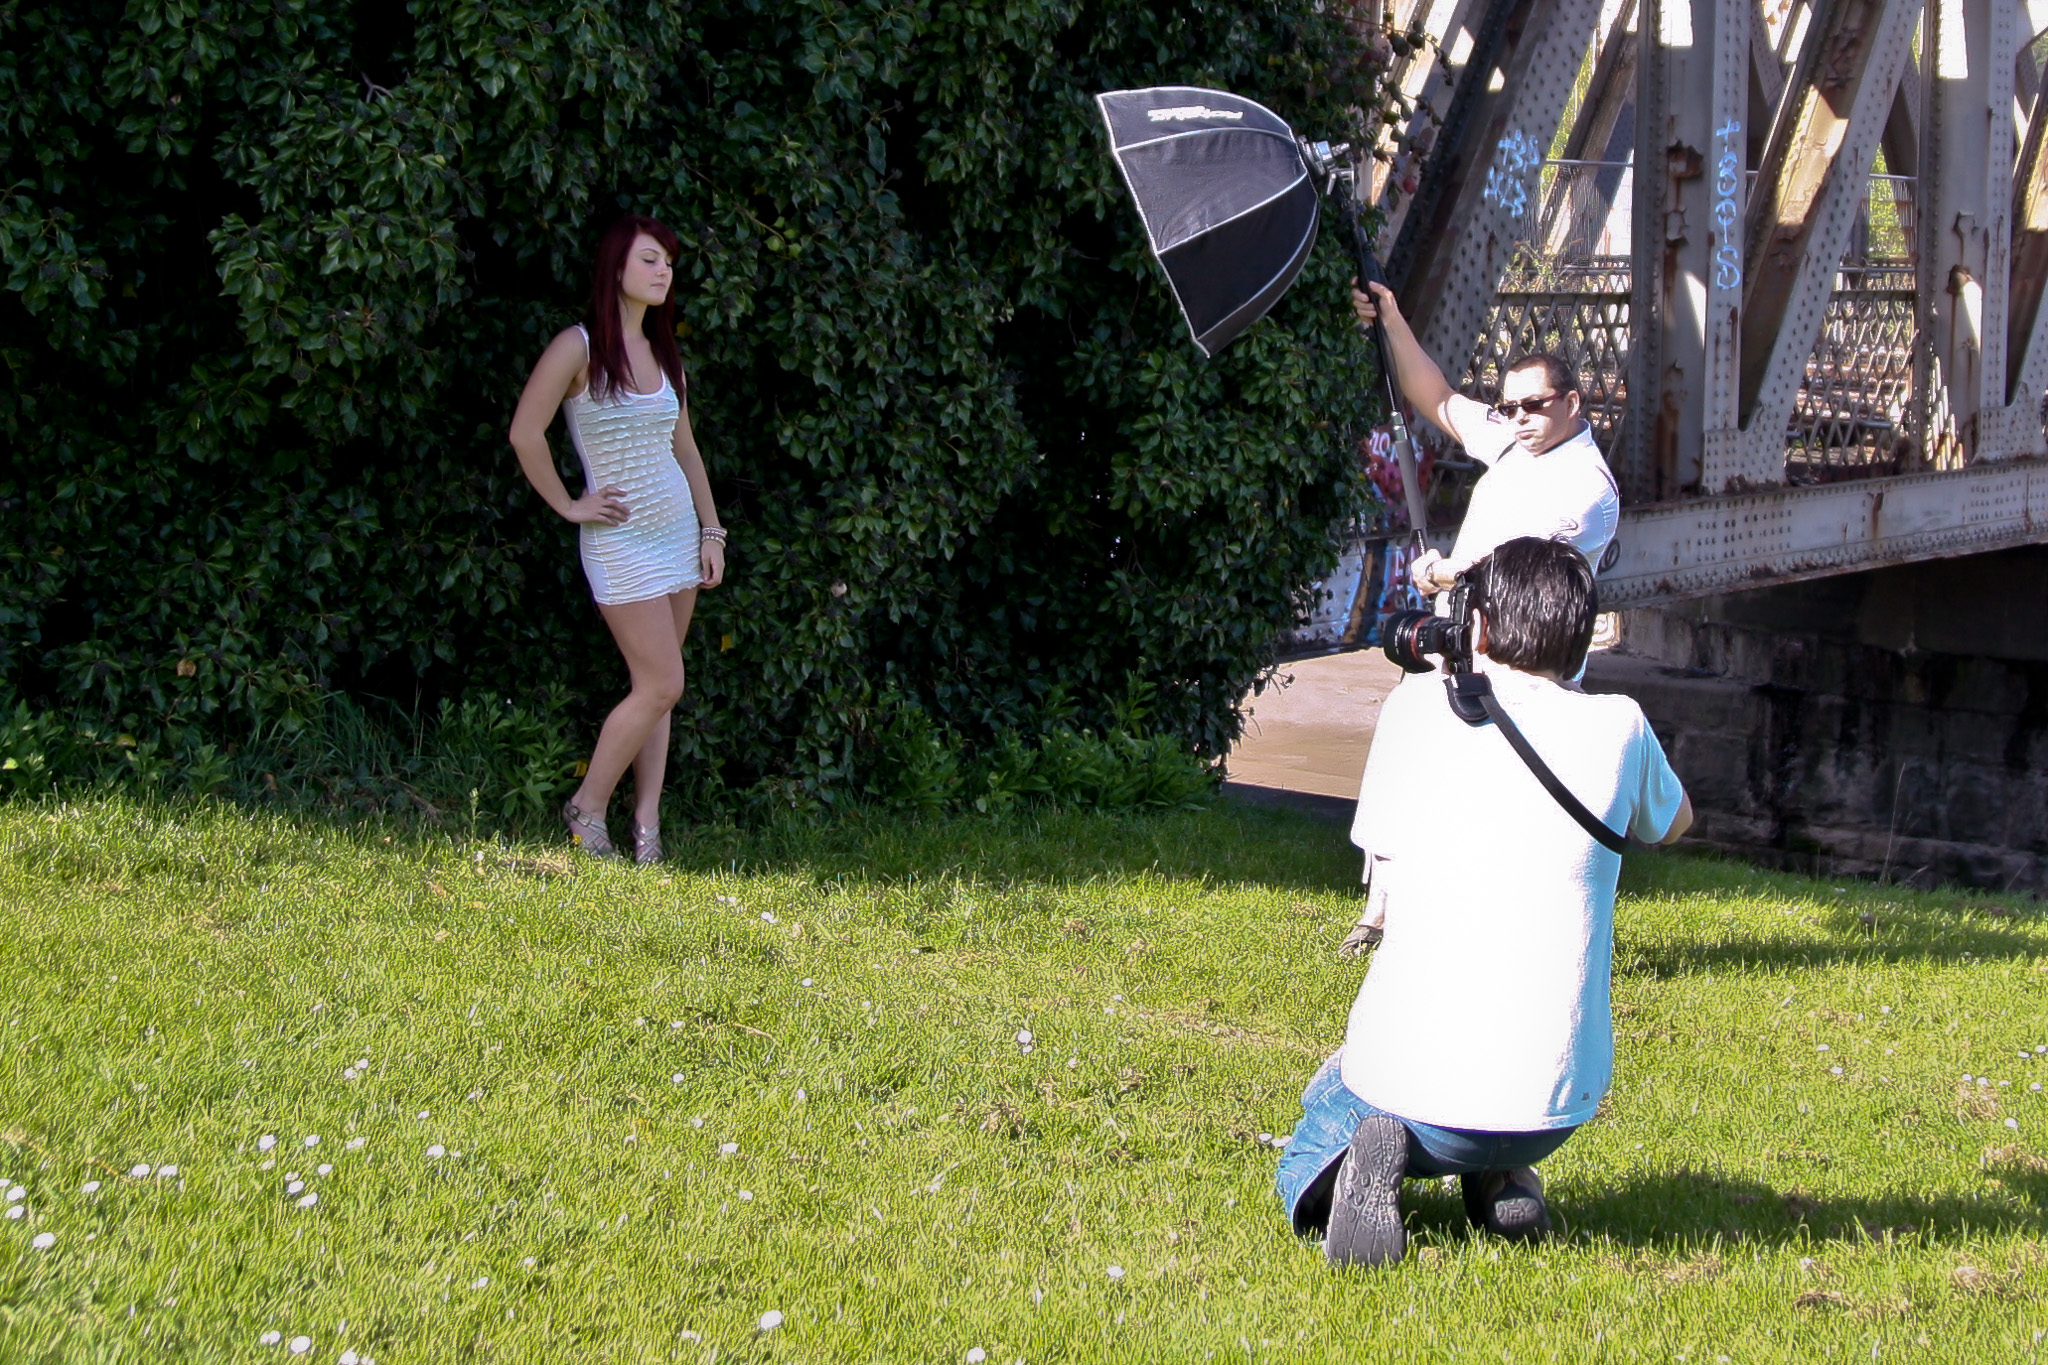
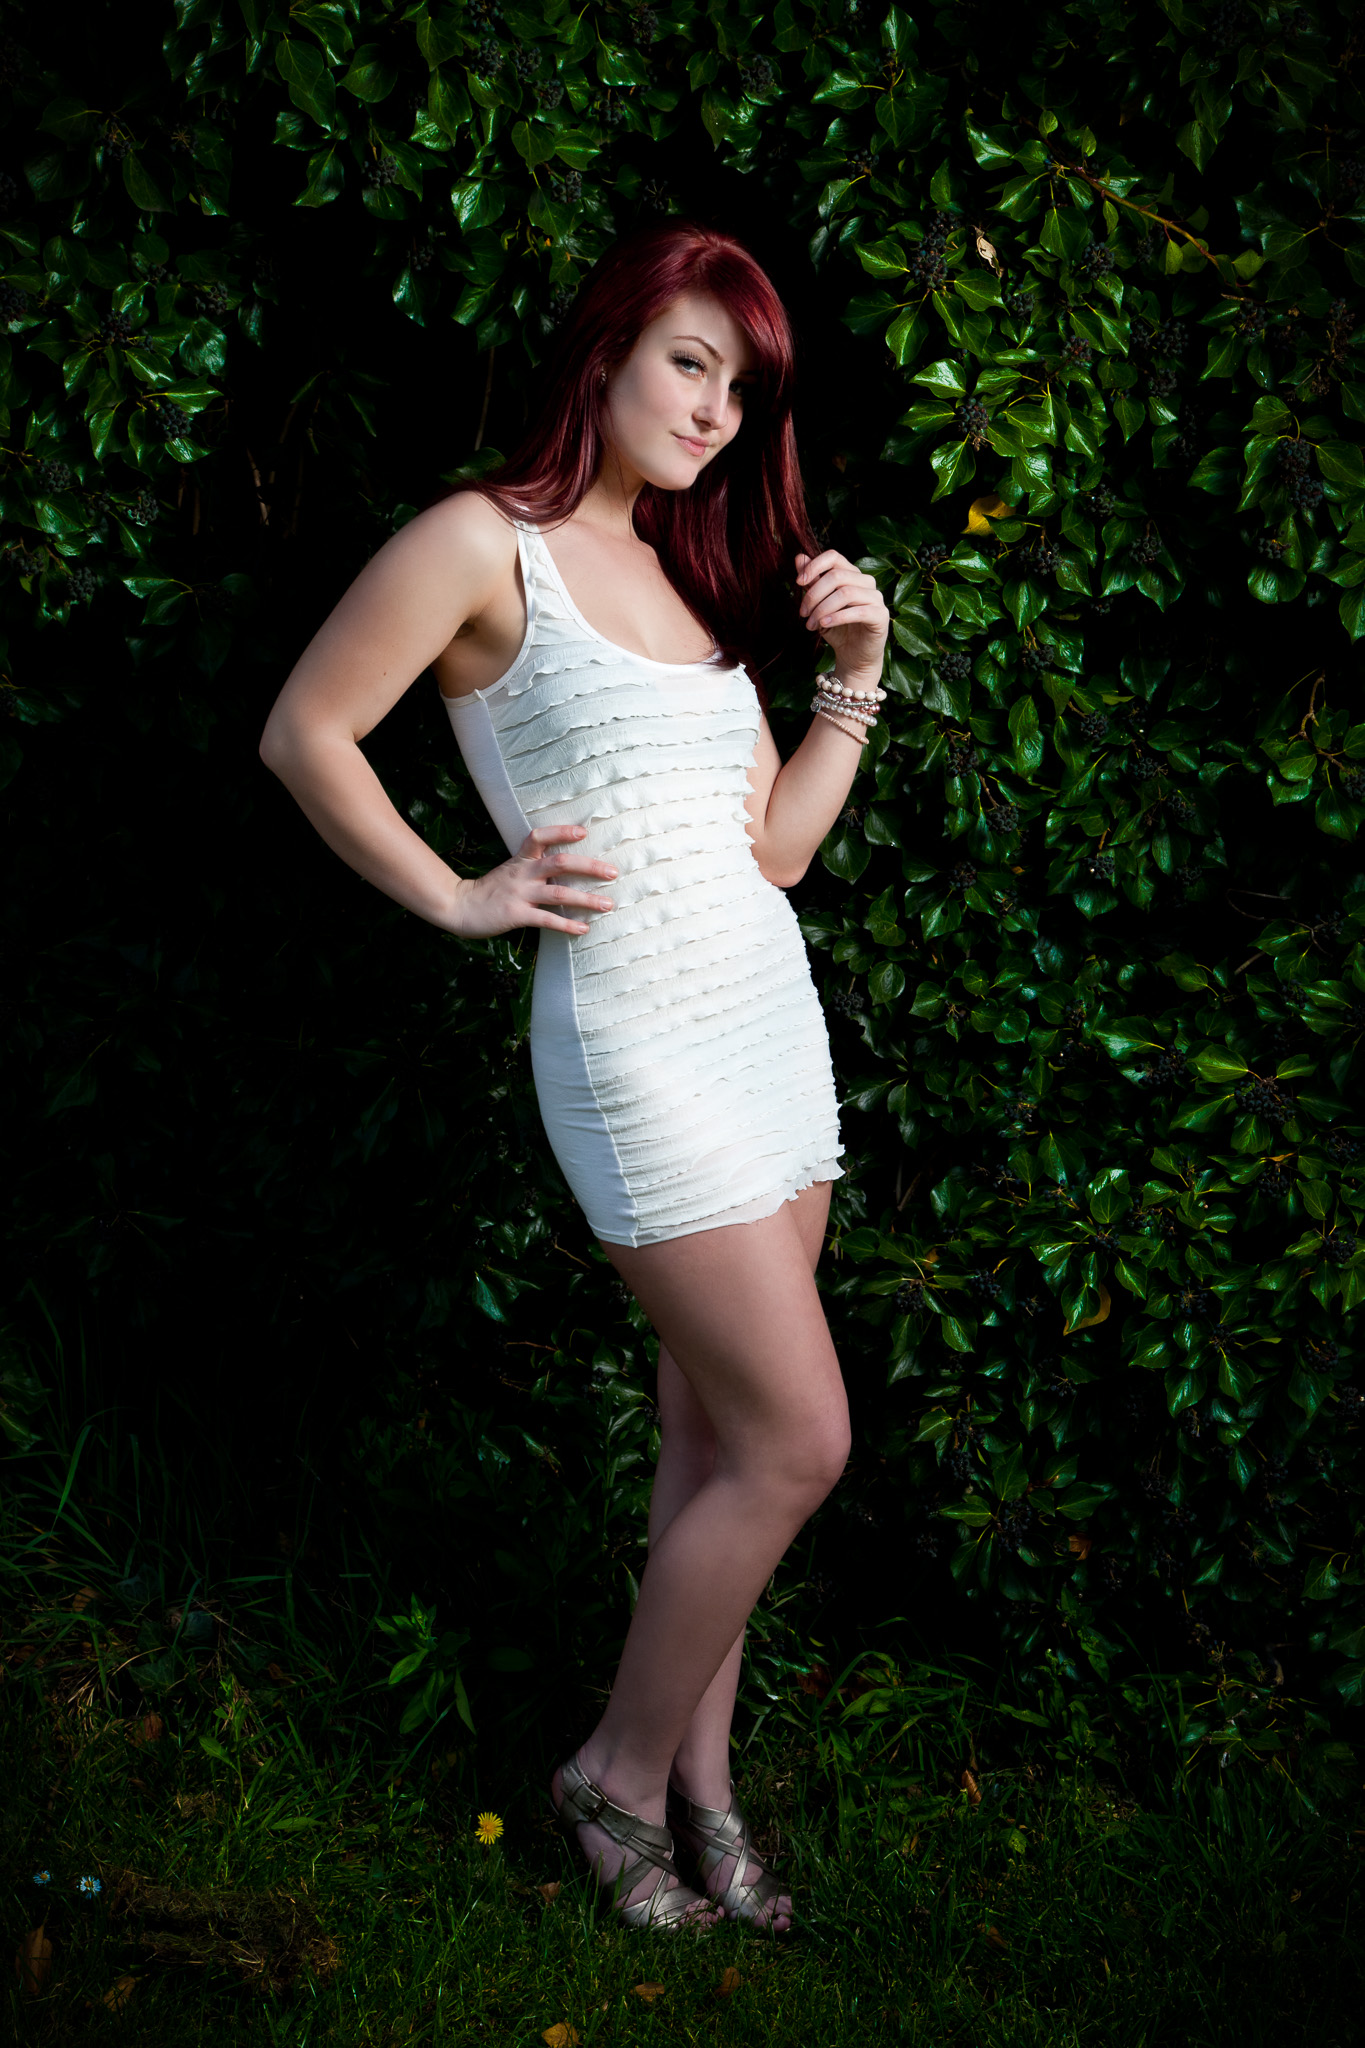
So after the obligatory coffee and a snack it was on to location number one. If you follow me on Twitter or like my Facebook page, you’ll know I’ve been out and about location scouting recently so I already had a few versatile spots I knew would work. The First of those was under Valentine Bridge for a little urban portraiture. I exposed for the buildings in the background which left Emma around 2 stops under exposed in the shade of the bridge so a Quadra head and the Deep Octa were brought in for fill.
Midweek this area is bustling with office workers on breaks, especially on such a beautiful day, but on a Saturday there are just a few passers-by…
which Emma soon tuned out!
Over zealous security guards are always a concern when working on privately owned land like this so we kept everything hand held.
And no, that wasn’t a comfortable shooting position!
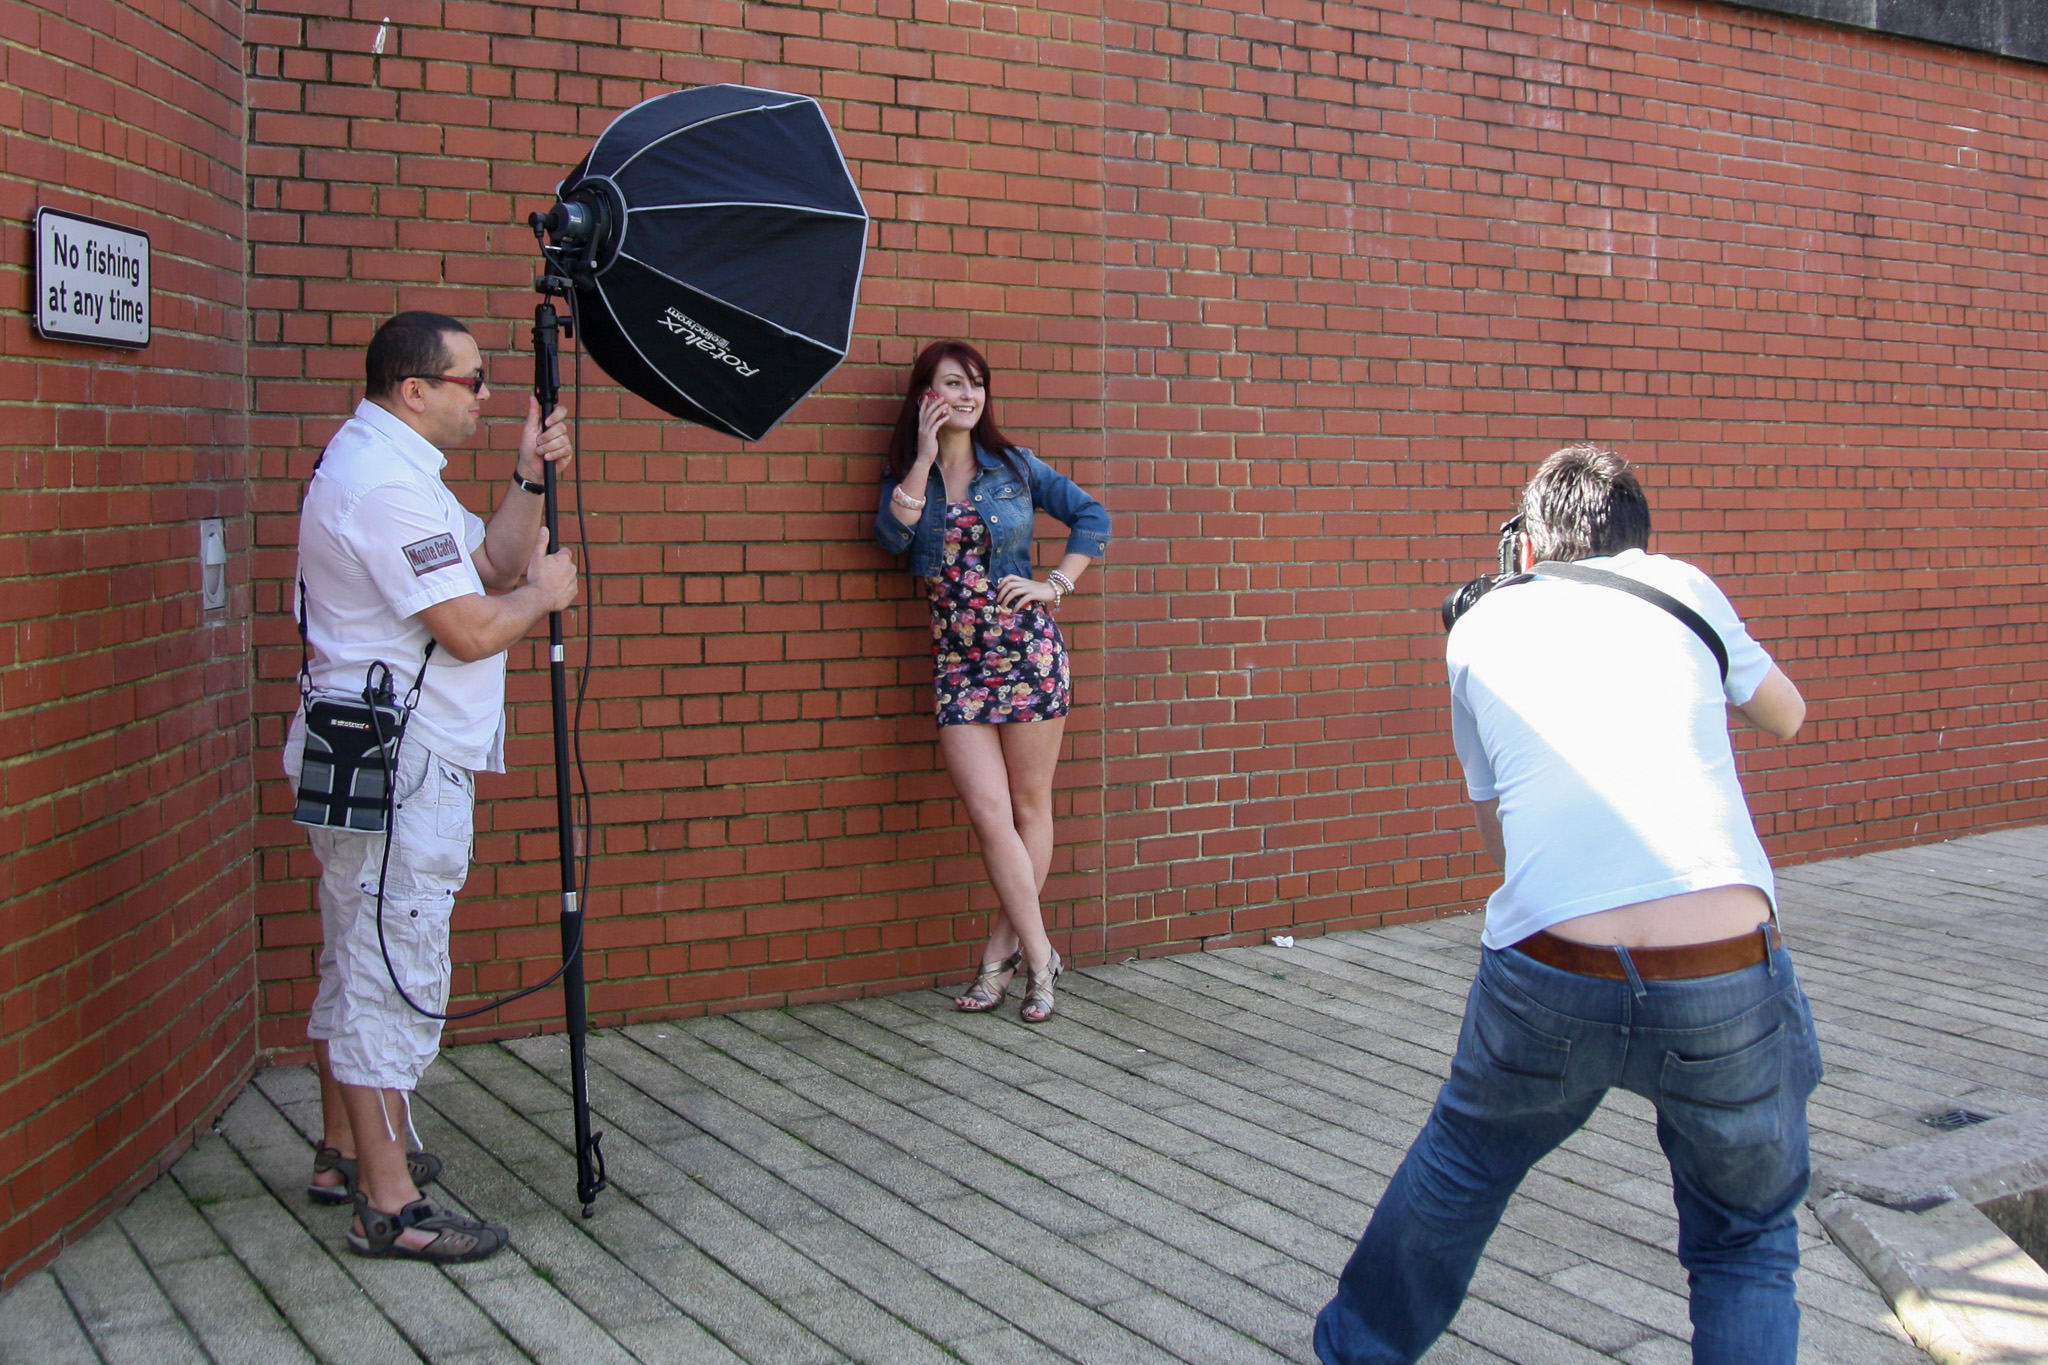
I always like to get as many looks as I can while at a location so Emma got changed into another outfit and we turned everything around and shot against the red brick wall behind us.
A completely different look for about 5 minutes work. Note to self – Buy a better belt!
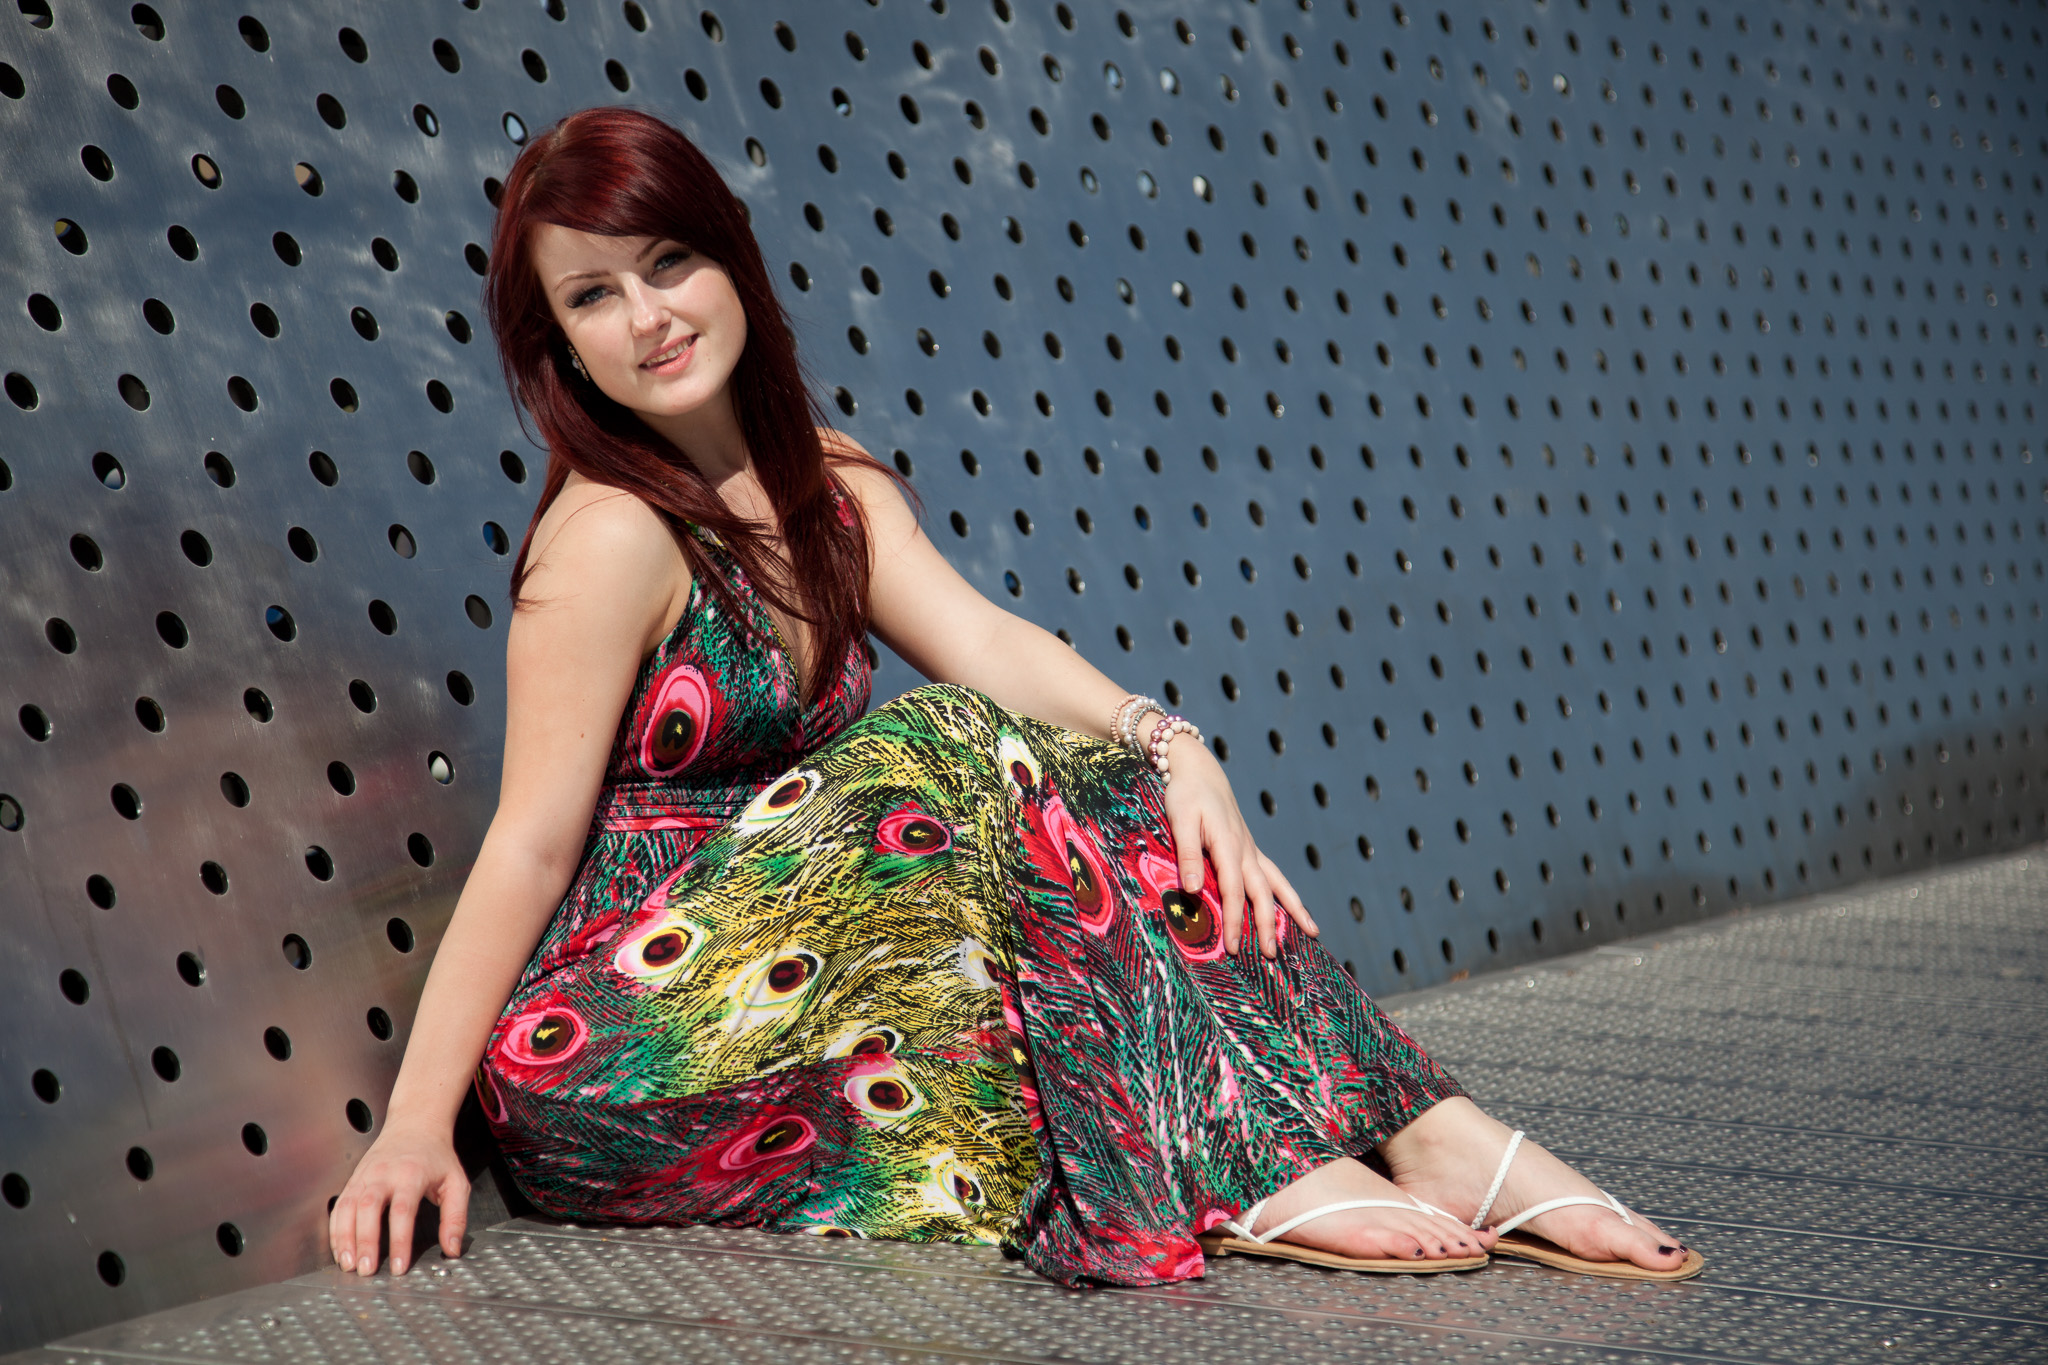
On to location two – another bridge a few minutes walk up river. Known locally as “the cheese grater”. Admittedly more by luck than judgement, the sun was in the perfect position to light Emma directly and provide its own fill for the shadows by reflecting off the side of the bridge.
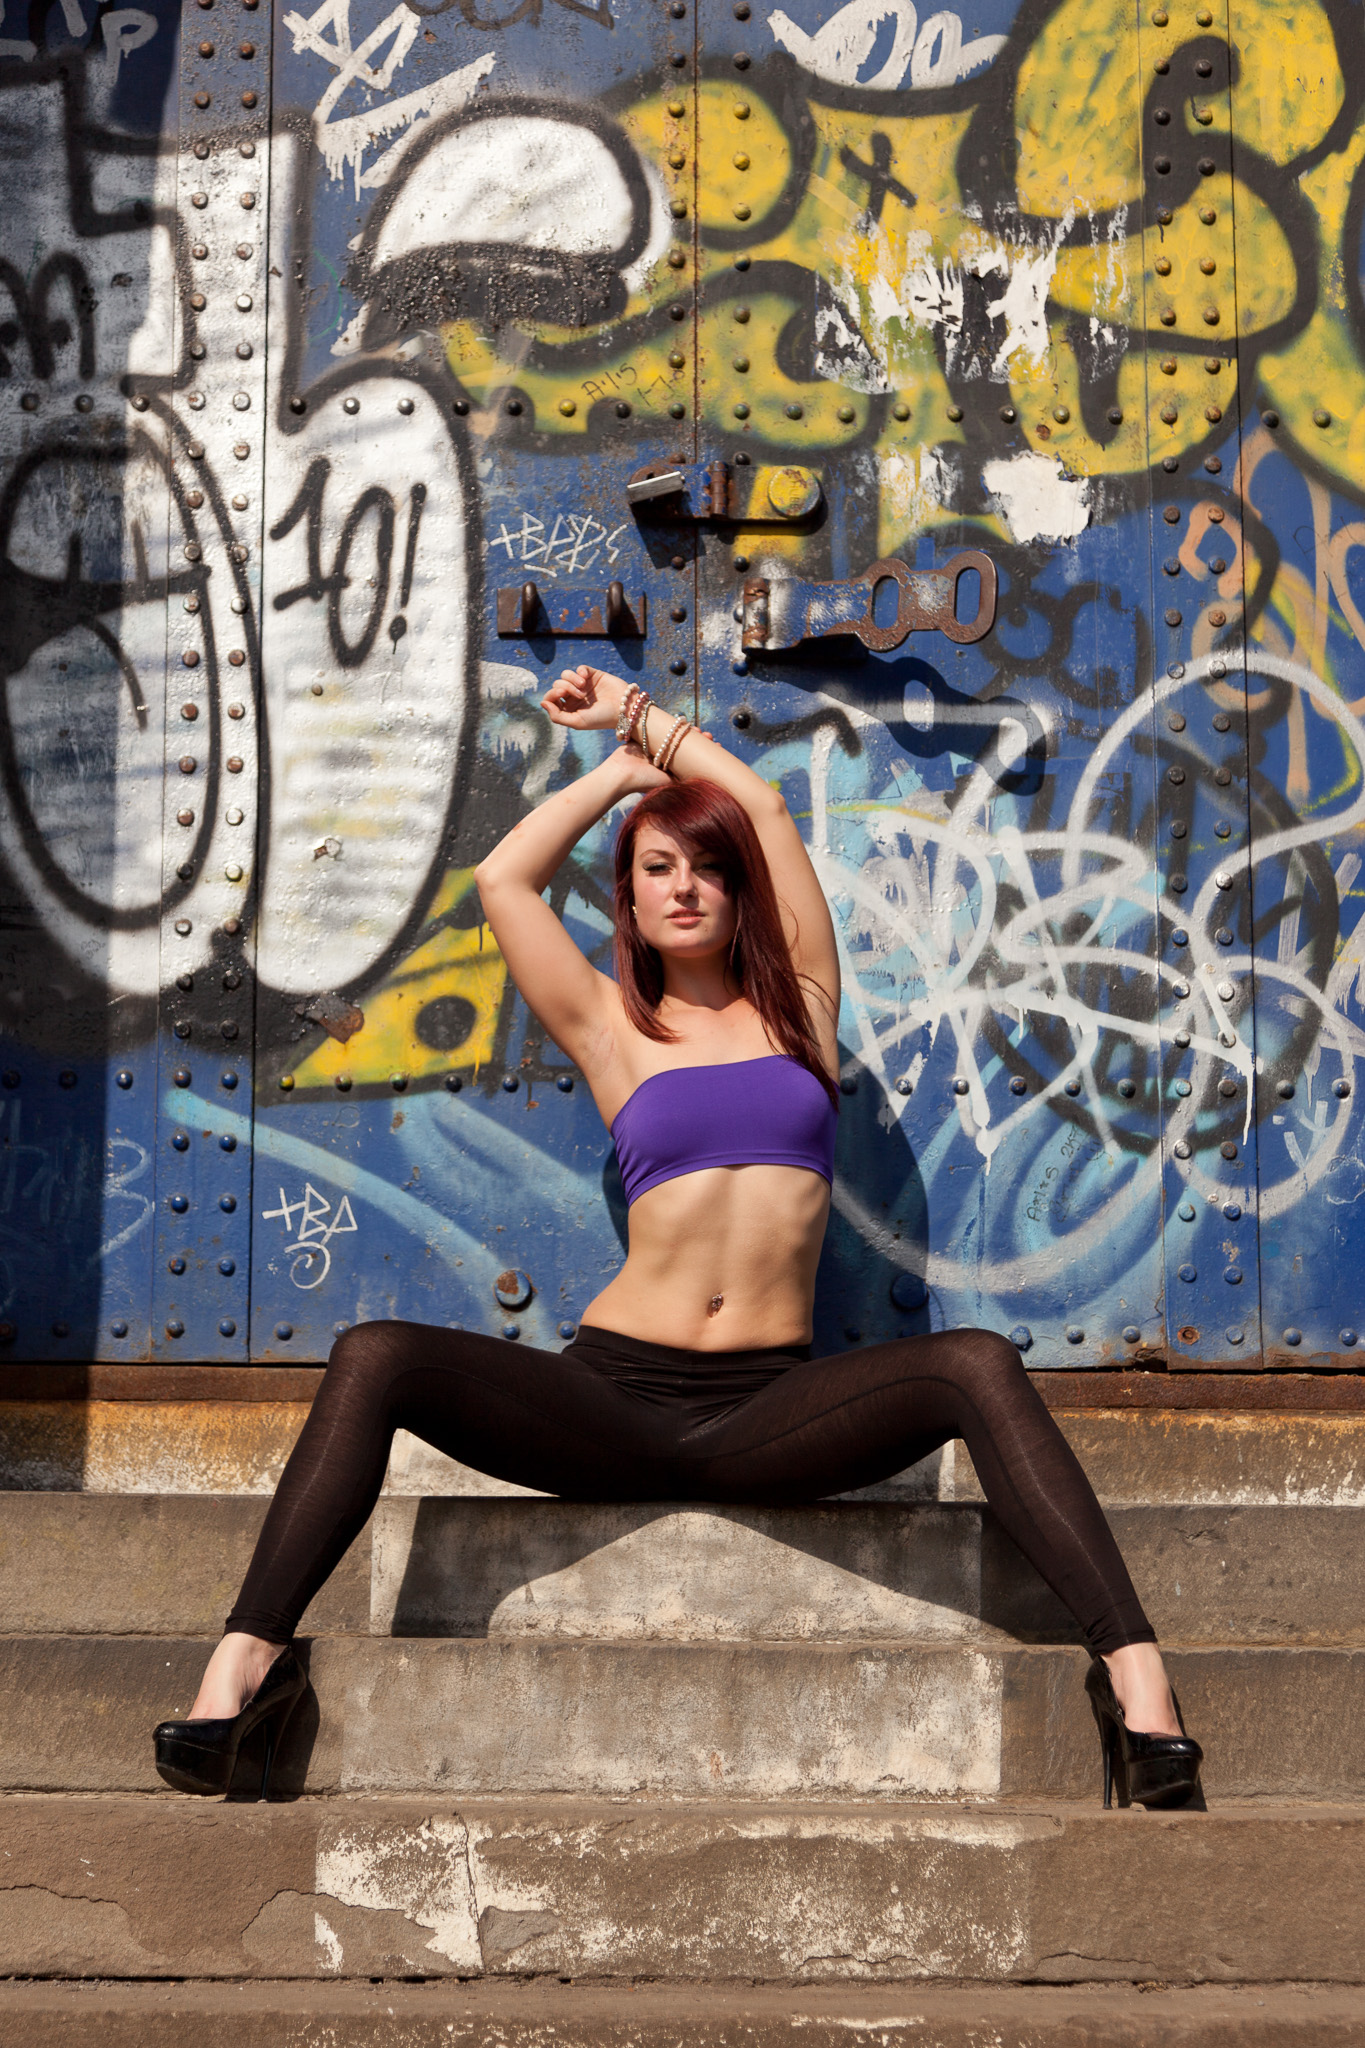
With some solid images in the can it was time to move to the far end of Bristol’s floating harbour and the old red brick warehouses on The Cumberland Basin.
Nothing fancy here, just natural, direct sunlight which sat well with the graffiti.
A short walk and a swift outfit change later and Emma’s is rocking the American high school kid look on a rusting iron bridge.
This is a fairly busy short cut for dog walkers, joggers and cyclists but it’s quite surprising how respectful people can be when they come across a scene like this. Many were reluctant to walk through the scene, even if I didn’t have the camera to my eye.
Simple lighting on this one again, just a Quadra head with an 18cm reflector to give a sharp fall off of light and draw the viewer to Emma’s face. Such a hard light source wouldn’t work for every subject but Emma has great skin and can carry it off easily.
Just around the corner was another pre-scouted location that I’ve wanted to use before but it’s always been too muddy. I find it easy to fall in to the trap of thinking a good location needs to be large, like an epic view or impressive structure, but this patch of ivy in the middle of an industrial landscape works brilliantly.
As you can see, the Deep Octa came out again for this shot, and again the front diffusion material stayed in the bag – I wanted a slightly more specular light to bring out the shine in the leaves.
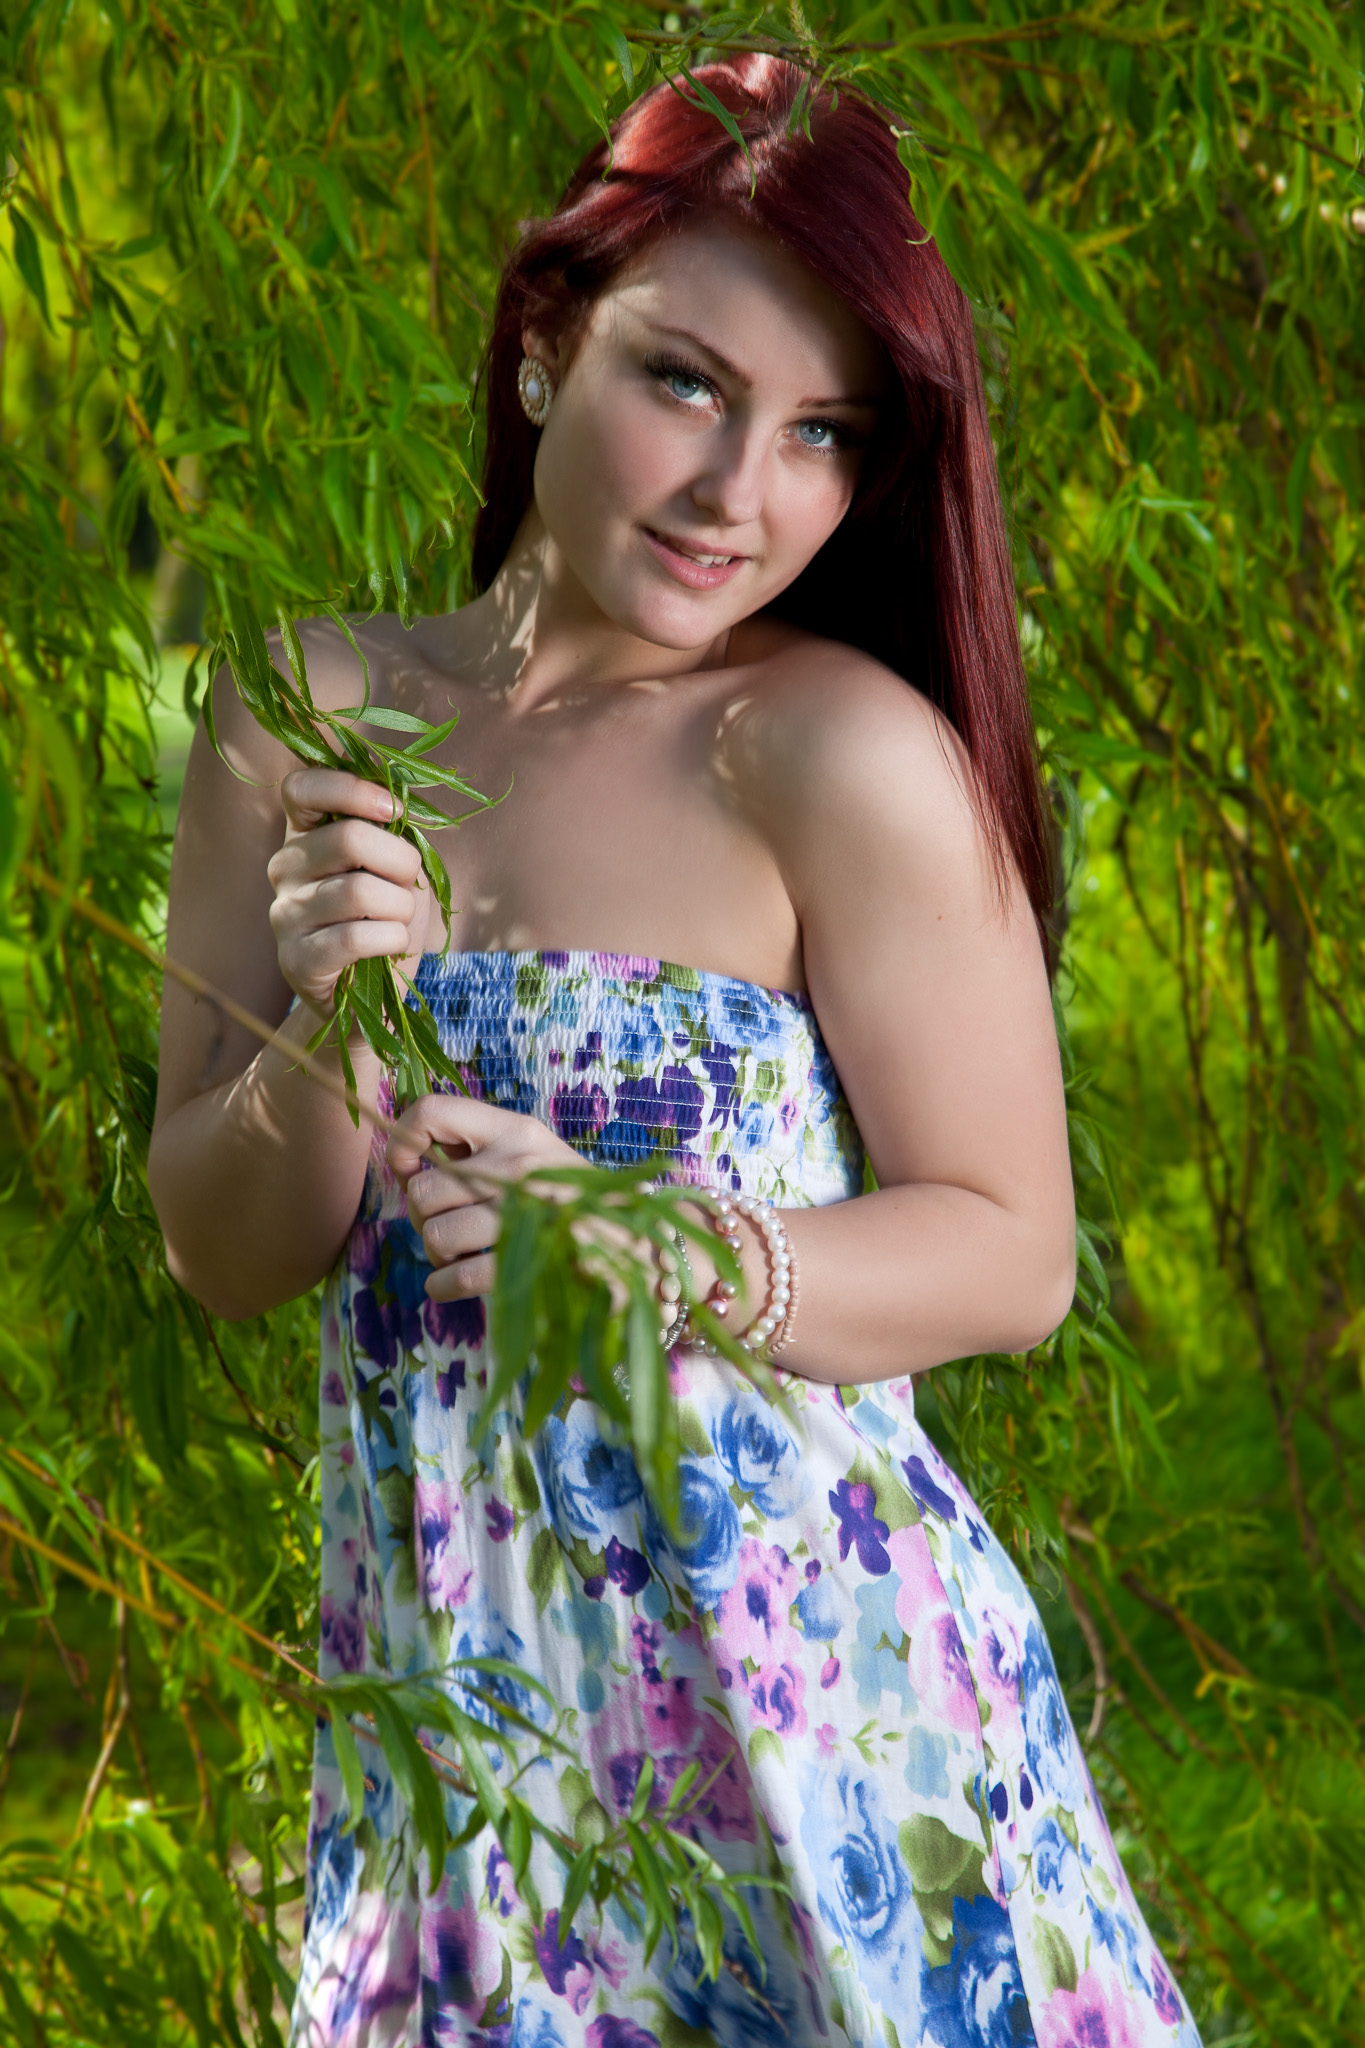
We’re were on a mission by this point – we just had one more location and one more look to shoot but the call of a beer and some food was strong! Emma is great at choosing outfits to match locations and as soon as she saw the weeping willow, she pulled yet another dress from her seemingly bottomless suitcase.
Going back to what I was saying earlier about locations, it would have been easy to have turned 90 degrees to the right here and shot with Bristol’s famous Clifton Suspension Bridge as a background, but the branches of the willow tree on the river bank made a much more suitable setting for the innocent look we were after. By now it was beer o’clock so we took a break for a few hours.
Up until we trekked out to the banks of the River Severn, the weather had been perfect without a cloud in the sky so we were pretty confident we’d get a beautiful sunset to finish the day off… fail. Epic fail! Just at the last moment clouds bubbled up from nowhere and we were left with this:
Ok, not quite the Ibizan vista I’d envisioned but it’s Severn Beech and you work with what you’ve got! After raving about how good this location was going to be after the previous nights location scouting, I knew I had to pull something out of the bag now I’d dragged everyone down there. The sun had let me down, but what I did have was a willing model, some warmth in the rocks and my own portable sun. So while brave Emma donned her bikini, I set about creating sunset with a Quadra head mounted high on a light stand and a CTO gell. With the cameras white balance on Tungsten and the flash head firing in warm light, the dull grey, post sunset sky turns blue. (I’ve written about this concept before called Working the CTO)
As Emma herself said, “it’s amazing what you can do with a big sweet wrapper”!
With 8 distinct looks in the can, the call of the bar became too strong and we called it a wrap!
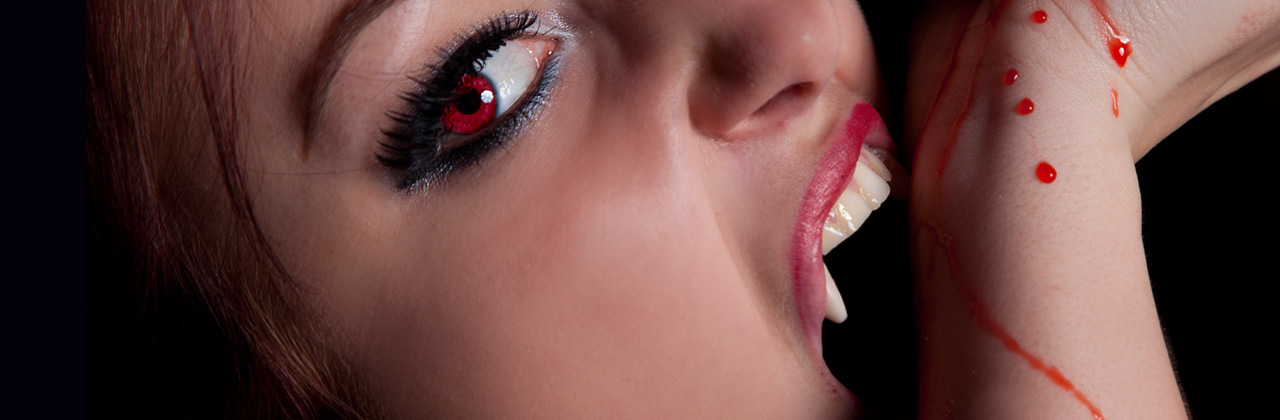
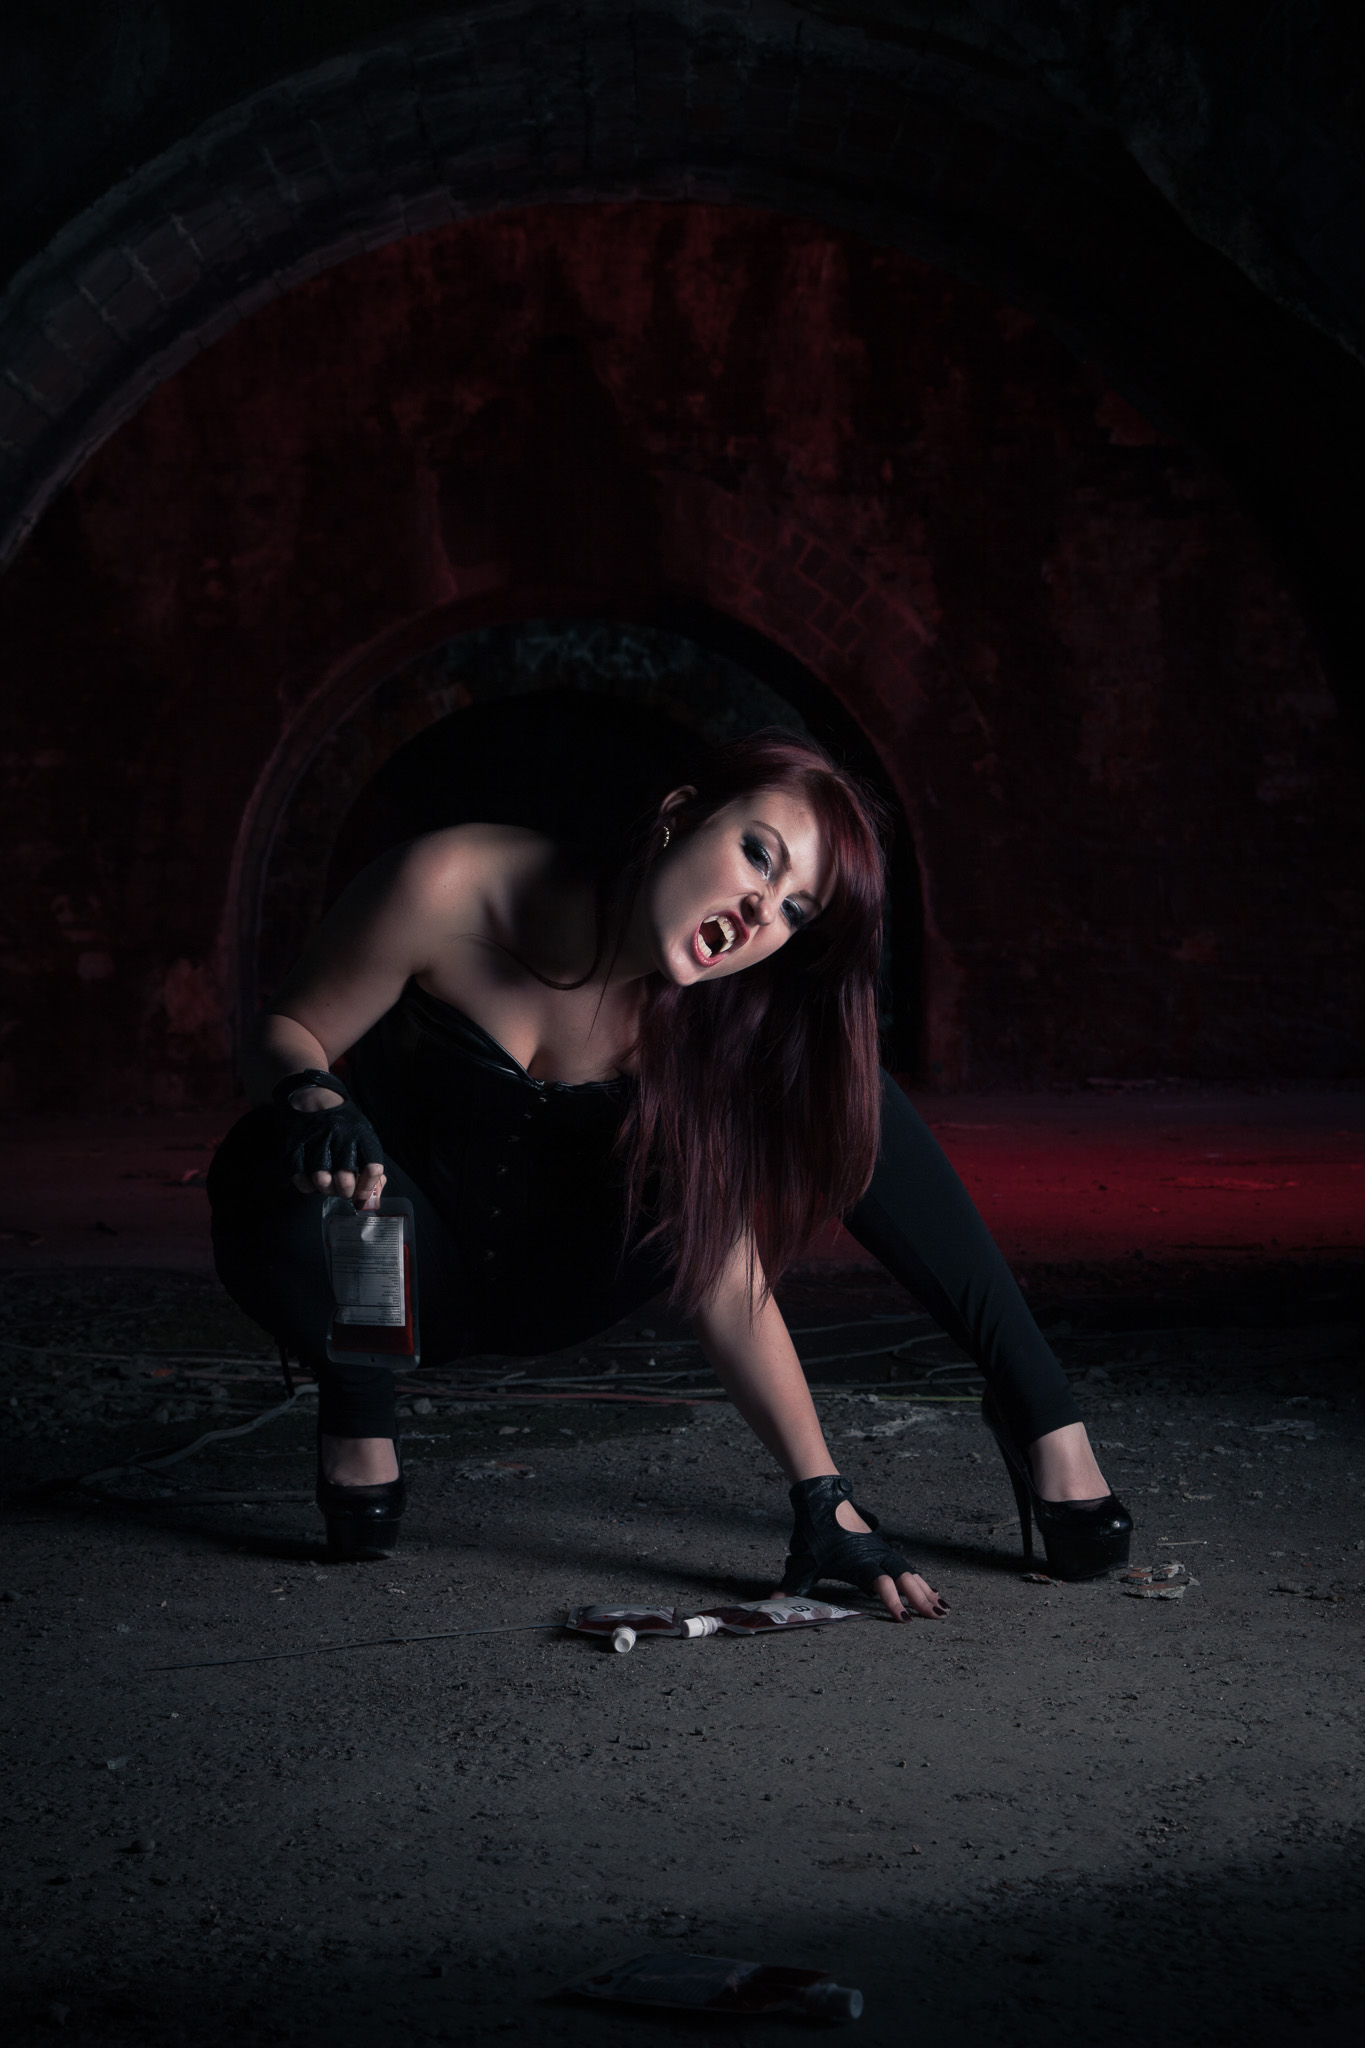
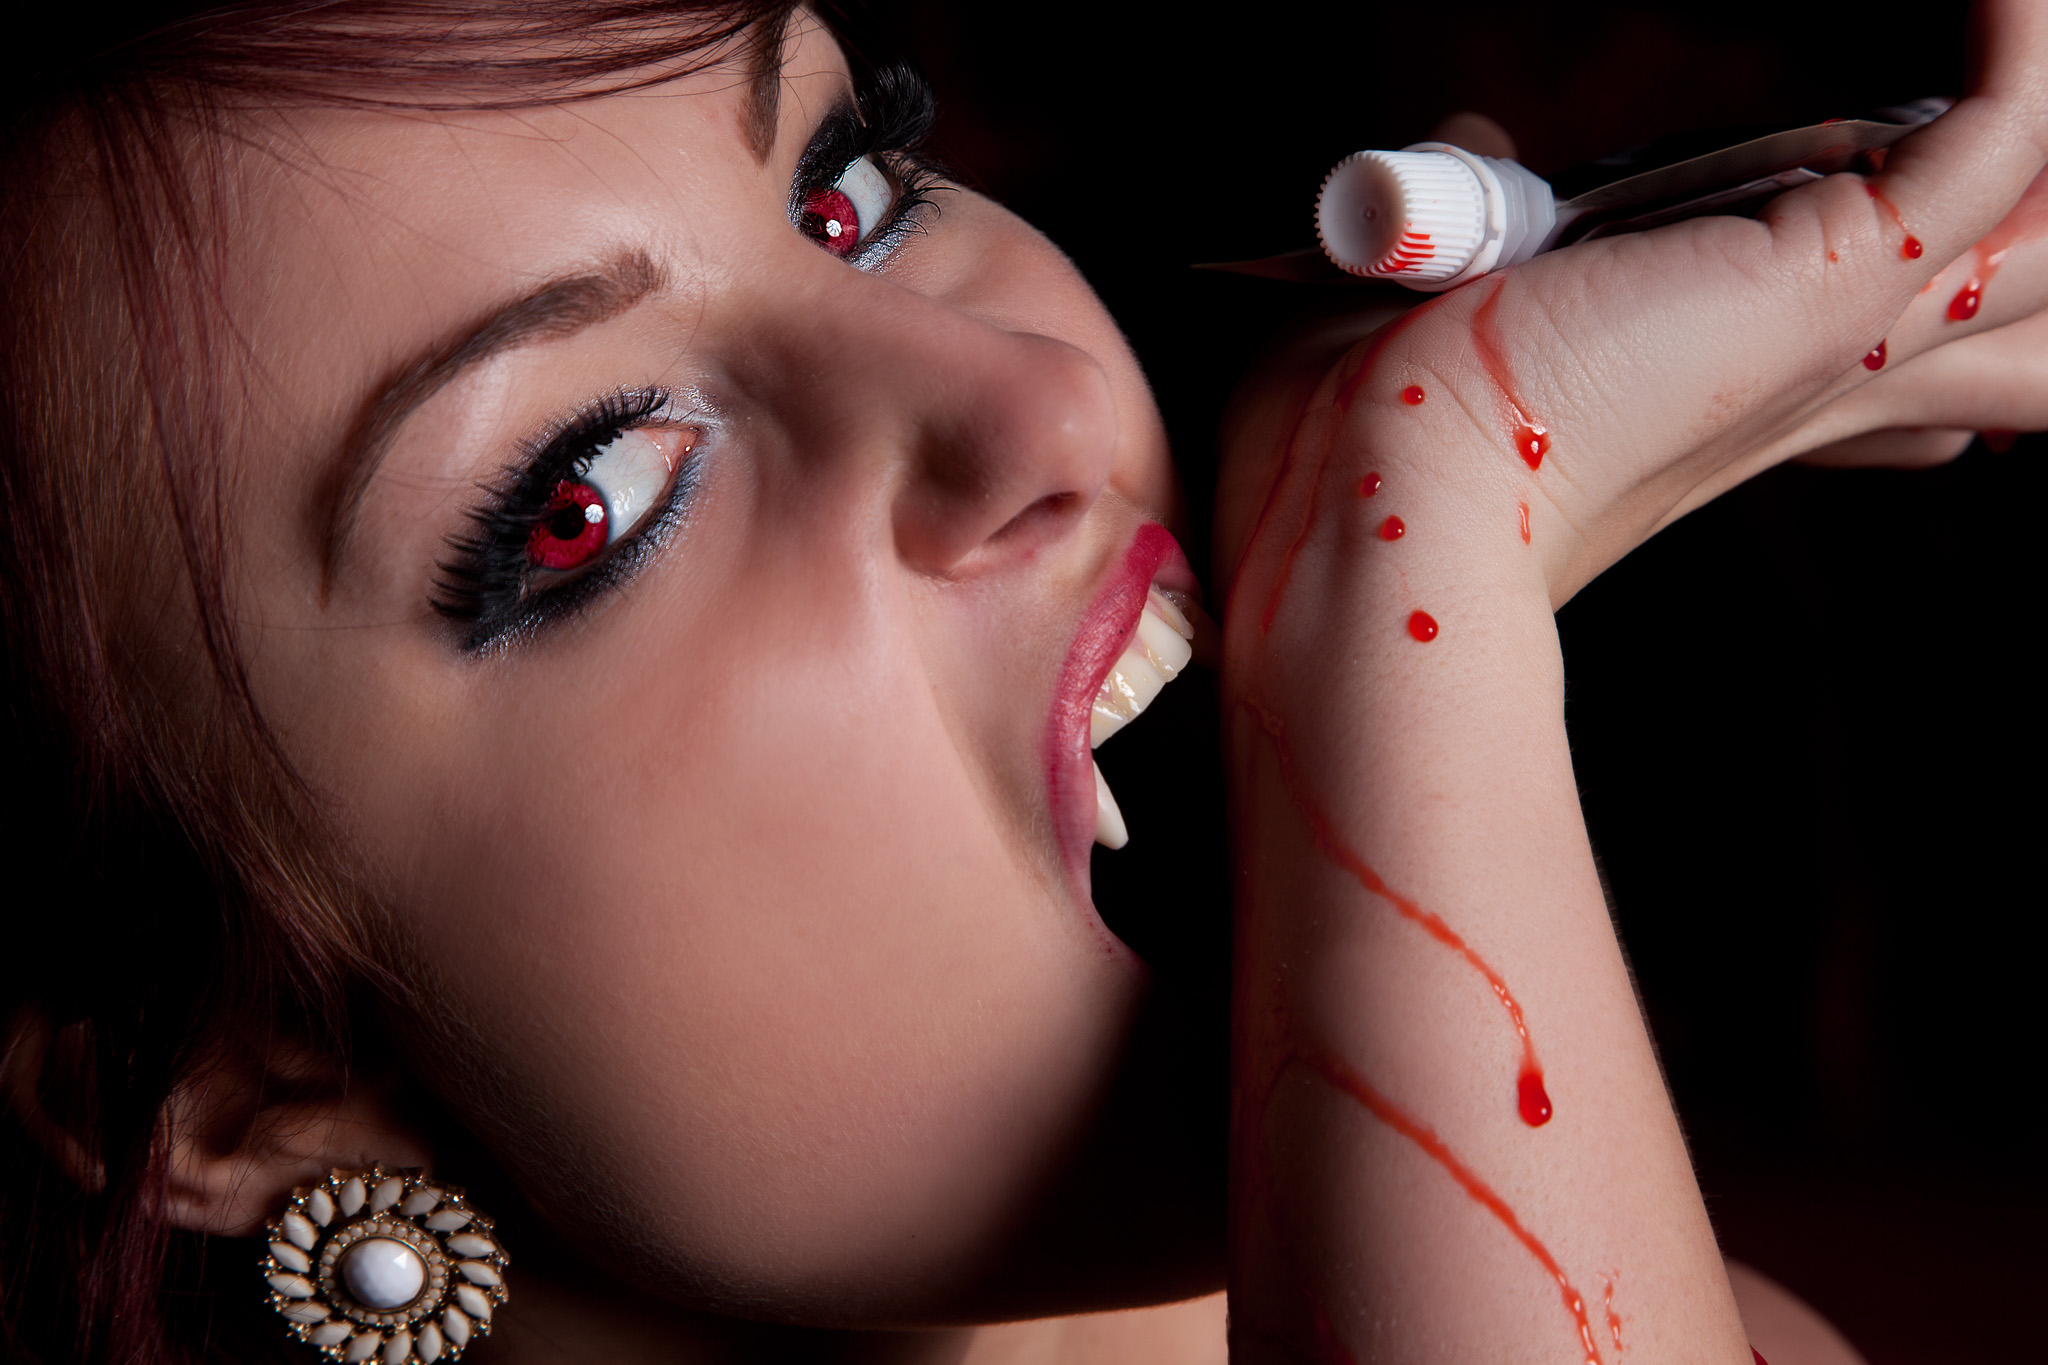
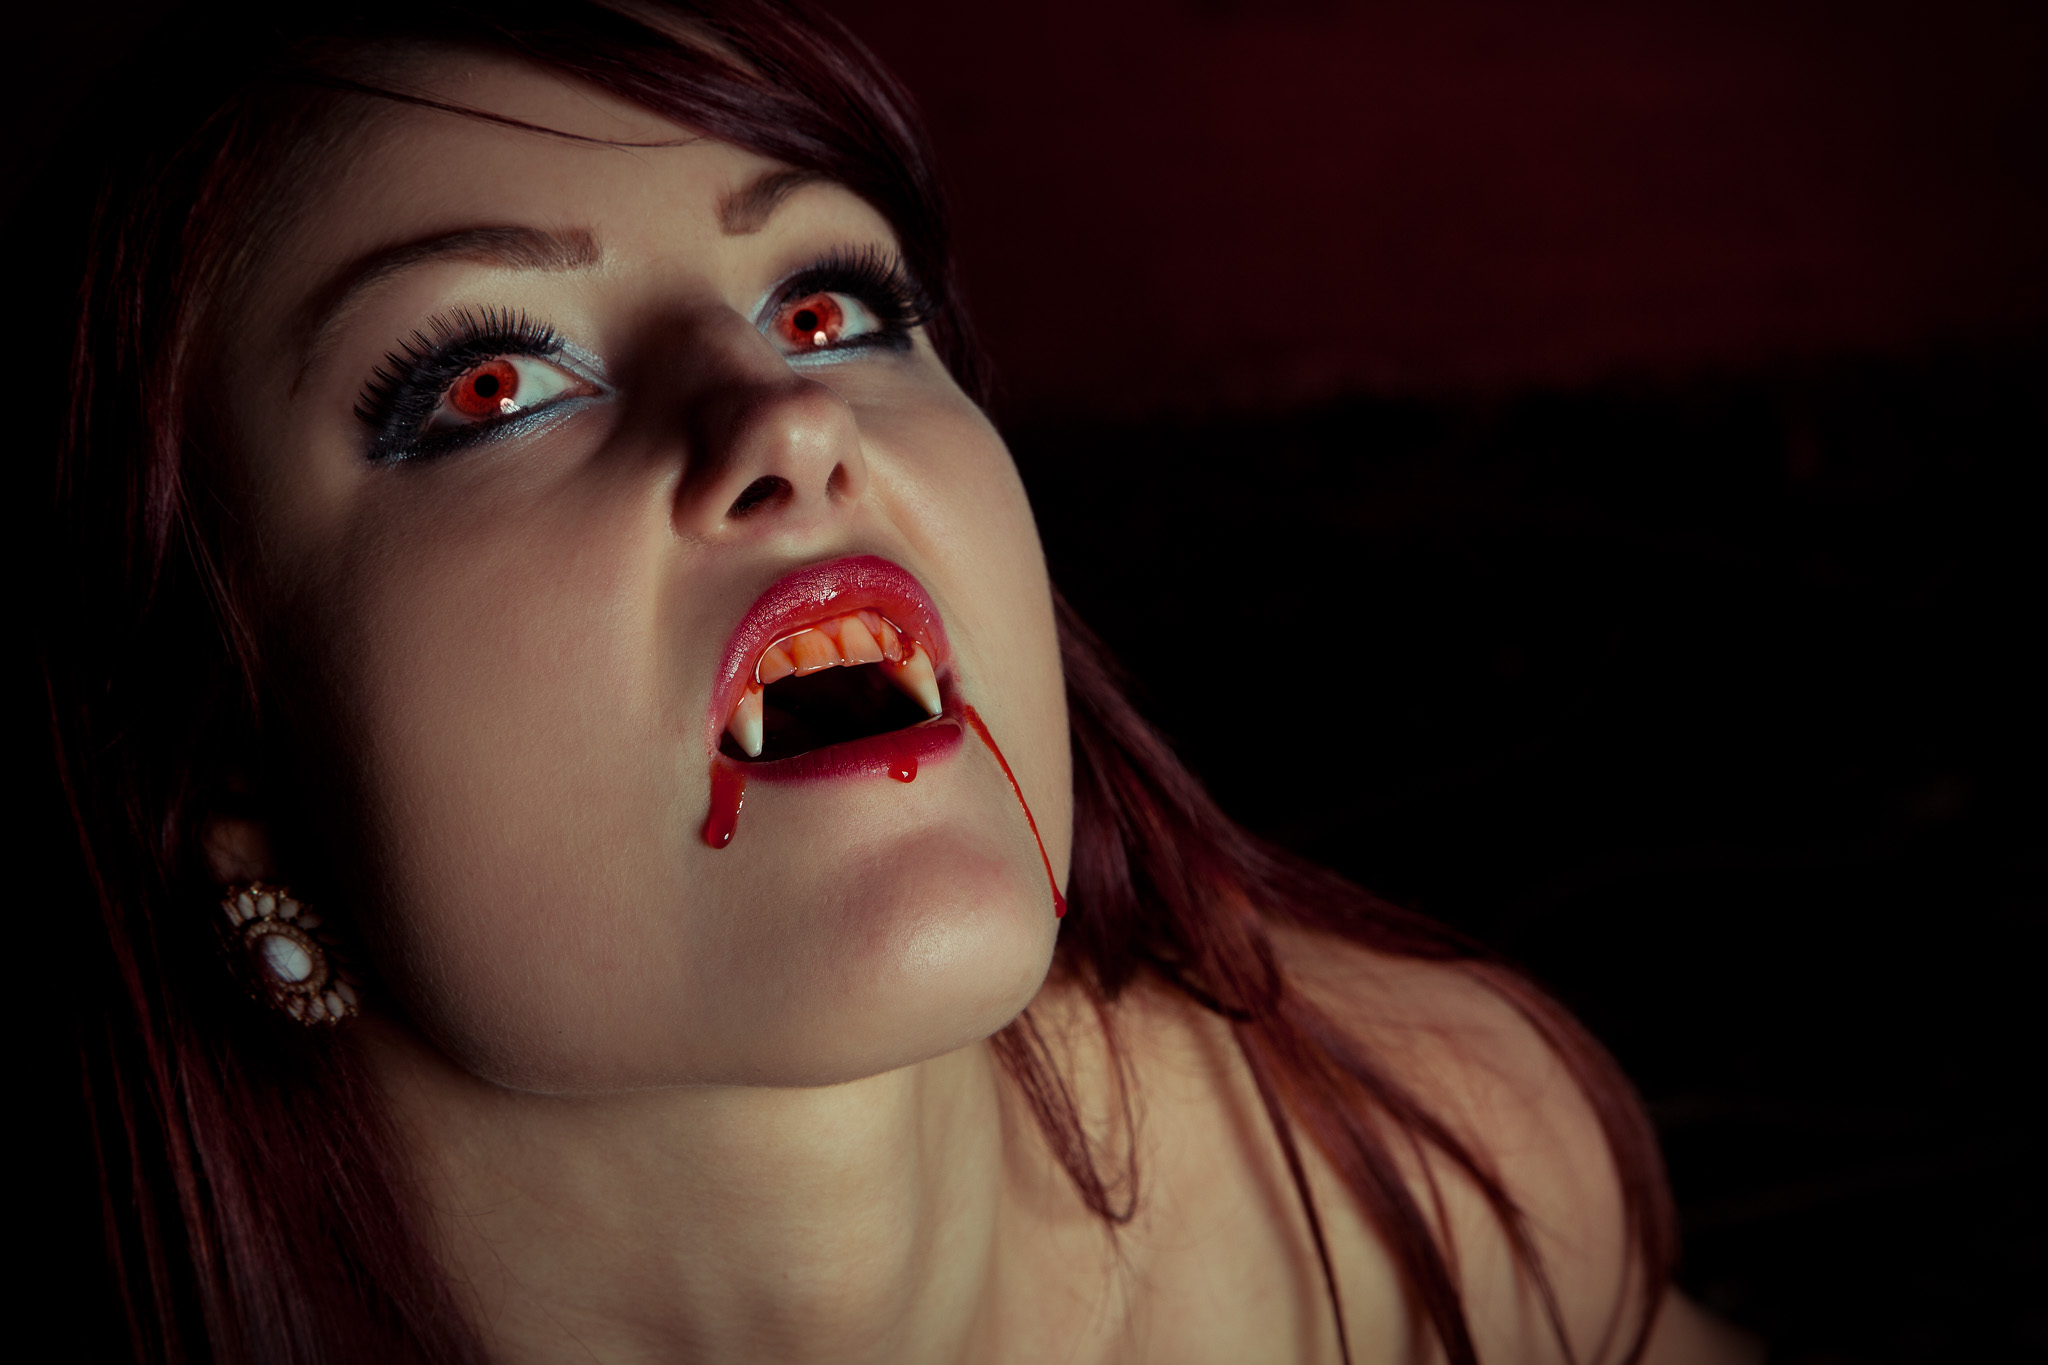
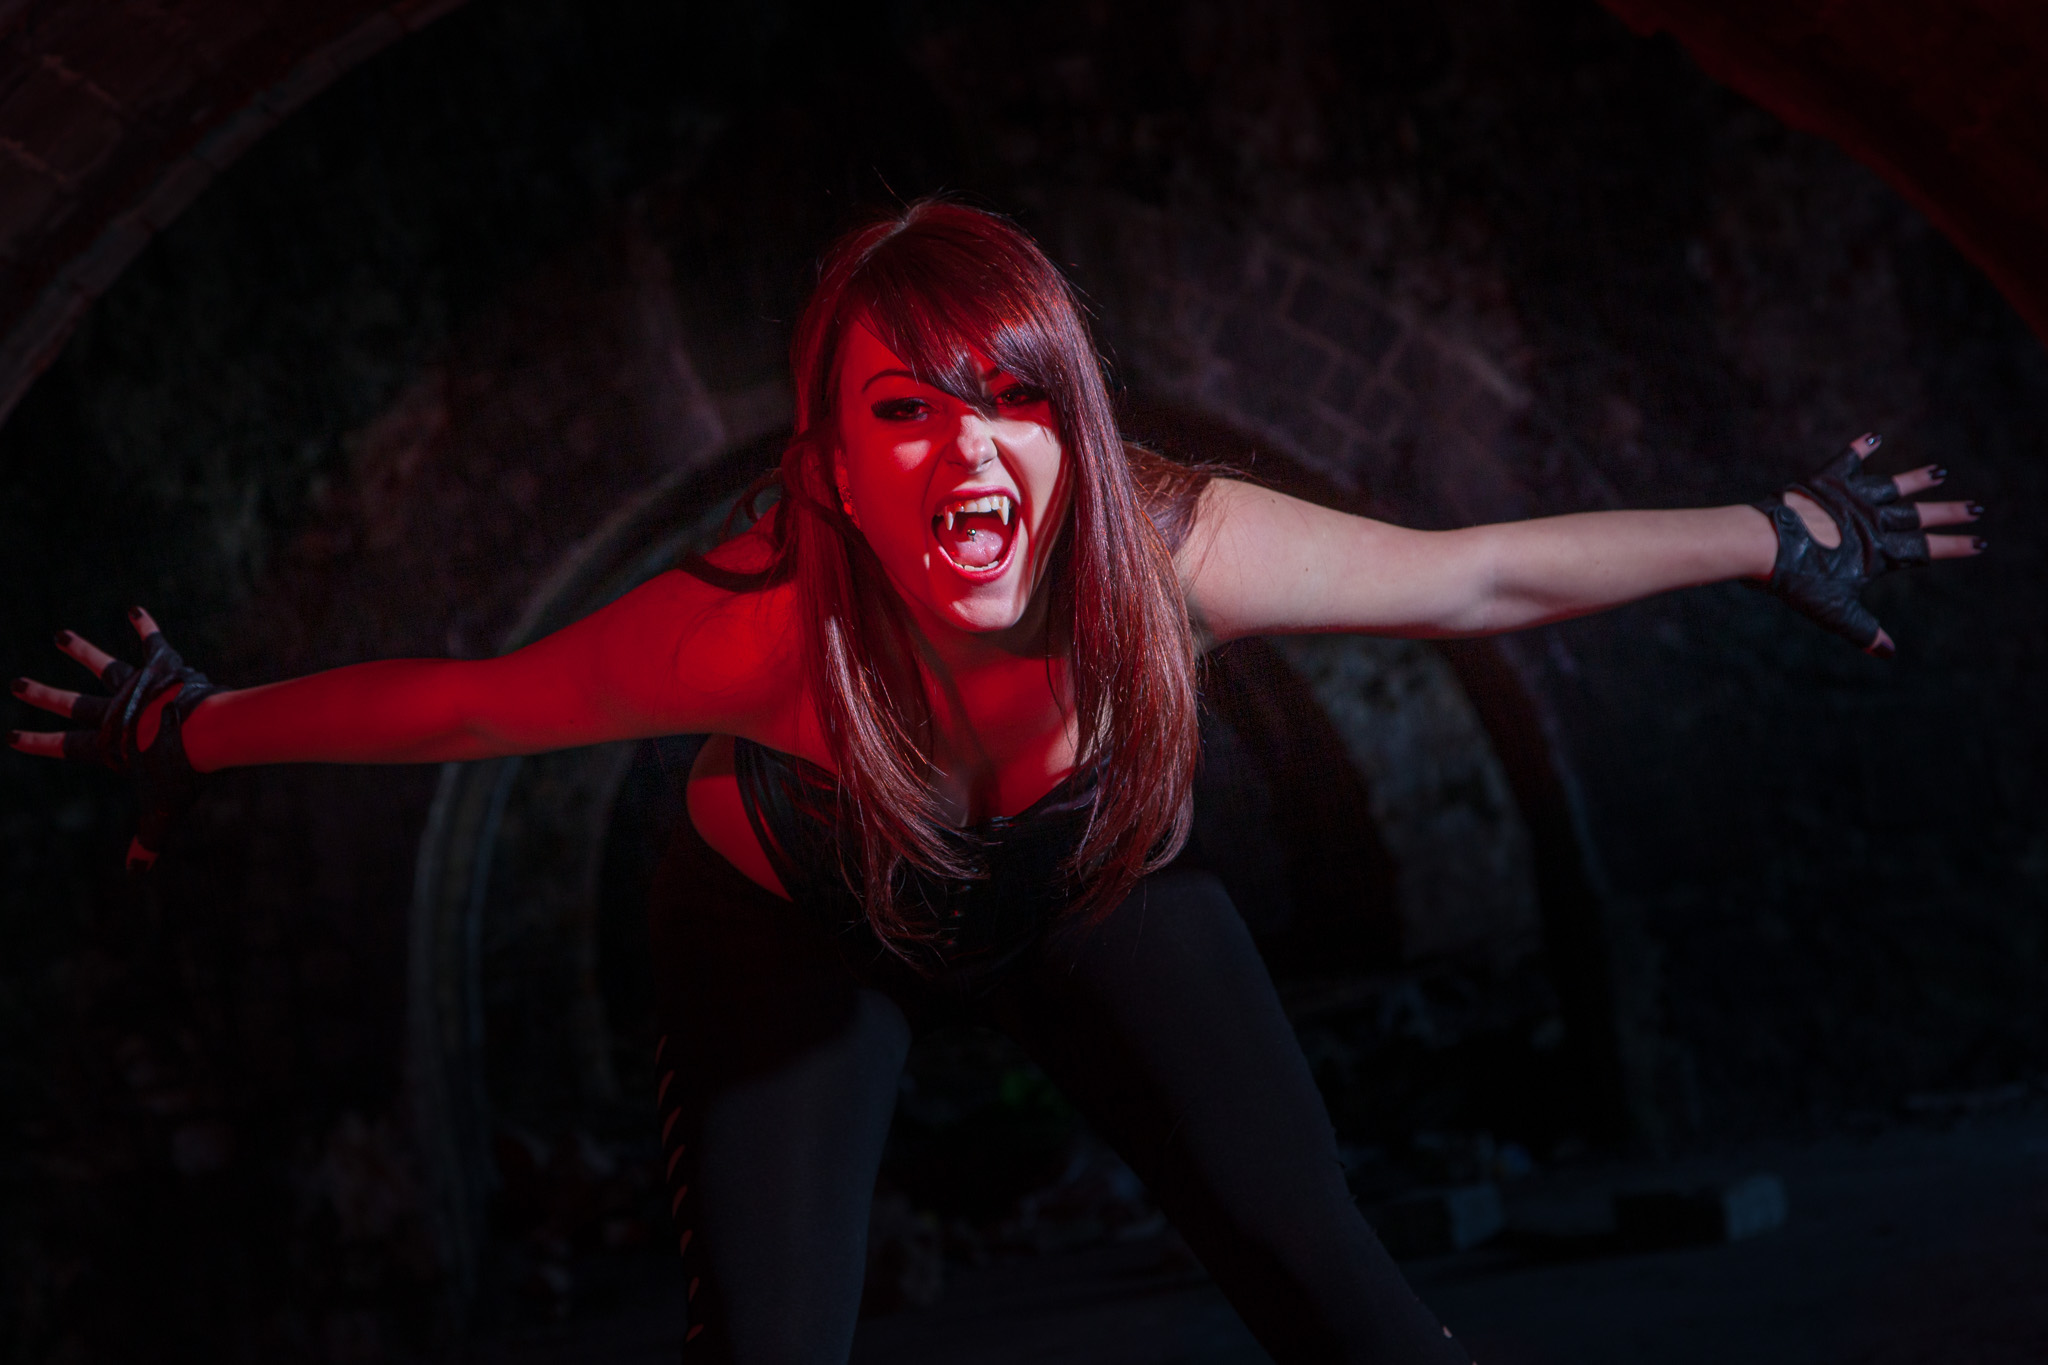
Sunday was vampire day! This was the original reason Emma came to Bristol so I had to get something good. Luckily, with Emma in costume and in character that was never in doubt. With the fangs in place and the fake blood flowing I knew I could get theatrical with the lighting. The key again was the Deep Octa as it gives a rapid fall off, lighting just what I wanted it to. I could then play with a few ideas for the background including letting some ambient burn in spookily or go all out Hammer Horror and use a red gelled flash.
I’m just pleased Emma was cleaned up and de-fanged before the PCSO came along to send us on our way!
So there you have it – a behind the scenes look at what a location shoot with me is like. If any photographers reading this would like to work with Emma (and I highly recommend you do!) check out her website and her PureStorm portfolio.
Thanks also to Helen and Darren for being able assistants and taken the behind the scenes photos.
If you have any questions, as always hit the comments.
Focus On Imaging is the biggest photography trade show in the UK – think of it as our version of Photokina or Photo Plus. While it’s not as large, you still get a few product launches there and this year I was particularly interested in The Flash Centre‘s launch of the ECO Ring Flash for the Elinchrom Ranger Quadra system. If you have followed my blog for a while, you’ll know I’m a bigfanof the Quadra pack and head system and I’ve been hankering after a ring flash for quite some time.
I’d looked at the Orbis and Rayflash gadgets that attach to a standard hotshoe flash and bounce the light around a series of light pipes but wasn’t impressed. They seemed a little fragile, are expensive enough to not be an impulse purchase and they eat up a load of power (around 2 stops in fact).
Let’s be generous and say a 580EXII is kicking out about 100w/s at full power. Drop that by 2 stops and you are down to 25w/s – that’s the minimum a Quadra pack can put out on it’s A channel. With such little power, you’re not going to get the prominent halo shadow that’s the signature of a ring flash and working outdoors you will need to work very close to get any effect at all.
The Quadra ECO ring flash, kicking out 400w/s at a few metres away, is a total different proposition. Plenty of power to create that halo shadow and enough to tame bright sunlight at a reasonable working distance. The Fast Show is coming up and I plan on seeing how it copes in daylight then, so stay tuned.
So, first impressions then?
It’s a solidly built bit of kit! The brackets that hold the flash to the camera attach to the tripod mount and are very adjustable to allow for a range of cameras and lenses. There also a tripod mount on the base.
The flash itself is all metal, except for the clear acrylic cover on the front to protect the flash tube. There is also a clip on translucent cover to diffuse the light slightly and hold any gels to may want to add.
The power lead that connects you to the pack is 2m (slightly shorter than the 2.5m leads that come with the Quadra A and S heads) so you can just sling the pack over your shoulder.
With it mounted to a 5D with battery grip and a 25-105mm lens I had no trouble reaching the zoom ring or shutter buttons and while its by no means small, it is lightweight and doesn’t get in the way. I did find the flash illuminated the specks of dust on the front element of my lens at certain focal lengths but that’s more than likely down to me fitting the ring too close to the body.
What’s that? A sample photo you say? Well, OK then! Thanks to Helen for being my guinea pig… again!
I’m lucky enough to have access to what can loosely be called some studio space (a huge empty room, large enough to get a car in that gives me completely control of the ambient light) so last night I tried a little automotive light painting.
So armed with nothing more than a camera, tripod and an Elinchrom Quadra with the modelling light on although any constant light source would do though.
I’d like to say that was all done in camera but it’s not. There are 3 individual shots that have been composited to make that final shot. Firstly, because of their brightness relative to the Quadra’s LED modelling light, I shot the headlights.
Then it was time to light the car. After a few tests with various softboxes I found the most even coverage came from simply walking around the car with just the Quadra head and 18cm reflector. A 13 second exposure at f/8 gave me time to walk fairly slowly around the car. The first shot below is a lap with the light held fairly low to get light onto the doors and the second was as high as I could reach to bounce some light of the car roof.
For this pass (another 13 second exposure) the light was held higher to thrown light onto the roof of the car.
Once in Photoshop, I layered the 3 images in Lighten mode and did a little burning to darken down the walls in the background. I also added and masked a desaturation layer to remove the slight yellow tinge from the fog lights and remove a colour cast from the wheels and floor. The result:
For a first attempt a light painting a car I am pleased, although looking at the final image, I see a few things I’ll look out for next time.


Recent Comments