
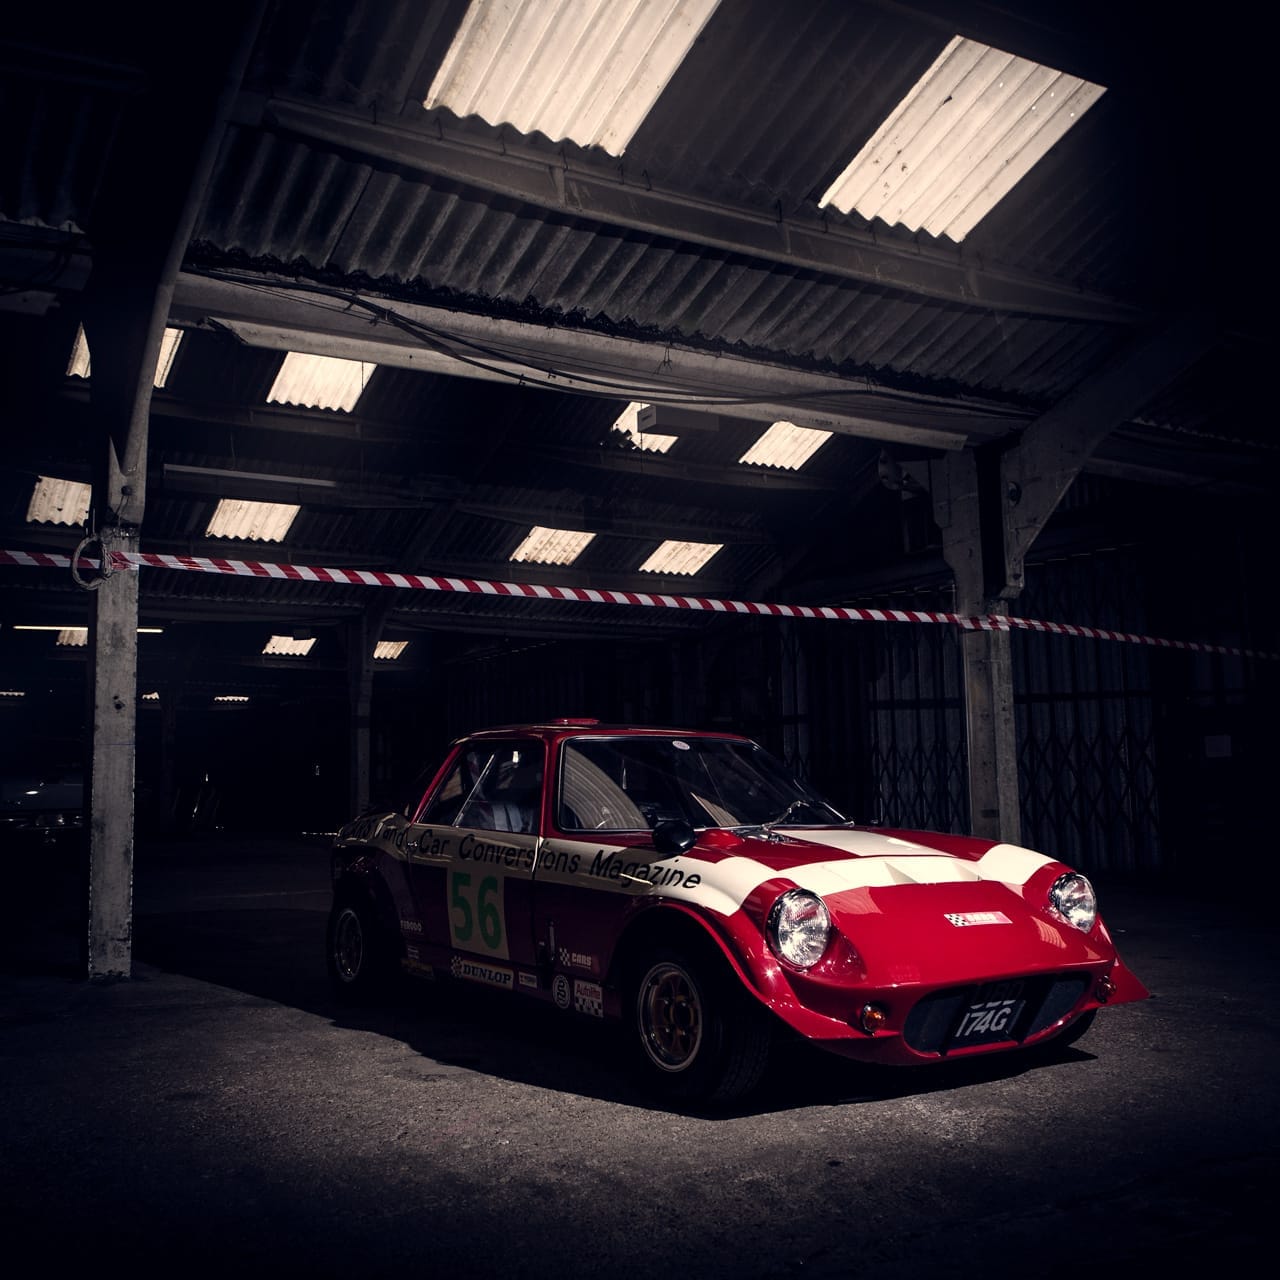
Here’s a photo taken earlier this year in a cattle shed near Coventry for today’s Photo of the Week. The event was Race Retro and between sessions on the mini rally stage a selection of classic rally cars gathered in the makeshift parc ferme.
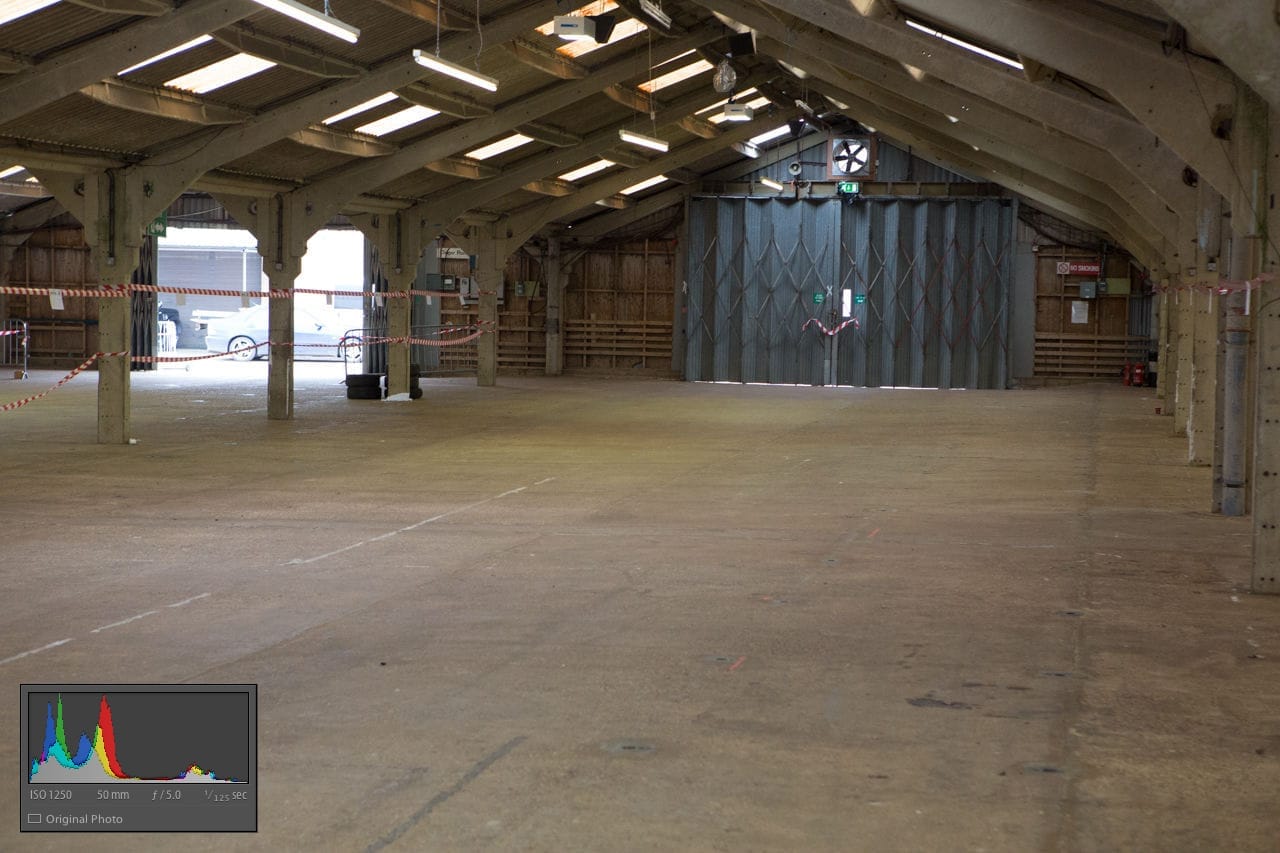
When left to it’s own devices in AV mode, the camera wanted to take the exposure at 1/125th, f5 at ISO1250 so I knew I could overpower the ambient light pretty easily with just a speedlite. If I had to stop down to f16 I’d have had a problem, but the final image was taken at f7.1 – no problem for a 580EXII.
Once I had the exposure dialled in it was a case of adjusting the power of the flash (I think was on about 1/4 power) and then finding a spot where it looked good. The idea here was to make it look as if there was a pool of light spilling in from the skylights in the roof above the Mini Gem GTE.
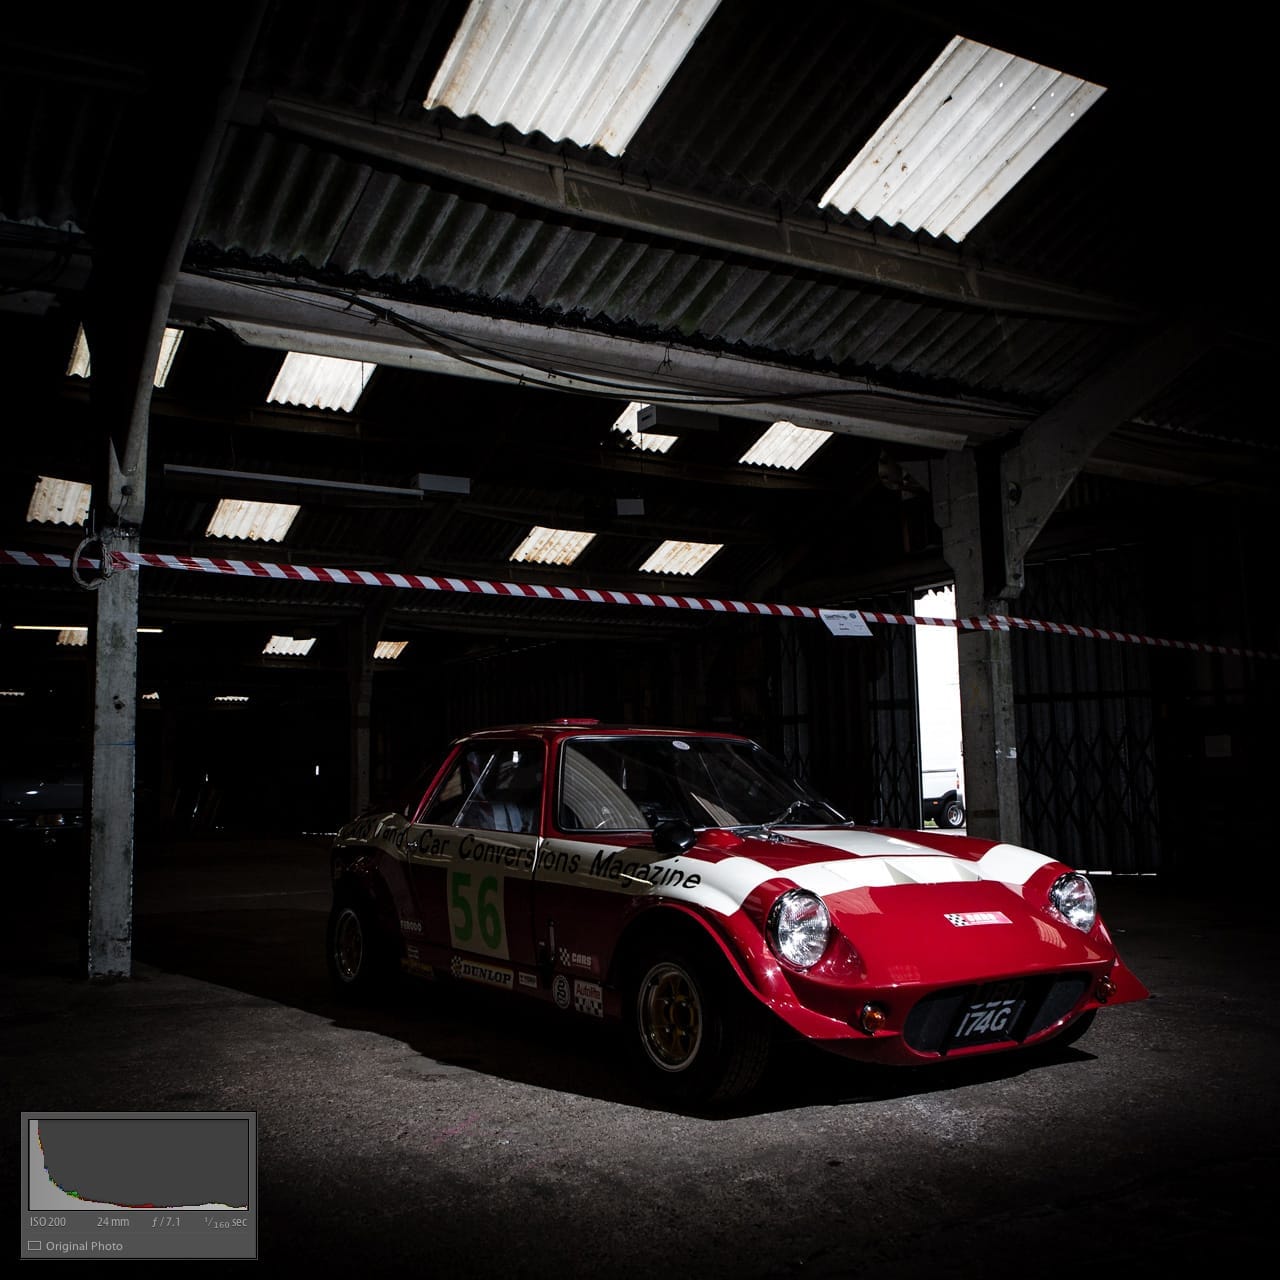
Over in Photoshop, the first task was to clean things up. Specifically the open barn door that’s distractingly bright and the reflective metal parts up in the roof space. This was done with a mixture of the Clone Stamp and just painting with the brush tool. I decided to leave the tape between the pillars above the car in as it matched the red and white paintwork so well.
 The final job was a little colour toning and general exposure tweaking.
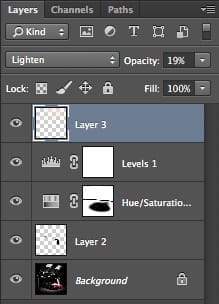
Starting at the bottom of the Photoshop layers panel on the left you can see the background is the original image. Layer 2 is the Clone Stamp work I did to fill in the open barn door.
The Curves 1 layer is a Curves adjustment layer that’s just to lighten the side of the car that was nearest to the camera. It’s a slight bump in exposure painted only onto the area needed with a layer mask.
The next layer up is a Hue/Saturation adjustment again layer masked so it only shows on the areas of the mask painted white. This is just desaturating the background whilst keeping the car and tape nice and bright.
Levels 1 is applying the colour toning. It’s not an obvious effect but its adding a little cyan to the shadows and warming the highlights a little.
And finally, Layer 3 is adding just a little haze around the skylights to simulate dust in the air. All this takes is some dabbing with a soft brush sampling a couple that’s already present in the light, a little Gaussian blur and a drop in opacity.
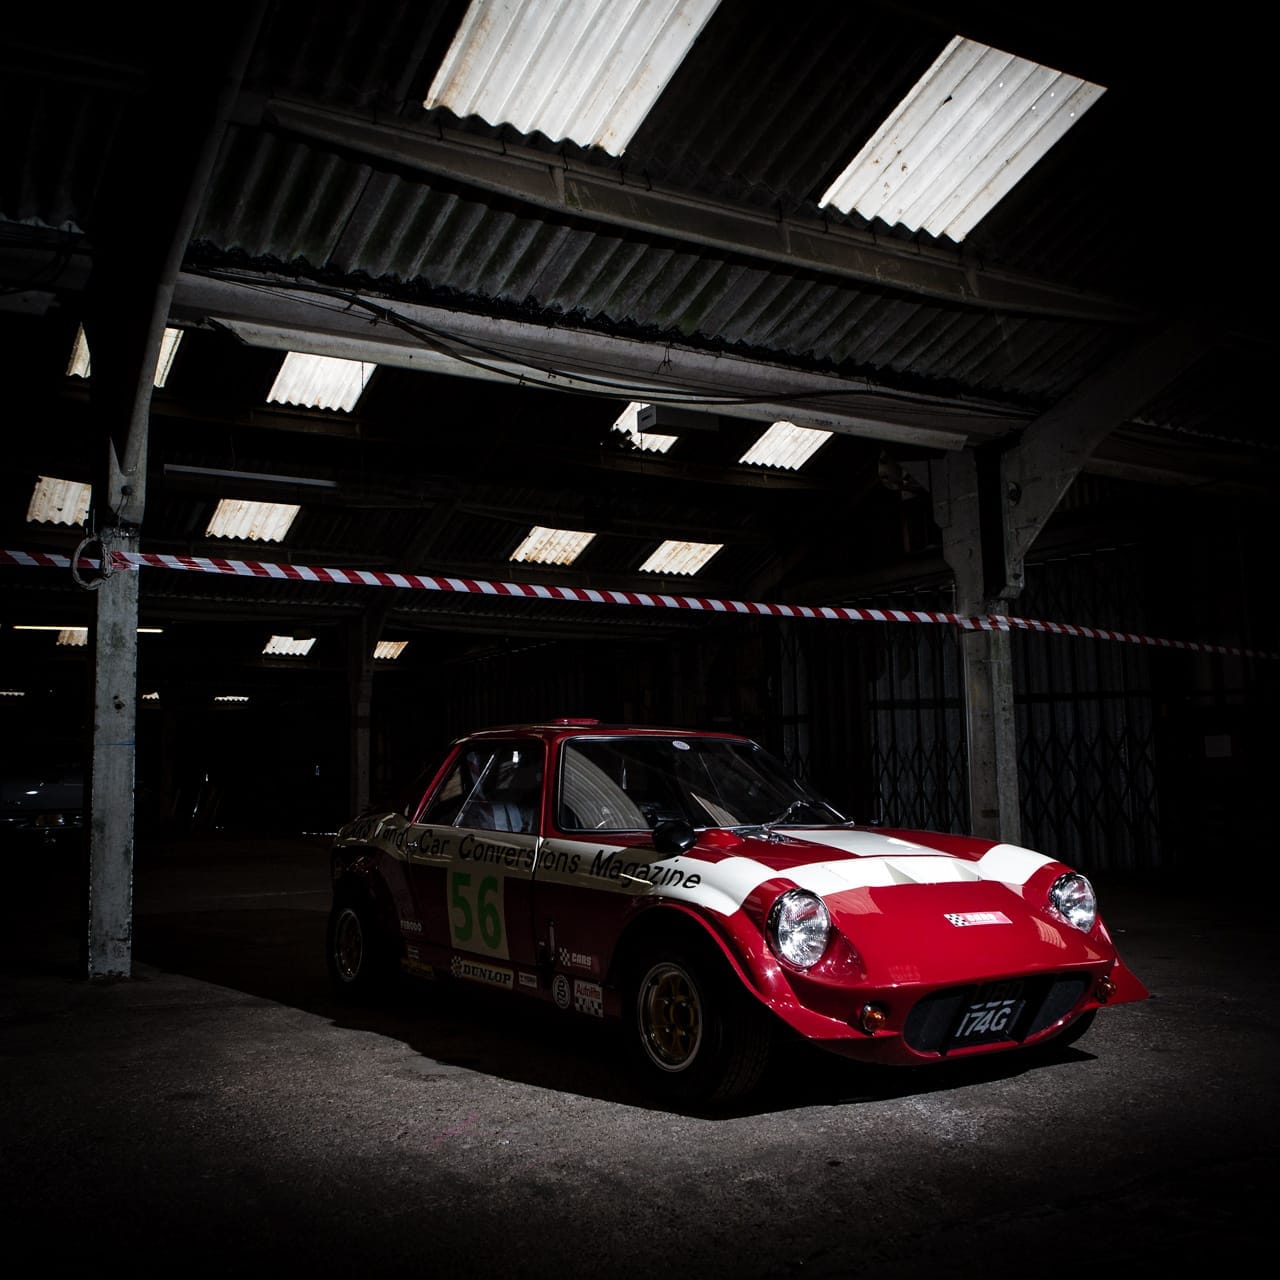
Here’s the final image. As always I’d love to hear what you think.

Light is everything in photography and sometimes it’s so good it’ll make you stop the car, grab your camera and jump over hedges to capture it. That’s what happened on Boxing Day two years ago.
I was cresting a hill not far from where I lived and saw the rays of light hitting Chew Valley lake. I know conditions like this don’t last long so I was out of the car and shooting in seconds. I had my 24-70mm f2.8 lens on the camera and no tripod so I worked with what I had. As Photoshop is so good at stitching images into panoramas these days, even hand held ones as long as you’re careful, I went for a nine frame pano to fit the whole scene in.
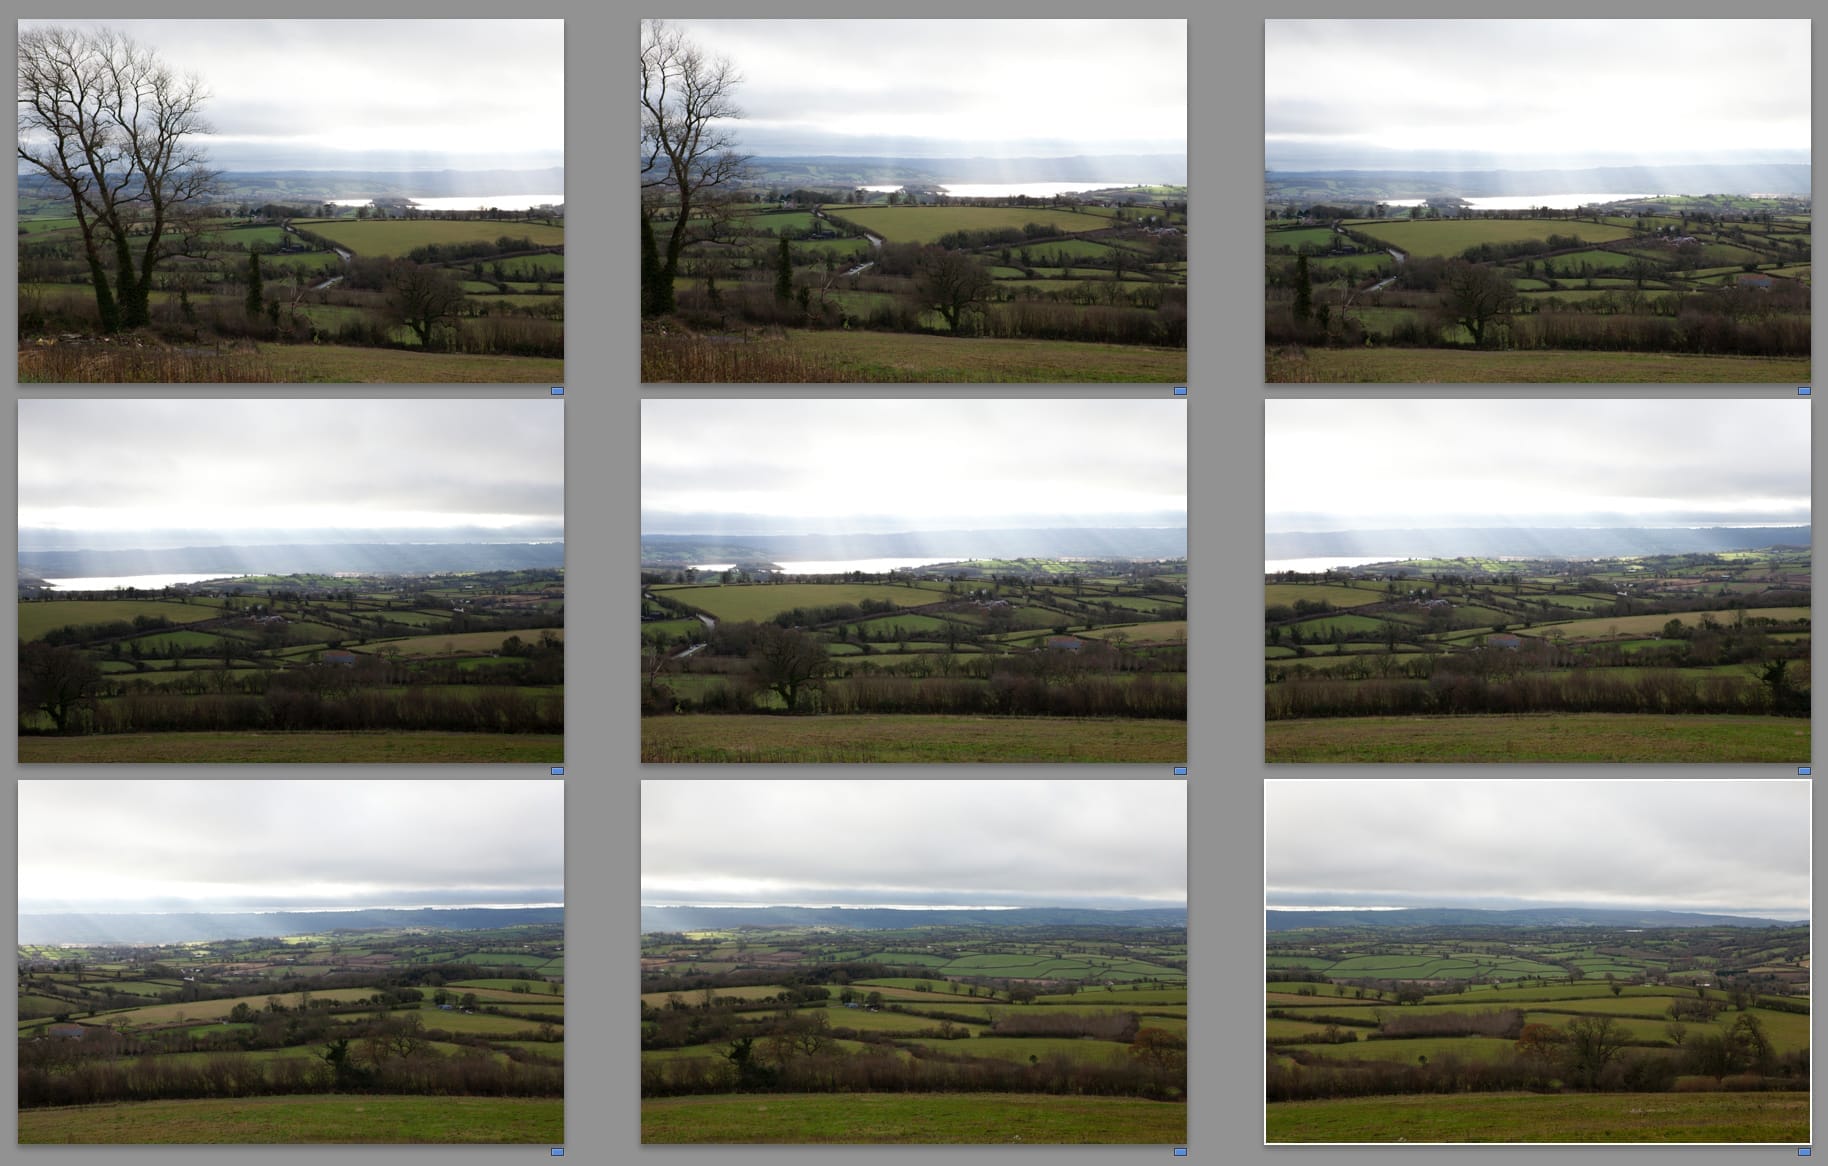

In this case, careful included keeping my shutter speed up to eliminate motion blur and 1/250th at 70mm is pretty safe. I stopped down to f7.1 so I had decent depth of field. Again, being at 70mm helped with this (the wider you go, the more depth of field you have at any given aperture) as did focusing about a third of the way into the scene. If you want to know more about Hyperfocal Distance, there’s a great post here. Choosing that shutter speed and aperture meant bumping my ISO to 400 to keep the overall exposure right.
Normally when shooting a panorama I’ll hold the camera in portrait orientation as this gives more leeway if you drift vertically as you move left to right but for some reason I forgot on this occasion. Luckily with such a clear horizon I kept level.
The post production side of things was pretty simple. I exported from Lightroom and let Photoshop create the pano in auto mode. Once complete I flattened the image (it reduces the amount of RAM needed and speeds things up massively), cropped it to trim off any white space caused by lens distortion and applied a few adjustment levels to bump the saturation and contrast. Here’s the final image:

I went on to get a couple of copies printed by the fine folks at Pix2Canvas who were able to make a custom sized canvas frame. At 150 x 30cm and nearly 200 megapixels it looks pretty impressive!

Today’s Photo of the Week popped back up on my radar recently as it’s being printed on perspex to be hung in an office in Glasgow.

It might not be obvious at first glance that this was shot at about 11pm on a clear moonlit night but if you look at the blurred blades on the wind turbines and the EXIF data the clues are there. The only post production here is a little noise reduction.
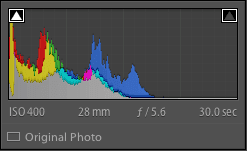
You can see this was shot at a 30 seconds – the longest exposure without going into Bulb mode. ISO and aperture were set to made a good exposure at that time after a few practise shots.
This is one of those histograms that don’t fit the mould. The data is bunched at the left side but that’s what you’d expect from a moonlit image – it’s naturally going to be dark and low contrast.
Gear wise, this needed nothing more than a tripod. I didn’t even have my shutter release with me so I just used the cameras self timer.

Today’s photo was taken just after dawn at the Bristol Balloon fiesta. Just before the sun rises about a hundred teams spring into action, unfurling huge balloons out on the launch field at Ashton Court.
This image intentionally looks pretty calm but just out of frame are hundreds of people dashing around. I shot this wide open at f2.8 because I wanted the trees and sun to be soft in contrast to the hard steel of the burner.

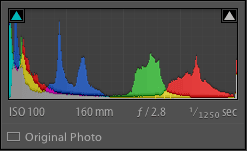
Because of the large difference in exposure between the gas burner and the sky I was working in manual mode, making sure I held as much detail as I could in the shadows without blowing out the sky.
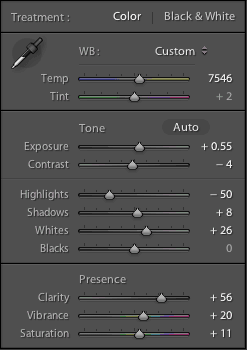 Over in Lightroom I made a few tweaks to finish things off. Firstly, I warmed the whole scene a little and upped the Vibrance and Saturation to enhance the sunrise feel. Then I pumped up the shadows to give tad more detail in the metalwork. There’s also some Clarity in there because Clarity is magic!

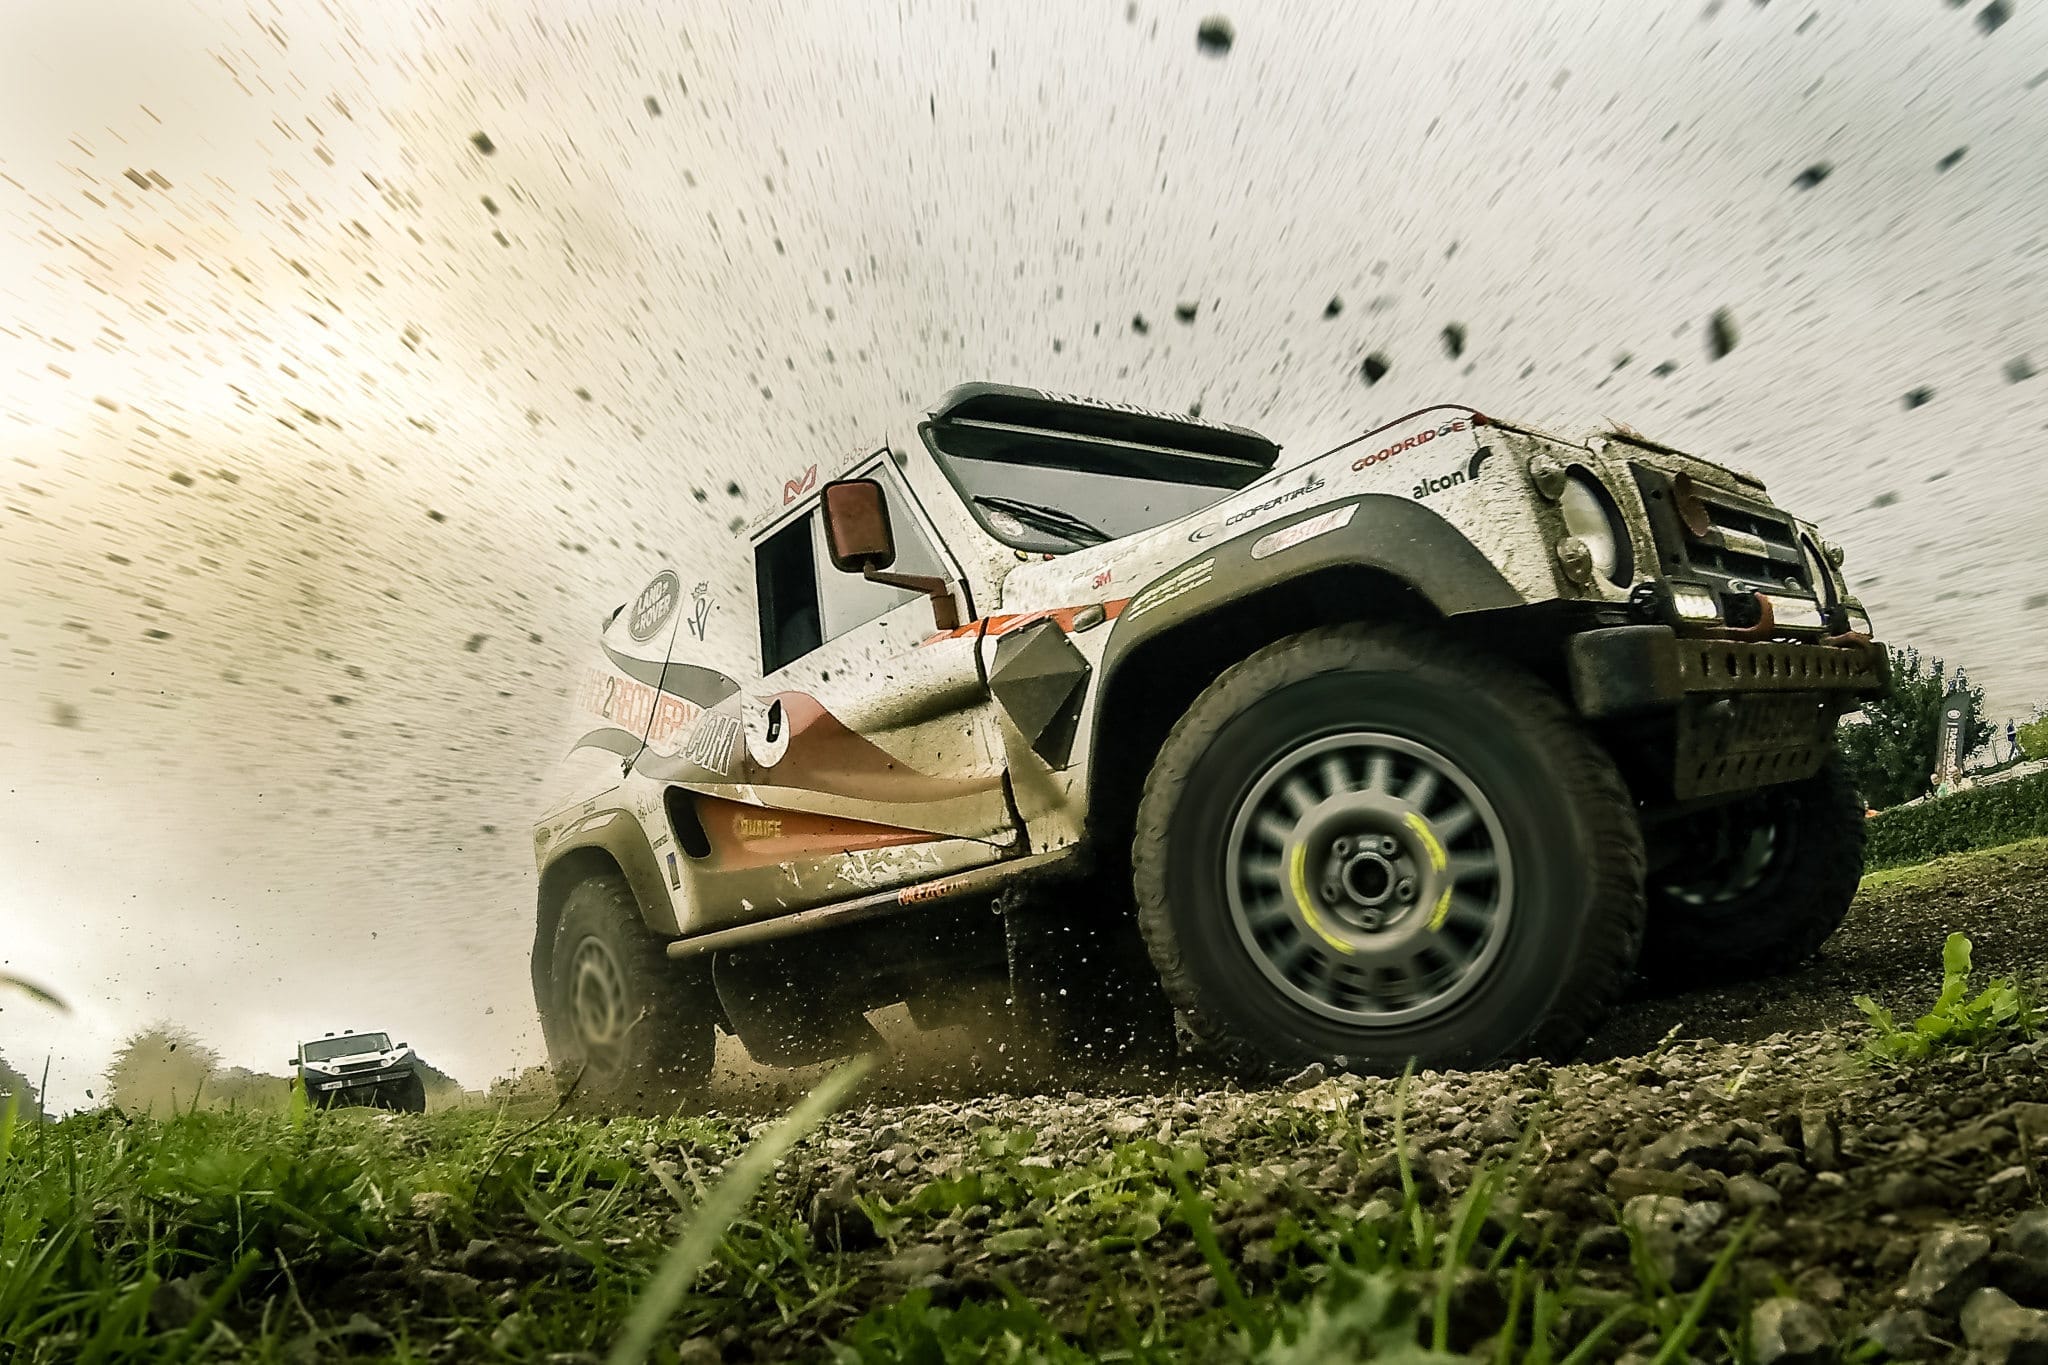
For this week’s photo you can probably tell I wasn’t actually behind the camera! I’ve positioned my GoPro Hero 3 against a tyre wall and retreated to a safe distance. If you look carefully, you’ll see me in front of the Race2Recovery truck on the right, leaning over the hedge. I’m using the GoPro app on my iPhone, right on the edge of wifi range, to trigger burst mode. That’s 10 shots per second for 3 seconds in this case.
After a few test runs to get used to the lag (being able to wirelessly review shots with the app really helps work this out) I was getting shots like the three below.
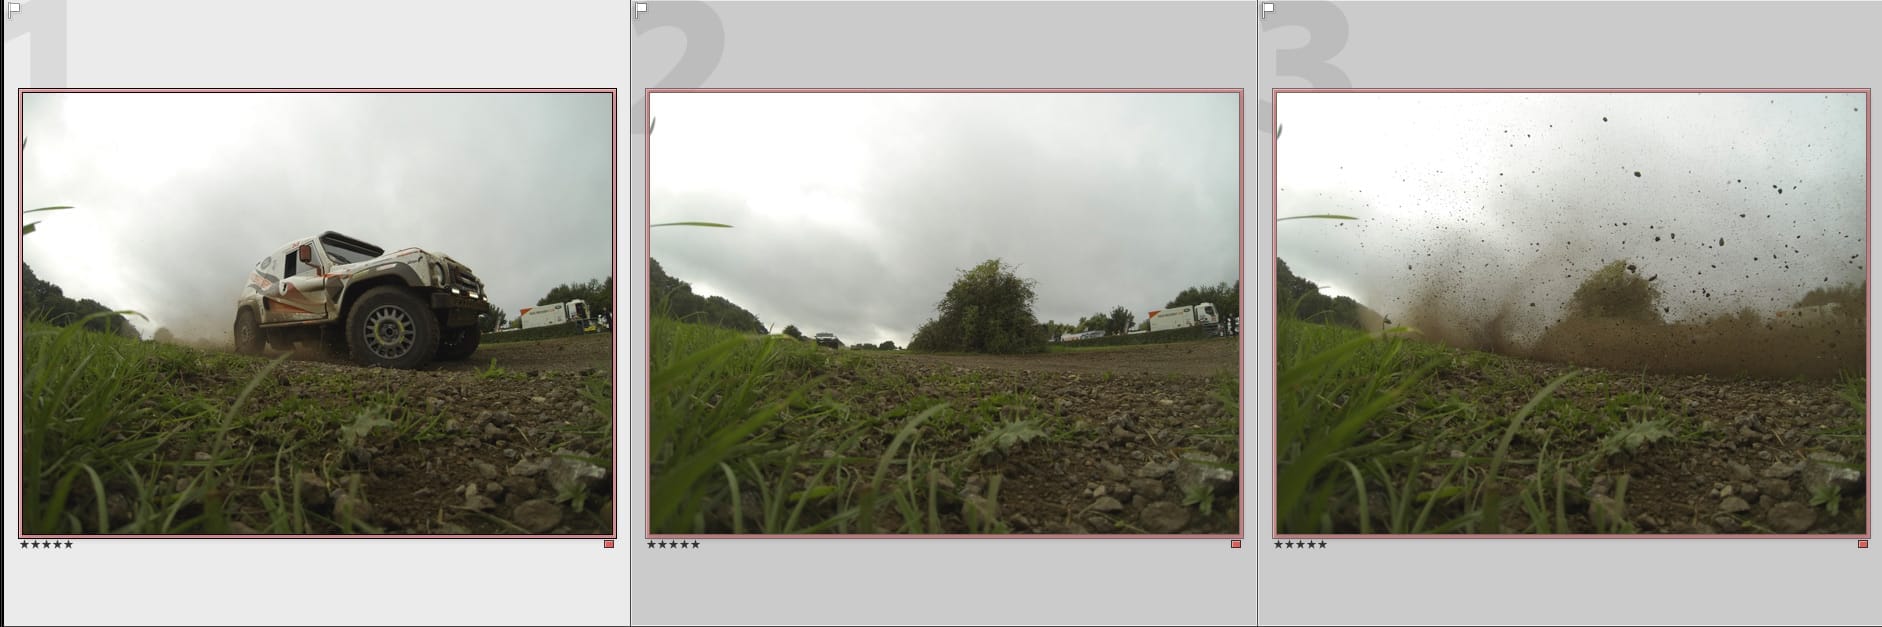
 These got opened as layers and auto-aligned in Photoshop. The shots were taken a few minutes apart and so much debris was hitting the camera that it moved a little so the auto-align came in handy when masking.
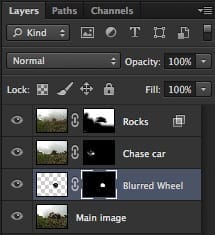
As you can see, it’s quite a simple file. Just the main exposure with an (artificially) blurred wheel, the chase car and the flying rocks.
So here is the base exposure. Because it’s shot with a GoPro, with no manual controls, you pretty much get what you are given. The quality is decent enough and 12 mega pixels gives plenty of opportunity to crop in but the real reason for using it in this case was the ability to get it VERY close to the action.
With no control over shutter speed, the wheels on the Bowler Wildcat were frozen still. I selected the wheel, popped it onto its own layer and applied a radial blur, masking out everything but the bits I needed. There is also a little motion blur added to the other wheels using the Smudge tool – literally the only time I use it!
Next up was the chase car. This was shot on completely different track session but I think its addition adds a little drama to the final image. 
Finally, the flying rocks. These were kicked up behind a different truck as it was trying to get closer and closer to my camera each lap! Again, with the GoPro shooting at whatever shutter speed it needs to work with its fixed 2,8 lens, the rocks were frozen in mid-flight so to add some movement I applied a very slight zoom blur. I’ve then masked the layer to control where the rocks appear.

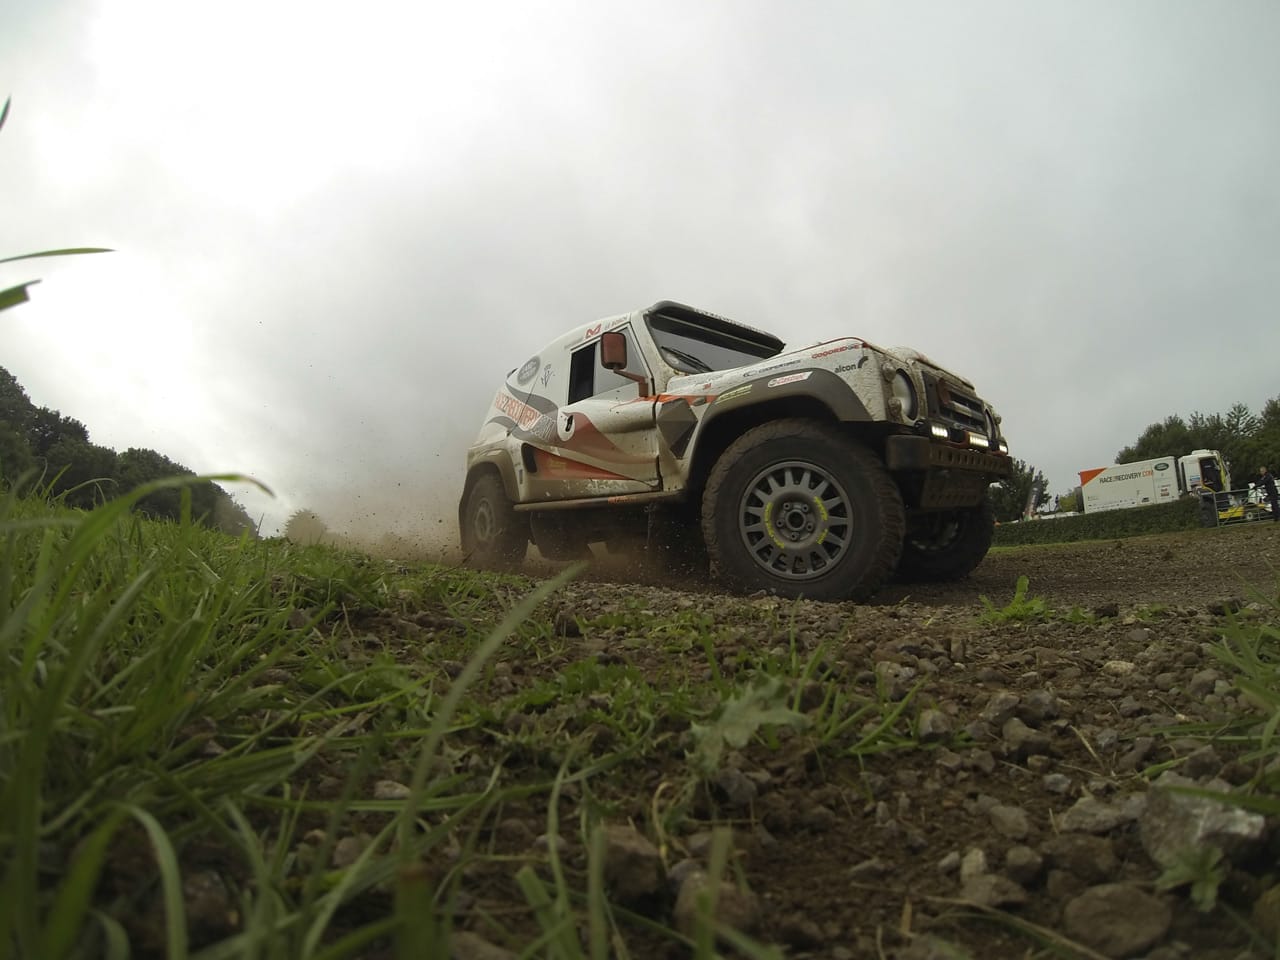
Which leads us on to the final image:
As usual, I’d love to hear what you think in the comments.

Recent Comments