
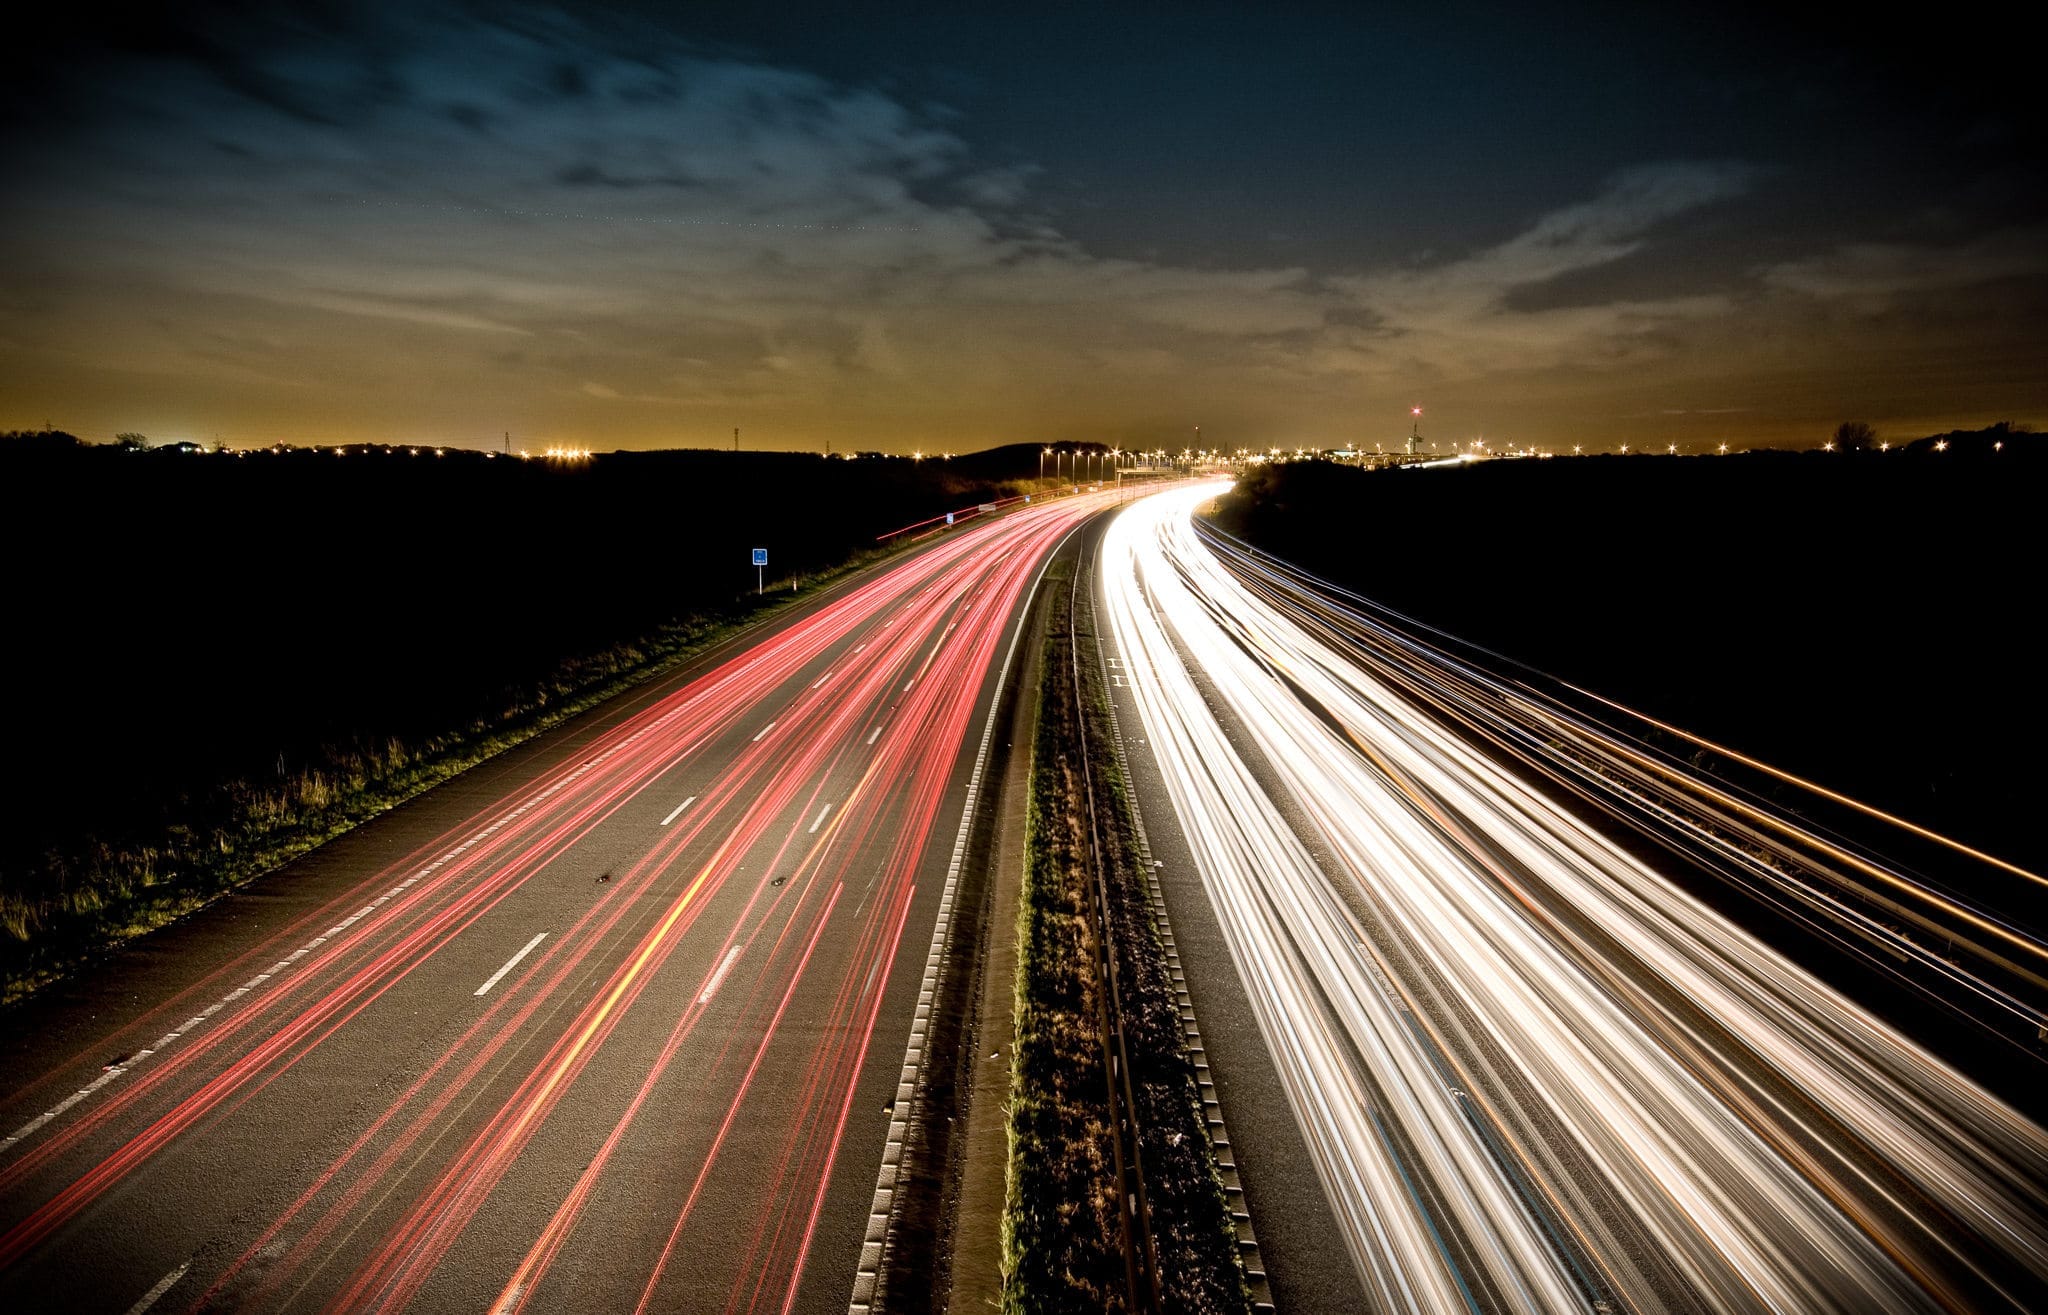
This image was taken a few years ago as a Get Off My Ass mission – I’d not been out with my camera for a while and decided that tonight would be the night. I don’t recall what gave me the idea but I decided on shooting some light trails and fired up Google Maps to find a suitable location.
This bridge is just north of the M4/M5 interchange outside Bristol. I like this location for the curve of the road leading towards the RAC tower and the light pollution from the city giving the sky some interest. I took a batch of images, a couple to get the right exposure for the sky and the rest at 15 seconds to capture the light trails. You get surprisingly few cars in 15 seconds leaving sparse trails so 4 frames were layered in Photoshop (using the Lighten blend mode) to give better density.

Overall I am pleased with the image but looking back at it now I can’t help but see one thing: The blue mile marker sign on the left hand side! How did I not see that glowing reflective blue square when I first edited it??

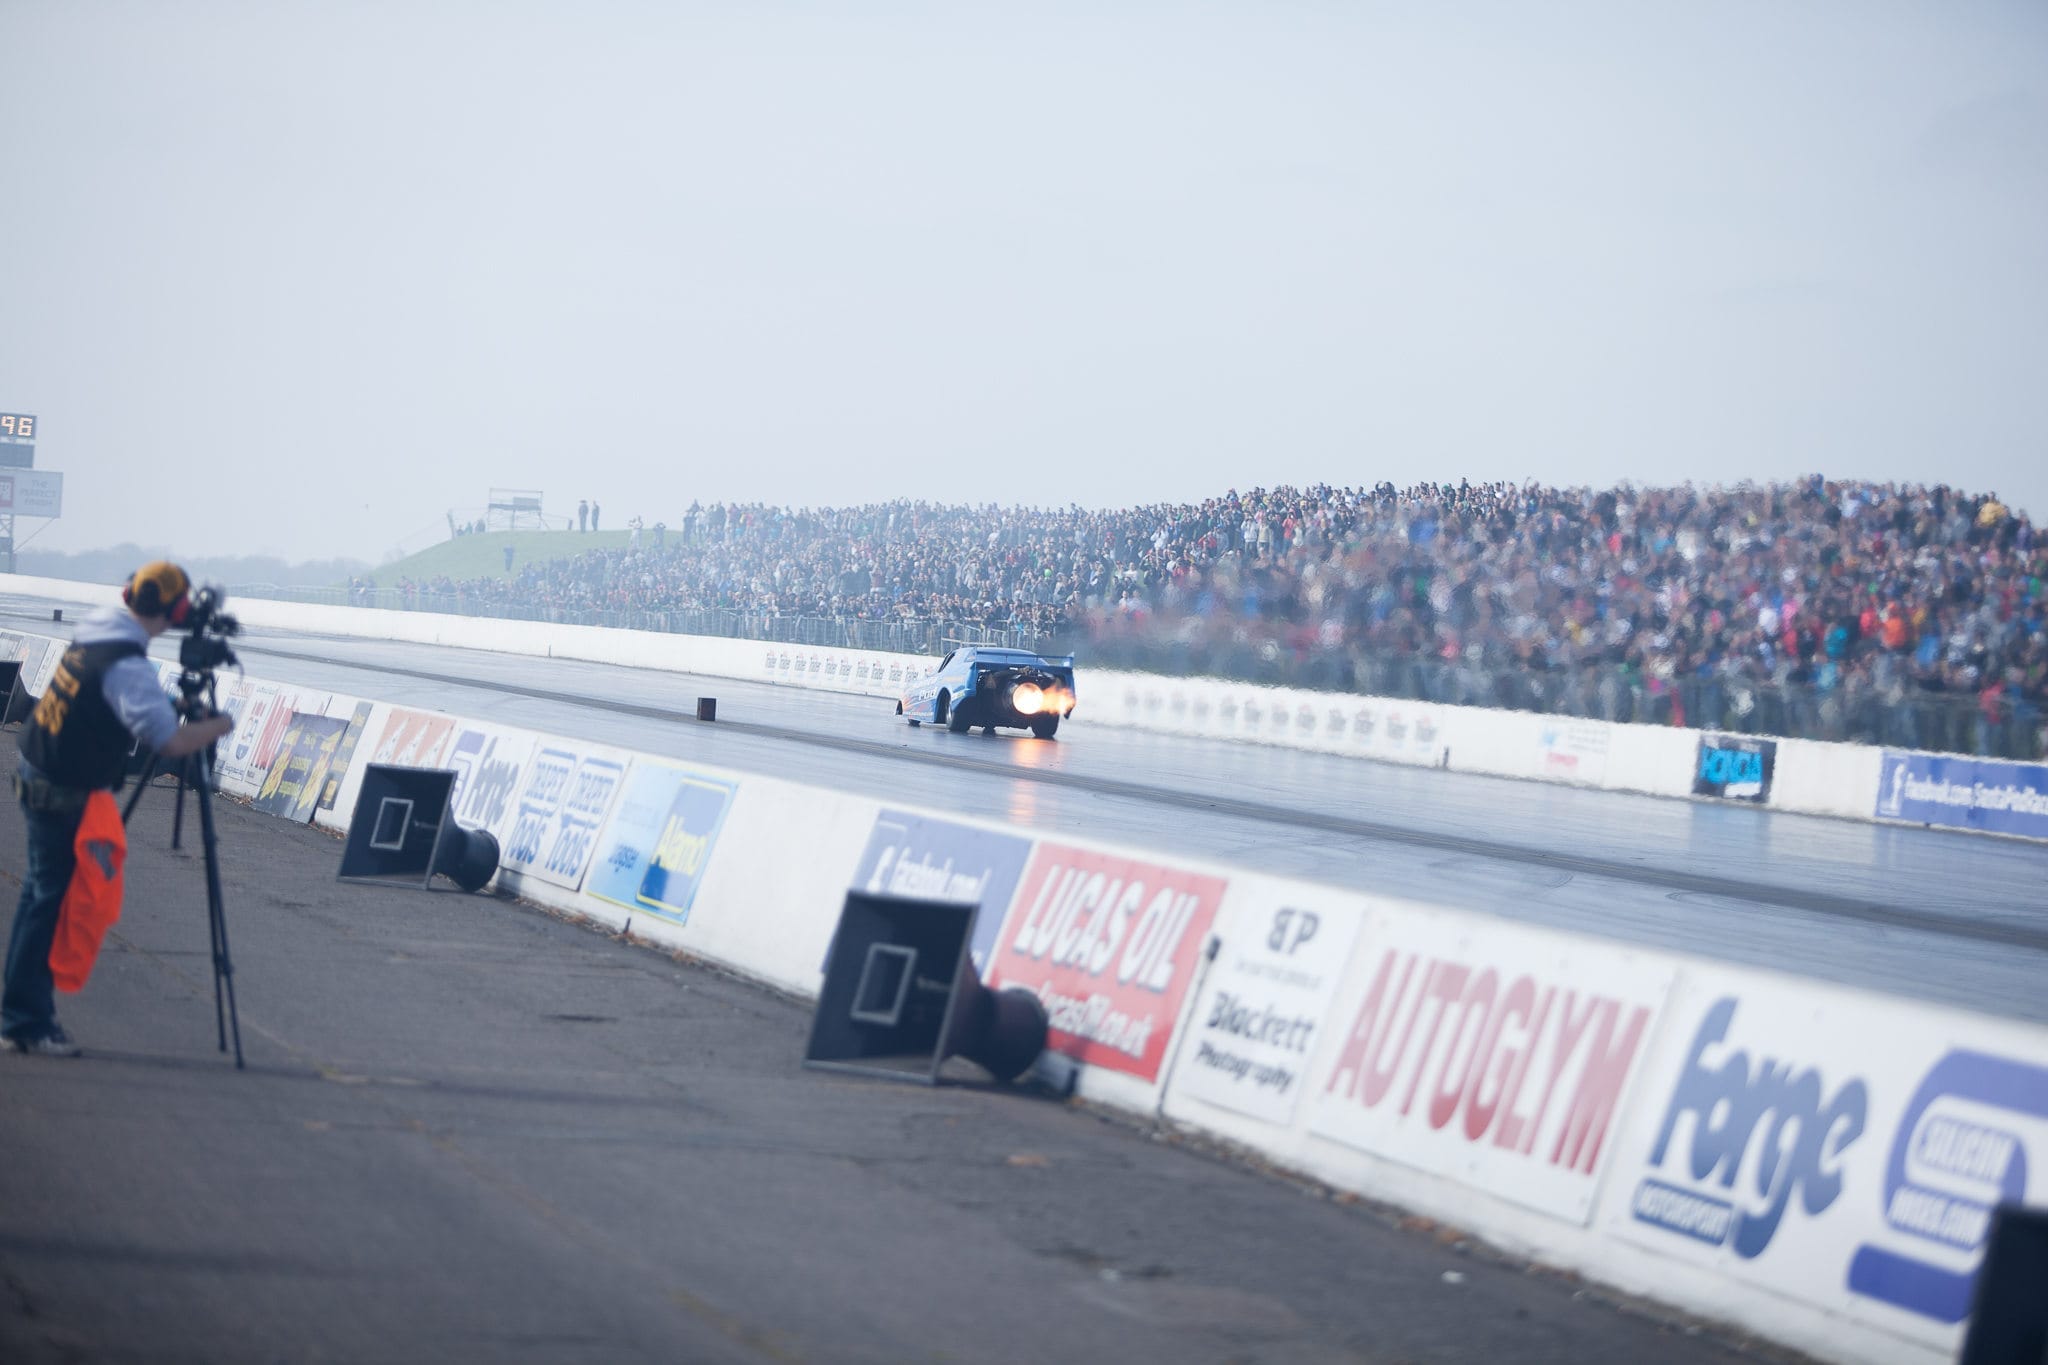
As you’d expect from its name the Fire Force jet car is fast but I think the sheer amount of noise it produces is what makes it hard to shoot. Couple that with the fact it’s literally halfway down the strip at Santa Pod in the blink of an eye and you’ll understand why I still only have a few good shots of it.
On this occasion I decided not to try panning as it passed me just off the start line and instead shot a bit wider facing down the down the track, waiting for it to enter my frame. This was the original shot. Composed with the car dead centre so I had my most sensitive focus point on it, AI Focus mode and high speed drive. This was one of a batch of pretty average “raw material” shots that I hoped I might be able to get something from. What stood out on this one was how the heat haze caused as the engine kicked out 5500lbs of thrust made the crowd looks almost like an oil painting.
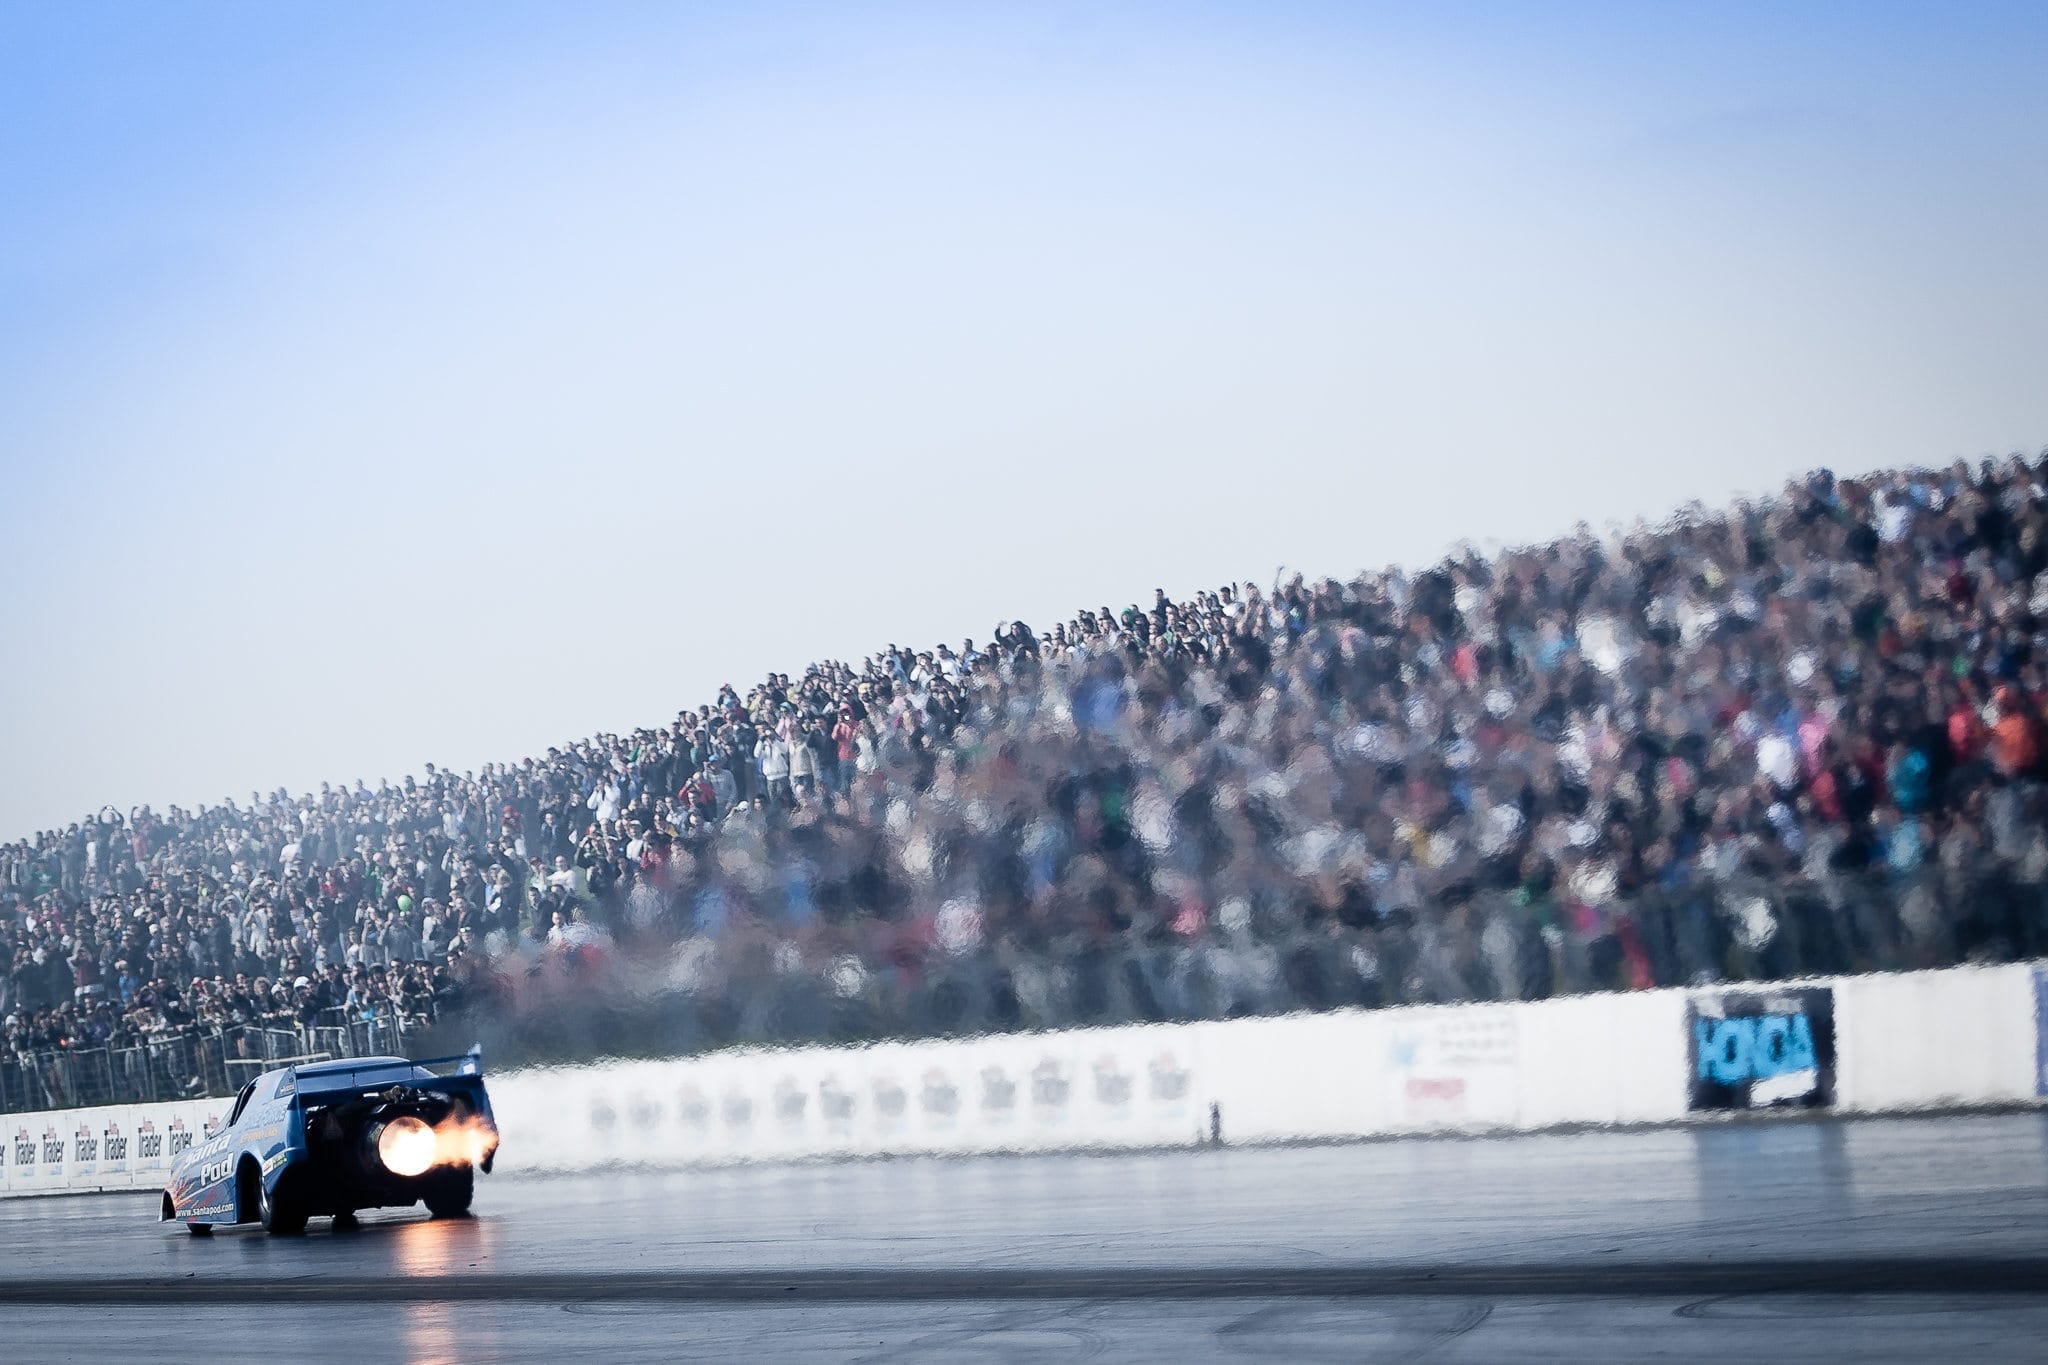
I saw enough in this shot to make it worth a little tweaking in Lightroom. I started with a fairly tight crop to improve the composition (this is where 20+ megapixels comes in handy) followed by a contrast boost, a little desaturation and a slight vignette. I’ve also applied one of my favourite Lightroom tweaks here and that’s the gradient filter. I use it to quickly put some interest in the sky. If there is some detail in the clouds I’ll use it to pull down the exposure and boost the contrast and clarity, but in this shot the sky was just simply flat grey. In this case I pulled the colour temperature to the cool side and increased the saturation to add a little blue to the sky.
Here’s the result:
Someone showed me a link this week to a program called Piccure designed to remove camera shake and motion blur from photographs. If this was an iPhone app, aimed at cleaning up those shaky images shot in nightclubs it’d be brilliant. Phone cameras just can’t deal with low light situations. But it’s not. This is a plug in for Photoshop Elements and Lightroom. It’s marketed at people with enough interest in photography to have bought an image editing package.
I quote from the website:
“Correct camera shake in a matter of seconds – save time, money and frustration.”
Seriously? I think this is just encouraging people to not learn the basics, to just spend more money on a plugin that will attempt to fix it after the fact in Photoshop. If you really want to “save time, money and frustration” just get to know your camera and learn the exposure triangle.
Dig a little deeper on the site and you get to this:
“For example, if you shoot a subject that is far away with a tele lens and you select a long exposure (e.g. 1/50), your image may be blurry because your camera has moved a little during the 1/50 seconds.”
It’s blurry because hand holding a long lens steady at 1/50th isn’t possible, even if you’re Joe McNally, but you do not need to buy Photoshop plugins. You can fix this easily by opening your aperture and/or upping your ISO.
This is clever technology but you really don’t need to spend £80 on it. Instead invest a little time in learning. There are plenty of free resources online, in fact you can even find a few tips on getting sharper shots right here.
So please, save your money and educate yourself instead with a few ebooks from Craft & Vision instead.

I was confined to an exhibition hall because a monsoon had descended on Peterborough Arena and the rest of the show I was at was rained off. Not exactly conducive to photography but hey, I like a challenge and that challenge came from ‘Maxxis babe’ Sarah. Something like “Go on then, come up with an idea!” “Give me an hour” was my reply.
I walked the hall but came up with nothing interesting. The place was rammed as a some of the outside parts of Modified National had squeezed inside. The atmosphere was great with everyone trying to make the best of it but there was barely room to move.
The only real option for a location was the Maxxis VW van but just shooting the girls with it in front of the Maxxis truck under the orange hall lighting wasn’t going to cut it. So I came up with the concept of the girls traveling the UK with this as their tour bus in a sixties, Summer Holiday style.
So here’s the original image. Everything but the bus is underexposed almost making it look like a composite already. Ideally I’d have preferred the bus on a plain or at least a simpler background but I had to work with what I had.

Obviously there was going to be a fair bit of compositing involved but the first job was to get the lighting right. The only light in the hall was coming from the high ceiling lights so the inside of the bus was dark and gloomy. If I dropped that onto a bright sunny background it was going to look very wrong. So, with the idea explained to the girls, out came the flashes.
The first is tucked away in the glovebox in front of Amy, camera right. It was set to a wide angle and feathered over towards Sarah on the left to even out the exposure. It’s not perfect but it’s close enough to pull back in post production.
Lana, Nickie and Danni in the back (seriously rocking the 60’s vibe by the way!) were lit with the second flash. It’s sat on the floor firing up towards the panel behind the front seats to make a nice big light source. Being a heavily modified van, this panel was covered in orange audio amplifiers so there was a MacGuver moment when some of the sticker sheets the girls were giving out we’re used to cover the amps and make a white reflector. Without this, the colour cast would have been very strong, especially with the amount of orange Lycra in the shot!
After a few test shots I knew I had the interior lit just right but the front of the bus was far too dark so a third flash is sat on the floor facing upwards hitting the front with just a wink of fill.
After using almost every Photoshop selection technique I know I had a finished layer mask.
Applying that to the original shot gave me a nicely lit, floating bus, ready to drop onto a suitably sunny background found on a stock library.
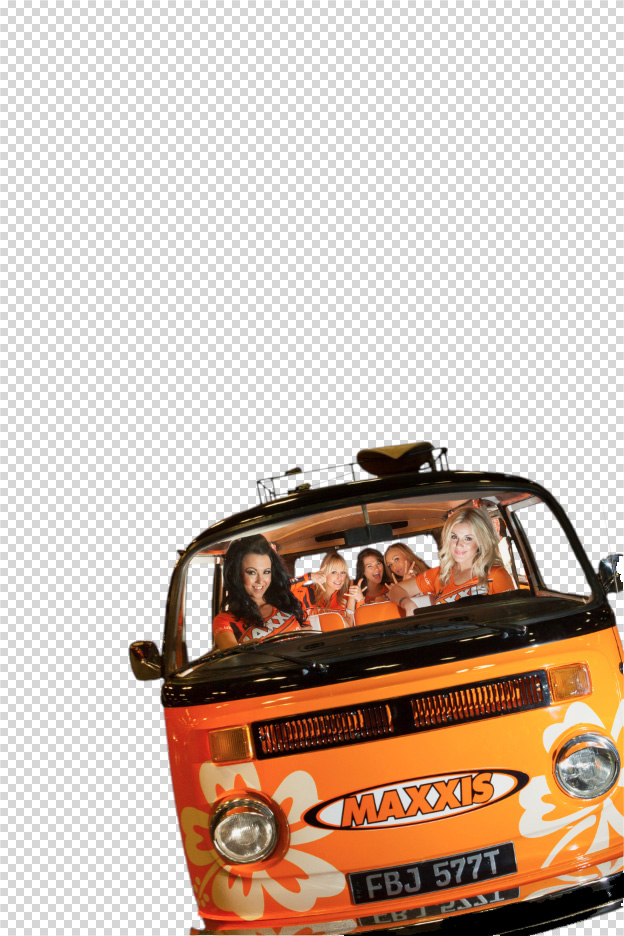
A quick Google for an Austin Powers font and a touch of the Warp tool and the image was done.

Yes, it’s ridiculous, cheesy and hammy but it shows the sun can still shine in an exhibition hall in rainy Peterborough.

I talk a lot about technique here on the blog. It’s only a very small part of photography as a whole but it’s not until actually using the camera becomes second nature that you can start really thinking about all the other stuff.
Seeing a different angle or composition, for example, is far harder to do when you’re still trying to figure out what your shutter speed needs to be.
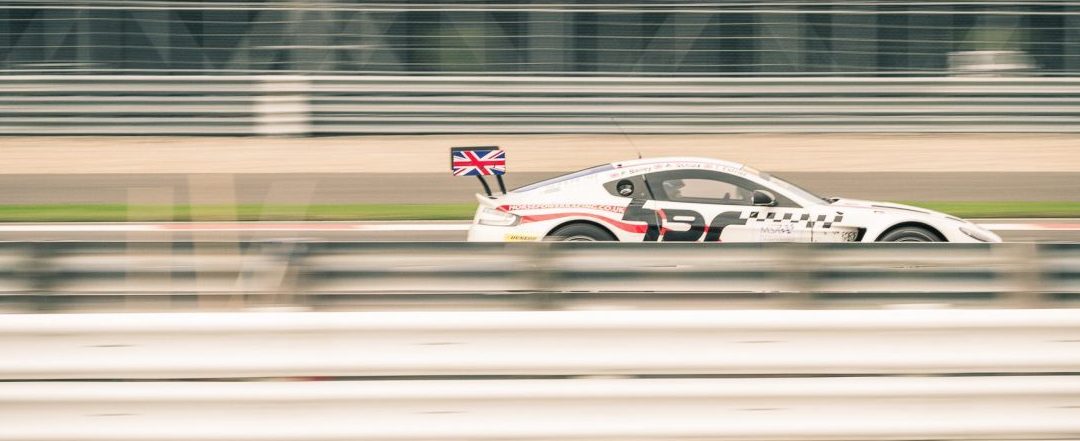
This weeks’ photo was taken when I was standing on Brooklands corner at Silverstone. I just happened to look behind me to see a car rounding Woodcote, just visible above the barriers. I found something to stand on to get myself a little higher and saw there was a shot to be had.
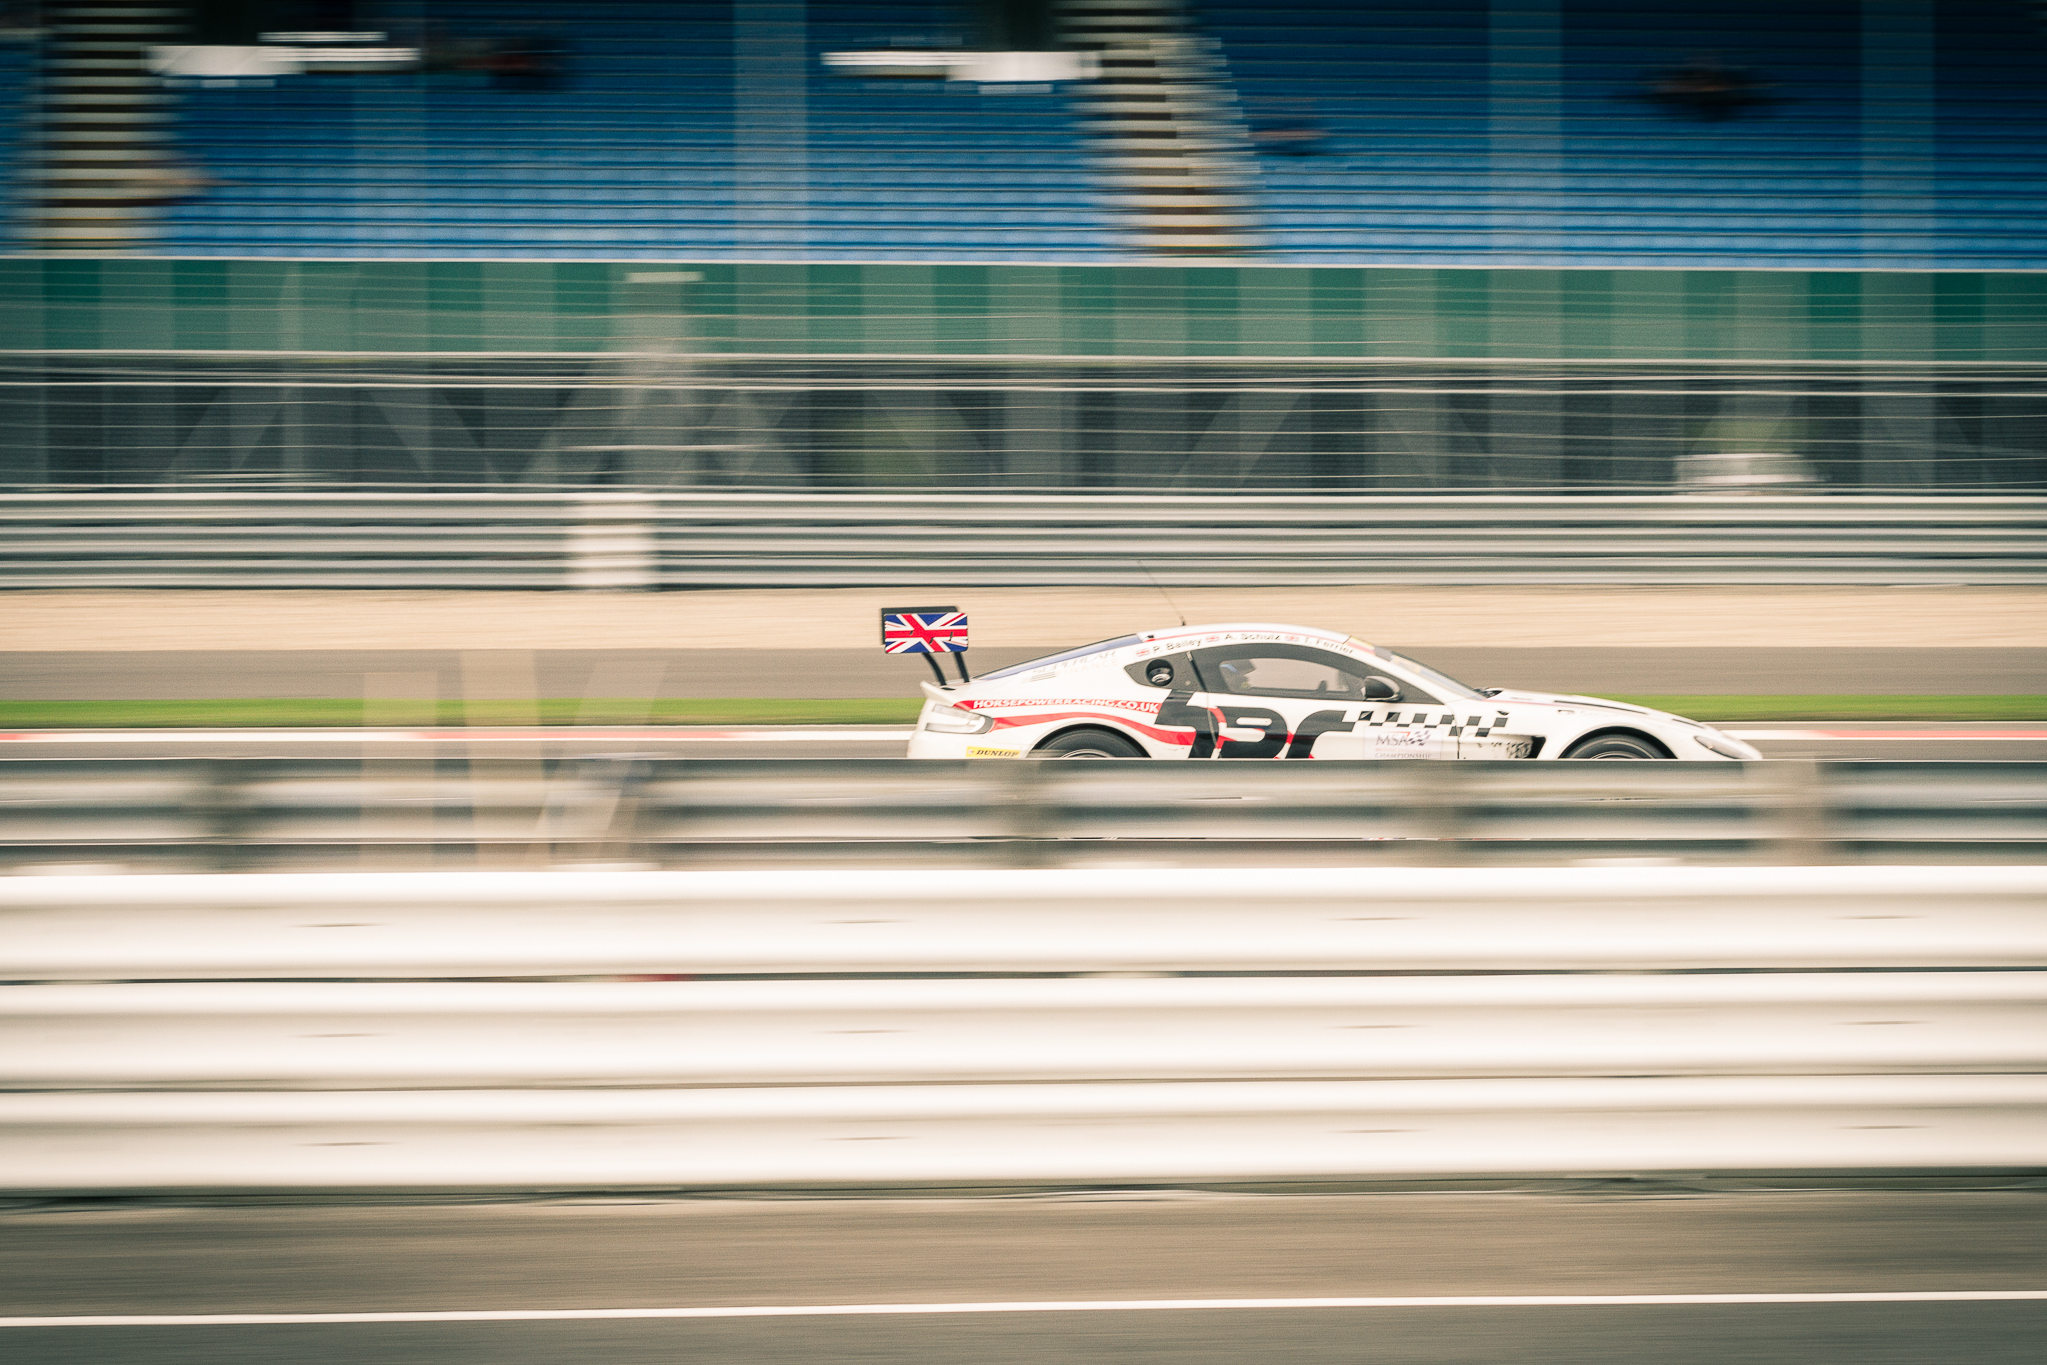
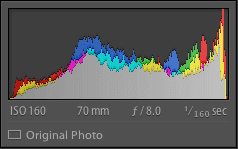 The settings are pretty standard for this type of shot (1/160th at f/8 in Shutter Priority mode) but I had them already dialed in so I didn’t have to think about them. All I had to do was pre-focus on where I knew the cars would be and flick my 70-200mm into manual focus. Because of the number of barriers, signs and fence posts along my panning path, my auto focus would have had very little time to lock on to the car one it came out into the open.
The real takeaway here is that because I wasn’t chimping the back of my camera, or fiddling with dials and buttons, I was free to look around me and spot this different image opportunity. So spend some quality time with your camera – get to know it even better.

Recent Comments