I’ve been shooting a fair amount of video of late and I’ll be the first to admit I am having to scale quite a learning curve. Aside from the obvious, there are a lot of differences between shooting still and moving images.
Some of this might seem a bit obvious, but if your experiences with video are anything like mine they aren’t obvious until you come up against them. Hopefully by sharing a few of my epiphanies, I can save you some time or money. Here we go:
Shoot lots of footage
Shoot more than you think you could possibly need. Then shoot some more. It’s called coverage and you need a way to bridge the gap between pieces of similar footage. Let’s take my recent efforts filming at Gymkhana Grid as an example. I might have two great bits of footage of the same car on two different parts of the course. When it comes to the edit, I can’t just stick those sections back to back, it’d be jarring and just doesn’t fit with what the viewer is used to. Cutting to someone in the crowd intently watching or cheering between the two clips would work nicely.
Frame it right in camera
I shoot my photos a little on the wide side. I know this will give me flexibility in post, especially if I am delivering them to a client who might want to overlay text. When you are producing 20+ megapixel images, cropping in 10% after the fact isn’t going to be a problem. With video though if you are shooting at 1080 you plan to show it at 1080 so there’s no room to crop. You need to get it right at the time of capture – something I am still trying to retrain my brain to do. If only the 5D shot 4K…
Leveling is a pain
I knew I had to get myself a fluid head to be able to do smooth pans and tilts so I got myself a mid range Manfrotto one and mounted it on my existing tripod. It works a charm if you’re on level ground but as soon as you need to adjust it, you are into the hell that is tweaking three legs one by one. Not a speedy process!
Mic check one two
Good audio is essential so I got myself a Rode Video Mic Pro. It’s a great bit of kit that hooks straight into you DSLR’s mic jack and sits in your hot shoe. It’s got three modes, standard, -10db for loud situations and a +20db mode designed for DLSRs. The theory is you drop the gain in-camera to a very low level and let the higher quality circuitry in the mic boost the levels. This works great, but bear in mind for loud sources, perhaps a drift car 5m away, to flick it back to the -10db mode! And of course… Remember to turn it on!
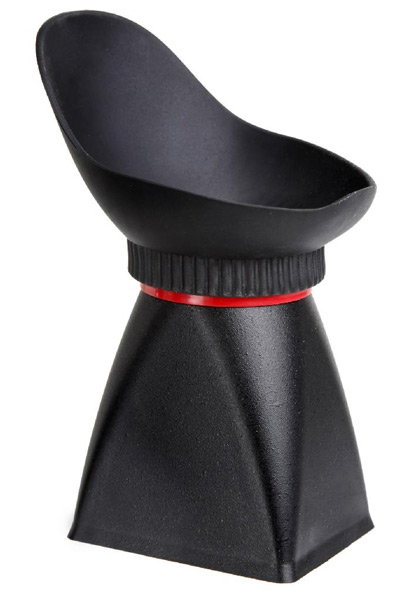
Get an LCD viewfinder
These are fantastic gadgets that allow you to hold your DSLR in live view mode up to your eye like you would a more traditional video camera. At about £20 from eBay it’s no brainer and a good place to start before you hook up and external monitor and build a whole rig. I’ve never used one of the more expensive models like the Zacuto Z-Finder but I don’t know how much more they could offer to be worth more than 10 times the price. Except maybe a lanyard… that’d be handy as I repeatedly lose mine buy putting it down and walking off. Lucky it keeps finding it’s way back to me.
So that’s it for now, no Earth shattering revelations, but a few things that I’ve encountered on my adventure in video. I hope they save you a little time and aggro.


0 Comments