Sharpness in your photos isn’t everything but it is one of the most important things. Even if you are conveying motion or isolating your subject against an out of focus background your subject still needs to be sharp.
Here are 5 tips to staying sharp:
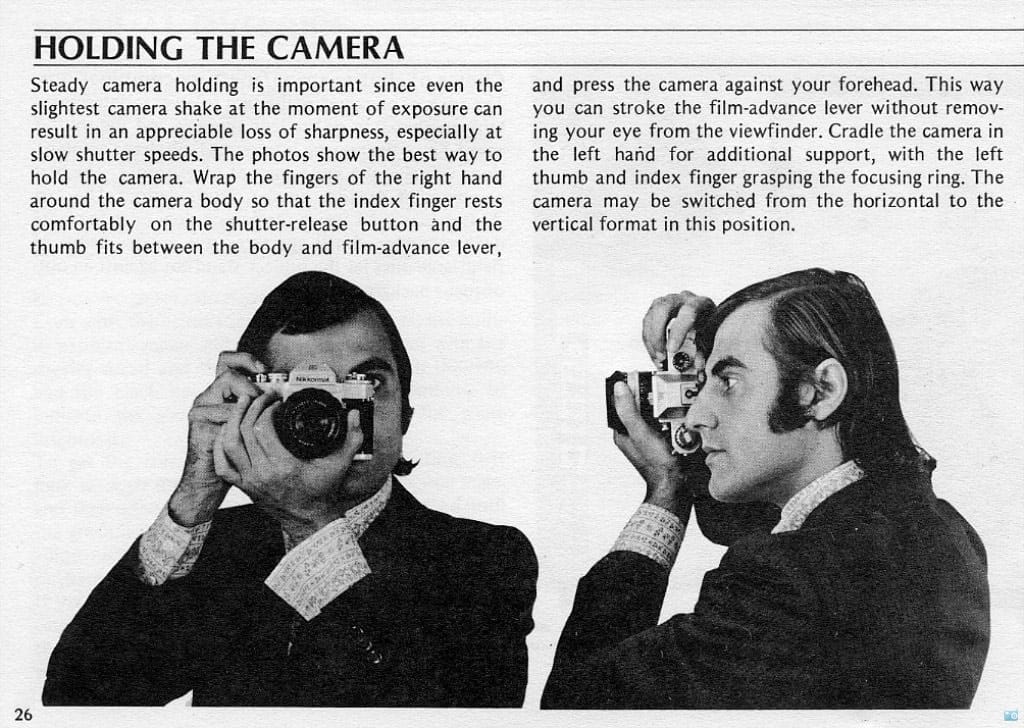
Hold it right
Hold your camera with your right hand and cup the lens from underneath with your left. The advice has been the same since the 70’s!
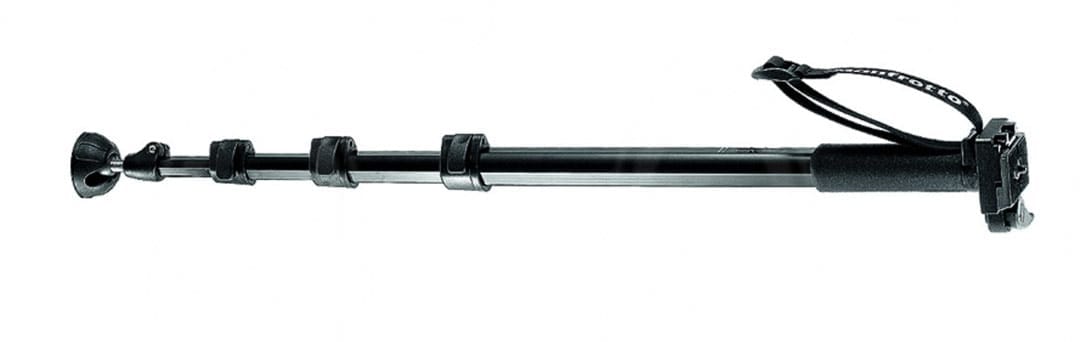
Support system
The longer the lens you are using, the harder it is to keep steady, especially after shooting for a while. This is where a monopod comes in. It’s obviously not as stable as a tripod so you won’t be taking 10 second exposures with it but it will really help you reduce camera shake while still giving you freedom of movement.
Keep your shutter speed up
There’s a simple rule of thumb to calculate how slow you can reliably hand hold. 1/Focal Length. Put simply, if you are shooting at 24mm, you shutter speed should be at least 1/30th of a second. At 200mm it should be at least 1/250th. Yes, Image Stabilization/Vibration Reduction lenses and good technique let you go slower, but the 1/Focal Length rule is a good place to start.
Pick the best focus point
I think most people focus and recompose – the technique where you position your subject under the centre focus point, half press your shutter button (or back button), change composition and take the shot. This is fine unless you are shooting with a shallow depth of field. Even that slight swing of the camera will change the distance to your subject and potentially move your focus from the eye to the tip of the nose or the ear. To reduce the amount of movement you have to make, select the focus point that closest to the area you want critical focus on.
Don’t be shallow
Just because your lens goes to f/1.8 or wider doesn’t mean you have to. If your subject is moving, even an inch backwards or forwards can knock out your focus. Stop down a bit so you have enough depth of field to cover what you want sharp and give yourself some leeway. Especially if it’s a situation that you aren’t in total control of.
Got some tips of your own? Add them to the comments below.
This post just saved my day. I’m on vacation in Yellowstone National Park and have been doing a lot of photography. The landscapes have been coming out fine but my wild animals have been really hit or miss. I borrowed my friends 100 – 400 and am not used to shooting a telephoto like this. A lot of the images will have just a touch of shake and it’s been annoying. Today was our last day in the park and this morning I read your post and realized that I’ve been shooting too slow of a shutter speed for this lens. I put the camera in manual mode but left ISO in auto. Set the shutter to always be over 1,00 with minor adjustments with conditions and stopped the lens down to f10. Since it’s a Mark iii I knew I could push the ISO up. It worked and I got reliably crisp shots all day. Thanks for this post the timing was perfect!!
Fantastic! I’m glad it helped.