Tuesday’s Photo of the Week involved adding a skyline as a finishing touch. For this image, the Skyline was the centre of attention.
This is The Sextons Skyline, aka SKY101, aka The Heff’s car and if you have spent any time at car shows around the UK, you will have seen it before. I’ve known Chris, the owner, for a few years and when he called me and told me about a location he had in mind I was heading south the next weekend.
With a car this aggressive looking and a location so dramatic, it would have been wrong not to go all out and make the shoot quite theatrical. Because of the location I was working with as little kit as possible so this whole shot was lit with a single strobe and even though my SkyPort radio triggers worked flawlessly, if I raised my Elinchrom Quadra any higher than 2.5 metres, it started to flash uncontrollably. A little scary! Considering the substation typically handles 400,000 volts of electricity, I was impressed I didn’t have to fall back to the old flash sync cable I’d packed just in case.
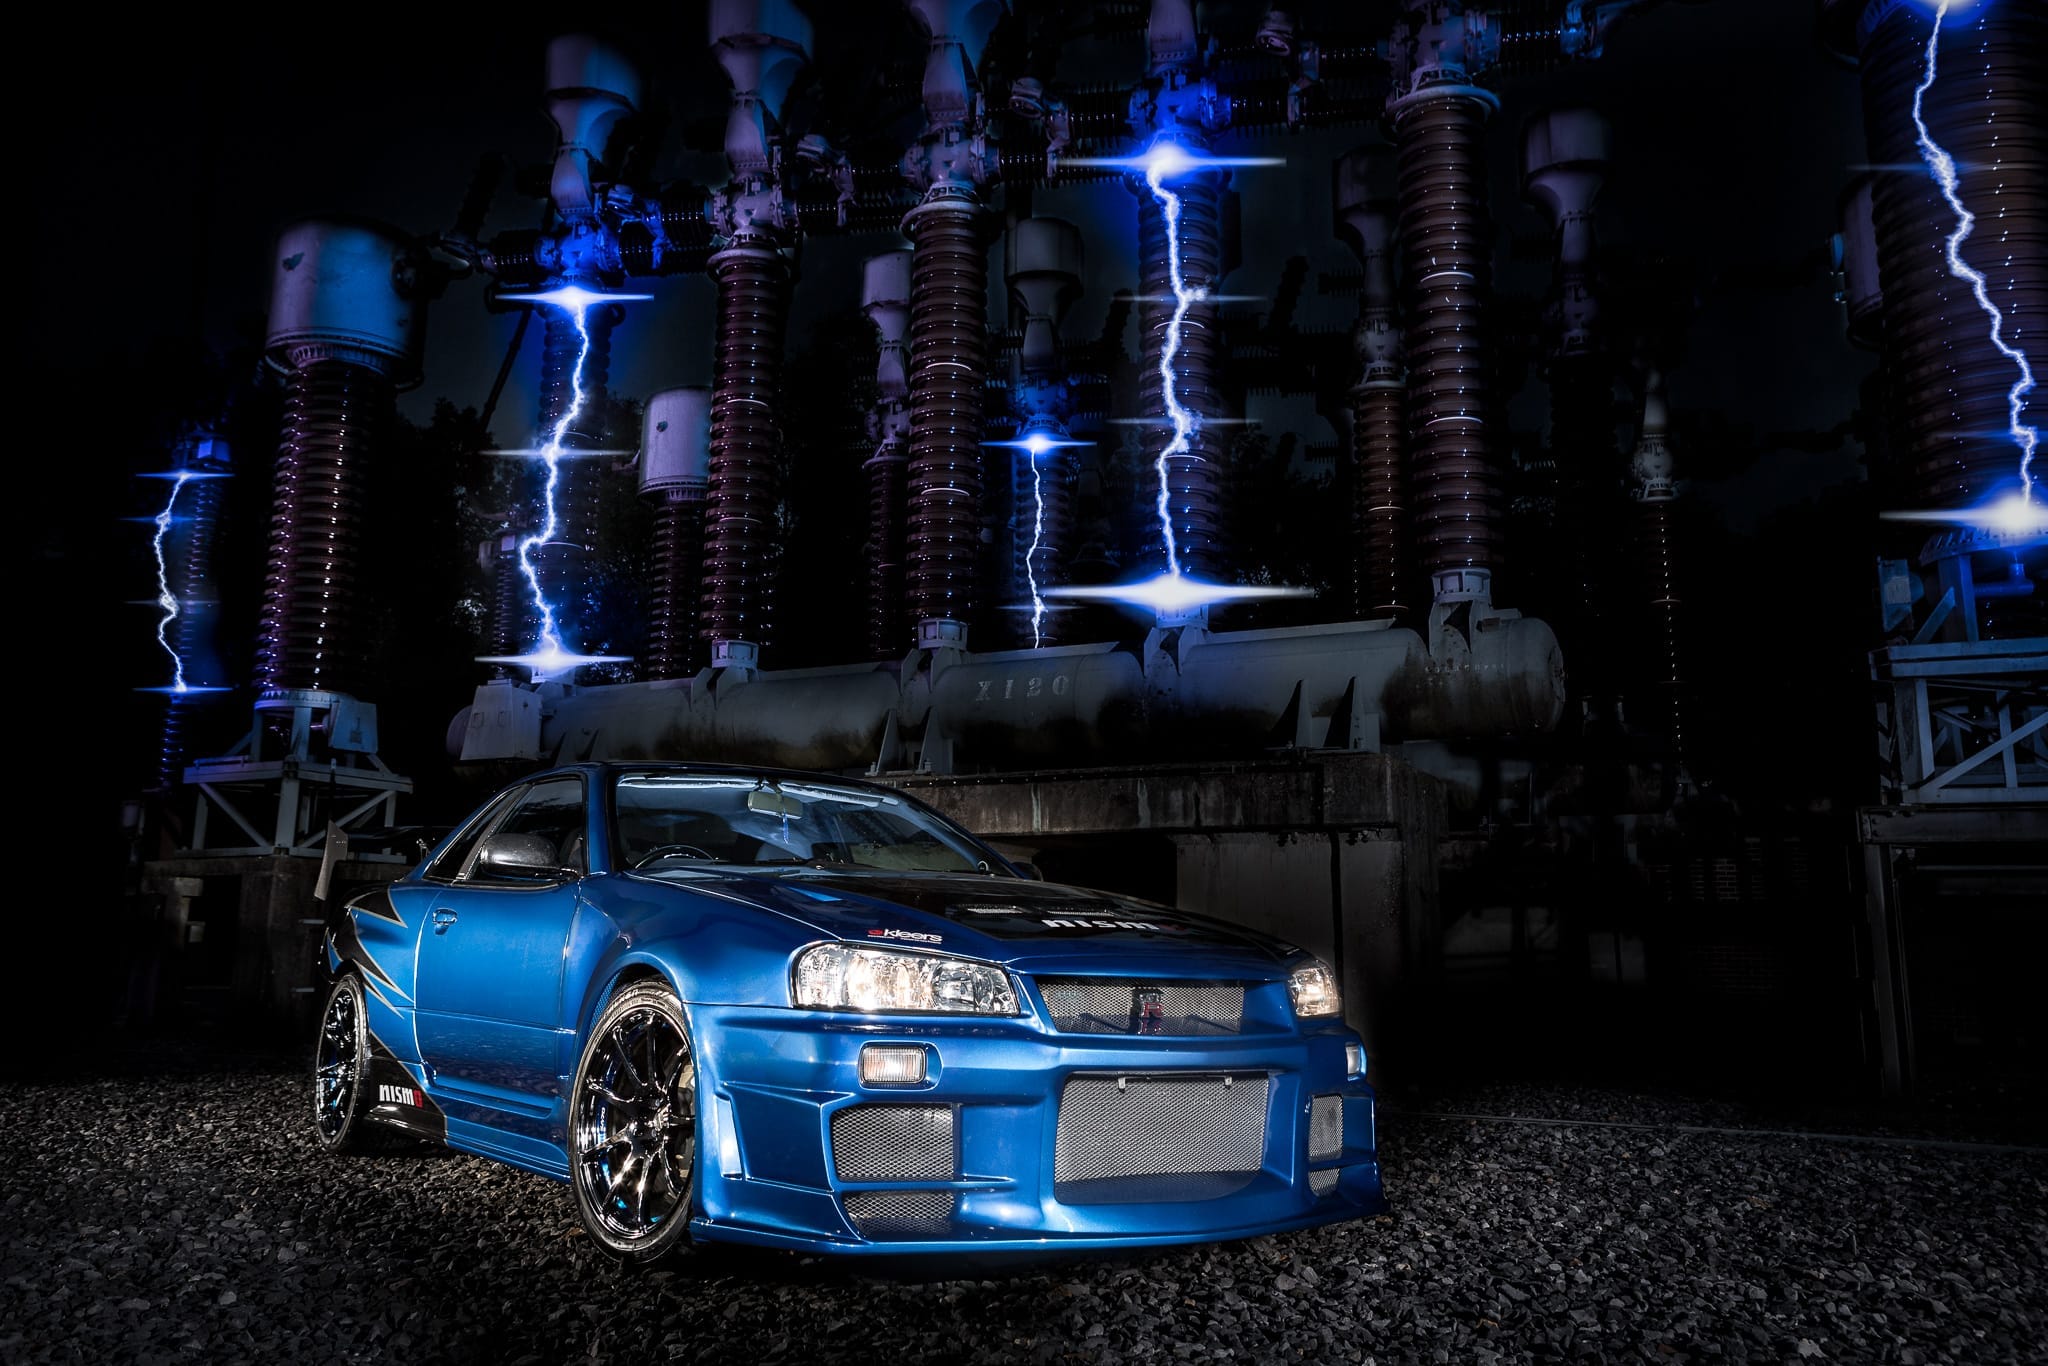
Despite the huge amounts of electricity involved, the substation handles it in a very understated way. You can hear the crackle and feel it in the air but photographically speaking, there not much to see, so I hammed things up a little. OK… a lot!
Because I was working with just one strobe, I had the camera locked in position on a tripod as I walked around the car lighting each panel individually with a fairly tight beam of light from a Maxi Spot reflector. The plan was always to shot lots of individual images and then layer them in Photoshop afterwards. To save me walking back and forth between the camera and the light I was using a wireless shutter release to speed things along.
As for camera settings, if you look at the selection of images below you can see I was under exposing the ambient light by about 3 stops and letting the flash do its work. I also shot an exposure just for the headlights and another one with more ambient light in case I needed some fill for the deeper shadows. Then finally I lit the background, gelled purple from the left and blue from the right to give a little theatre.
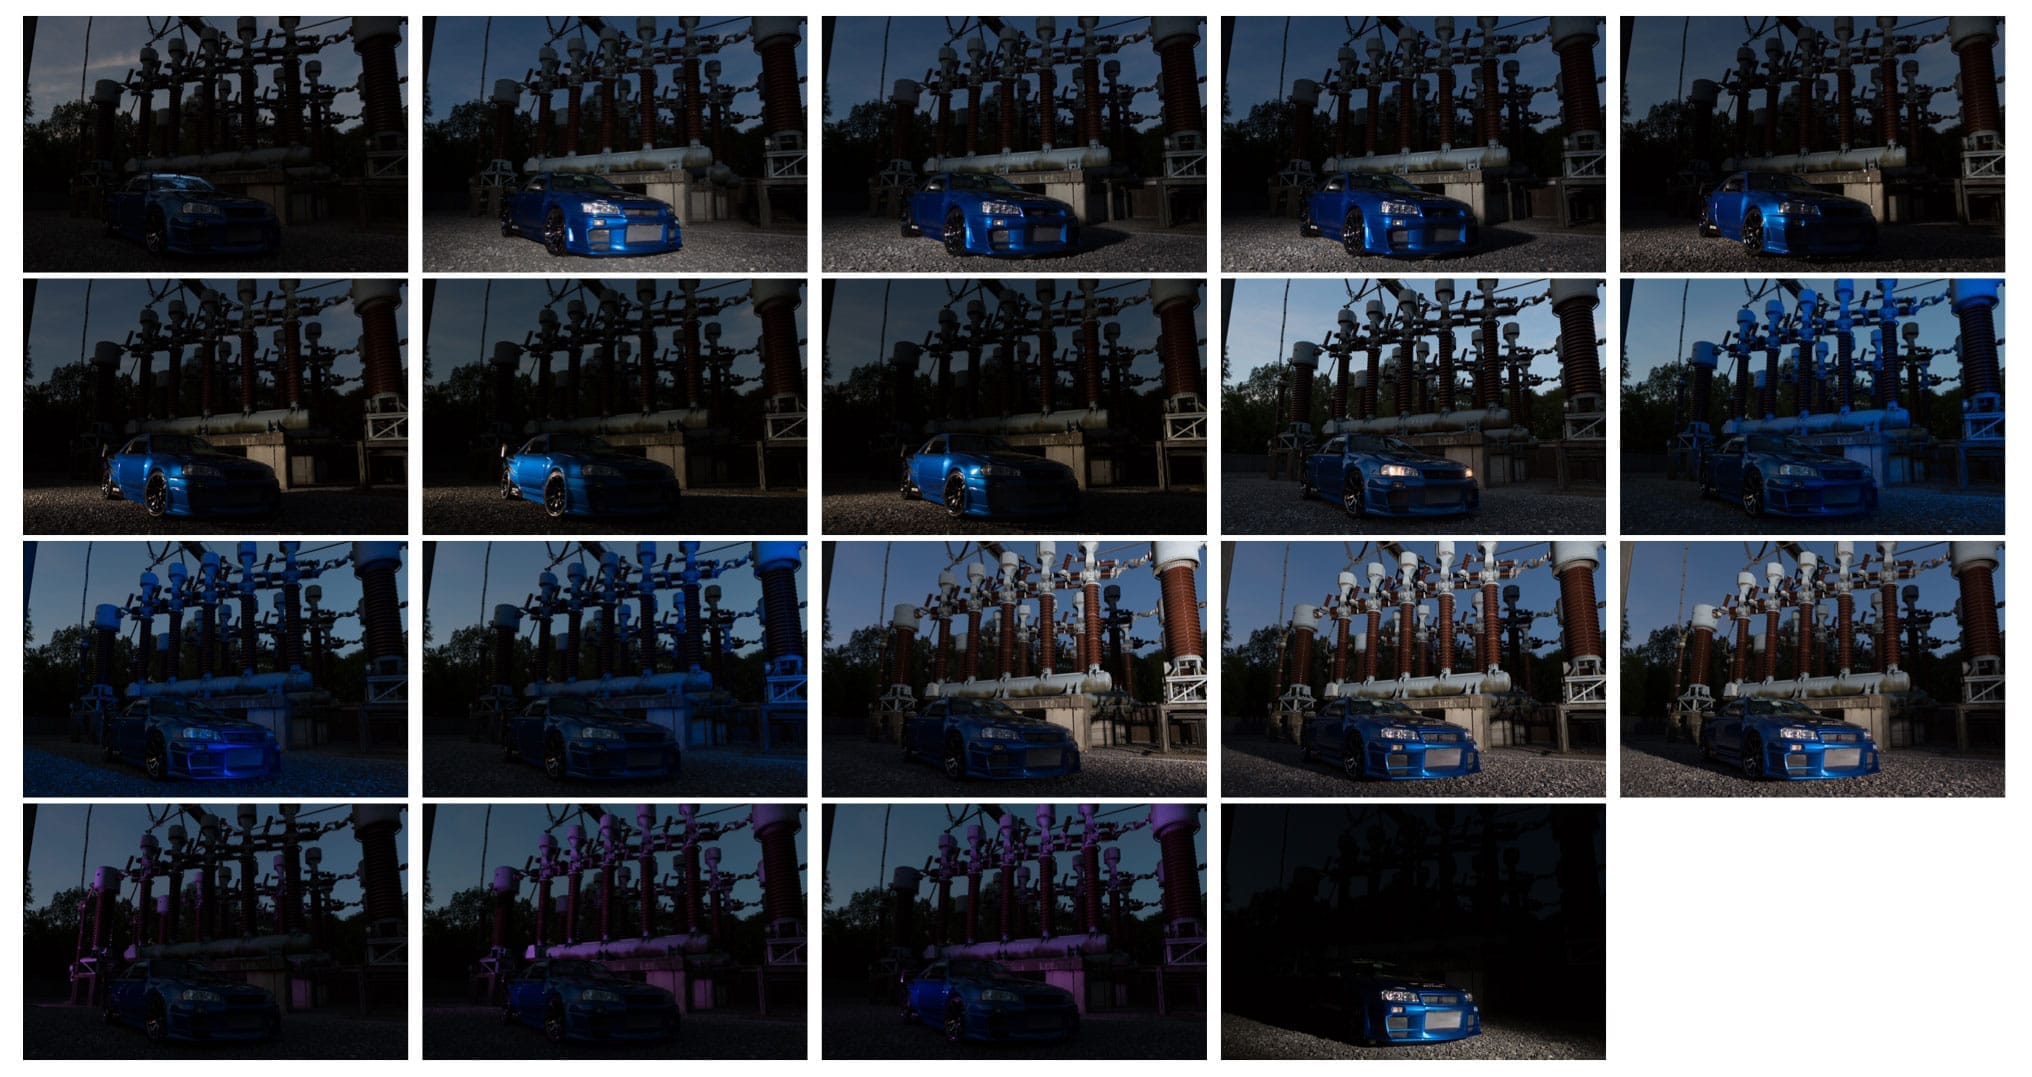
Once I knew I had all everything I could possible need in the camera, off to Photoshop I went. I painted in the lit areas of of the using layer masks and then went to town on a Frankenstein style background. Here’s a screen capture of the final build up.
That was an awesome video, really enjoyed it