Sunset is my favourite time to shoot, not just because of the “golden hour” light you get, but because it’s the time adding flash to an image can change it the most. You can take a photo of your subject, under what looks to the naked eye to be pretty dull conditions, and then show them something on the rear screen of your camera that they can’t believe hasn’t taken hours in Photoshop.

It’s all about colour balance: Using a mixture of white balance settings on your camera and coloured gels on your flash will enable you to really bring out colour in the sky, especially useful when you don’t get the apocalyptic, fire and brimstone sunset you were hoping for.
So for this set of images I gelled my main flash (camera left in a beauty dish) with one full and one half cut CTO gels. A CTO gel is a sheet of translucent orange plastic that’s designed to bring your daylight balanced flash up to the same colour temperature as a standard Tungsten light bulb. A “half cut” is a sheet that’s half strength. The “proper” use would be to match your flash to the ambient light, but it’s often used by photographers such as David Hobby (from whom I learnt this tip) to warm up skin tones to flatter your subject. A half or a quarter cut (an even less tinted sheet) on your key light will give your subject a healthy glow.
What if you add a full cut and a half cut to your flash, making it a really warm orange colour? If you don’t change your camera white balance to Tungsten you’ll have an over-tanned subject. You are adding one and a half cuts of orange to the light on your subject, then effectively taking the whole scene down by a full cut but changing your camera’s white balance. Tungsten mode on the camera will bring the full CTO light back to daylight colour temperature (plain white), leaving just the half cut left to gently warm your subject’s skin.
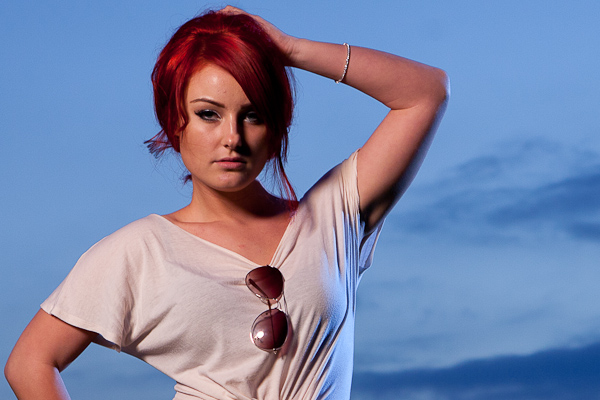
Here’s where it gets good! By setting your white balance to Tungsten you cool the colour temperature of the whole scene down. That brings the very warm light on your subject back to just above normal, but it also cools everything else in the scene. The areas not being lit with your super warm flash, go extra cool. In this case, the grey clouds turn blue.
So in less words: Light subject with very warm light. Adjust white balance to compensate. Get slightly warmed subject and cool blue background.
Want to take it a notch further? How about adding a second, un-gelled flash as a rim light? Position it directly opposite your main light and, because it’s un-gelled and therefore cooled down by your shift in white balance, it’ll appear to be throwing cool light in from your artificially blue background.
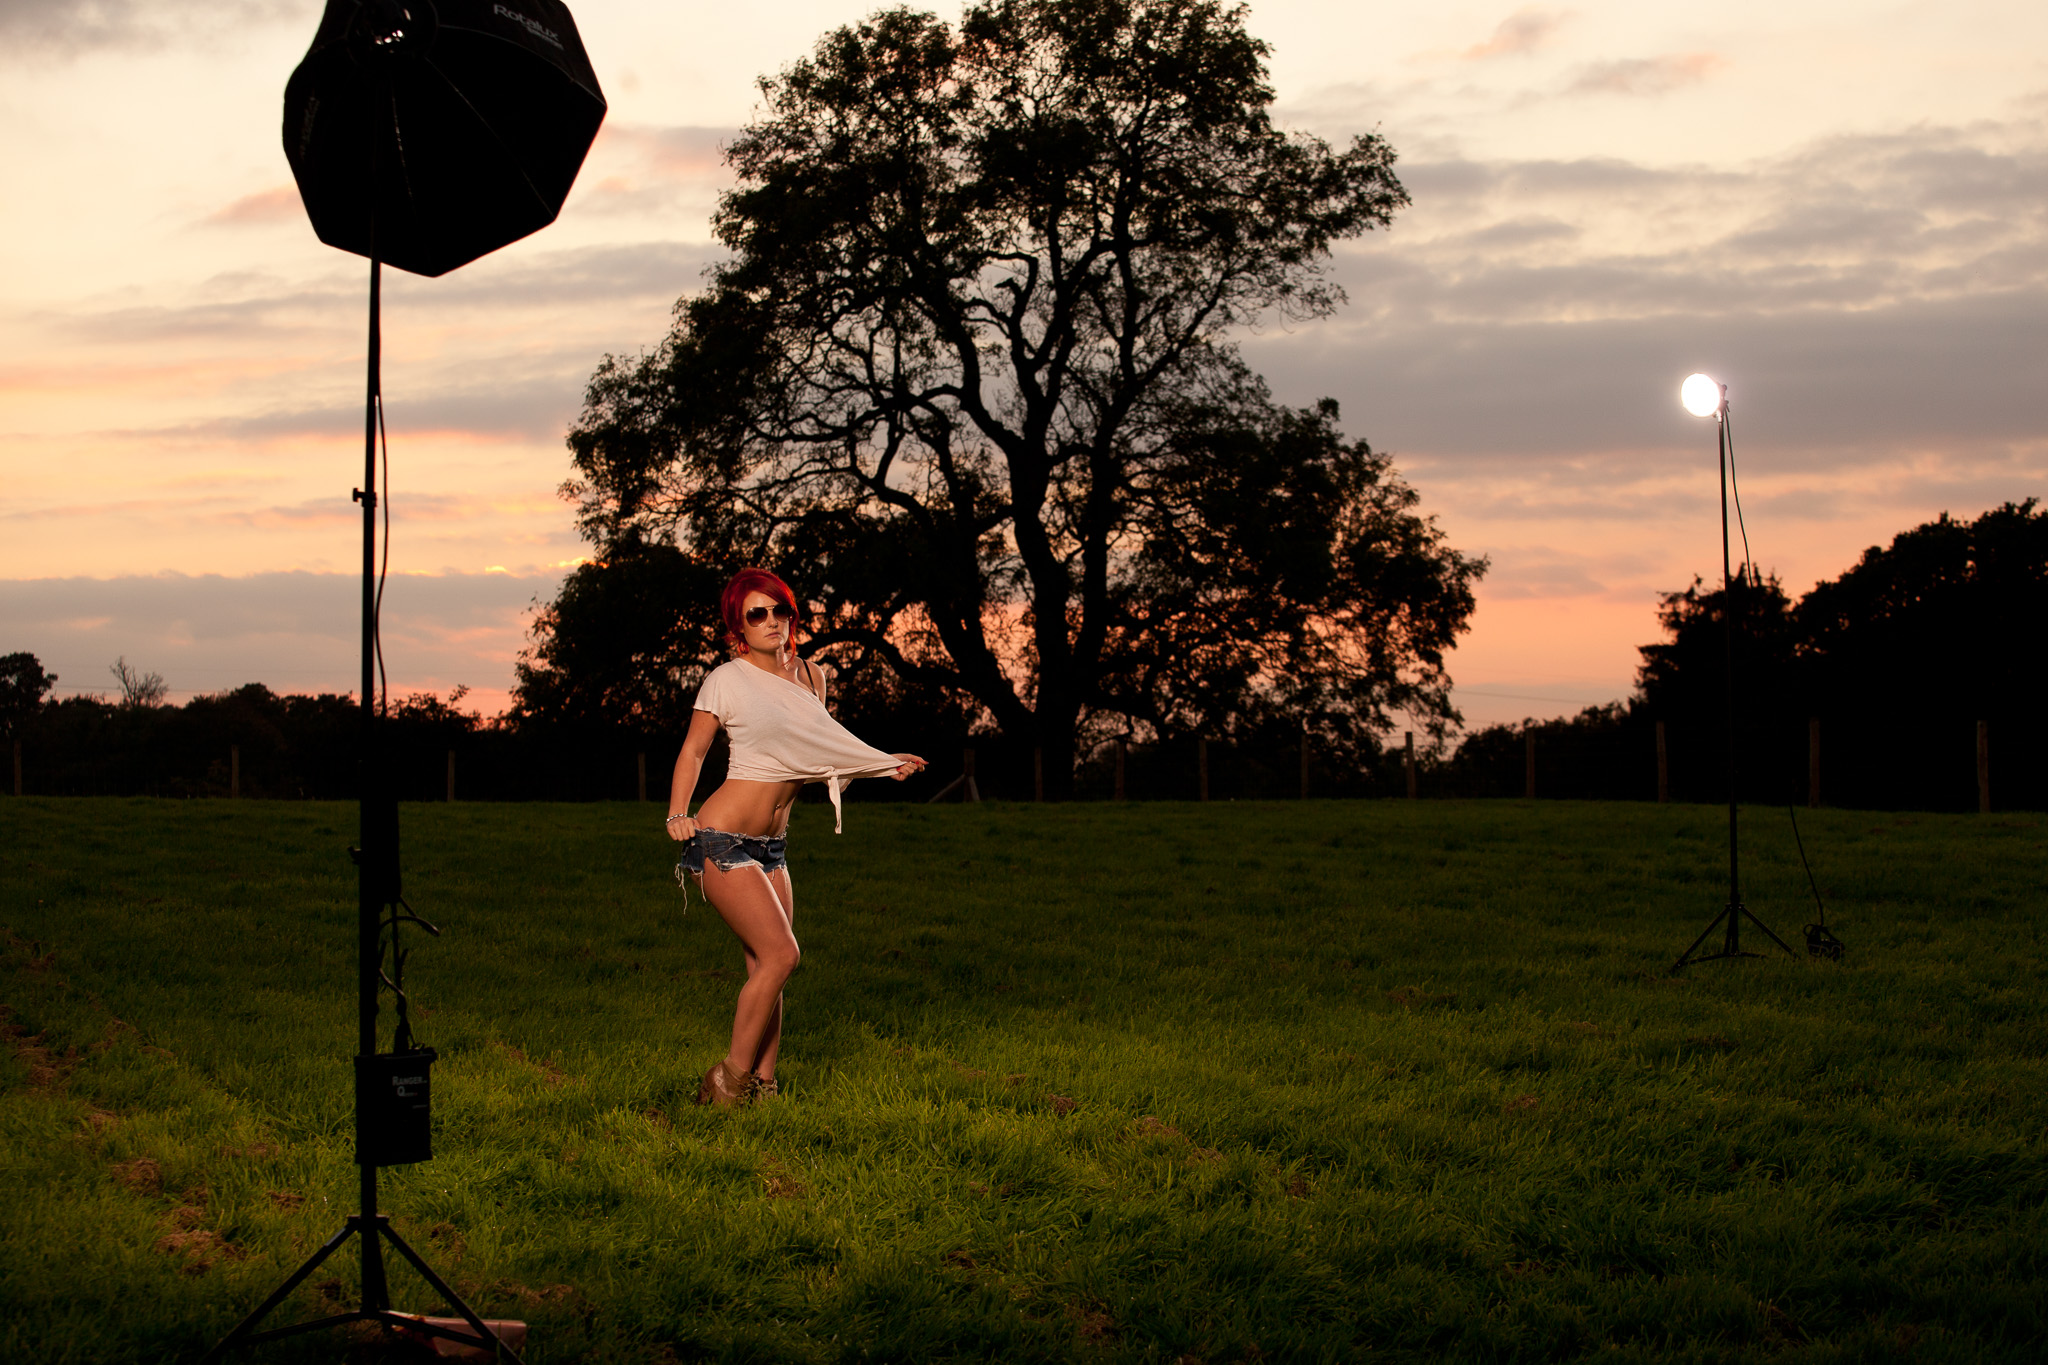
The image above was taken early in the shoot, before the sun dipped out of view and before I gelled the main light so there’s no colour shift in the sky, but it does show the layout of the lights. Soon after the sky began turning grey so the CTO gels were called into action. You’ll be able to see when in the gallery at the end of this post
Enjoy the behind the scenes video, and as usual if you have any questions, post a comment.


