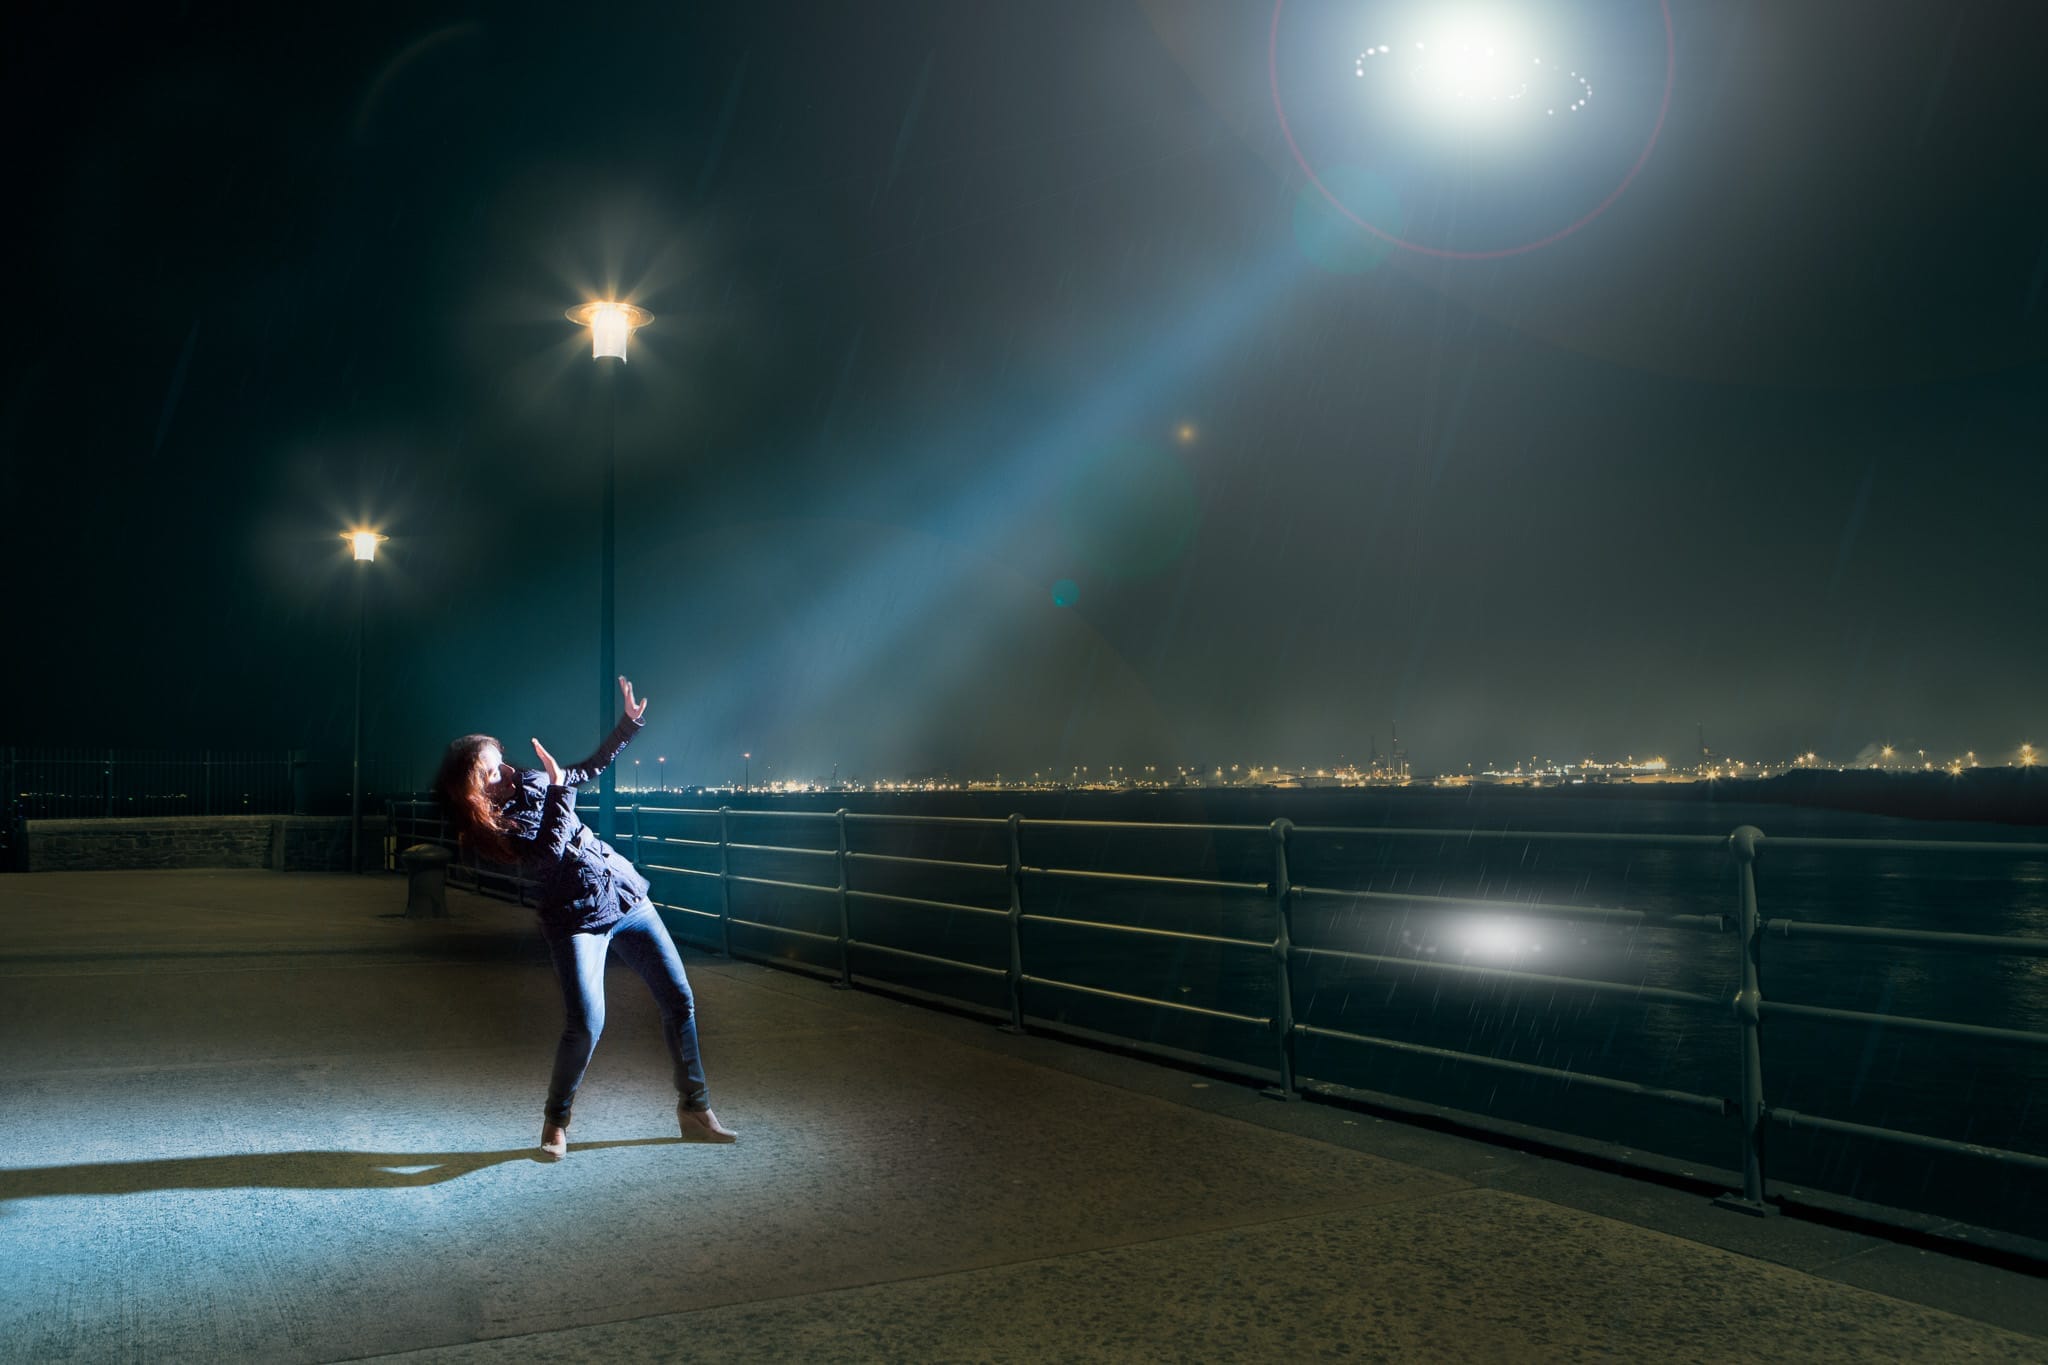
I have been watching a lot of the free YouTube videos created by Aaron Nace and the Phlearn.com team recently and I’ve been feeling inspired to push what I do in Photoshop a bit further. My goal with this shot, taken this weekend, was to go full-on Hollywood sci-fi blockbuster.
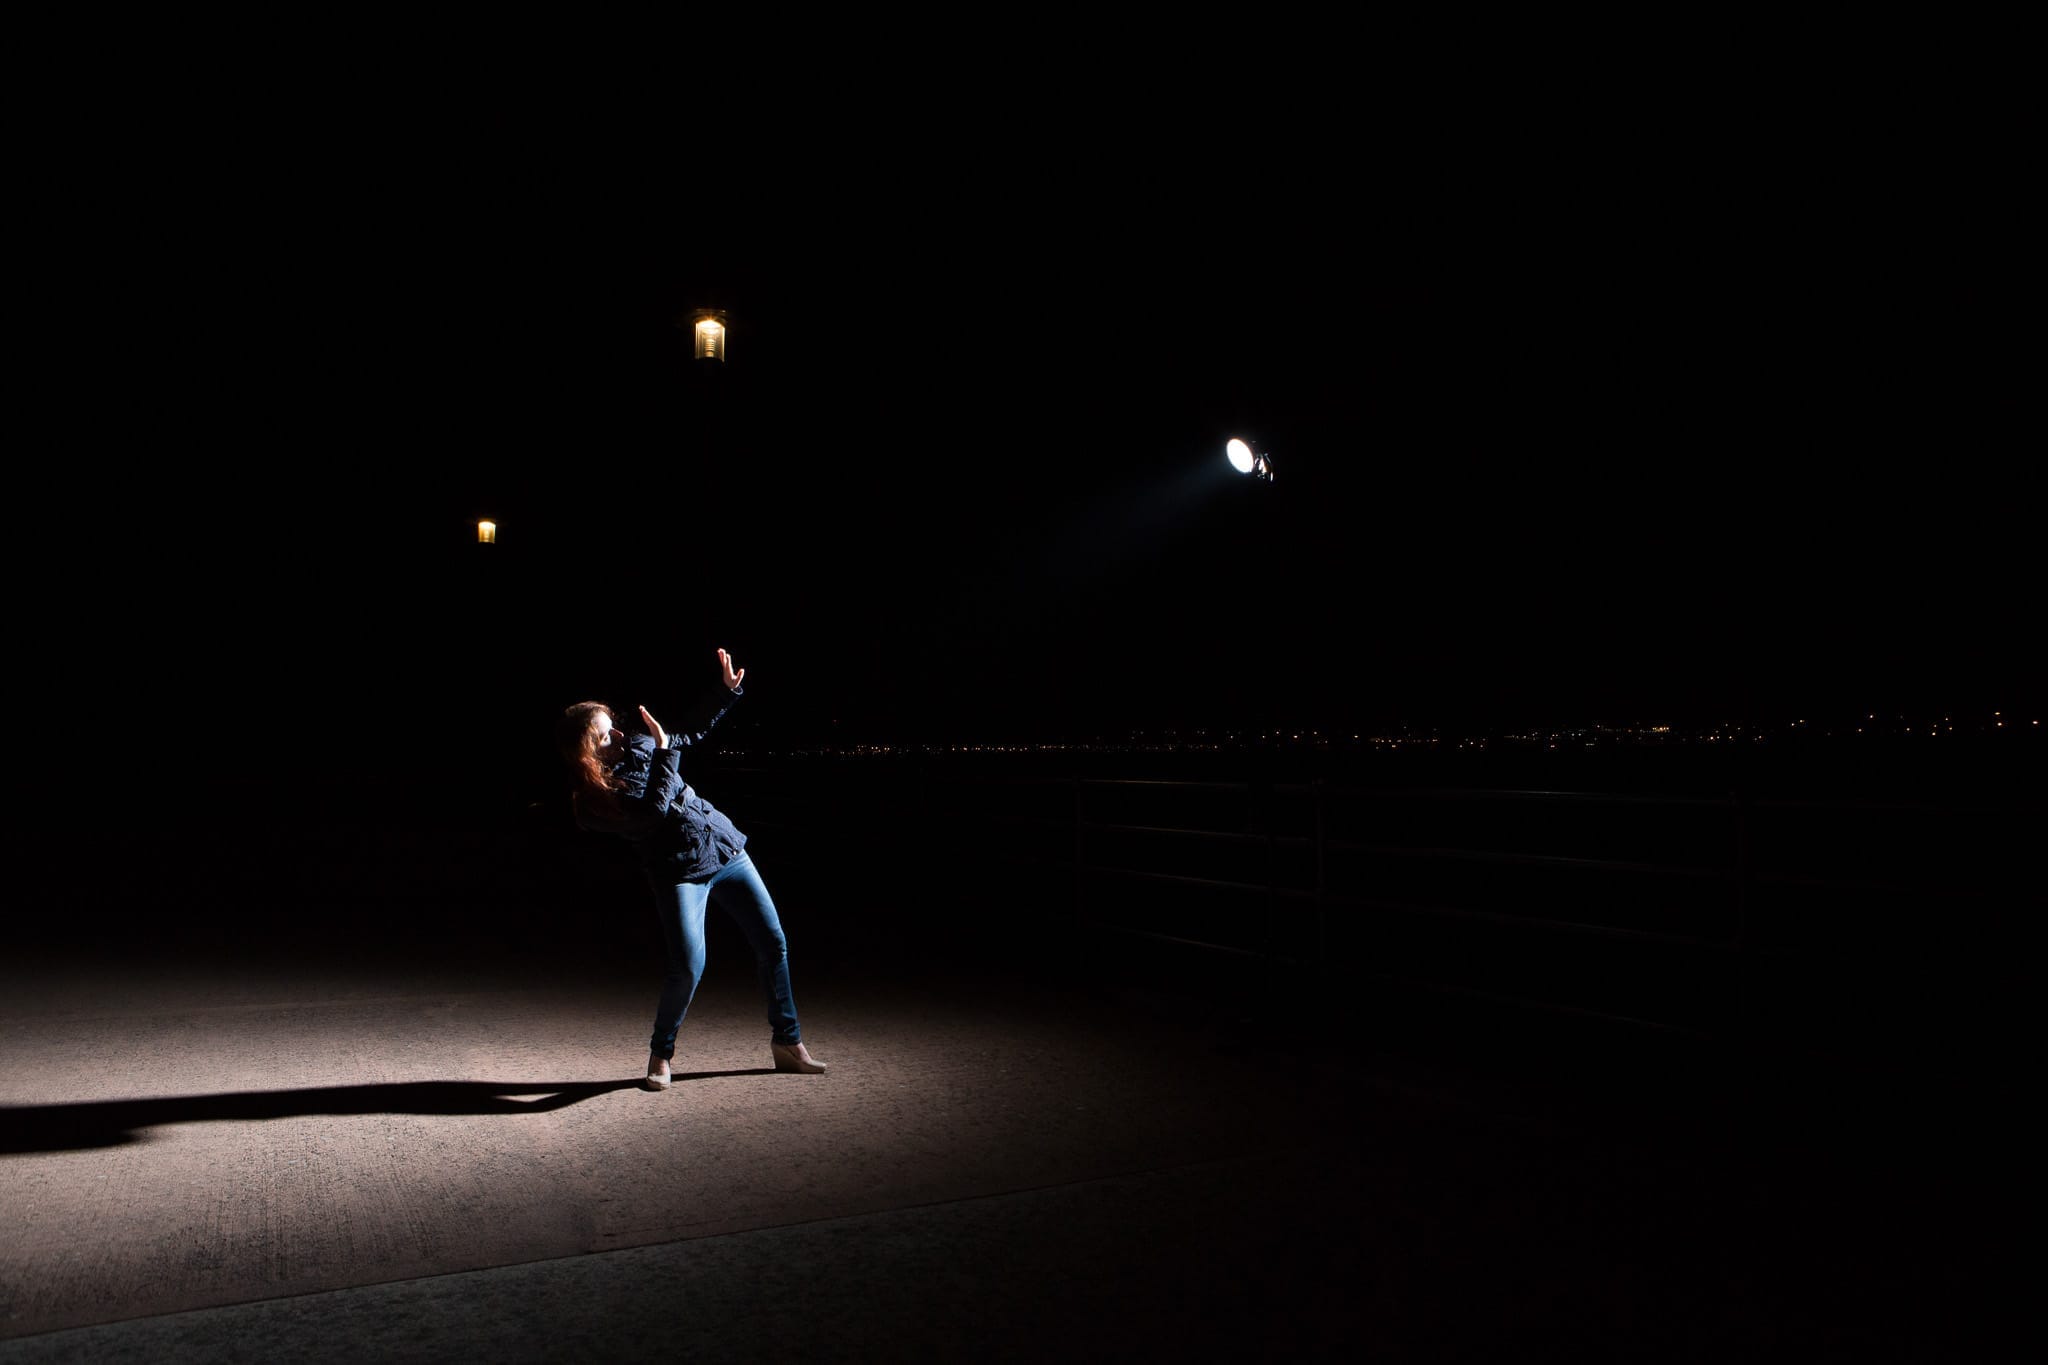
Just down the road from me is this view, where the marina ends and the Severn Estuary begins with a huge industrial area making a suitably dystopian background. This is the scene as is, shot at 2.5 seconds with an aperture of f/7.1 to add a subtle starburst effect to each light source. Because of the low light I was locked down on a tripod to avoid any motion blur.
With a few different exposures of the same composition in the can to chose from later, it was time to bring my ever-patient other half Helen into the scene. Despite the life boat keeping station just offshore she got into the role and threw a few “Oh my God! Aliens!” poses.
Lighting was about as basic as it gets. I was using an Elinchrom Quadra with a 7″ reflector and a 30° grid but it was on such low power I could have easily achieved the look with a speed light and a Honl grid or even something a little more Strobist. You can see the light in the above image, about nine feet in the air to camera right. One of the beauties of shooting from a tripod is you can easily remove things like light stands from an image by shooting multiple exposures and using layer masks in Photoshop.
Speaking of Photoshop, this is where the real heavy lifting with this image was done. As planned. This wasn’t a case of fixing what I could, and should, have got right in camera. This was about adding a specific look and this is where the techniques I picked up from Aaron came in.
There are three main Photoshop edits here.
I won’t make this into a full tutorial as Phlearn have already done a fantastic job but I’ll give a quick outline of each step.
Step 1: Colour Grading
Until recently I have done any split toning of my images in Lightroom. Split toning means adding a different colour to you shadows and highlights. In this case I went for a cool greeny blue in the dark areas of the image and a warm yellowy orange in the highlights using Solid Colour adjustment layers and the Blend If options in Photoshop’s Layer Styles.
Step 2: Beam of light
This is just a selection drawn with the polygonal lasso tool on a new layer, filled with white and Gaussian blurred. The thing that that makes it more believable is the fact it done on three layers, each is a slightly narrower, slightly brighter, slightly less blurred beam.
Step 3: Clouds around the light sources
Light is invisible. You only see it when in interacts with something else and when talking about alien tractor beams over water this is going to be mist. I created this with Photoshop’s Render Clouds feature, Gaussian blurred them a little then painted them in around each source of light with a layer mask to make the beam a little more solid and convincing.
So all in all, about 10 minutes to set up, another 10 to shoot and a couple of hours in Photoshop but the majority of the work went in to planning and pre-visualising the image before even leaving the house.
I’d love to hear what you think of the final image. Am I wielding Photoshop like a scalpel or a sledgehammer?

