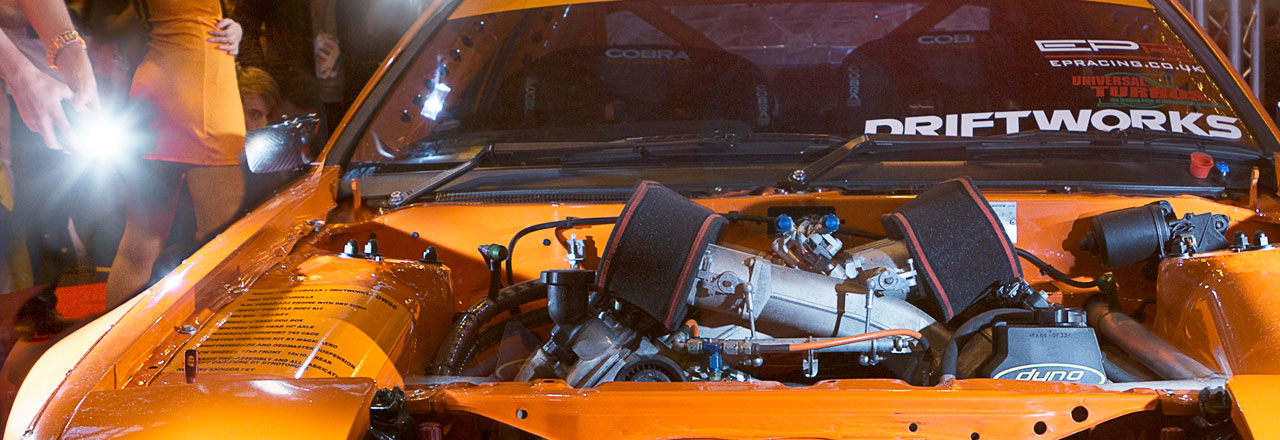
Photo of the Week – Driftworks AE86
Any shows at the National Exhibition Centre are notoriously difficult to shoot. Orange overhead lights, red carpet, messy backgrounds and crowds of people make it hard to come away with anything other than snapshots.
I like the challenge though. It makes me think about my composition more, keep an eye out for moments and think about what I can do with a cheeky bit of off-camera lighting.
In this case I thought I’d do something a bit different with the star of the British Drift Championship stand at this years Autosport International – the new Driftworks AE86. This car was getting a lot of attention and the stand was crowded all day, compounded by the presence of Maxxis girls Holly and Michelle.
My idea was pretty simple – I wanted to light the car so my shot looked different from the thousands of others taken over the course of the 4 day show but there was no chance of closing the stand or even keeping people back so I had to work fast
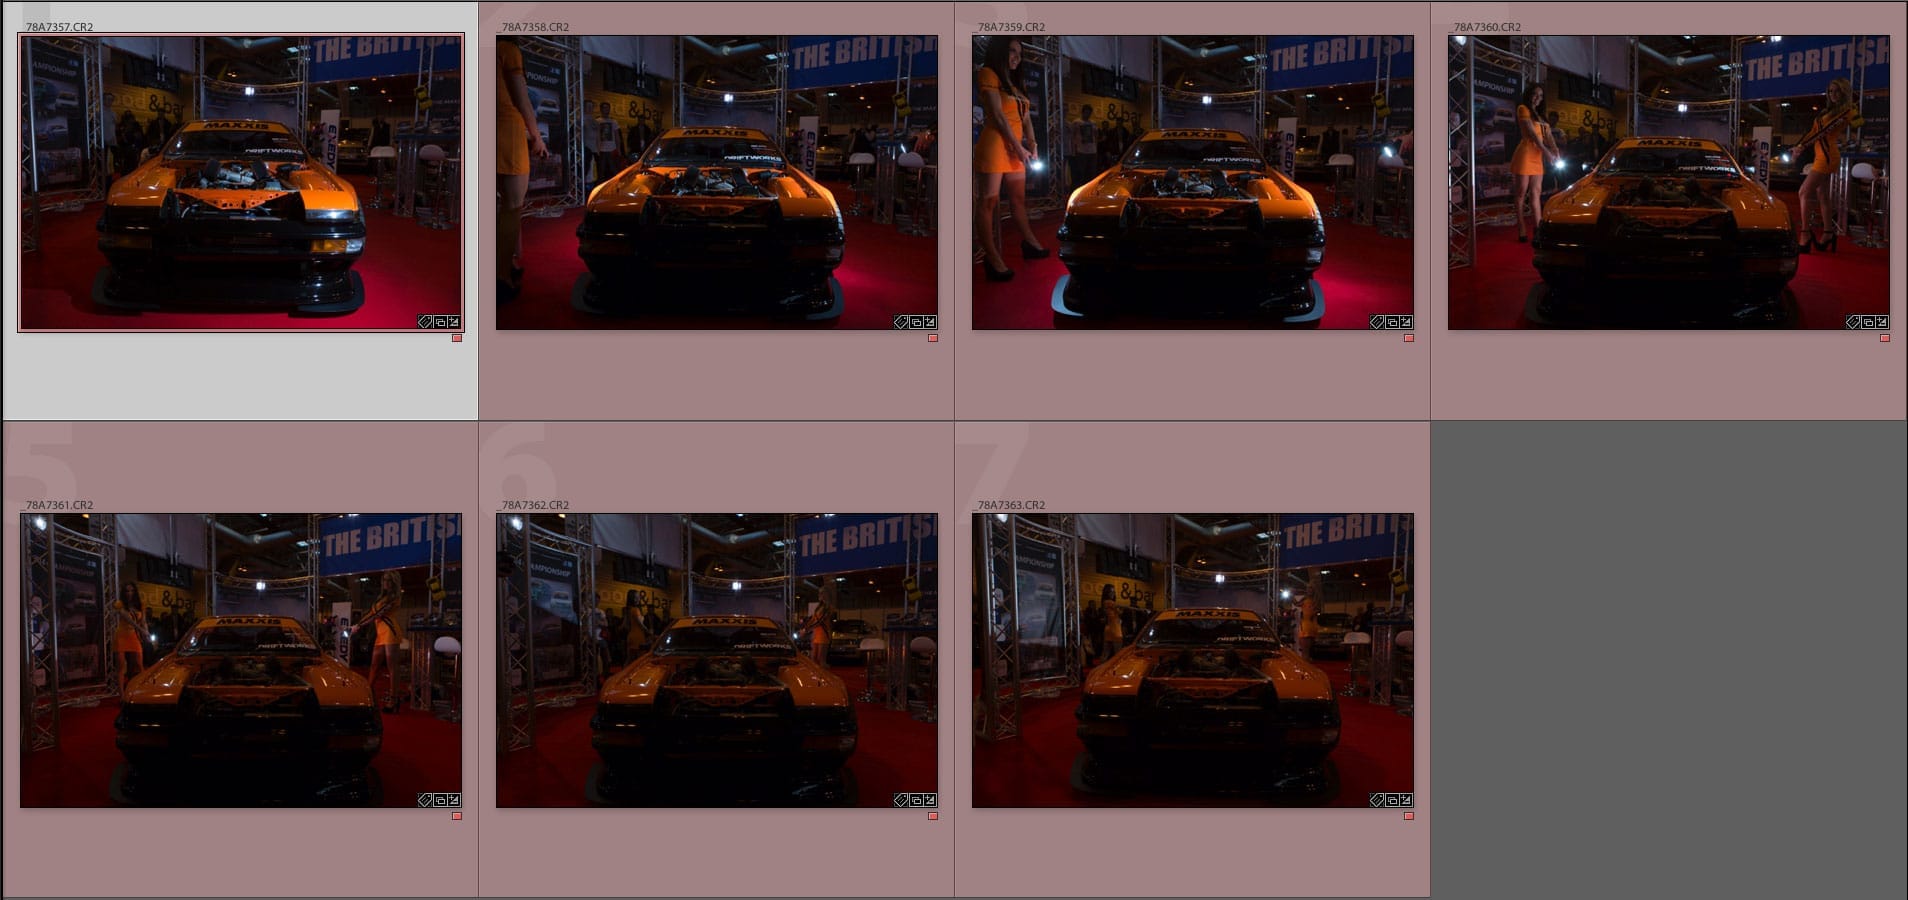
With no time or space for lightstands, I’d typically set the camera up on a tripod and walk around the car holding a flash and remotely fire the shutter to capture a range of images to combine in Photoshop later… But I had no tripod.
This is where Holly and Michelle came in handy. Not only were they my Voice Activated Lightstands, but they added a bit of colour co-ordinated glamour to the shot.
I fired a few test shots holding the flash about one meter from the car to get my exposure and flash power dialed in then briefed the girls on what I needed them to do. I was going to be stuck in position at the front of the car staying as steady as possible to make aligning the images easier so I wouldn’t be able to coach them.
Then it was time to shoot. The girls got into position holding my speedlights and triggers, I convinced the gathered crowd to move back a couple of meters and 20 seconds and 7 frames later we were done.
Then it was over to Photoshop. Because the component images were shot in such a rush and in difficult conditions, this needed a little more work with curves than I’d have liked. I’m a big exponent of getting it right in camera but when you don’t have the opportunity to re-shoot or add a fill light you just have to rely on fixing things in post production.
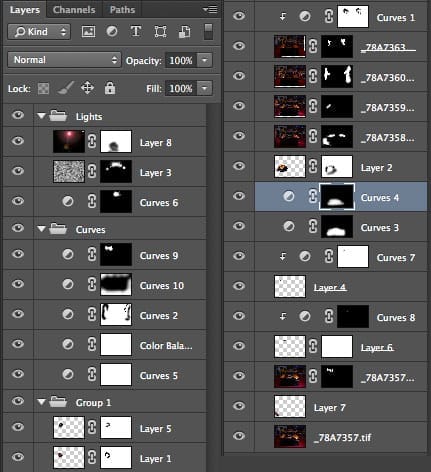
As you can see, there a quite a few layers involved but they can be split into 4 main groups. There are visible layers like the background layer with the unlit car and on top of that are masked layers to add light and girls. Then there are curves adjustment layers clipped to those layers to correct exposure. Above those are more far-reaching curves adjustment layers for overall colour and exposure correction and finally there are a few layers to add a little haze to the visible light sources.
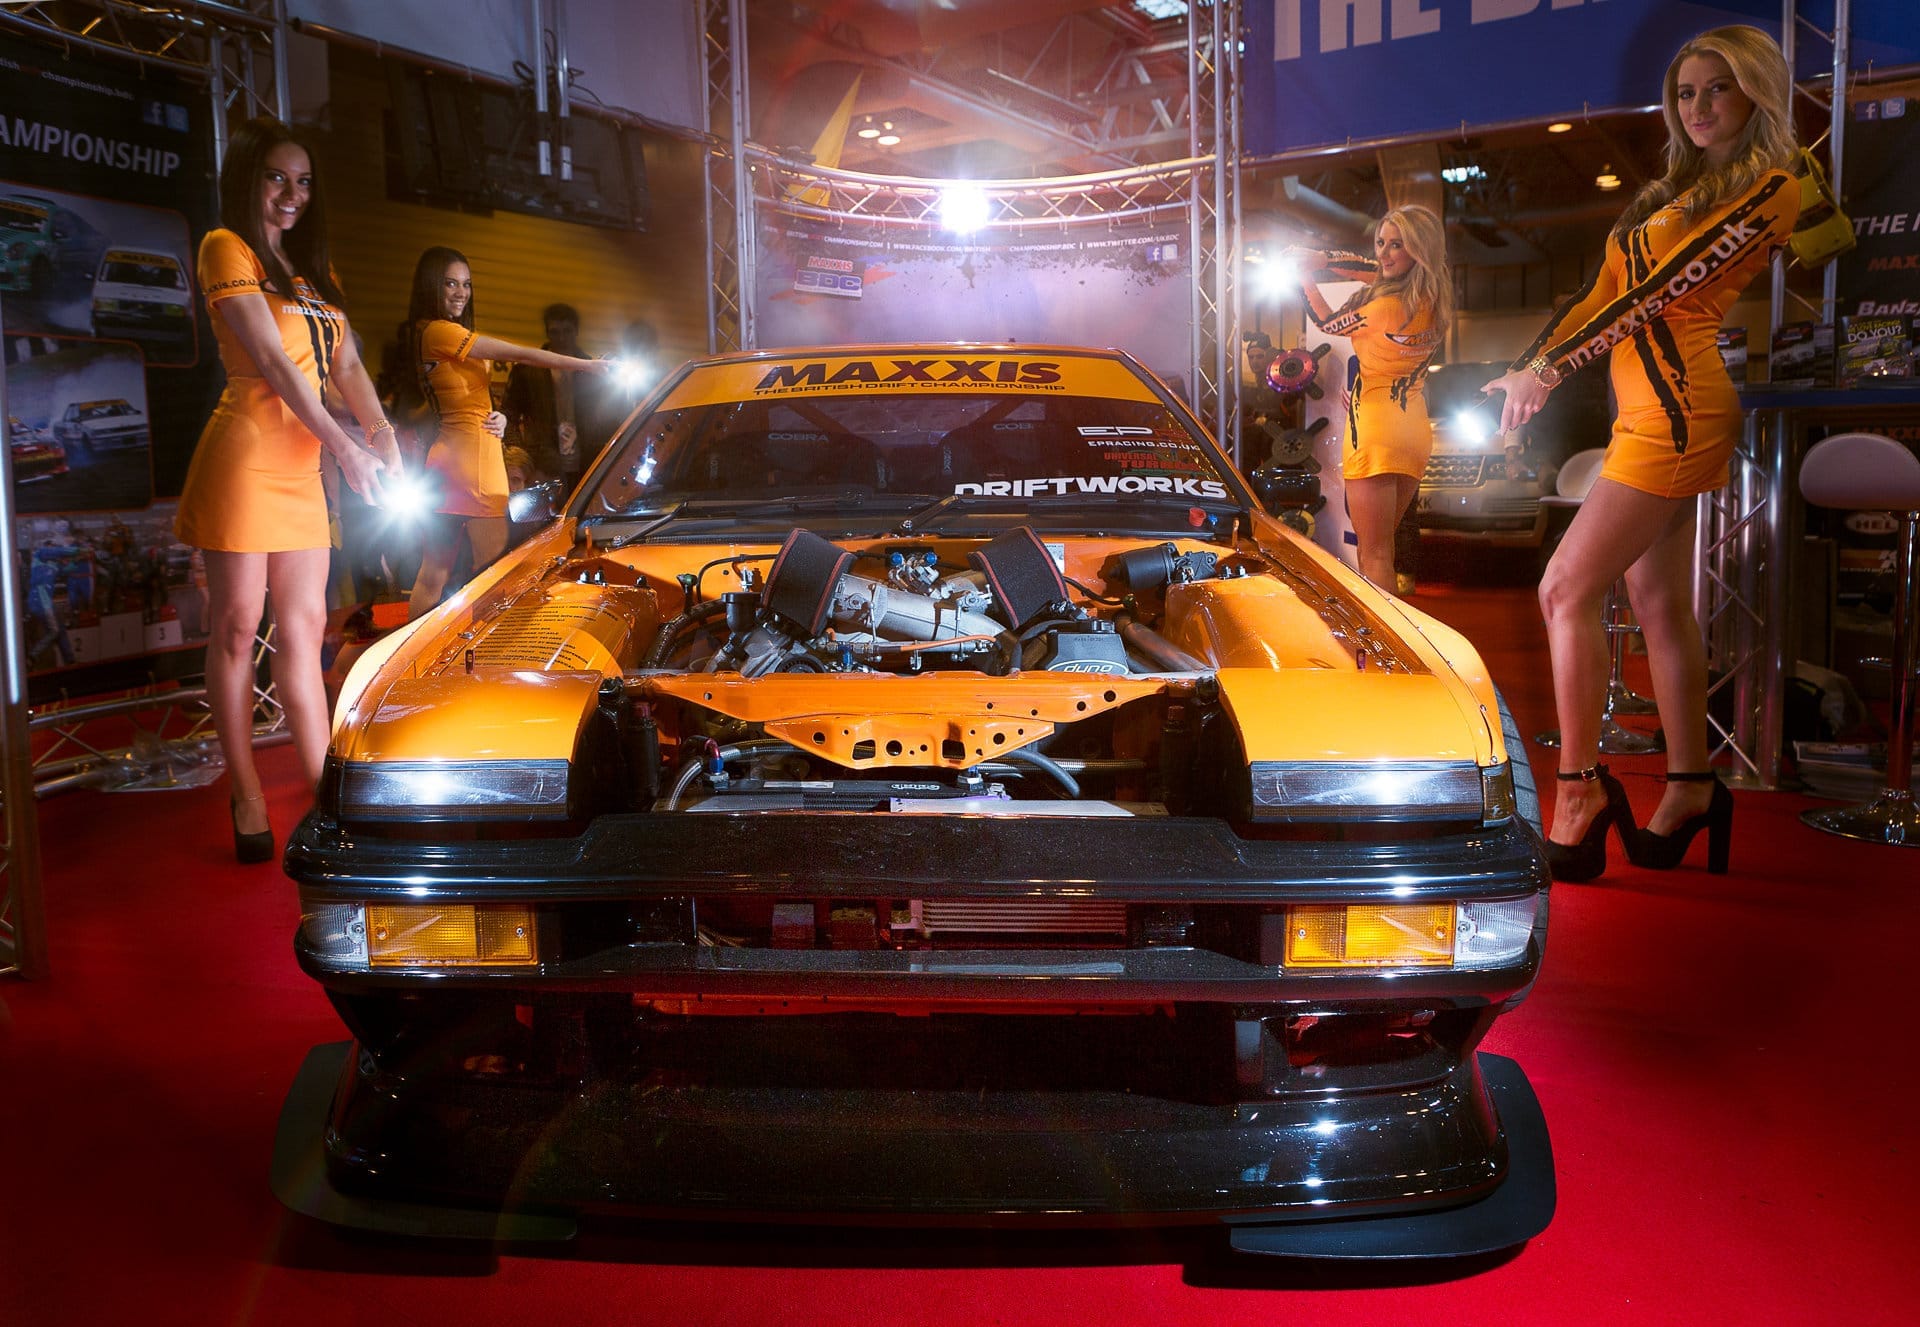
So here’s the final image – As always I’d love to hear what you think in the comments below.

Recent Comments