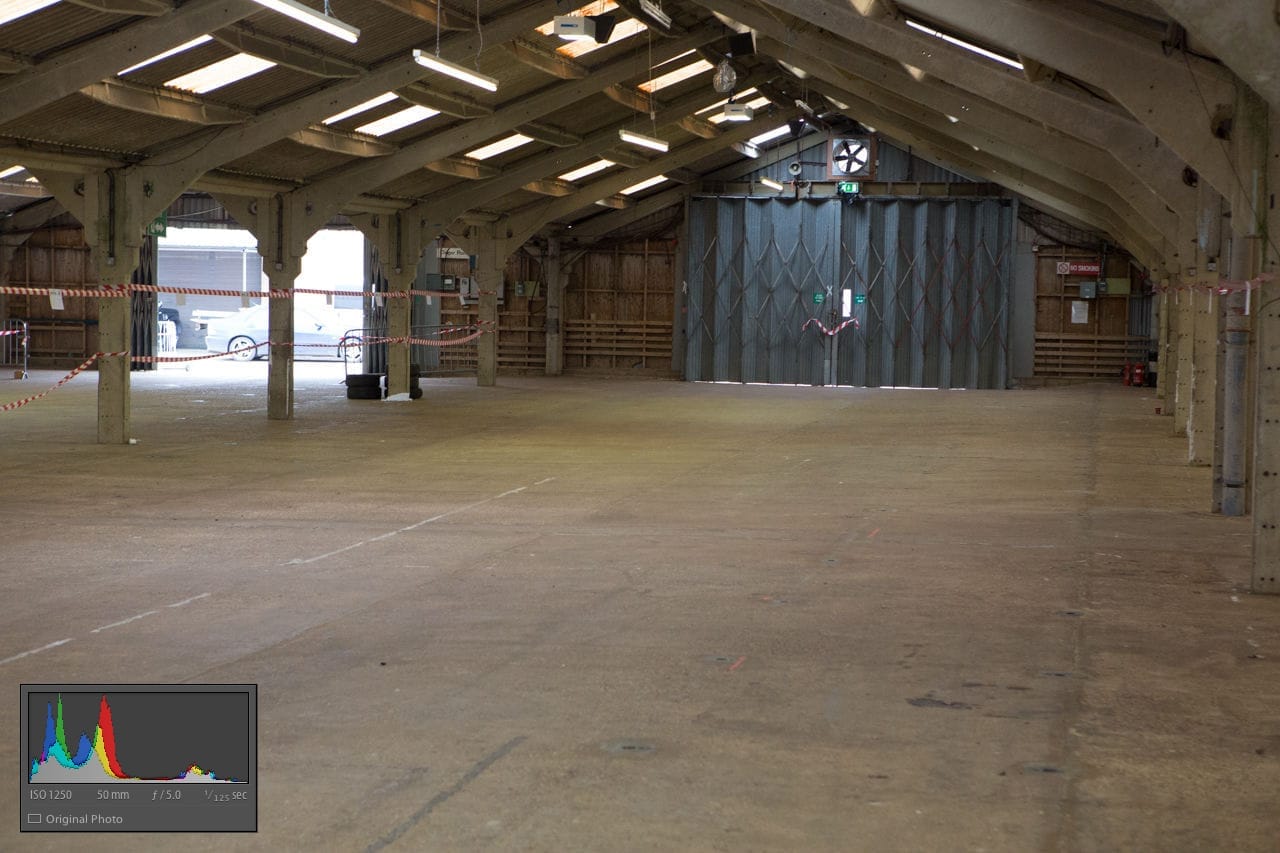
Here’s a photo taken earlier this year in a cattle shed near Coventry for today’s Photo of the Week. The event was Race Retro and between sessions on the mini rally stage a selection of classic rally cars gathered in the makeshift parc ferme.
When left to it’s own devices in AV mode, the camera wanted to take the exposure at 1/125th, f5 at ISO1250 so I knew I could overpower the ambient light pretty easily with just a speedlite. If I had to stop down to f16 I’d have had a problem, but the final image was taken at f7.1 – no problem for a 580EXII.
Once I had the exposure dialled in it was a case of adjusting the power of the flash (I think was on about 1/4 power) and then finding a spot where it looked good. The idea here was to make it look as if there was a pool of light spilling in from the skylights in the roof above the Mini Gem GTE.
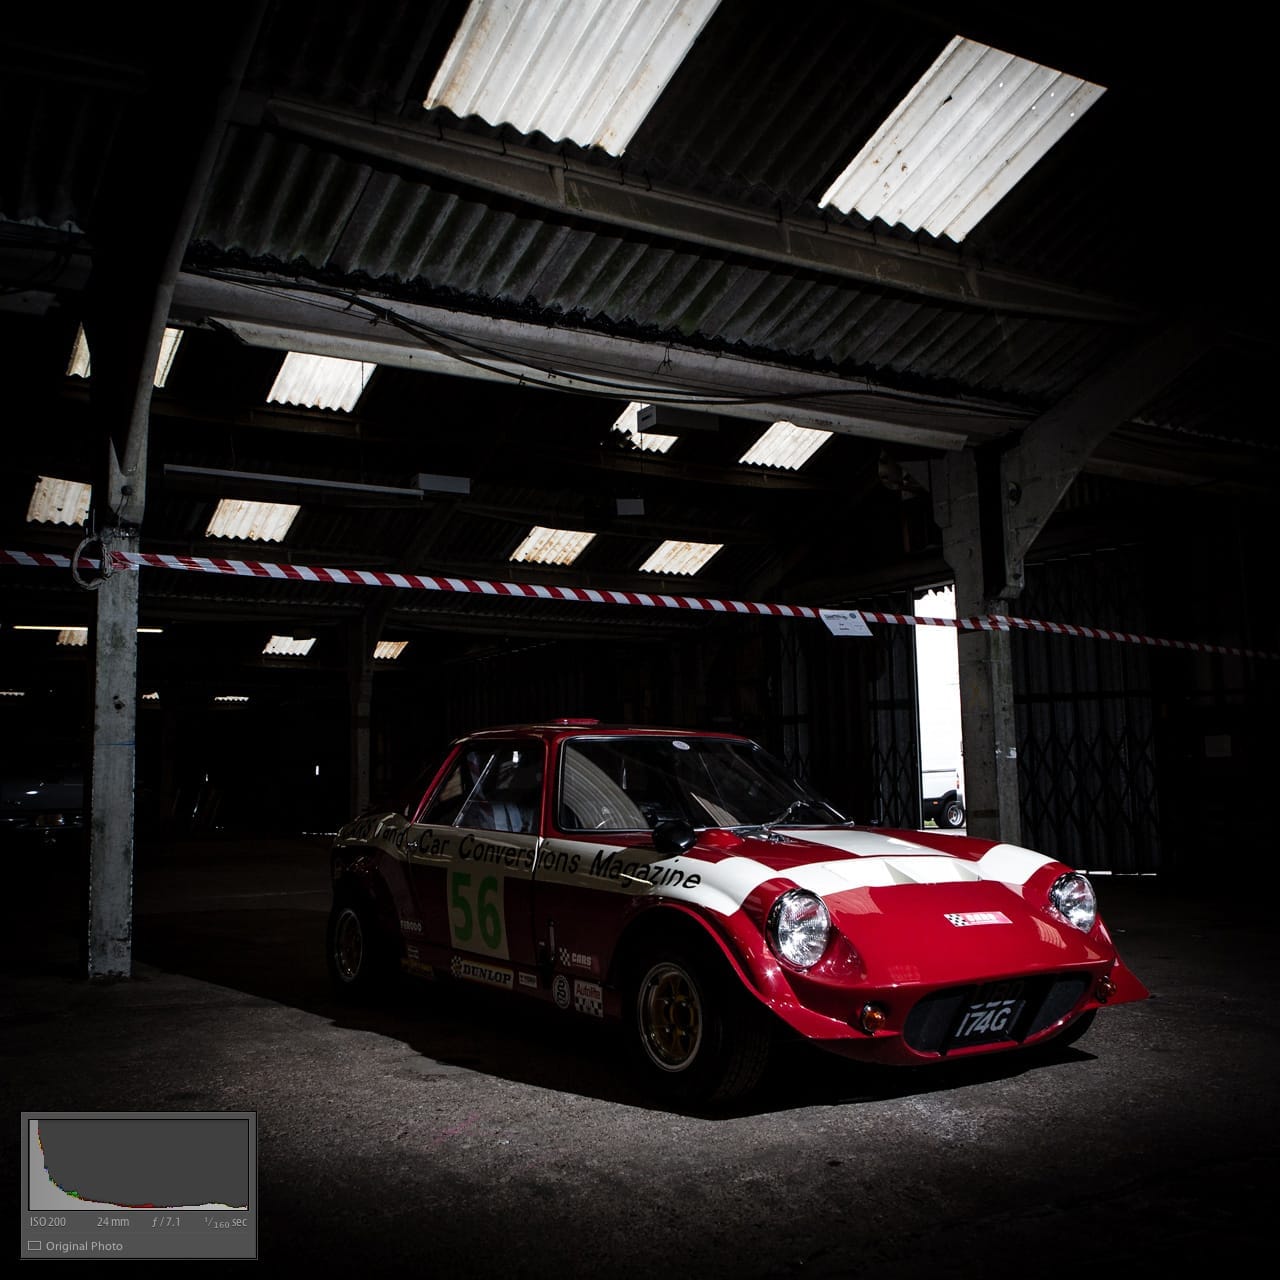
Over in Photoshop, the first task was to clean things up. Specifically the open barn door that’s distractingly bright and the reflective metal parts up in the roof space. This was done with a mixture of the Clone Stamp and just painting with the brush tool. I decided to leave the tape between the pillars above the car in as it matched the red and white paintwork so well.
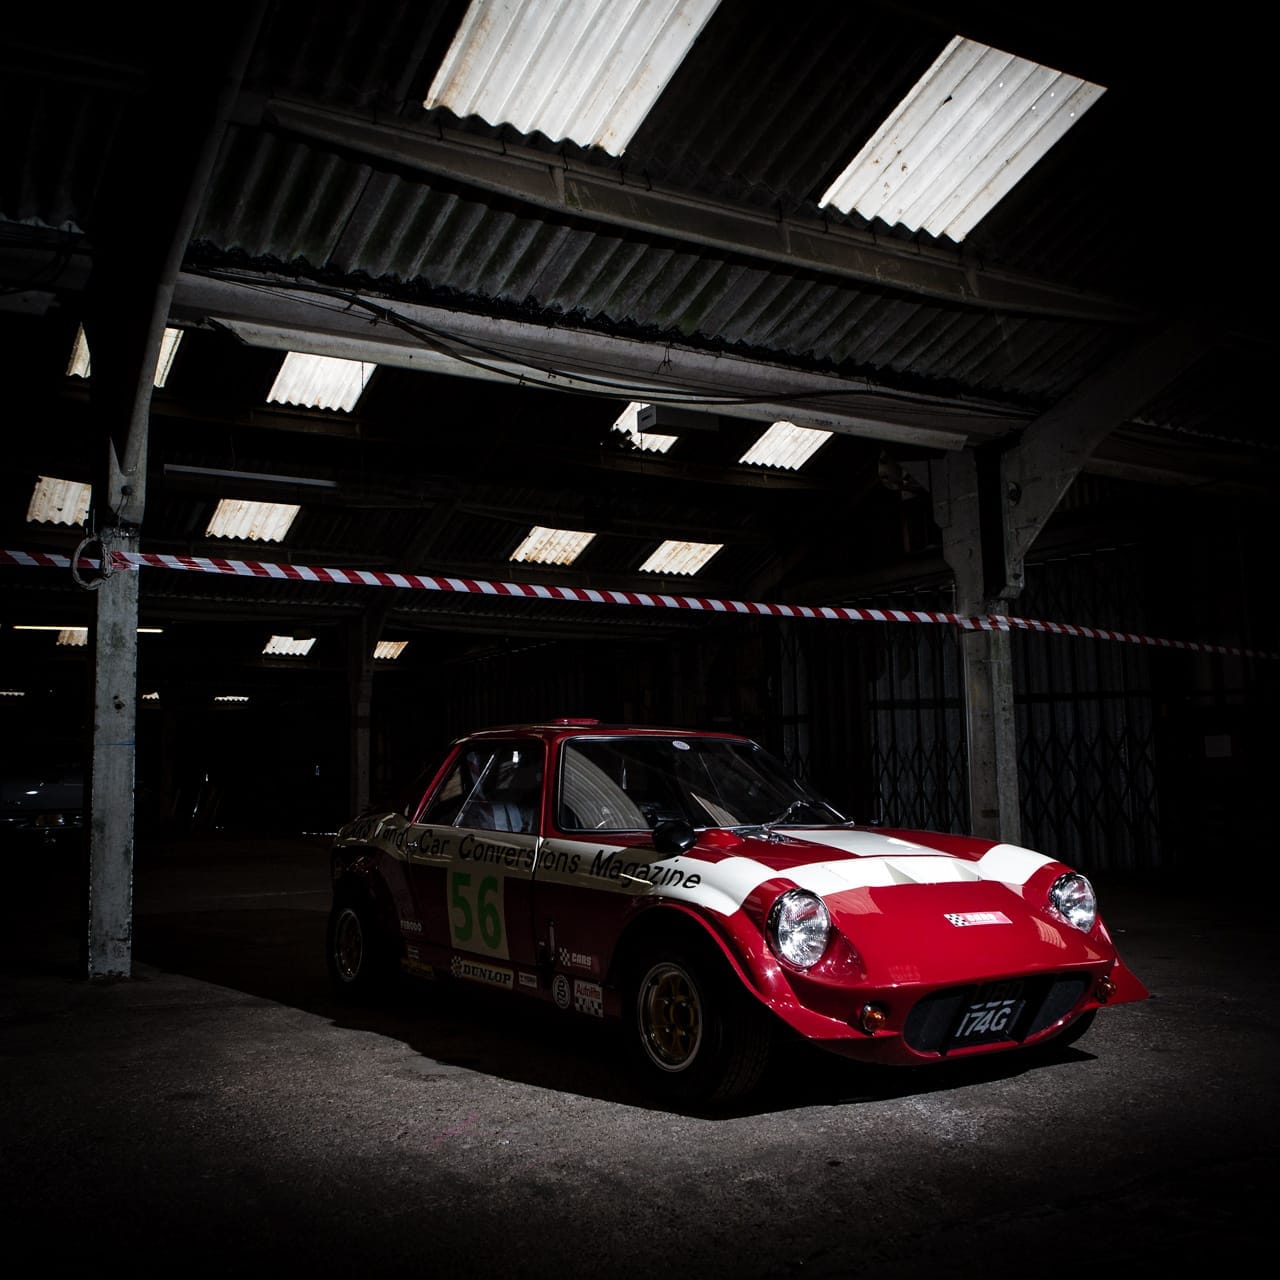
The final job was a little colour toning and general exposure tweaking.
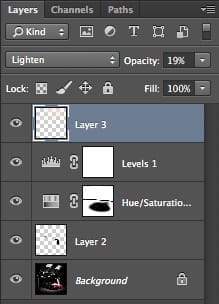
Starting at the bottom of the Photoshop layers panel on the left you can see the background is the original image. Layer 2 is the Clone Stamp work I did to fill in the open barn door.
The Curves 1 layer is a Curves adjustment layer that’s just to lighten the side of the car that was nearest to the camera. It’s a slight bump in exposure painted only onto the area needed with a layer mask.
The next layer up is a Hue/Saturation adjustment again layer masked so it only shows on the areas of the mask painted white. This is just desaturating the background whilst keeping the car and tape nice and bright.
Levels 1 is applying the colour toning. It’s not an obvious effect but its adding a little cyan to the shadows and warming the highlights a little.
And finally, Layer 3 is adding just a little haze around the skylights to simulate dust in the air. All this takes is some dabbing with a soft brush sampling a couple that’s already present in the light, a little Gaussian blur and a drop in opacity.
Here’s the final image. As always I’d love to hear what you think.
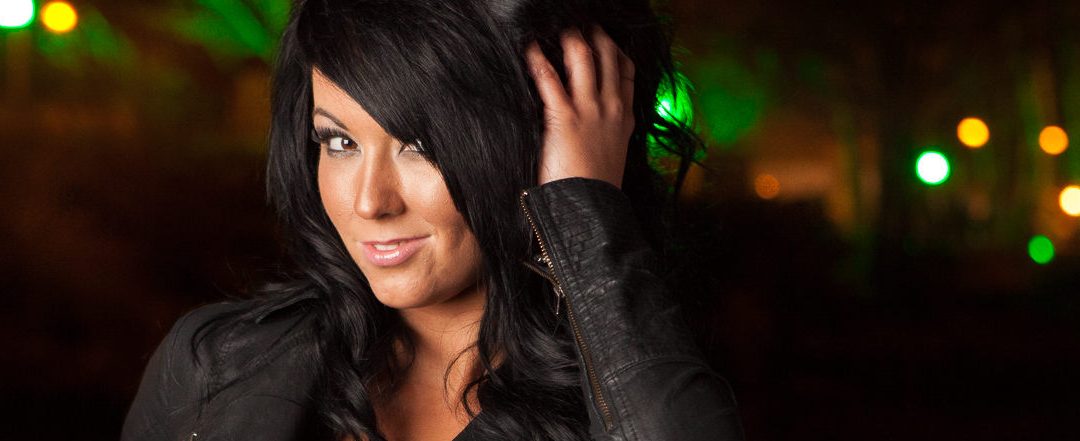
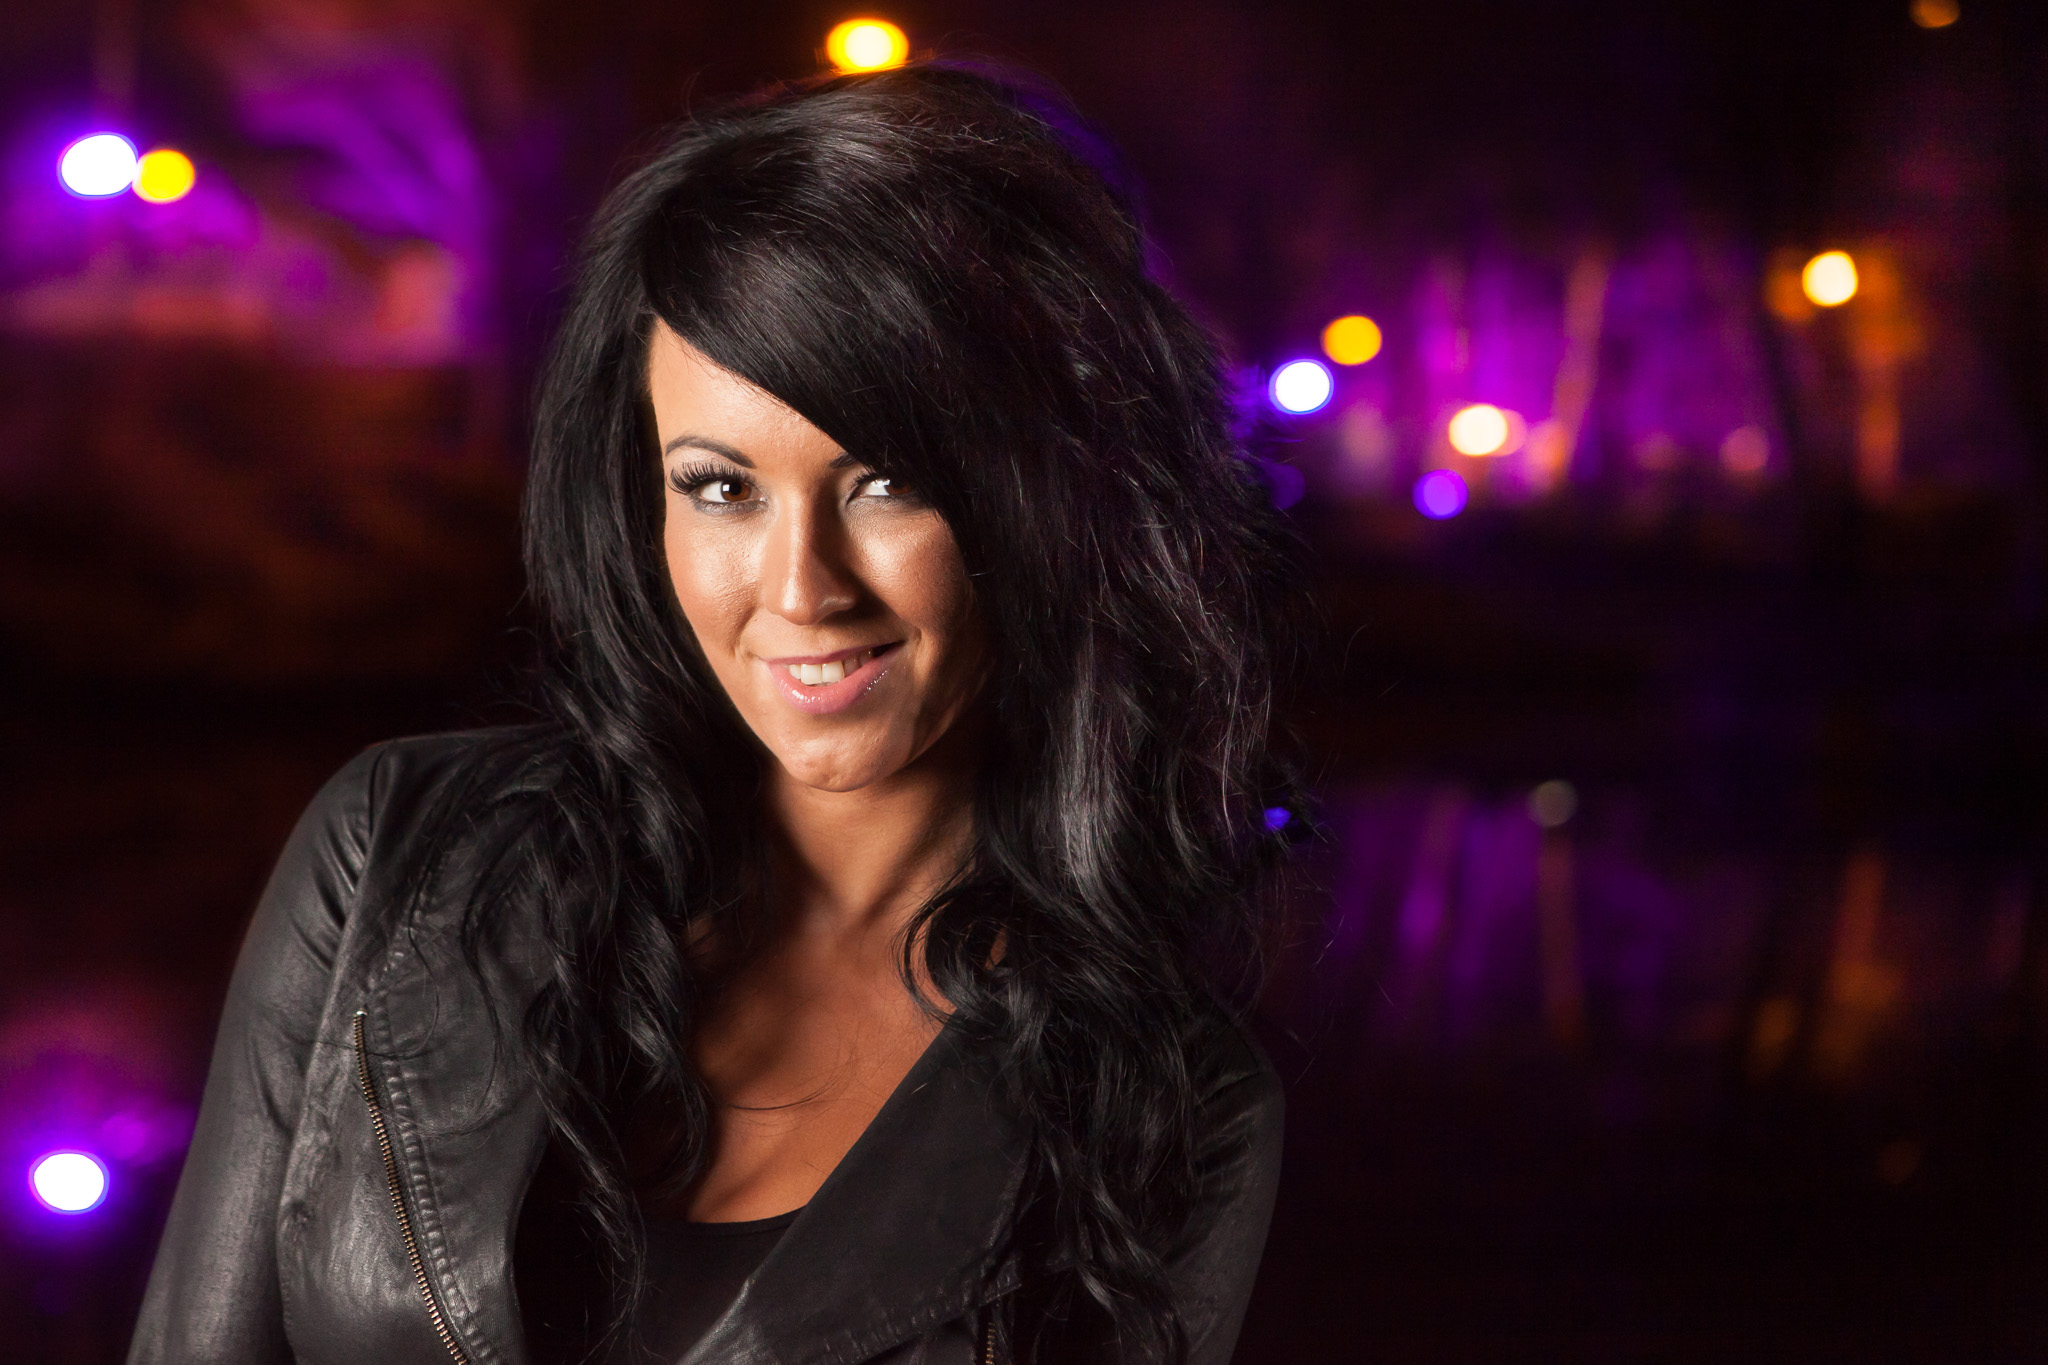
I was confined to an exhibition hall because a monsoon had descended on Peterborough Arena and the rest of the show I was at was rained off. Not exactly conducive to photography but hey, I like a challenge and that challenge came from ‘Maxxis babe’ Sarah. Something like “Go on then, come up with an idea!” “Give me an hour” was my reply.
I walked the hall but came up with nothing interesting. The place was rammed as a some of the outside parts of Modified National had squeezed inside. The atmosphere was great with everyone trying to make the best of it but there was barely room to move.
The only real option for a location was the Maxxis VW van but just shooting the girls with it in front of the Maxxis truck under the orange hall lighting wasn’t going to cut it. So I came up with the concept of the girls traveling the UK with this as their tour bus in a sixties, Summer Holiday style.
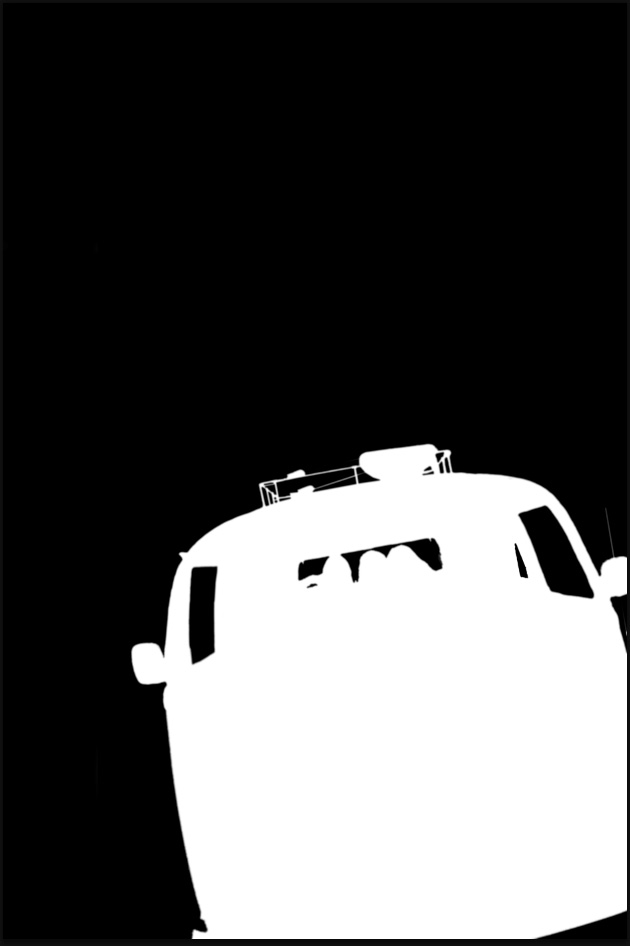
So here’s the original image. Everything but the bus is underexposed almost making it look like a composite already. Ideally I’d have preferred the bus on a plain or at least a simpler background but I had to work with what I had.
Obviously there was going to be a fair bit of compositing involved but the first job was to get the lighting right. The only light in the hall was coming from the high ceiling lights so the inside of the bus was dark and gloomy. If I dropped that onto a bright sunny background it was going to look very wrong. So, with the idea explained to the girls, out came the flashes.
The first is tucked away in the glovebox in front of Amy, camera right. It was set to a wide angle and feathered over towards Sarah on the left to even out the exposure. It’s not perfect but it’s close enough to pull back in post production.
Lana, Nickie and Danni in the back (seriously rocking the 60’s vibe by the way!) were lit with the second flash. It’s sat on the floor firing up towards the panel behind the front seats to make a nice big light source. Being a heavily modified van, this panel was covered in orange audio amplifiers so there was a MacGuver moment when some of the sticker sheets the girls were giving out we’re used to cover the amps and make a white reflector. Without this, the colour cast would have been very strong, especially with the amount of orange Lycra in the shot!
After a few test shots I knew I had the interior lit just right but the front of the bus was far too dark so a third flash is sat on the floor facing upwards hitting the front with just a wink of fill.
After using almost every Photoshop selection technique I know I had a finished layer mask.
Applying that to the original shot gave me a nicely lit, floating bus, ready to drop onto a suitably sunny background found on a stock library.
A quick Google for an Austin Powers font and a touch of the Warp tool and the image was done.
Yes, it’s ridiculous, cheesy and hammy but it shows the sun can still shine in an exhibition hall in rainy Peterborough.
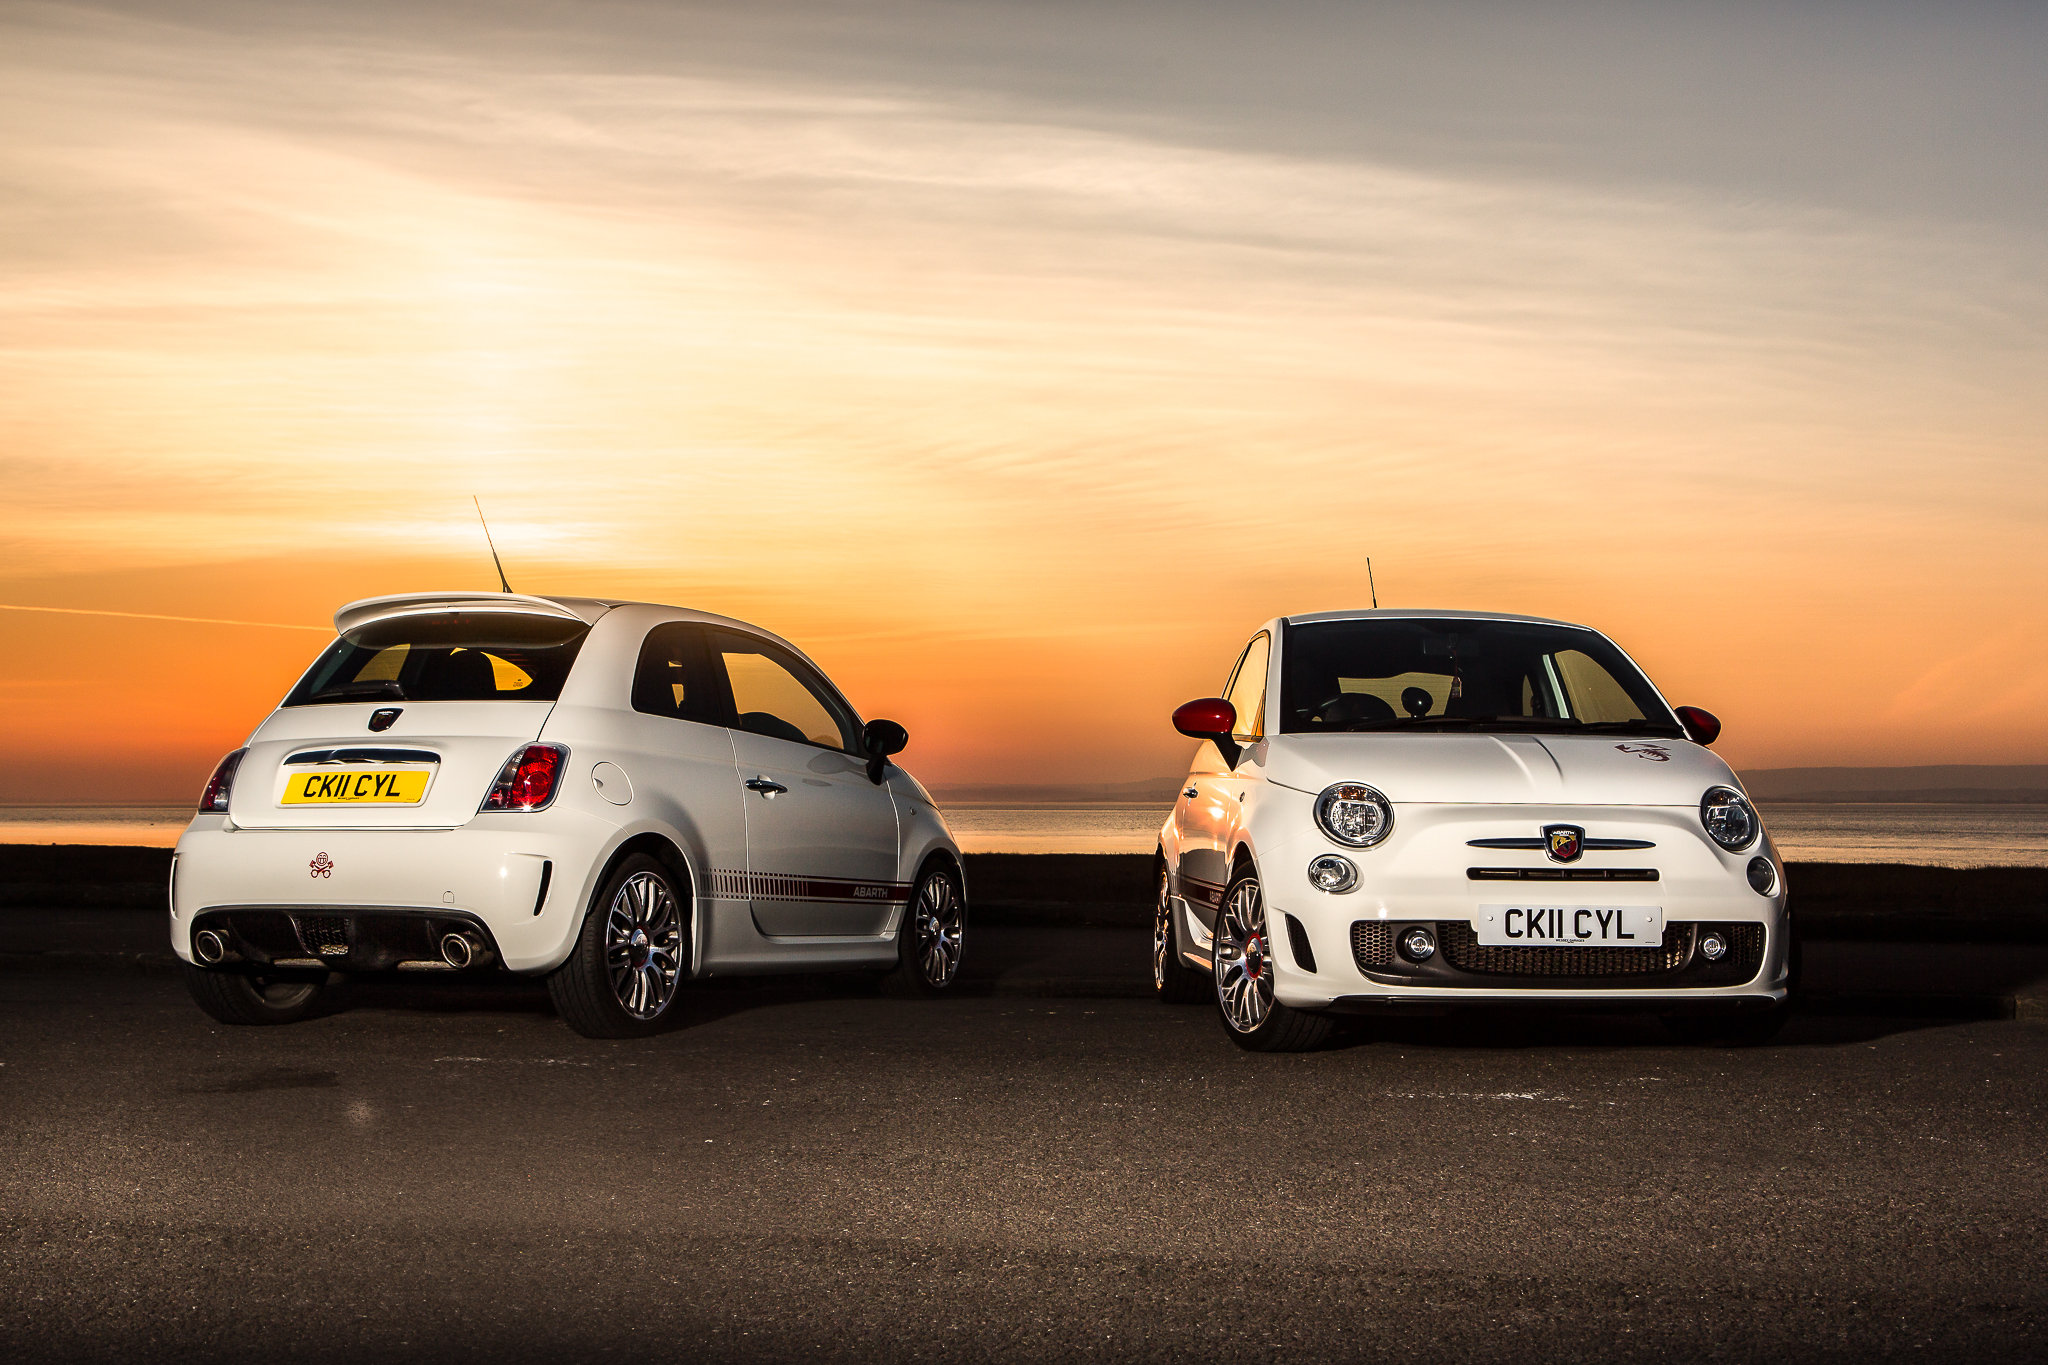
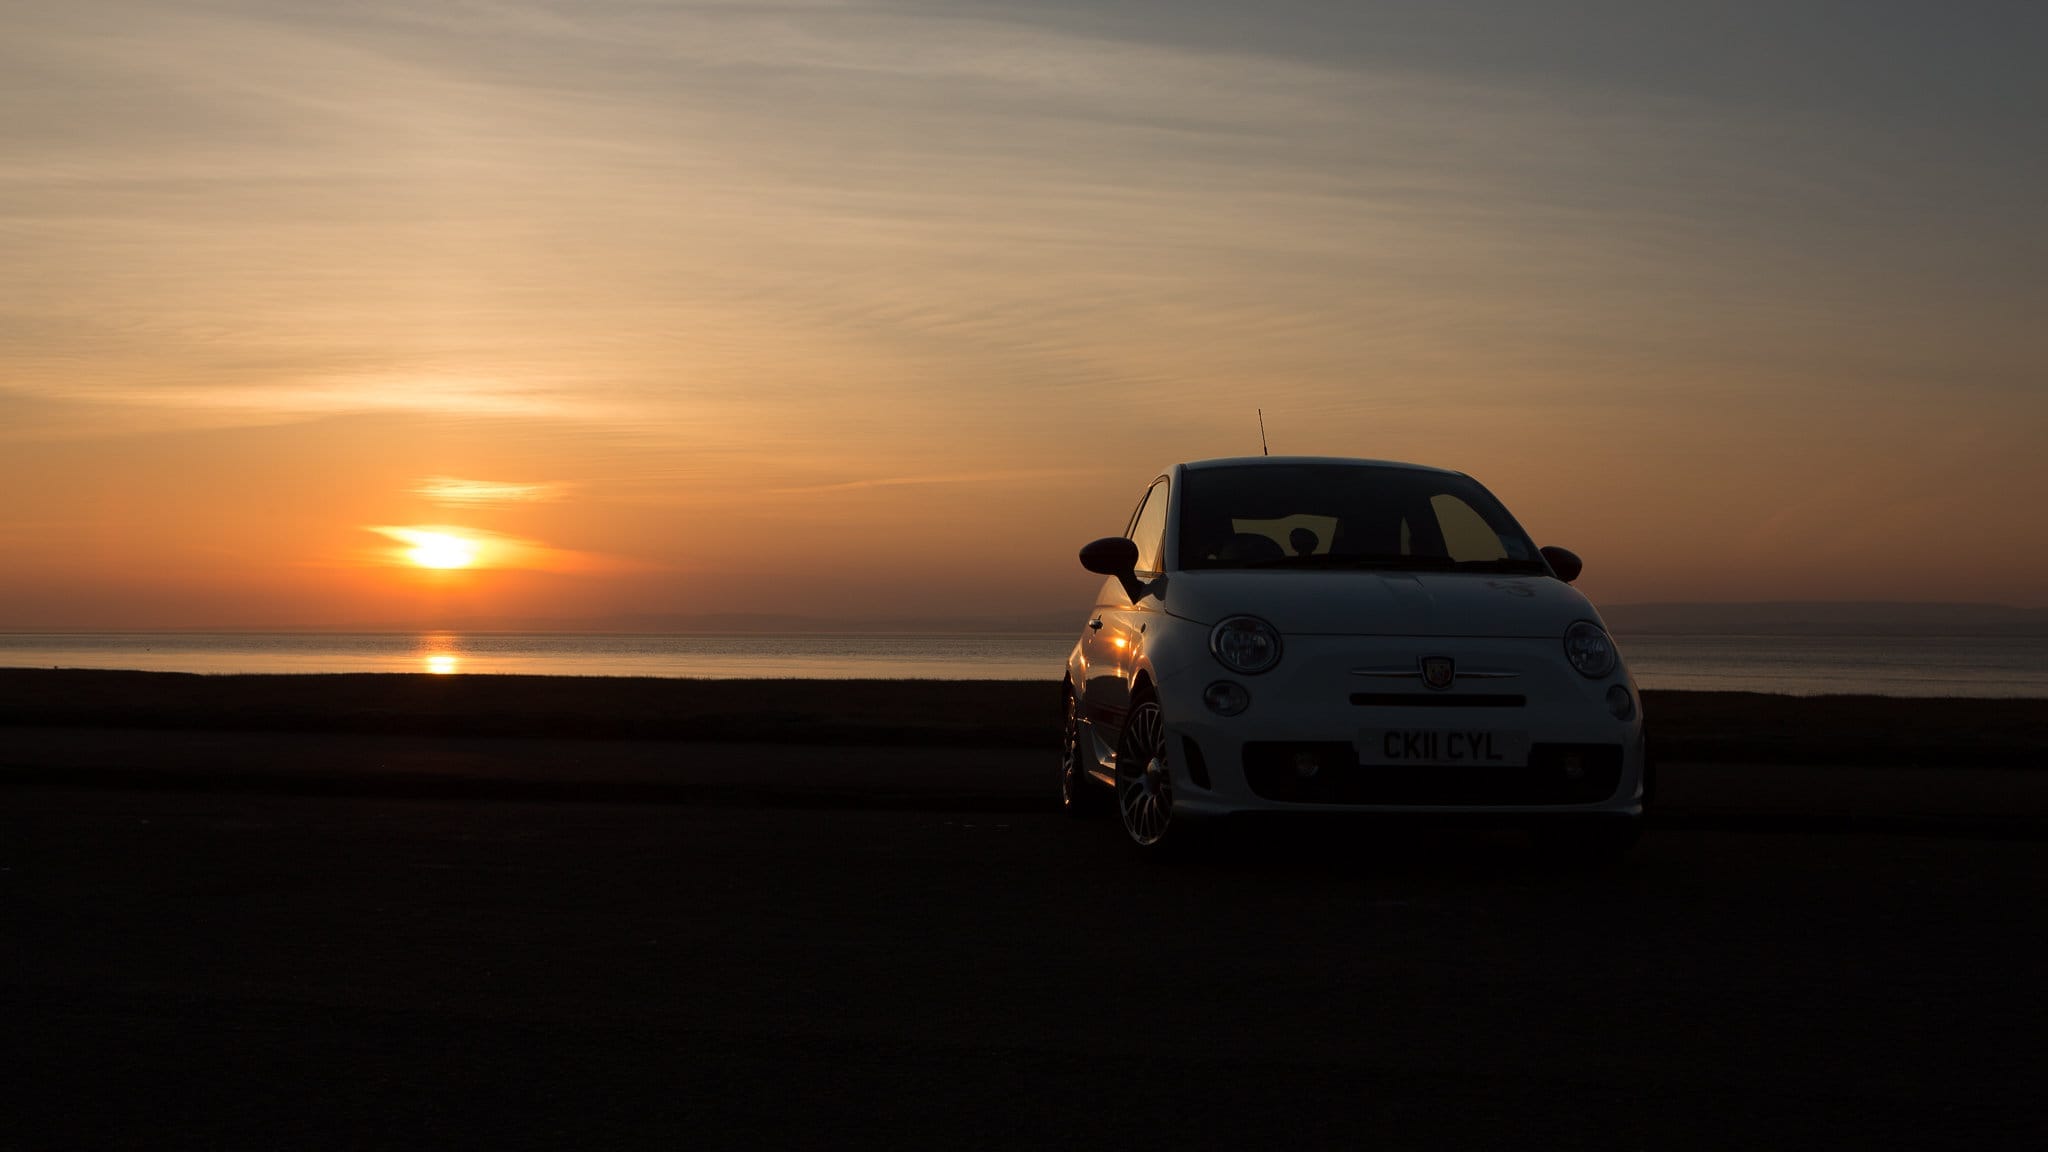
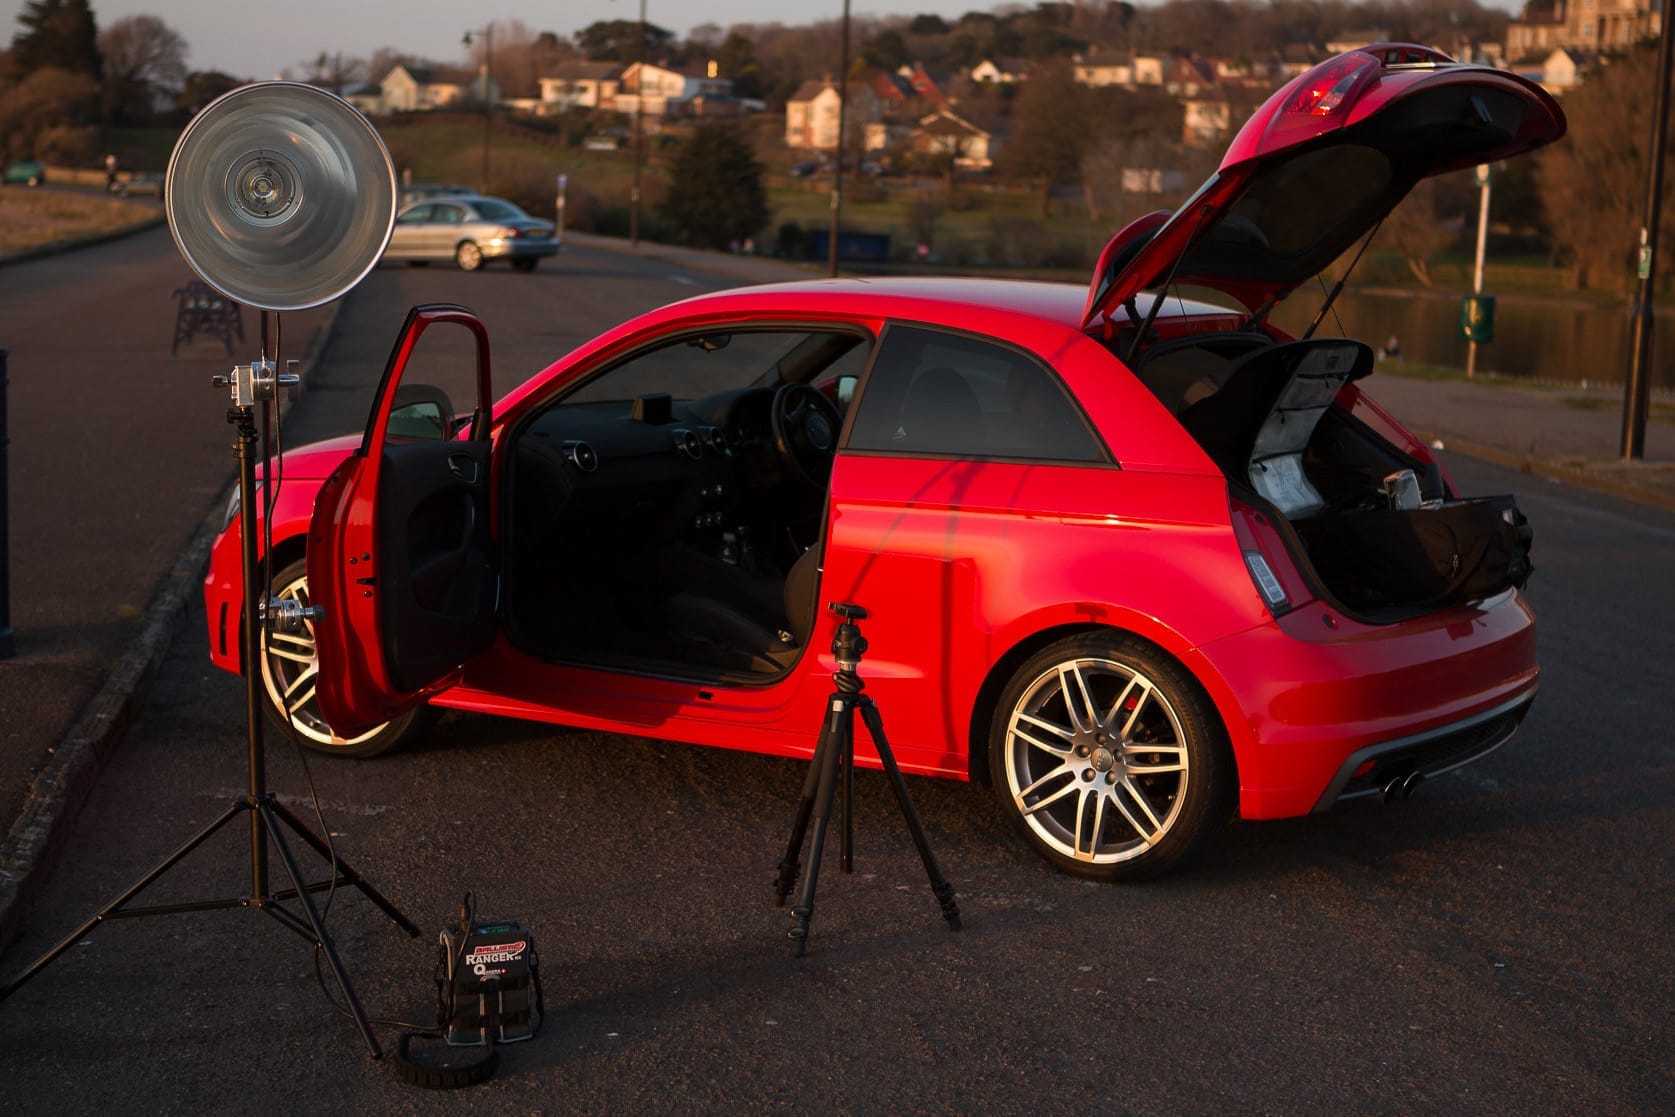
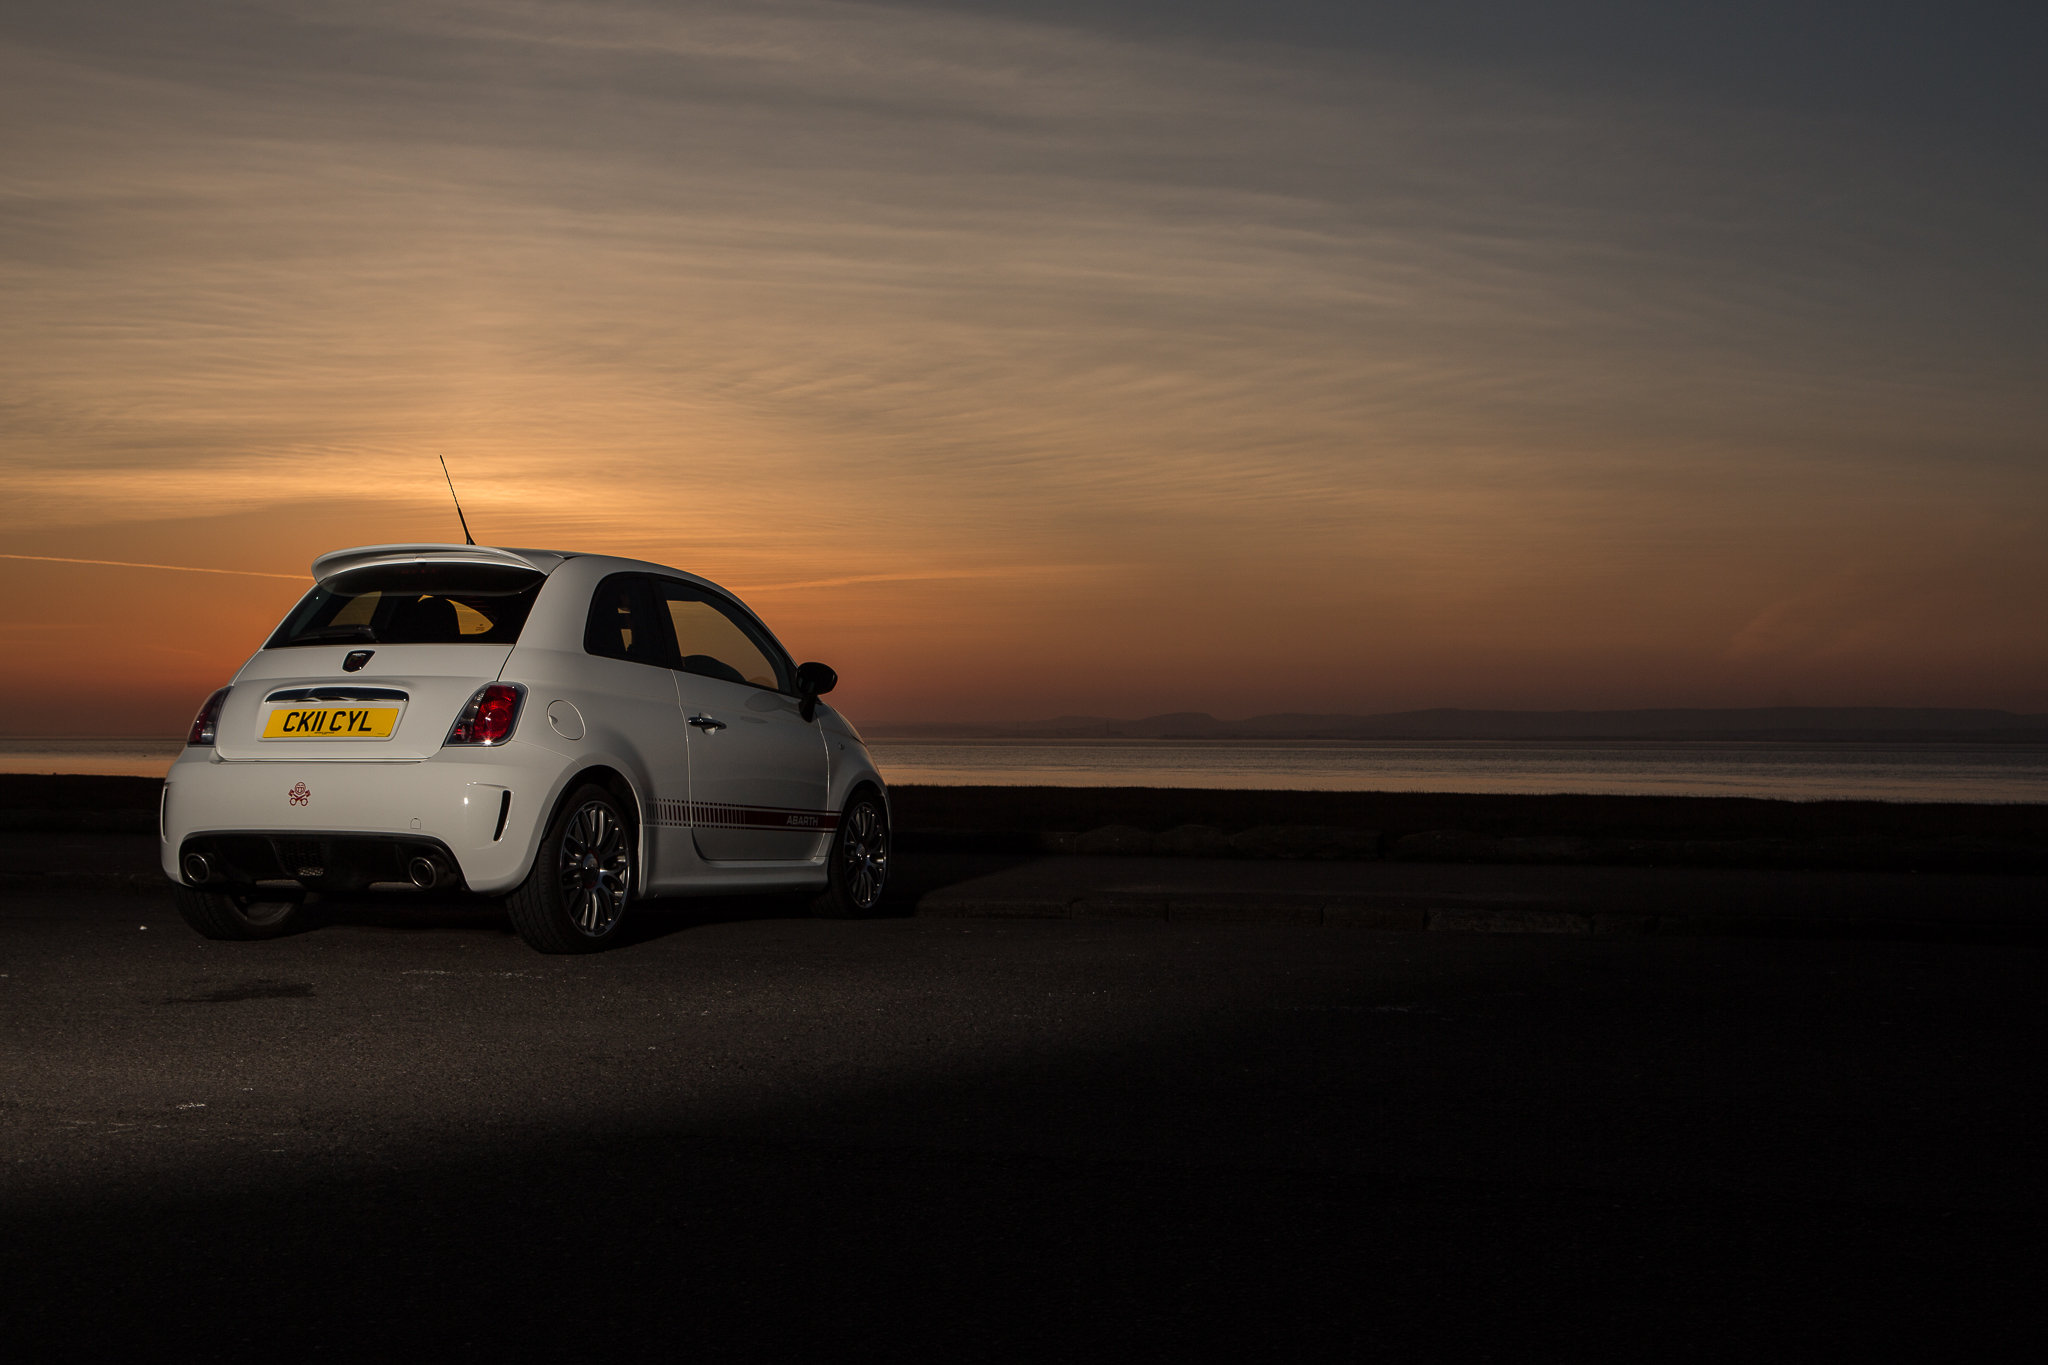
Earlier in the summer I shot this tidy little Fiat 500 Abarth down on the banks of the river Severn facing towards the setting sun. I wanted to make the image a little different so I decided to capture the car from 2 angles in the same shot.
To capture the colour and detail in the sky I had to underexpose by about 2 stops which left the car itself very dark.
So out came the Quadra! This time in a Maxispot – basically a big metal bowl reflector that creates a tight beam of light and throws it a good distance without much loss. This meant I could position to the light on the other side of the road and not inconvenience passing traffic – although it did get a few quizzical looks at the roadside.
As I was planning to combine 2 images, I was locked down on a tripod for this shot and framed widely enough to fit ‘both’ cars in.
You can’t see it in the images, but I a placed a lens cap on the kerb to mark exactly where to park for the second angle.
In post production it was simply a matter of layering the two images, masking out the areas I didn’t want and then applying a few contrast, colour balance and exposure tweaks. Here’s the final image again.
If you have only just found my blog, you can catch up on previous Photos of the Week here.
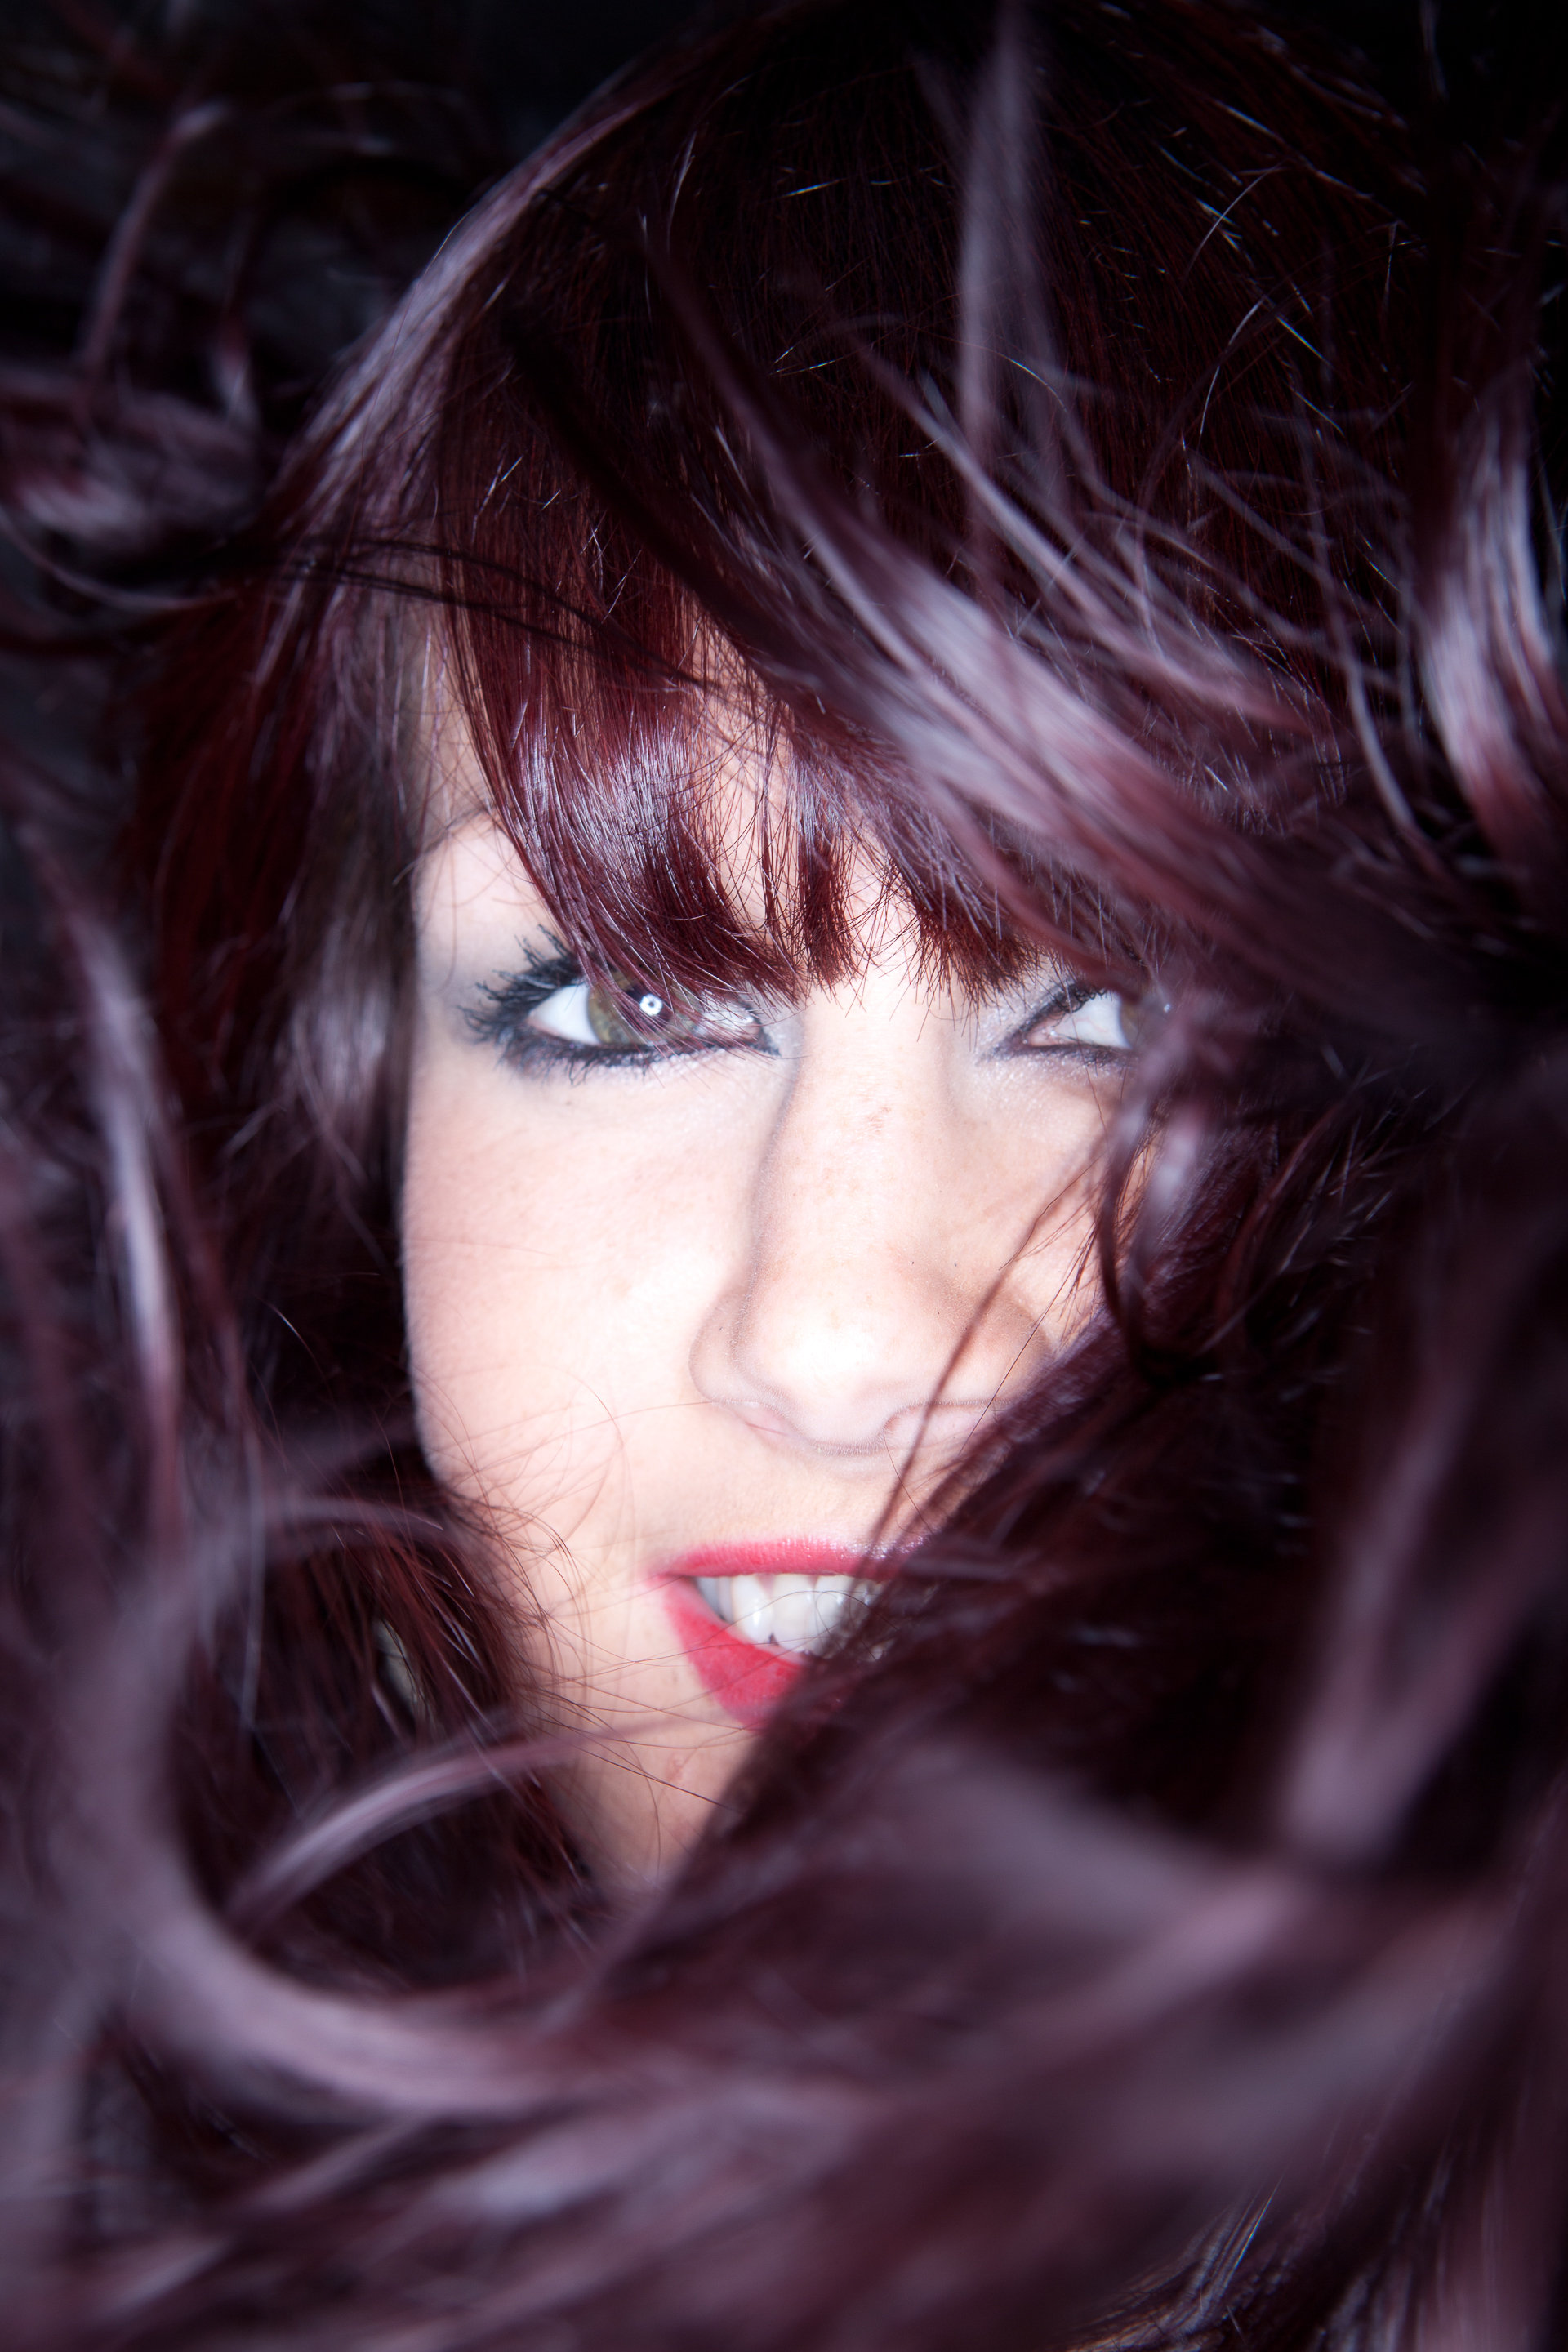
A happy accident for you this week. It’s one of those shots that had I tried to get it, I wouldn’t have. What we have here is the combination of a Quadra ECO ring flash and a huge (and I mean HUGE) leaf blower that was found lying around.
I moved in close, partly to crop out the surroundings (this was shot in a cluttered industrial unit) and partly to make the ring-shaped catchlight prominent in Gemma’s eyes. I took one or two test shots to get my exposure right, then had someone stand camera right and unleash the wind. I have a about a dozen frames of poor Gemma just looking windswept but among them was this one. Luck kicked in when part of Gemma’s hair whipped around towards the camera, framing her face and falling nicely out of focus.
If you’ve spent any time on my blog, you’ll know I like shooting on location. I love all the choices I get when it comes to balancing strobes with the available light – juggling all the variables is so much more fun than shooting in a studio where you have complete control over the lighting.
Shooting at night takes that to the extreme. Capturing what little ambient there is can be tricky when your flashes want to nuke everything with light.
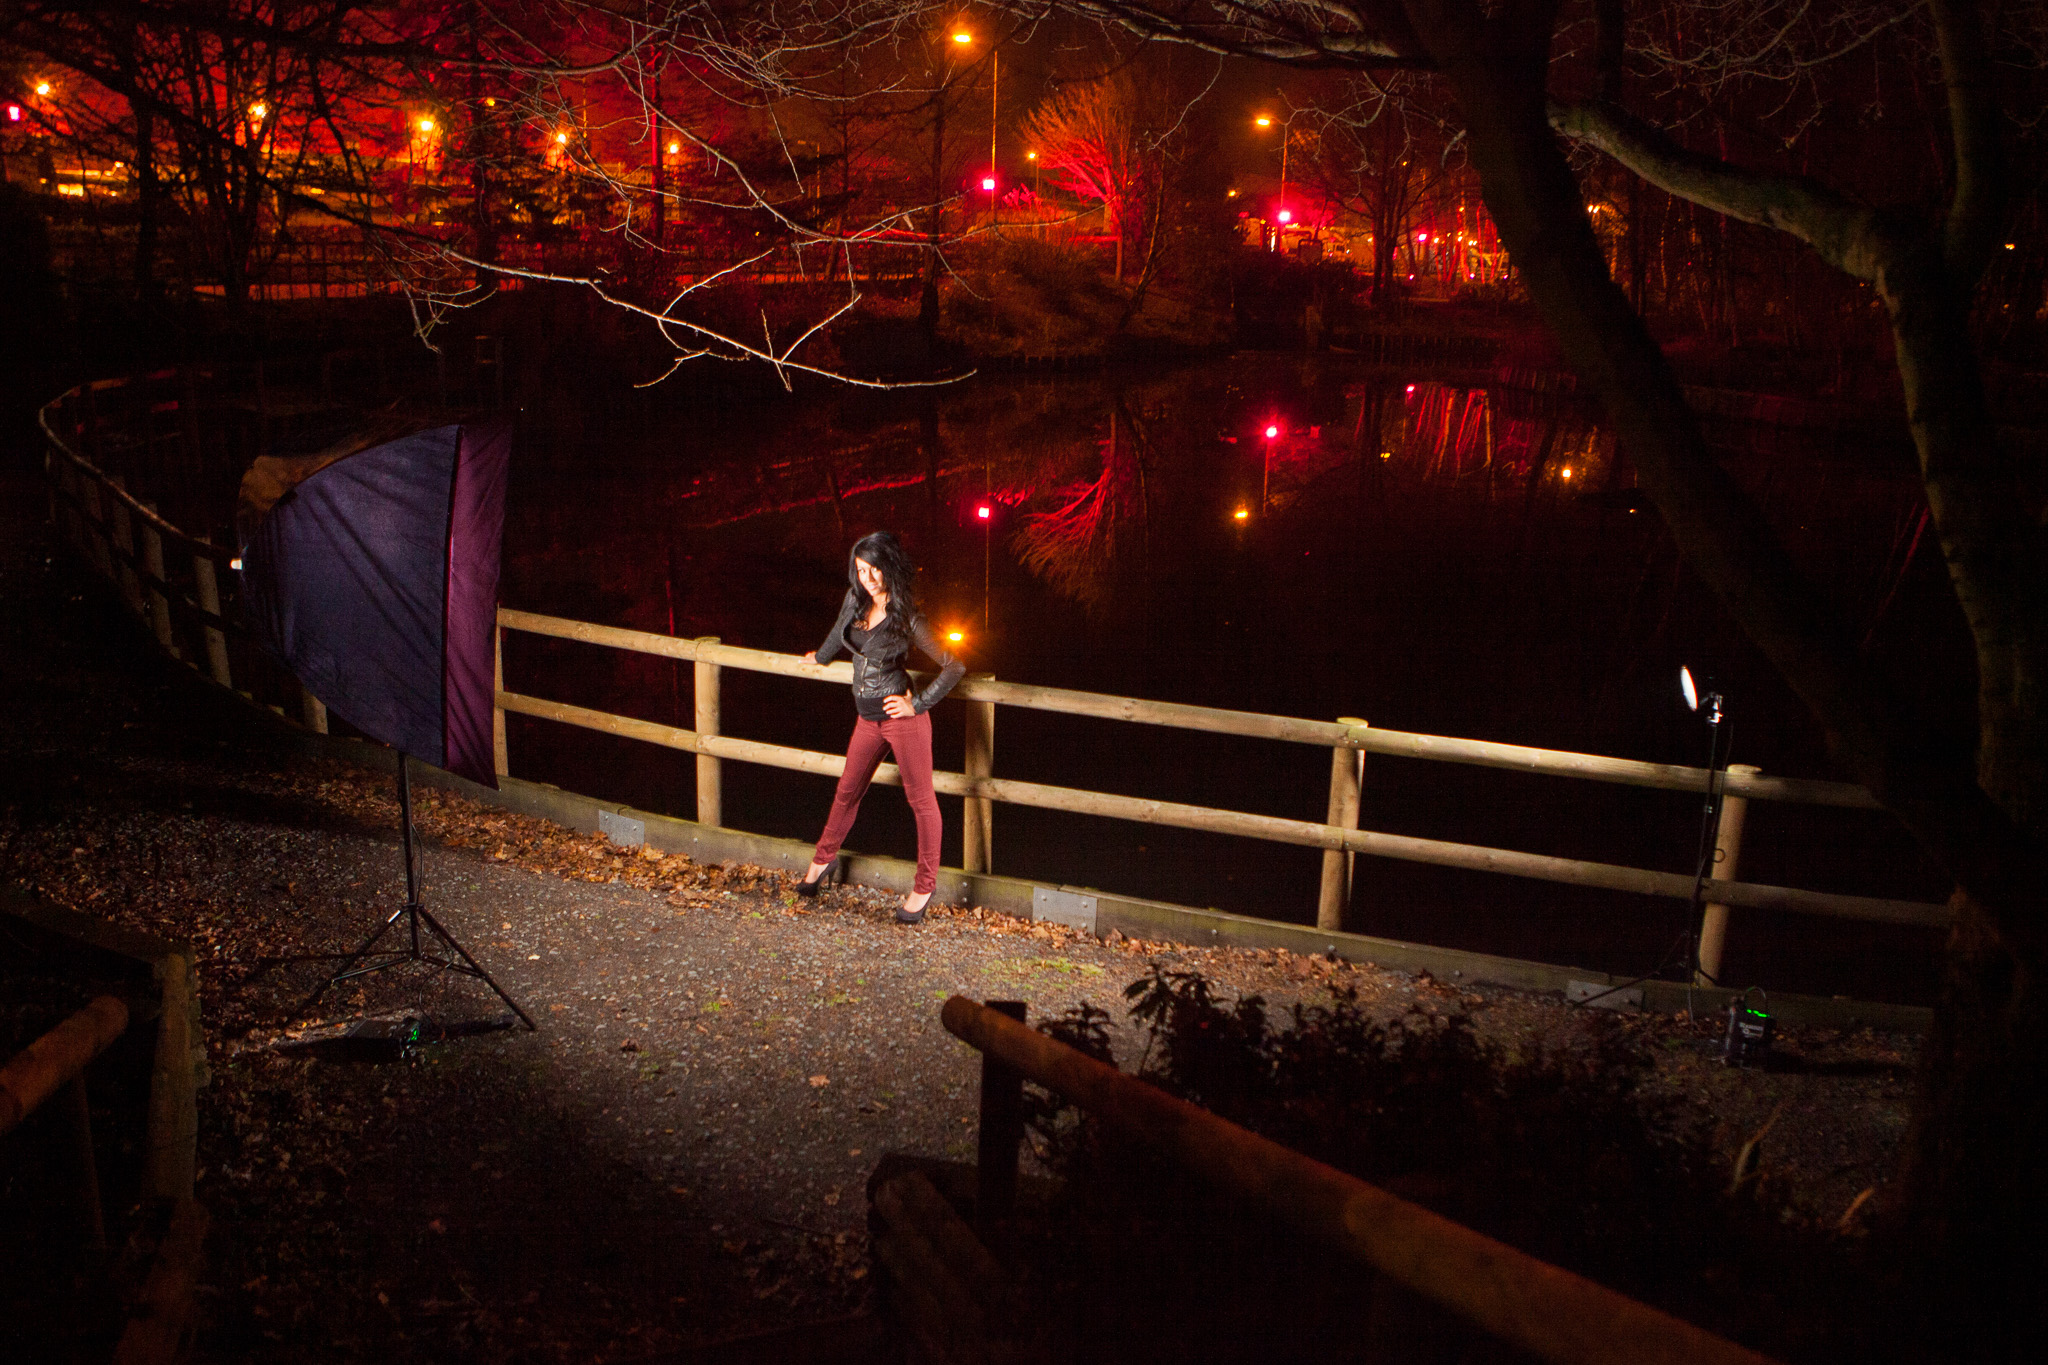
I came up against such a situation a couple of weeks ago, so here’s what I did to stop my model, Sarah, from floating in a sea of under exposed blackness.
The image above was taken out by Pendigo Lake at the NEC near Birmingham in pitch darkness. So dark in fact that I had to ask friends to light the area with mobile phones while I set up. Without some artificial light on her, Sarah wouldn’t register at all.
Before the Quadras got powered on though, I found my ambient exposure. If I went straight in with flash, I’d have ended up with a good exposure on Sarah but a dark background. I wanted the coloured lights on the other side of the lake as my background so I left the strobes off for now, slowed my shutter speed and cranked up my ISO. The sweet spot turned out to be 1/20th second, f/4 at ISO 1600. Obviously shooting 1/20th handheld is usually a no no but when using strobe, the very short duration of the flash will freeze anything it hits. Plus, as there was no ambient light falling on her, I knew Sarah was going to be free from any motion blur from camera shake.
Then came the lighting on Sarah: A Westcott 50″ Apollo softbox (review of this coming soon) camera right and a gridded strobe camera right, slightly behind her.
As you have to start somewhere I set both packs to 1/4 power and fired off a test – let’s just say it was a little over exposed! Even at minimum power (25 w/s) on the ‘A channel’ on the packs I was still going to end up with a glowing Sarah if I wanted to keep the detail in background. I could have closed my aperture or lowered my ISO 2 stops to restrict the amount of flash getting in but that would have forced me to go to shutter of 1/5th of a second – slower than I was comfortable with.
So instead I switched my Quadra heads over to the packs “B channel” and dialed all they way down to 8w/s – just enough power to balance the ambient light and produce this set of images.

 The final job was a little colour toning and general exposure tweaking.
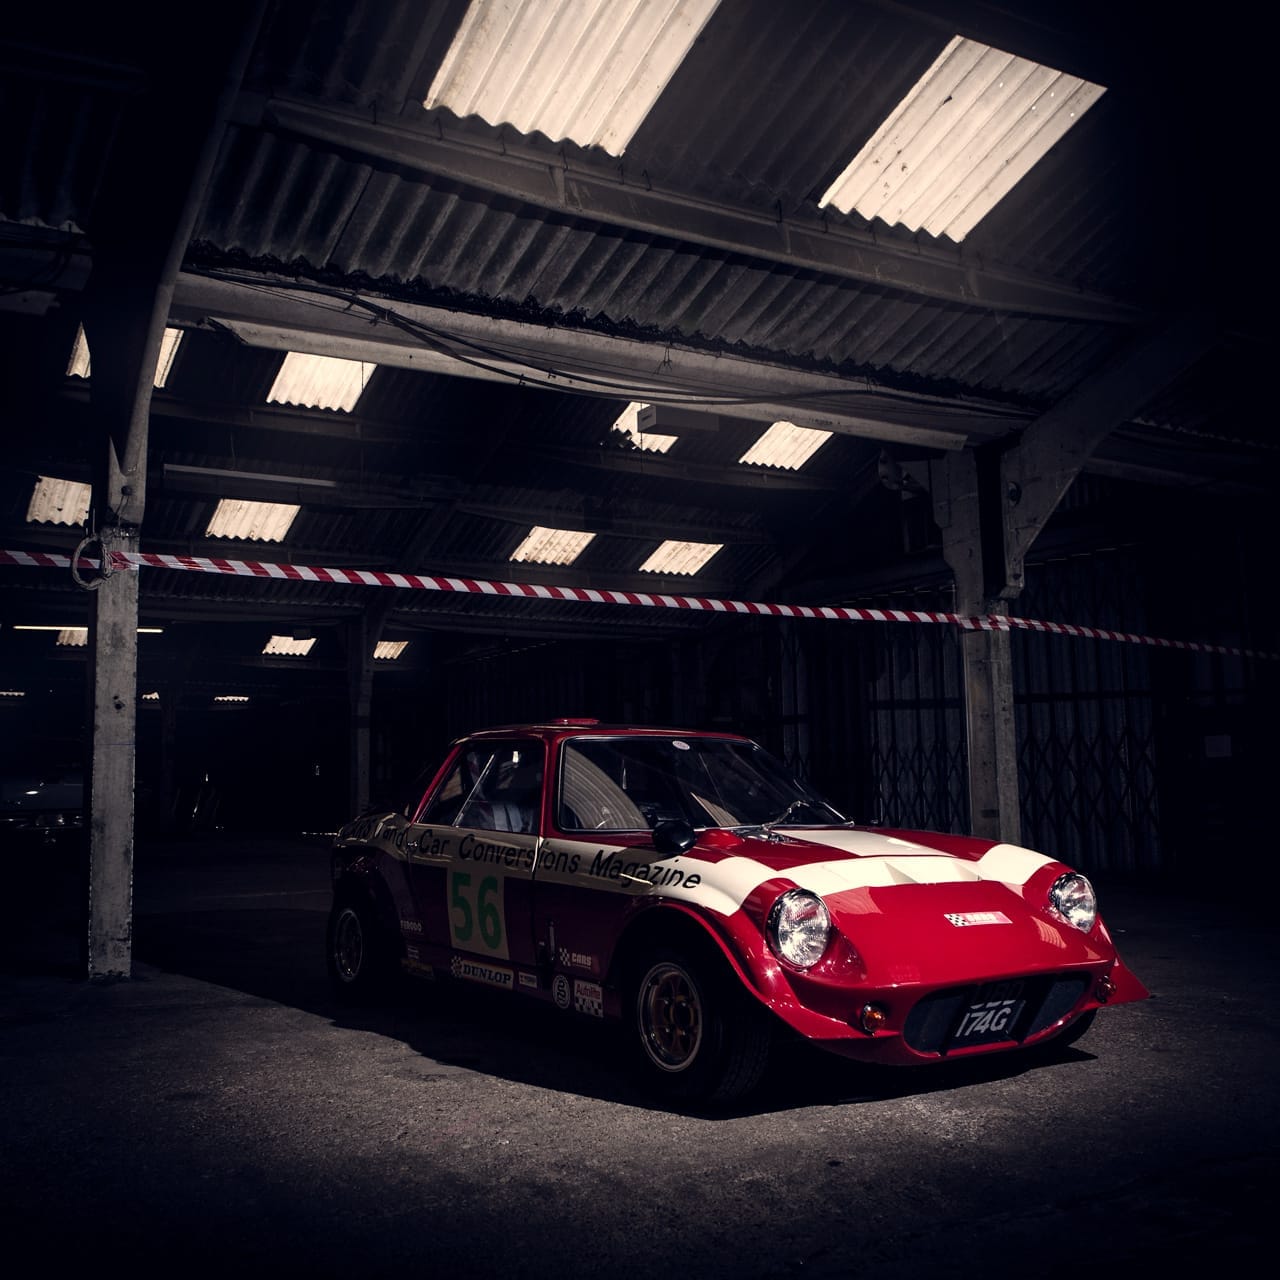


Recent Comments