Tuesday’s Photo of the Week involved adding a skyline as a finishing touch. For this image, the Skyline was the centre of attention.
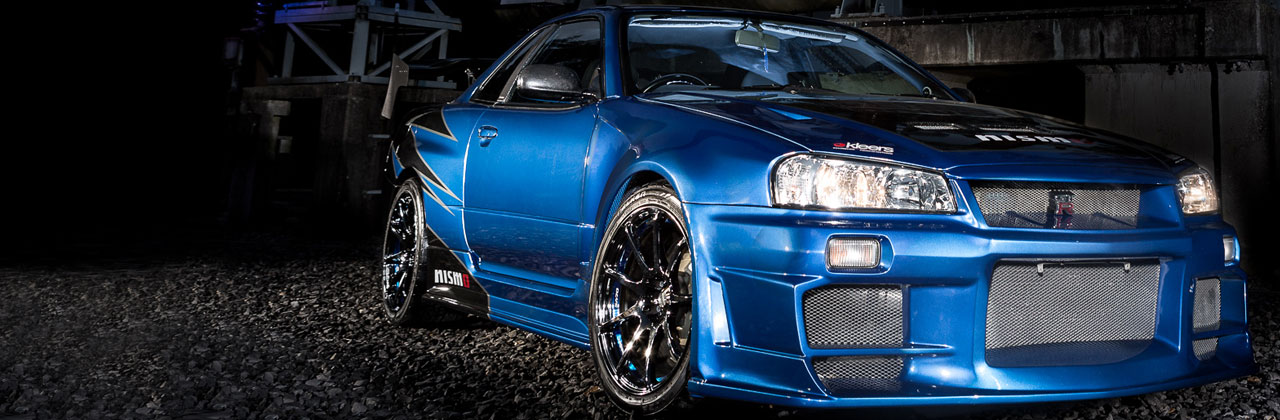
This is The Sextons Skyline, aka SKY101, aka The Heff’s car and if you have spent any time at car shows around the UK, you will have seen it before. I’ve known Chris, the owner, for a few years and when he called me and told me about a location he had in mind I was heading south the next weekend.
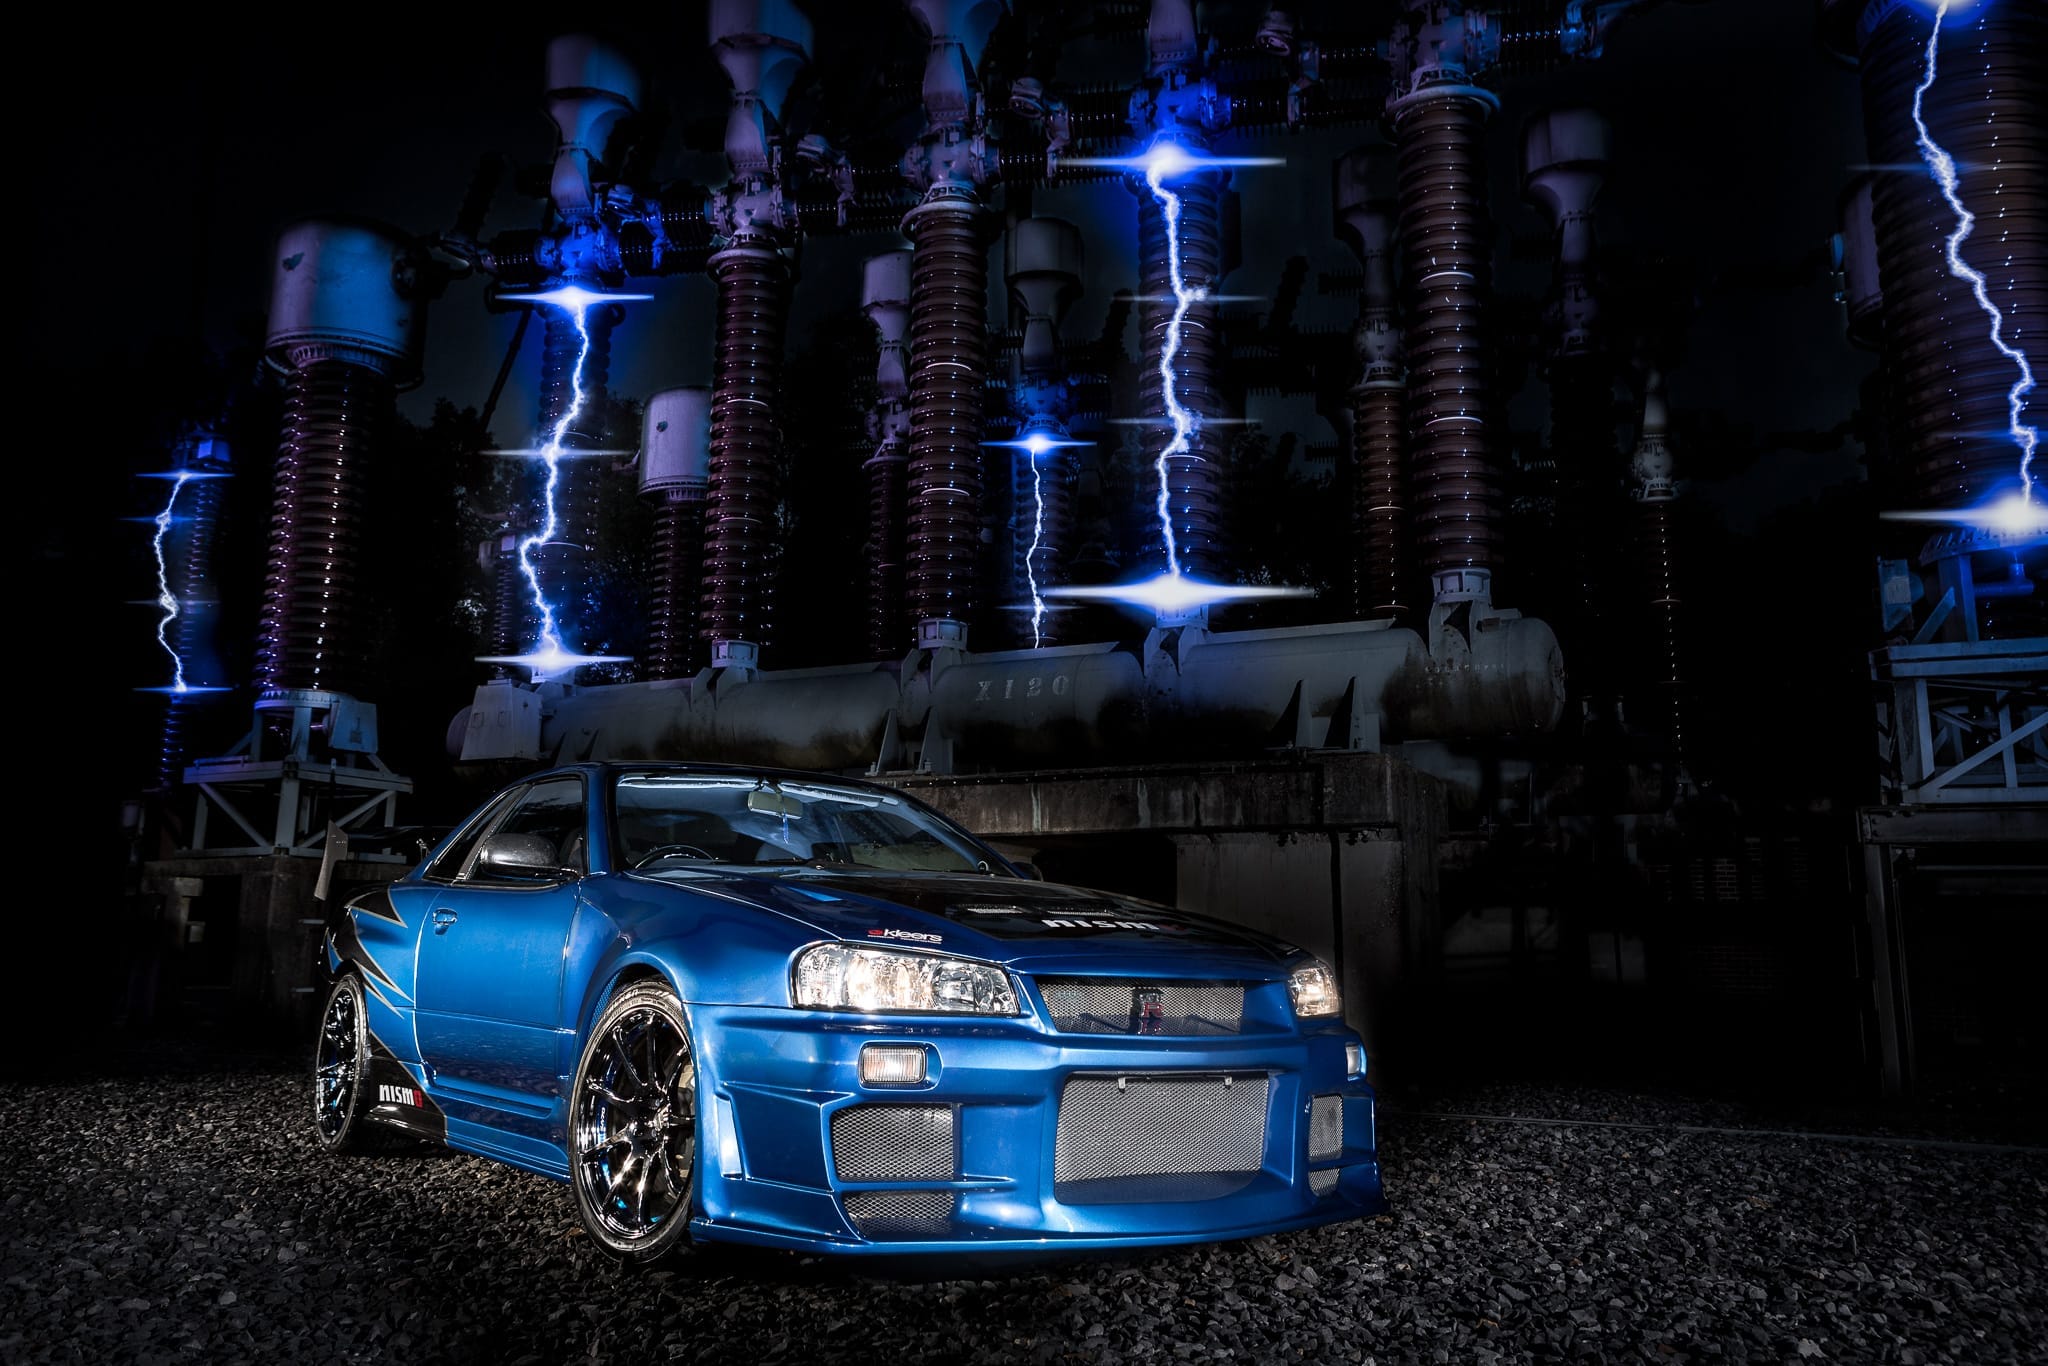
With a car this aggressive looking and a location so dramatic, it would have been wrong not to go all out and make the shoot quite theatrical. Because of the location I was working with as little kit as possible so this whole shot was lit with a single strobe and even though my SkyPort radio triggers worked flawlessly, if I raised my Elinchrom Quadra any higher than 2.5 metres, it started to flash uncontrollably. A little scary! Considering the substation typically handles 400,000 volts of electricity, I was impressed I didn’t have to fall back to the old flash sync cable I’d packed just in case.
Despite the huge amounts of electricity involved, the substation handles it in a very understated way. You can hear the crackle and feel it in the air but photographically speaking, there not much to see, so I hammed things up a little. OK… a lot!
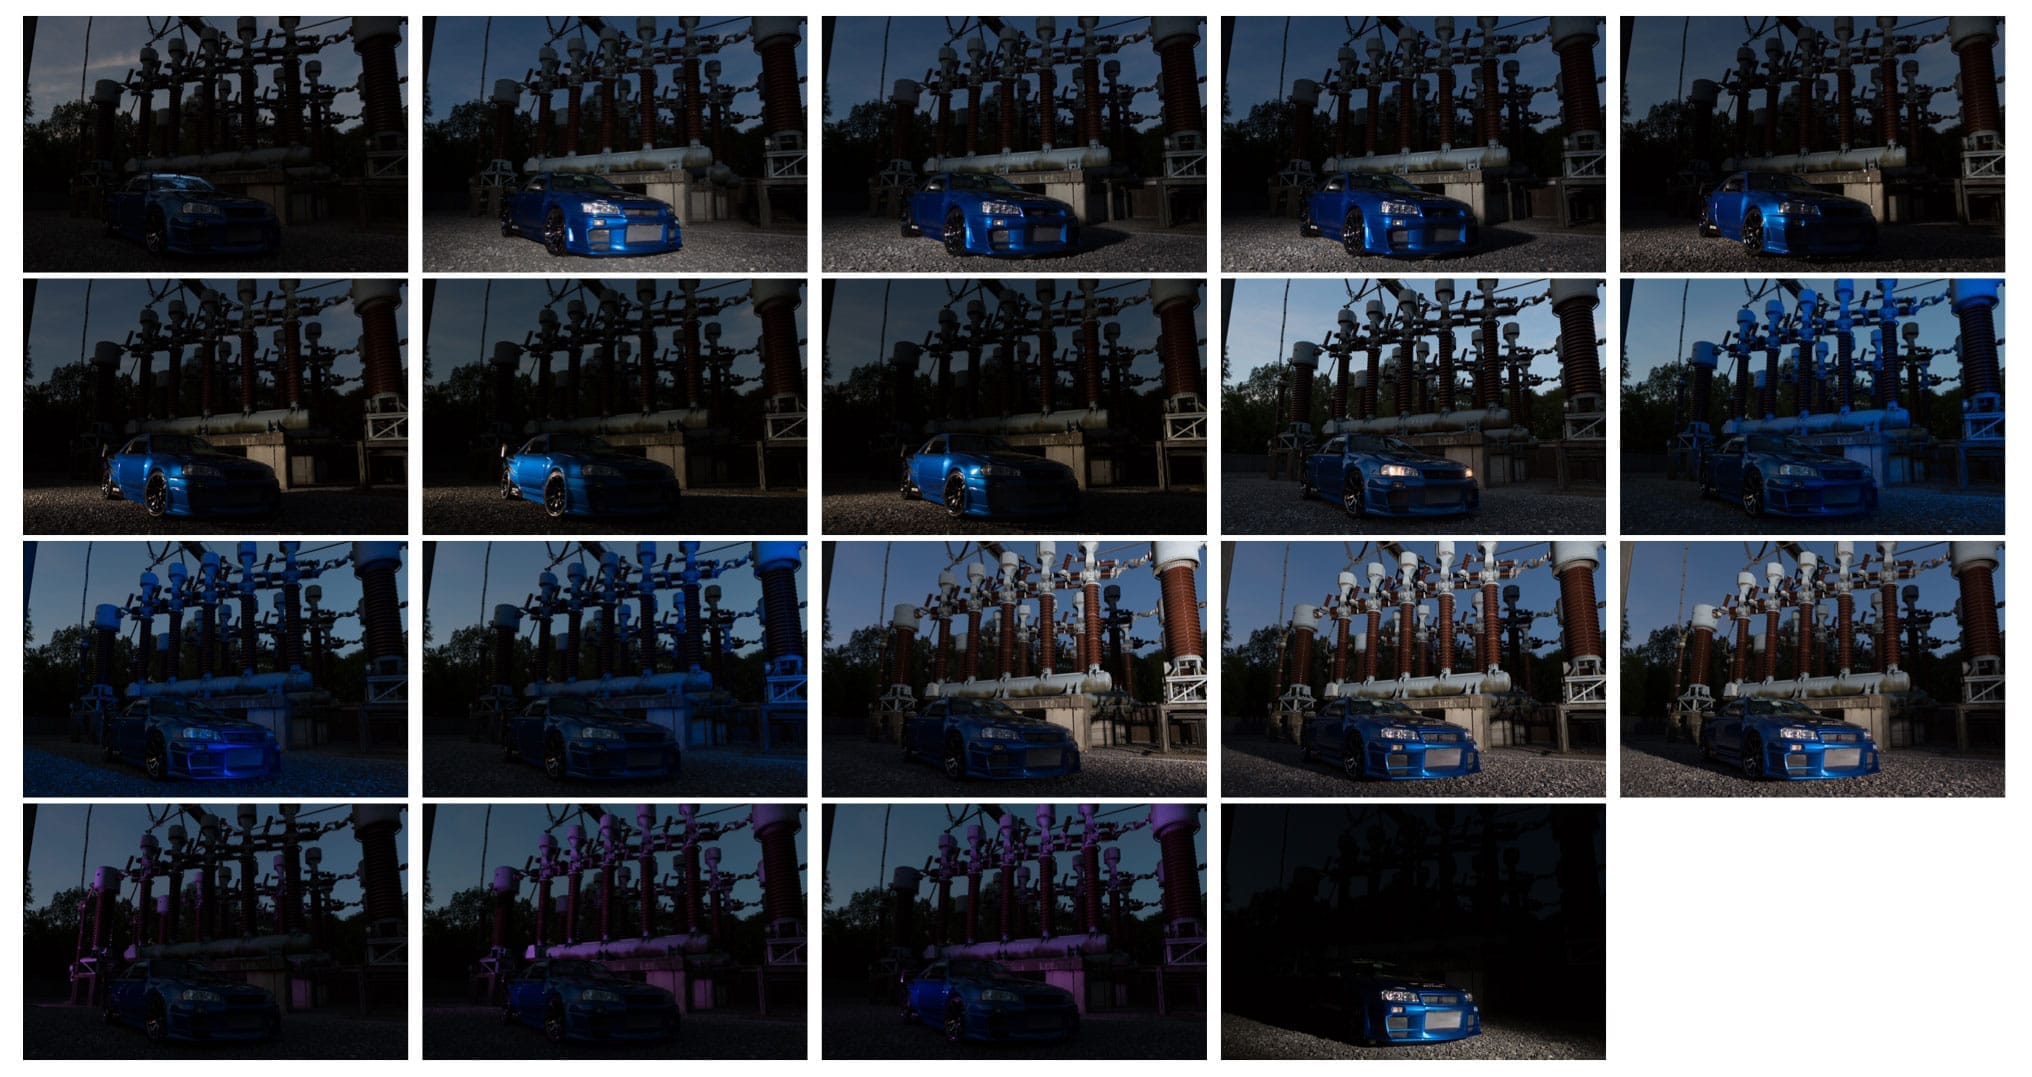
Because I was working with just one strobe, I had the camera locked in position on a tripod as I walked around the car lighting each panel individually with a fairly tight beam of light from a Maxi Spot reflector. The plan was always to shot lots of individual images and then layer them in Photoshop afterwards. To save me walking back and forth between the camera and the light I was using a wireless shutter release to speed things along.
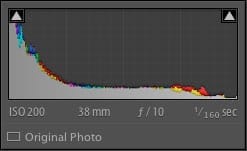
As for camera settings, if you look at the selection of images below you can see I was under exposing the ambient light by about 3 stops and letting the flash do its work. I also shot an exposure just for the headlights and another one with more ambient light in case I needed some fill for the deeper shadows. Then finally I lit the background, gelled purple from the left and blue from the right to give a little theatre.
Once I knew I had all everything I could possible need in the camera, off to Photoshop I went. I painted in the lit areas of of the using layer masks and then went to town on a Frankenstein style background. Here’s a screen capture of the final build up.
This week’s photo comes from an advertising campaign I shot a couple of years ago for the insurance company Performance Direct. It was piece of work that was born out my ethos of working for free to build relationships but that’s another blog post…
The brief was to shoot a range of images to be used in adverts across a range of magazines, from prestige and classic to performance and modified. The lovely Hayley here was the face of classic insurance.
The whole shoot took place in a classic car club in east London, basically a large building filled with a vast array of amazing cars.
Definitely not a studio so in order to minimise clutter in the background of the shots I underexposed the ambient light by quite a bit. My sync speed of 1/160th (the 5D MKII would have managed 1/200th, but the cheap eBay triggers I used at the time were more reliable at 1/160th ) and f/10 did the job nicely without taxing the my pair of Elinchrom BRXi500’s. In this case, the main light is camera right in a 50″ Westcott Apollo softbox and there’s a gridded separation light coming from camera left to lift Hayley’s dark hair and right shoulder off the background.
As you can see above, the shot I delivered to the client was left pretty much how it came out of the camera as they had a team of designers who would be working with the image. All I did was remove a few specular highlights from various bit of chrome trim on other cars off in the distance.
For my portfolio I wanted something a bit more striking so I dropped in a city skyline to finish the image off. Once the tones were matched, the trickiest part was distorting the image so everything looked in perspective. Here is my version of the final image.
Last weekend saw Trax come to Silverstone and another chance to be to shoot in the famous Formula 1 pit lane. No planning, no preparation – just a beautiful car and an unlocked garage. Rather that just hitting you with the eye candy, I thought I’d de-construct a few of the shots and tell you what I did to get them. As always, start simple. At 1/160th (a safe sync speed on the 5DMkII using Elinchrom Skyports) at f/6.3 all ambient light was killed allowing me to add my own light. When shoot a car, you can get away with hard light, so this was lit with bare Quadra’s either side.
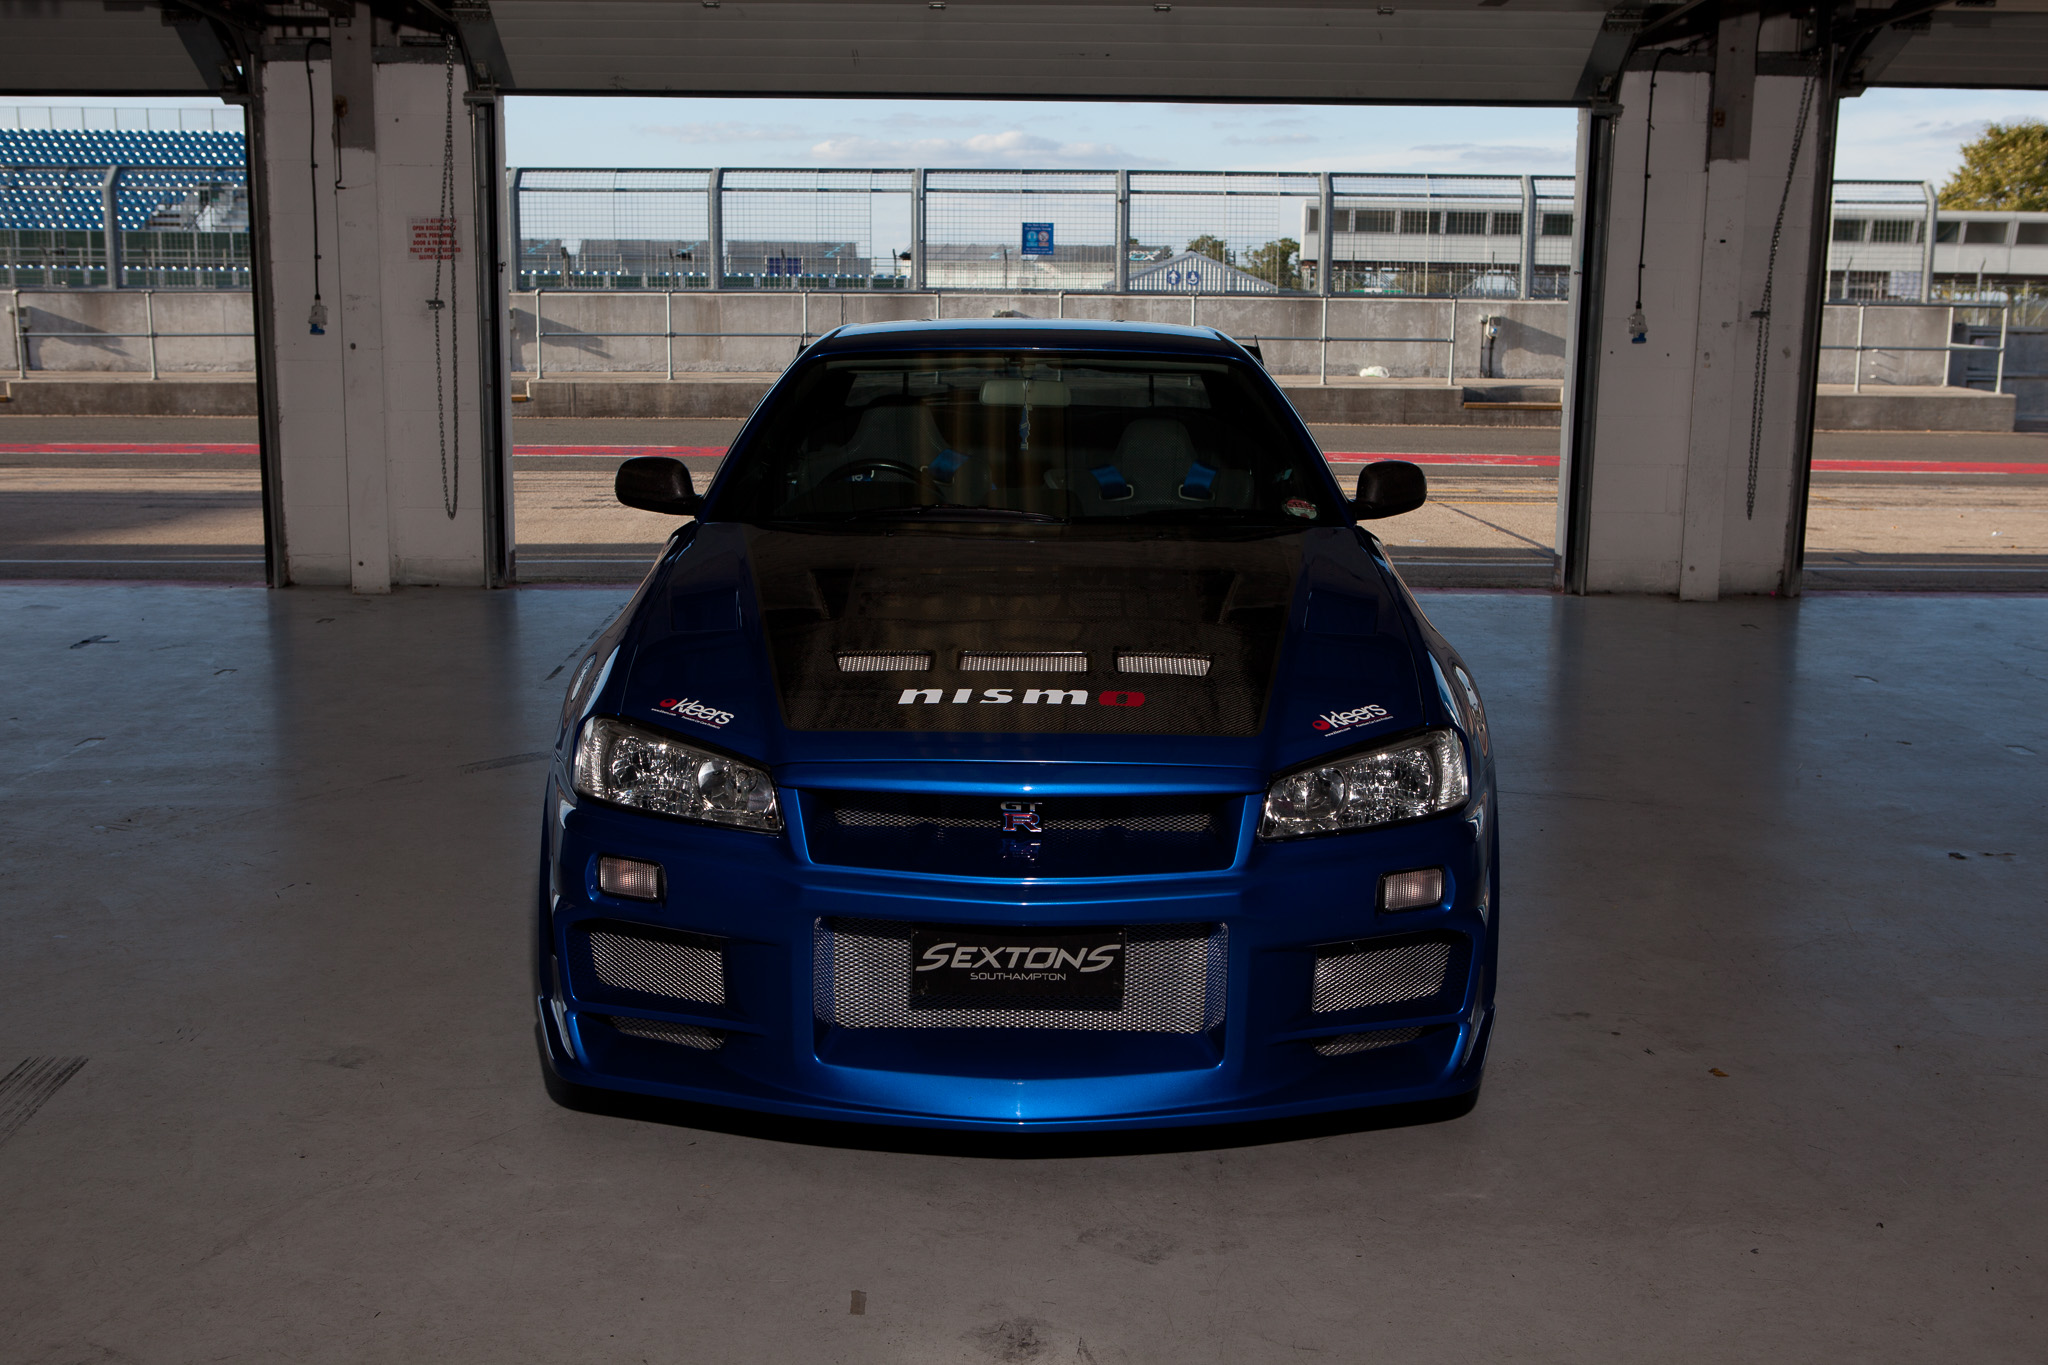
With the doors opened, and the car turned around, I exposed for the scene outside (1/160th @ f/8) to give the picture some context, then started adding flash to bring it up to the same level.
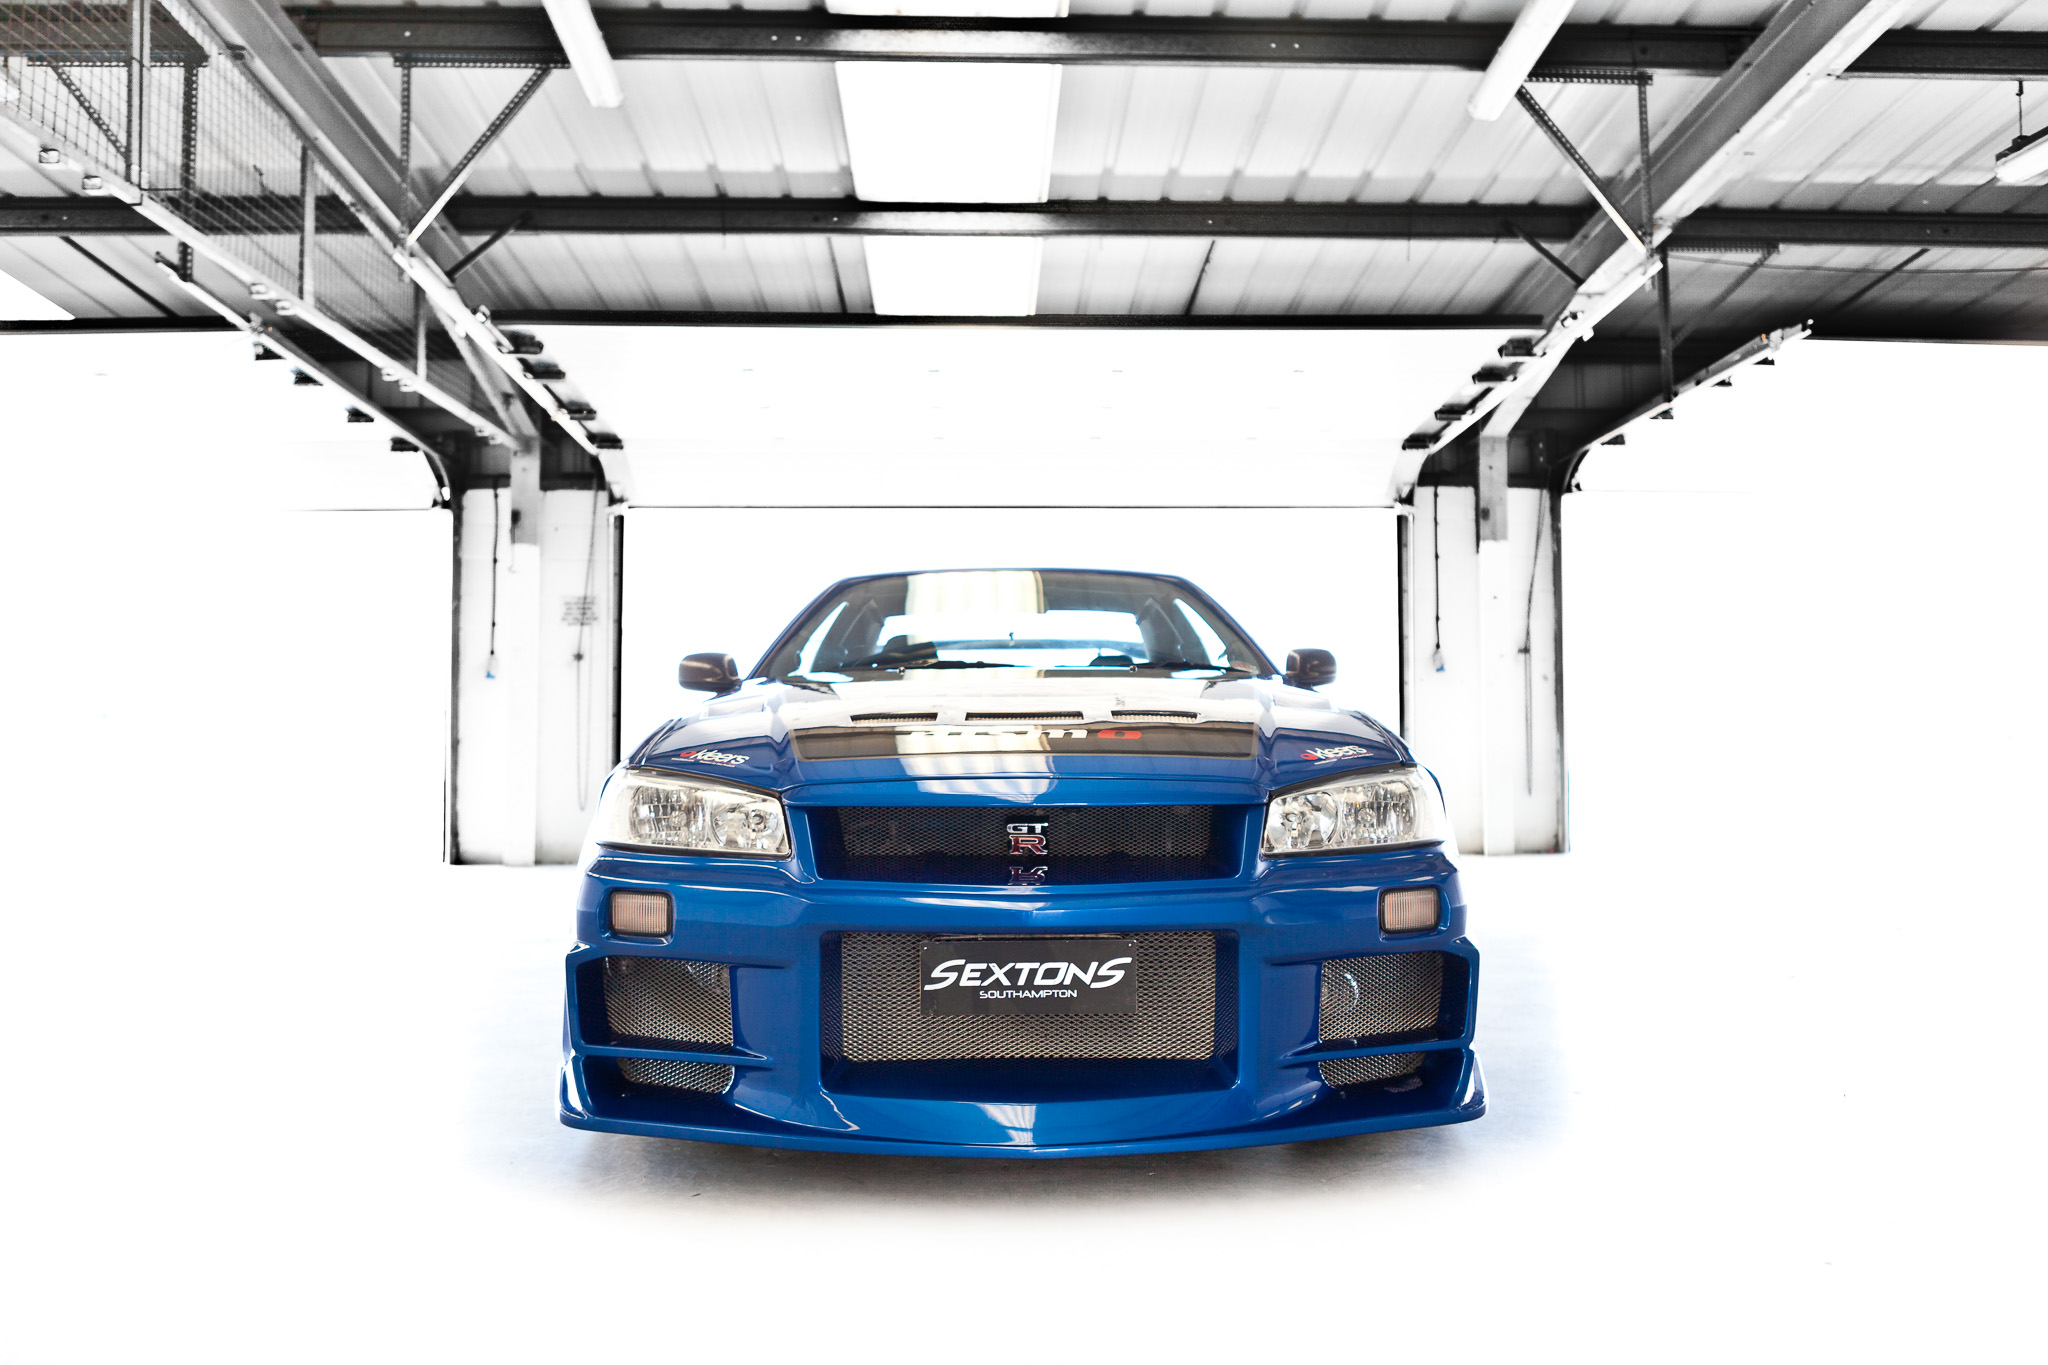
I quickly realised this wasn’t going to be very exciting though, so I killed the flash, opened up to f/2.8 and kept slowing the shutter until the car was properly exposed and the bright pit lane blew out. A bit of desaturation and floor clean up in Photoshop yielded this:
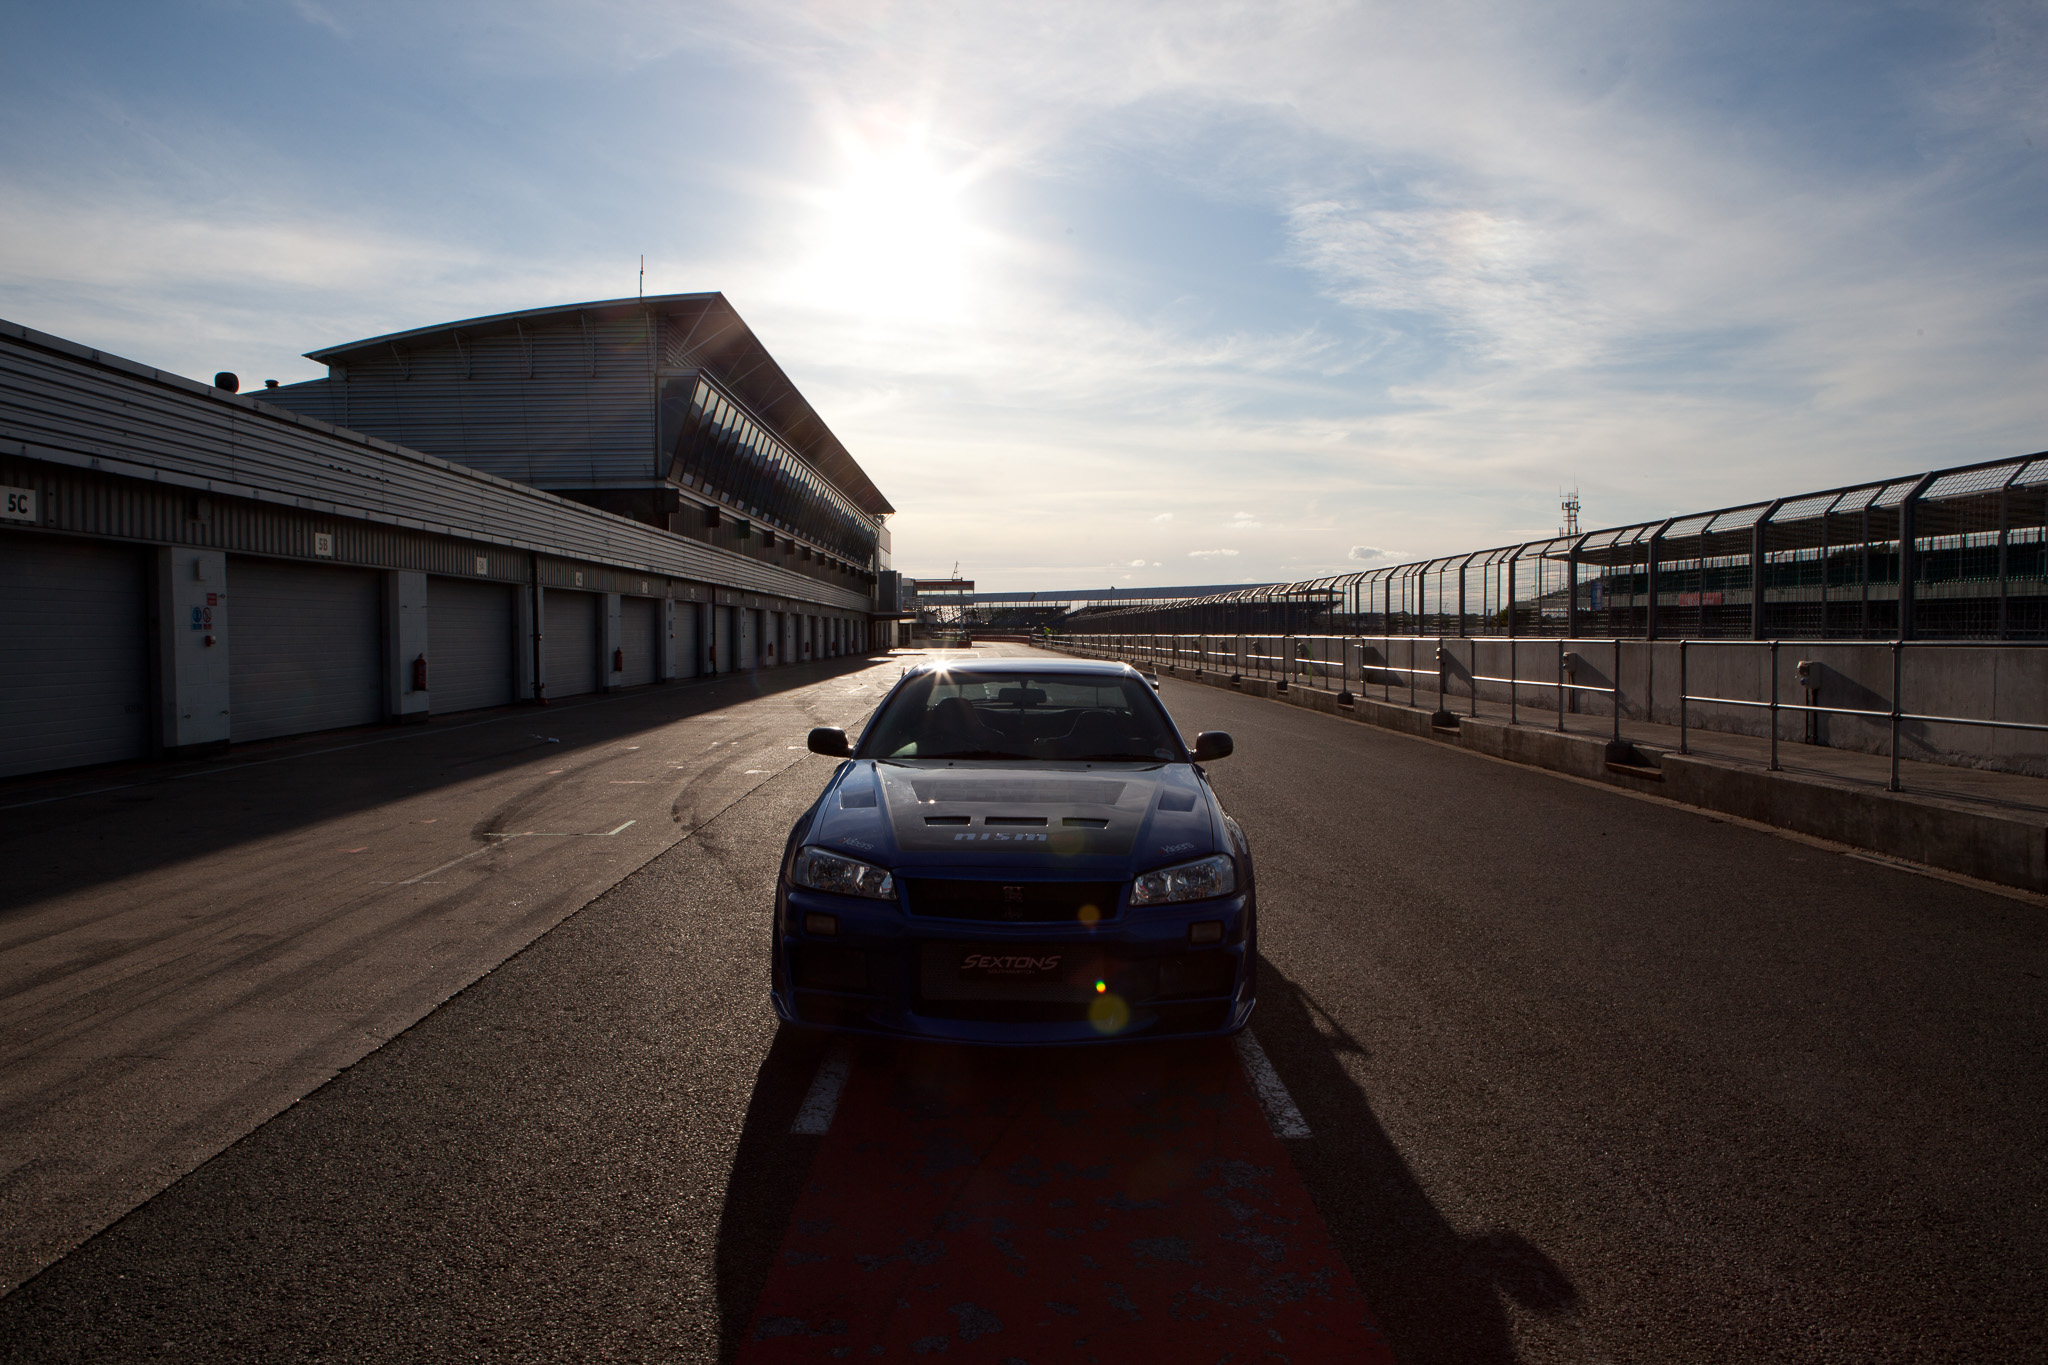
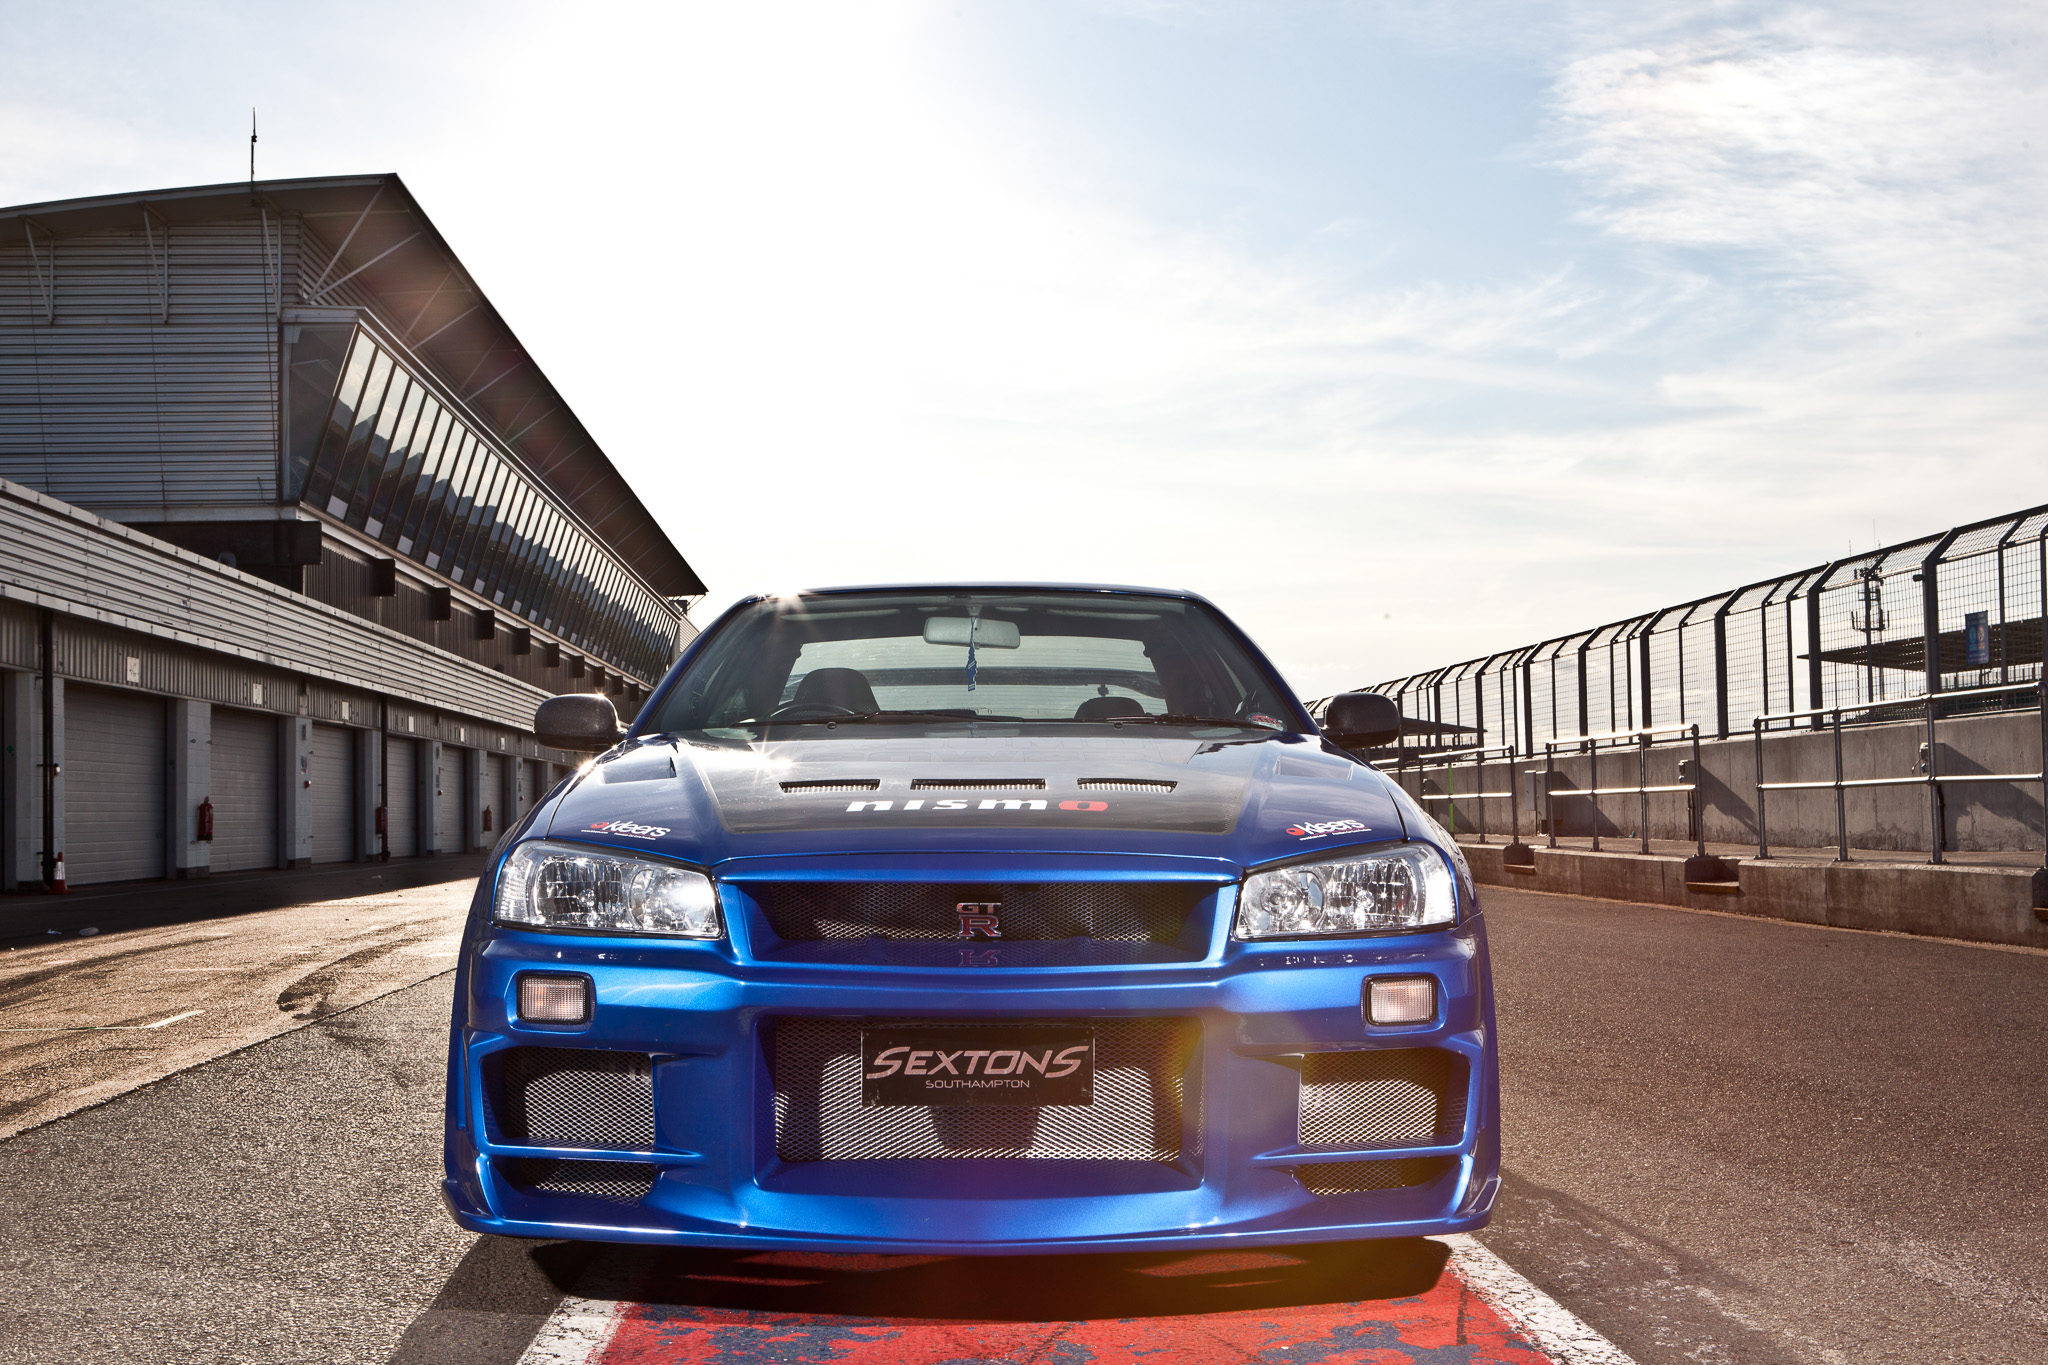
Time to move outside and shoot down the pit lane using the sun as a back light. To control to sun, and be able to keep it in the frame I had to stop down to f/16 at 1/160th which meant I had to crank my lights to full power (400WS) and bring them in fairly close.
If I’d had my 18cm reflectors I would have had a bit more leeway and would have been able to shoot wider. You can see here how close I needed the lights.
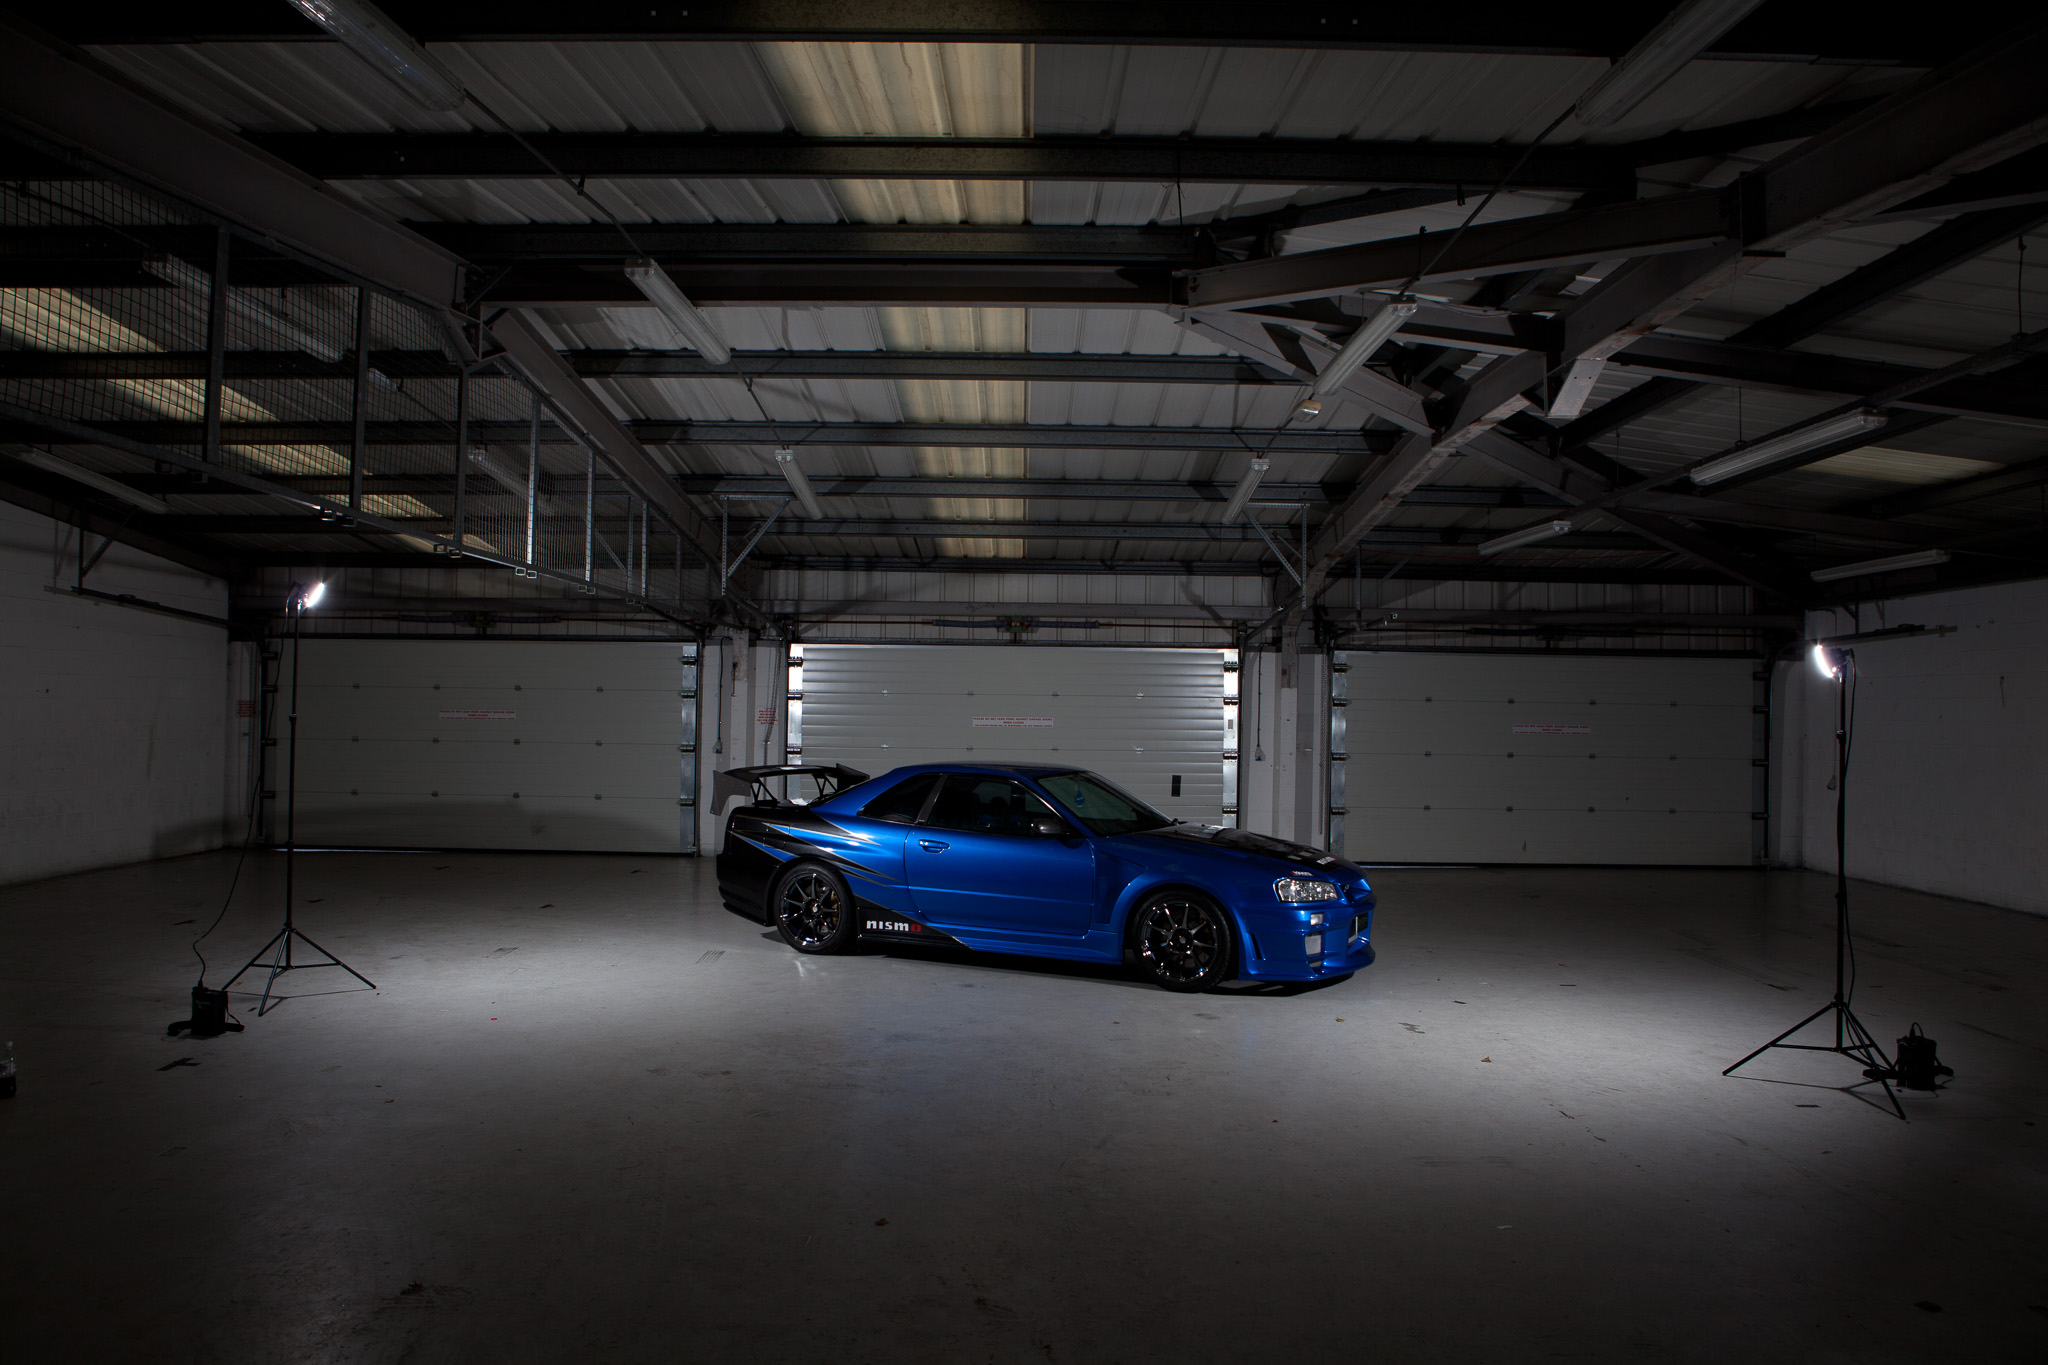
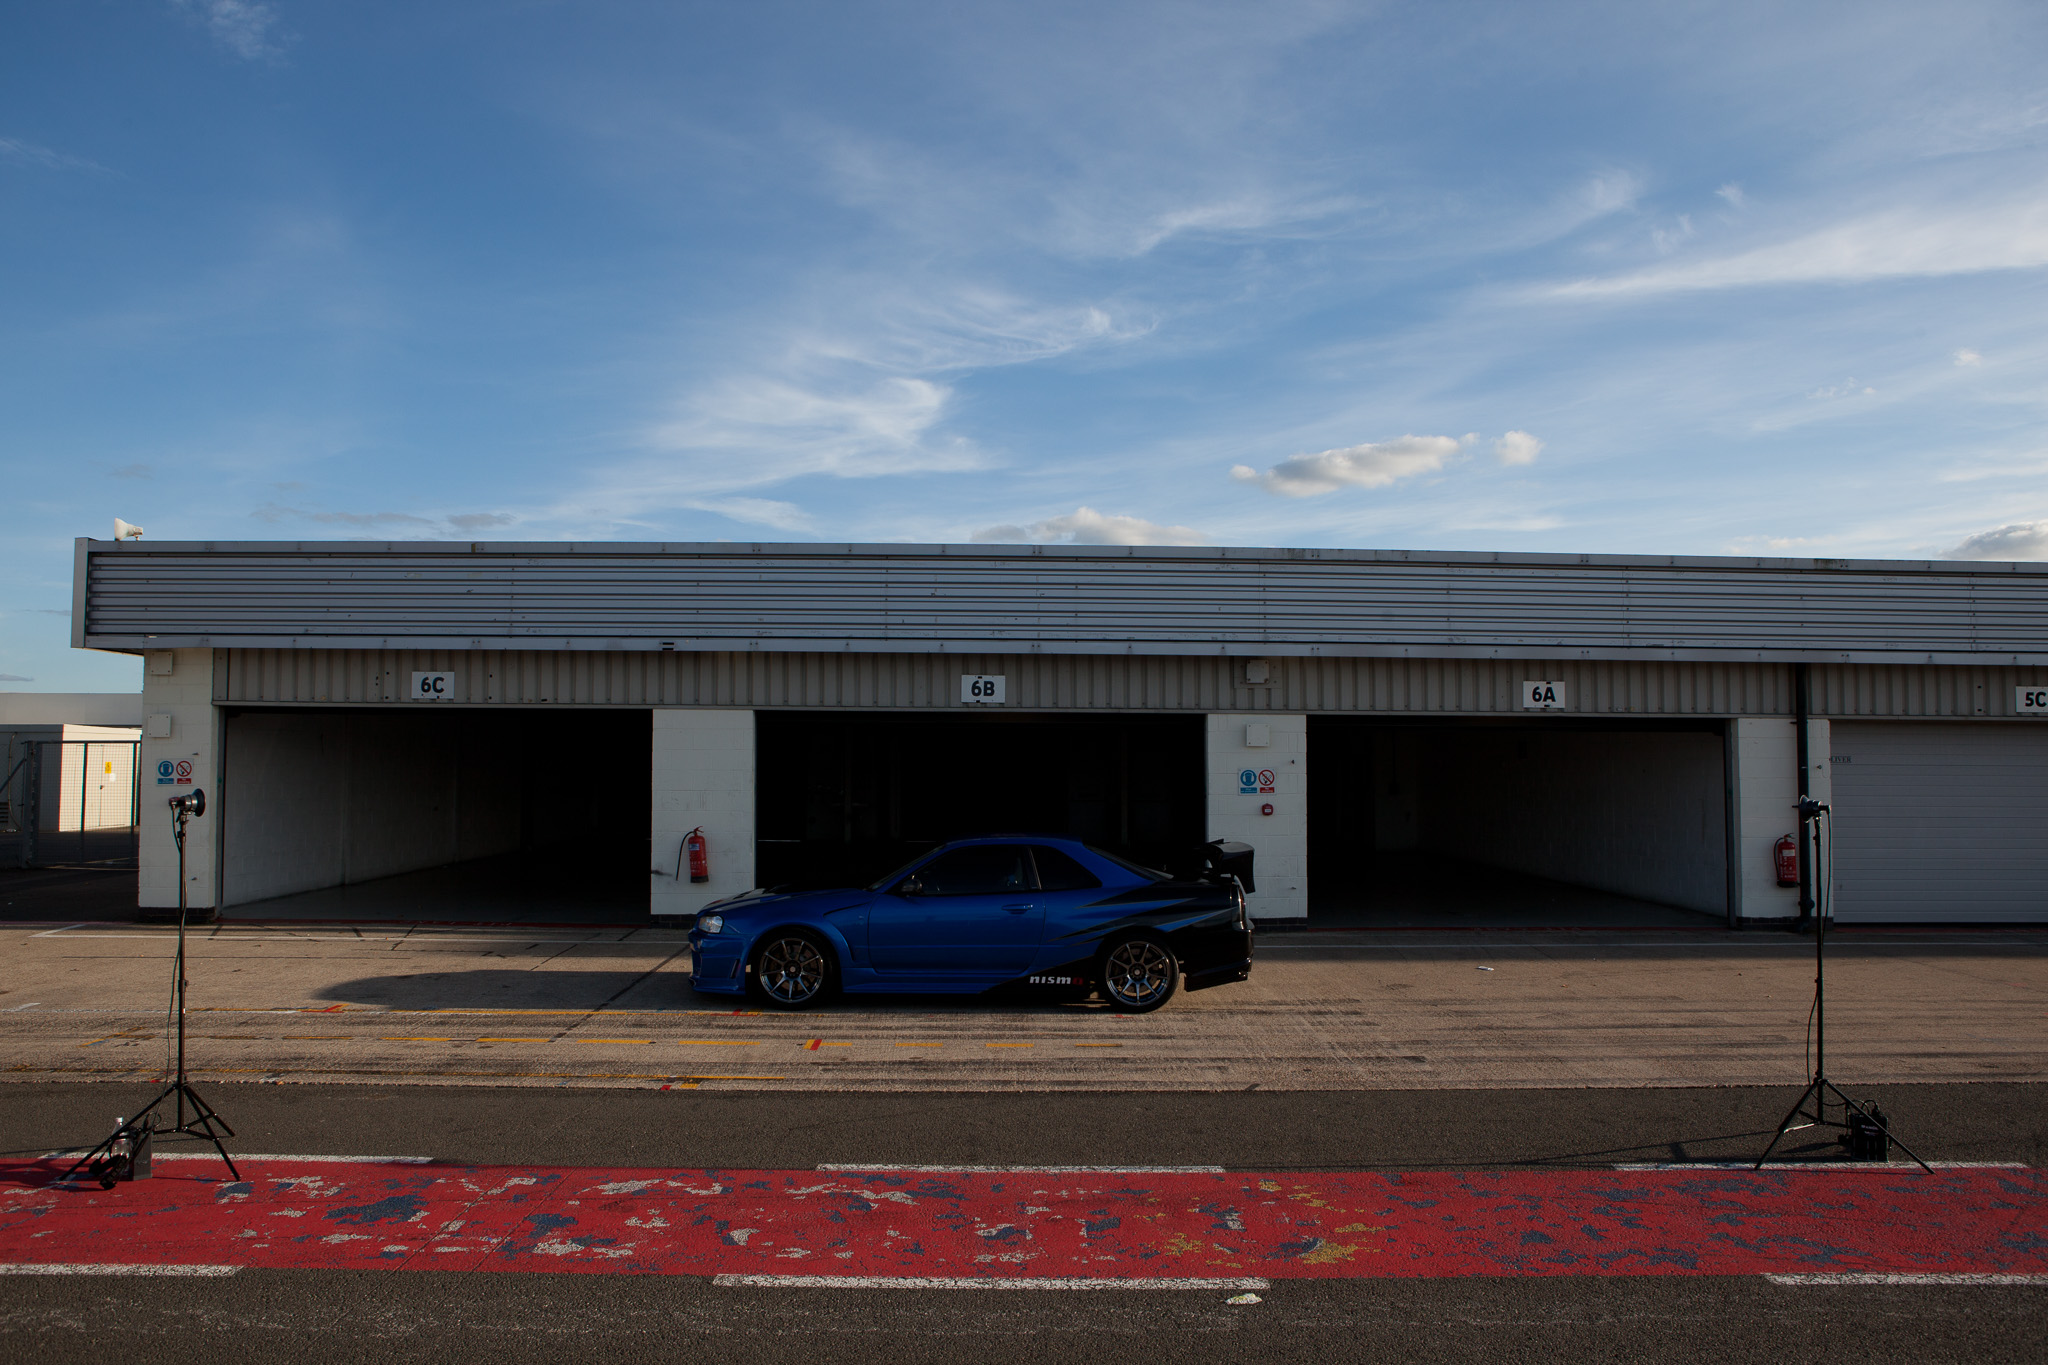
Then at the suggestion of Chris the owner, we tried a wide, side view as if the car had just driven in for a pit stop. I knew it was doing to be hard to light, but what the heck! Once again I set my exposure for the ambient light and under exposed by about 1 stop to keep some saturation and detail in the blue sky (1/160th at f/9 this time as the suns not in the frame). Here’s the shot unlit.
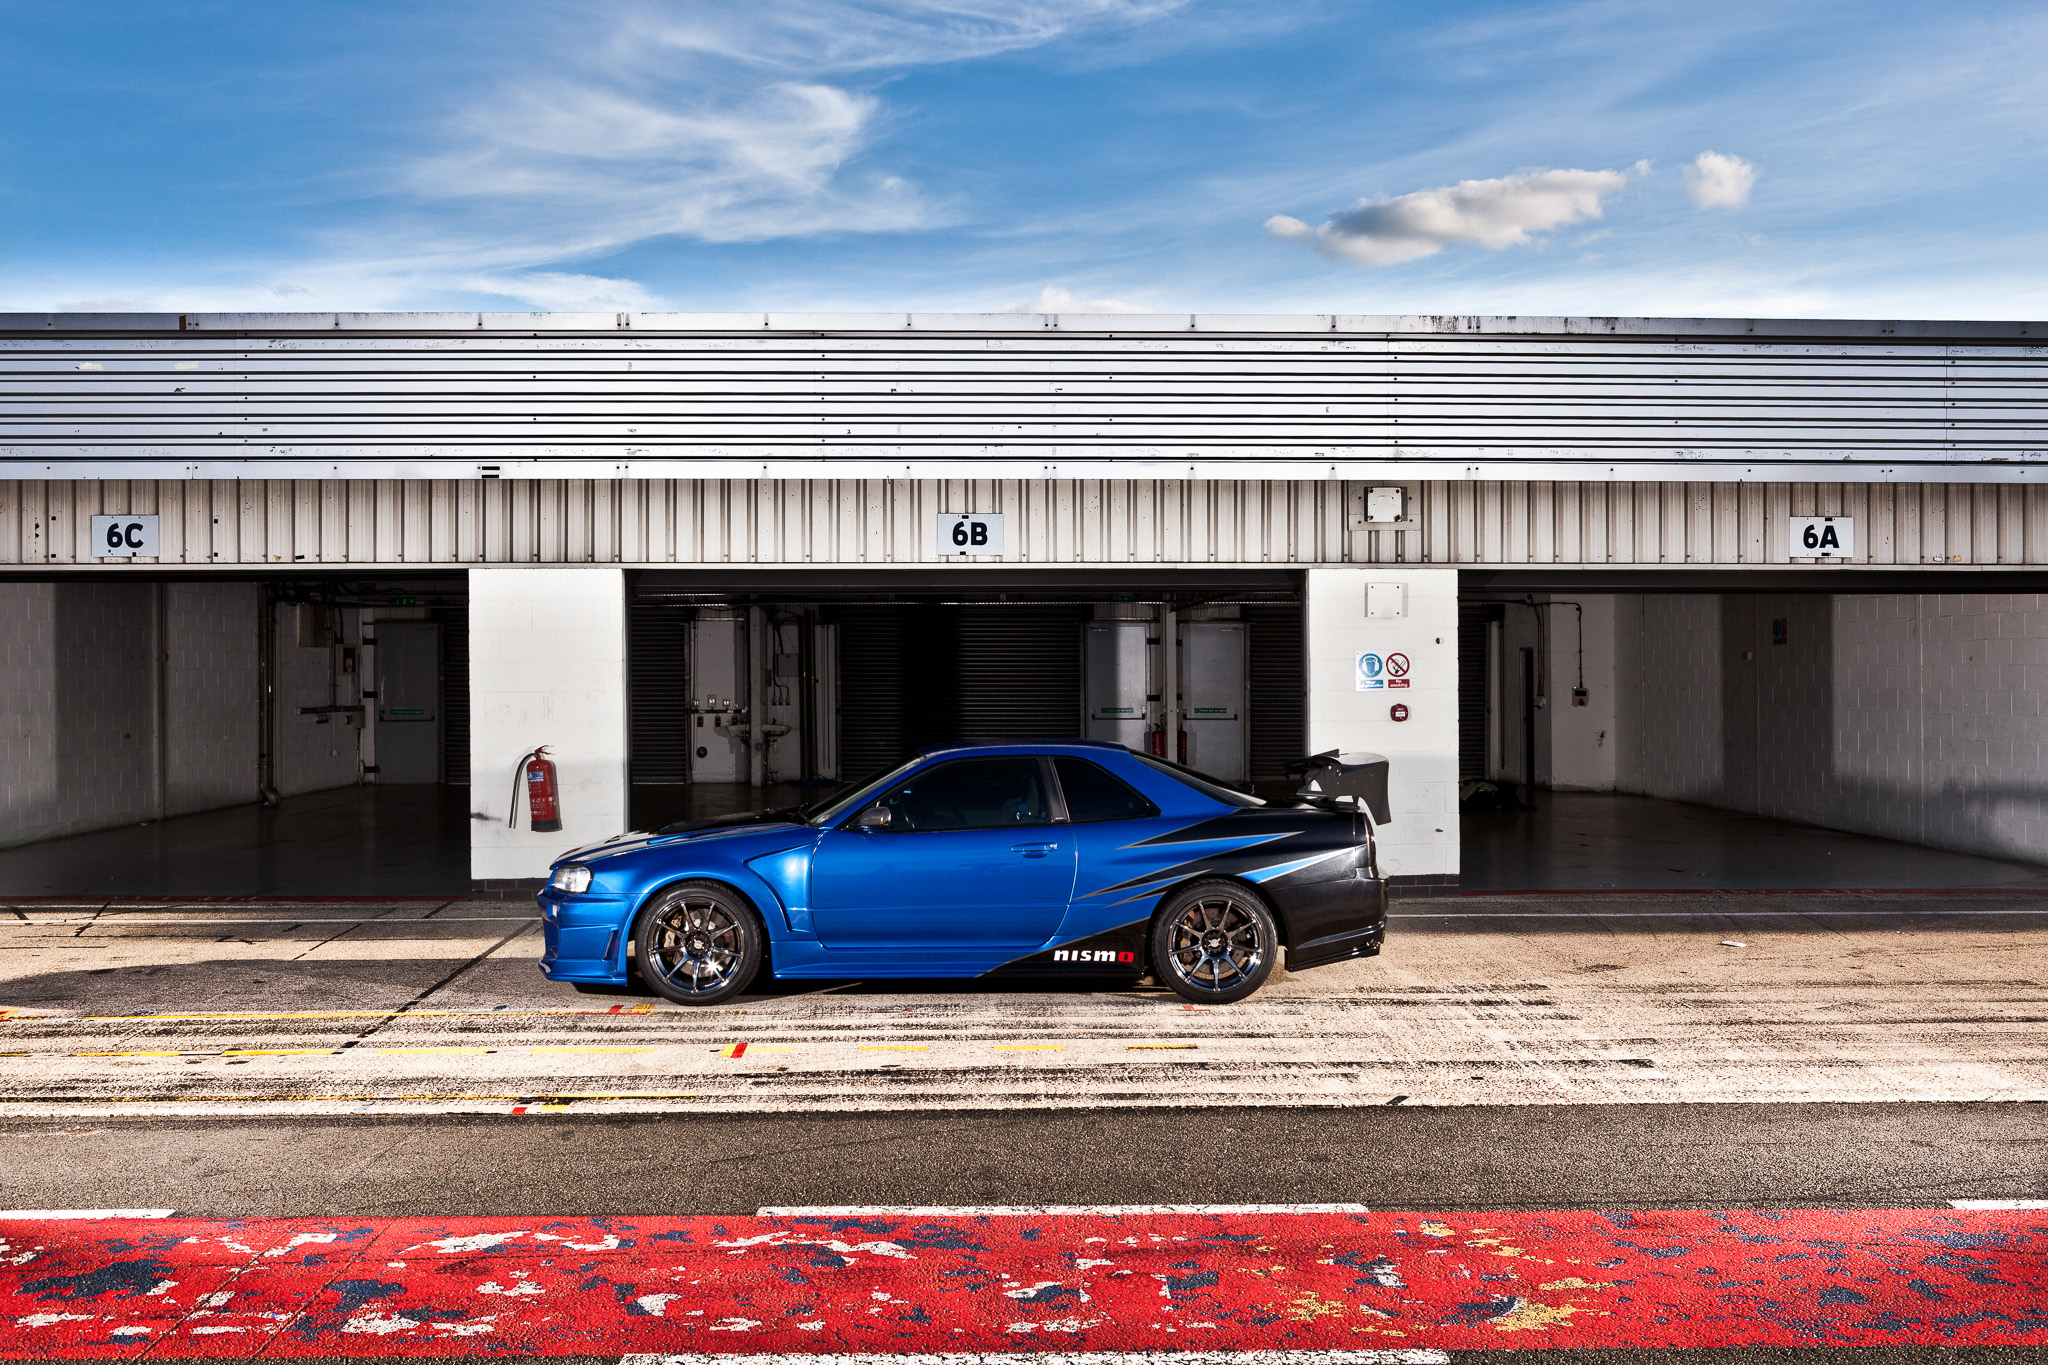
And with the same settings but with the flashes firing at full power again. I had to have the lights in a little closer than I wanted meaning I couldn’t quite get the end walls of the garage in shot. I’m rearranging my camera bags this weekend to make sure I always have the 18cm reflectors and some grids with me!
Everything in photography is a compromise and working within the limitations imposed by location, subject or gear is all part of the challenege. I’m still happy with the final shot:
Enjoy the final images, and as always, click on any image to see the big, high quality version.


Recent Comments