I’ve been getting some question sent to me lately on the blog, Facebook and Twitter, which is brilliant. It means I can turn them into posts so everyone can hopefully benefit from the answers.
First up was Matt with a question about lighting:
Hi Simon
I found your site originally when I was looking into light painting, then I ended up here again when I was looking into different portable lighting systems. Impressive work all around! It’s definitely inspiring me more to give lighting a proper go too.I firstly ended up looking into Alien Bees or Einsteins, but once they’re imported to the UK the cheap price point quickly disappears.Anyway – I’m just curious, would you still recommend the Quadras you have? I’ve been looking into Profoto and Bowens too, it’s just tricky to decide between them all. I’ve found a couple companies that seem to be designing similar ones to Paul C Buffs lights, or at least at that price-point, but there’s practically no reviews for them and I don’t really fancy being the first to try them either.
There’s plenty of people aswell as yourself that love Quadras, so that’ll definitely make it easier to part with the cash in the future.
Cheers! Matt
Hi Matt
I know what you mean about the Paul C Buff stuff. I’d love a Vagabond Mini and a couple of Einsteins but you’re right, by the time you get them to the UK the price is far less attractive.
In answer to your question, yes, I still love my Quadras, there’s so much about them to like. They are small and light, pack a decent punch and the built-in Skyport radio triggers are very handy. The Profoto packs and a heads are gorgeous but I just couldn’t (and still can’t!) justify the cost. And to be honest they aren’t as compact and portable.
If you are just getting in to lighting though, I’d say start small. Buy some used hot shoe flashes and some cheap eBay wireless triggers and learn to use them in manual. Then, when you run out of power and find yourself limited, step up to something bigger.
Bear in mind you can use any constant light source to light paint with though. It’s a great chance to get all McGuyver with a torch!
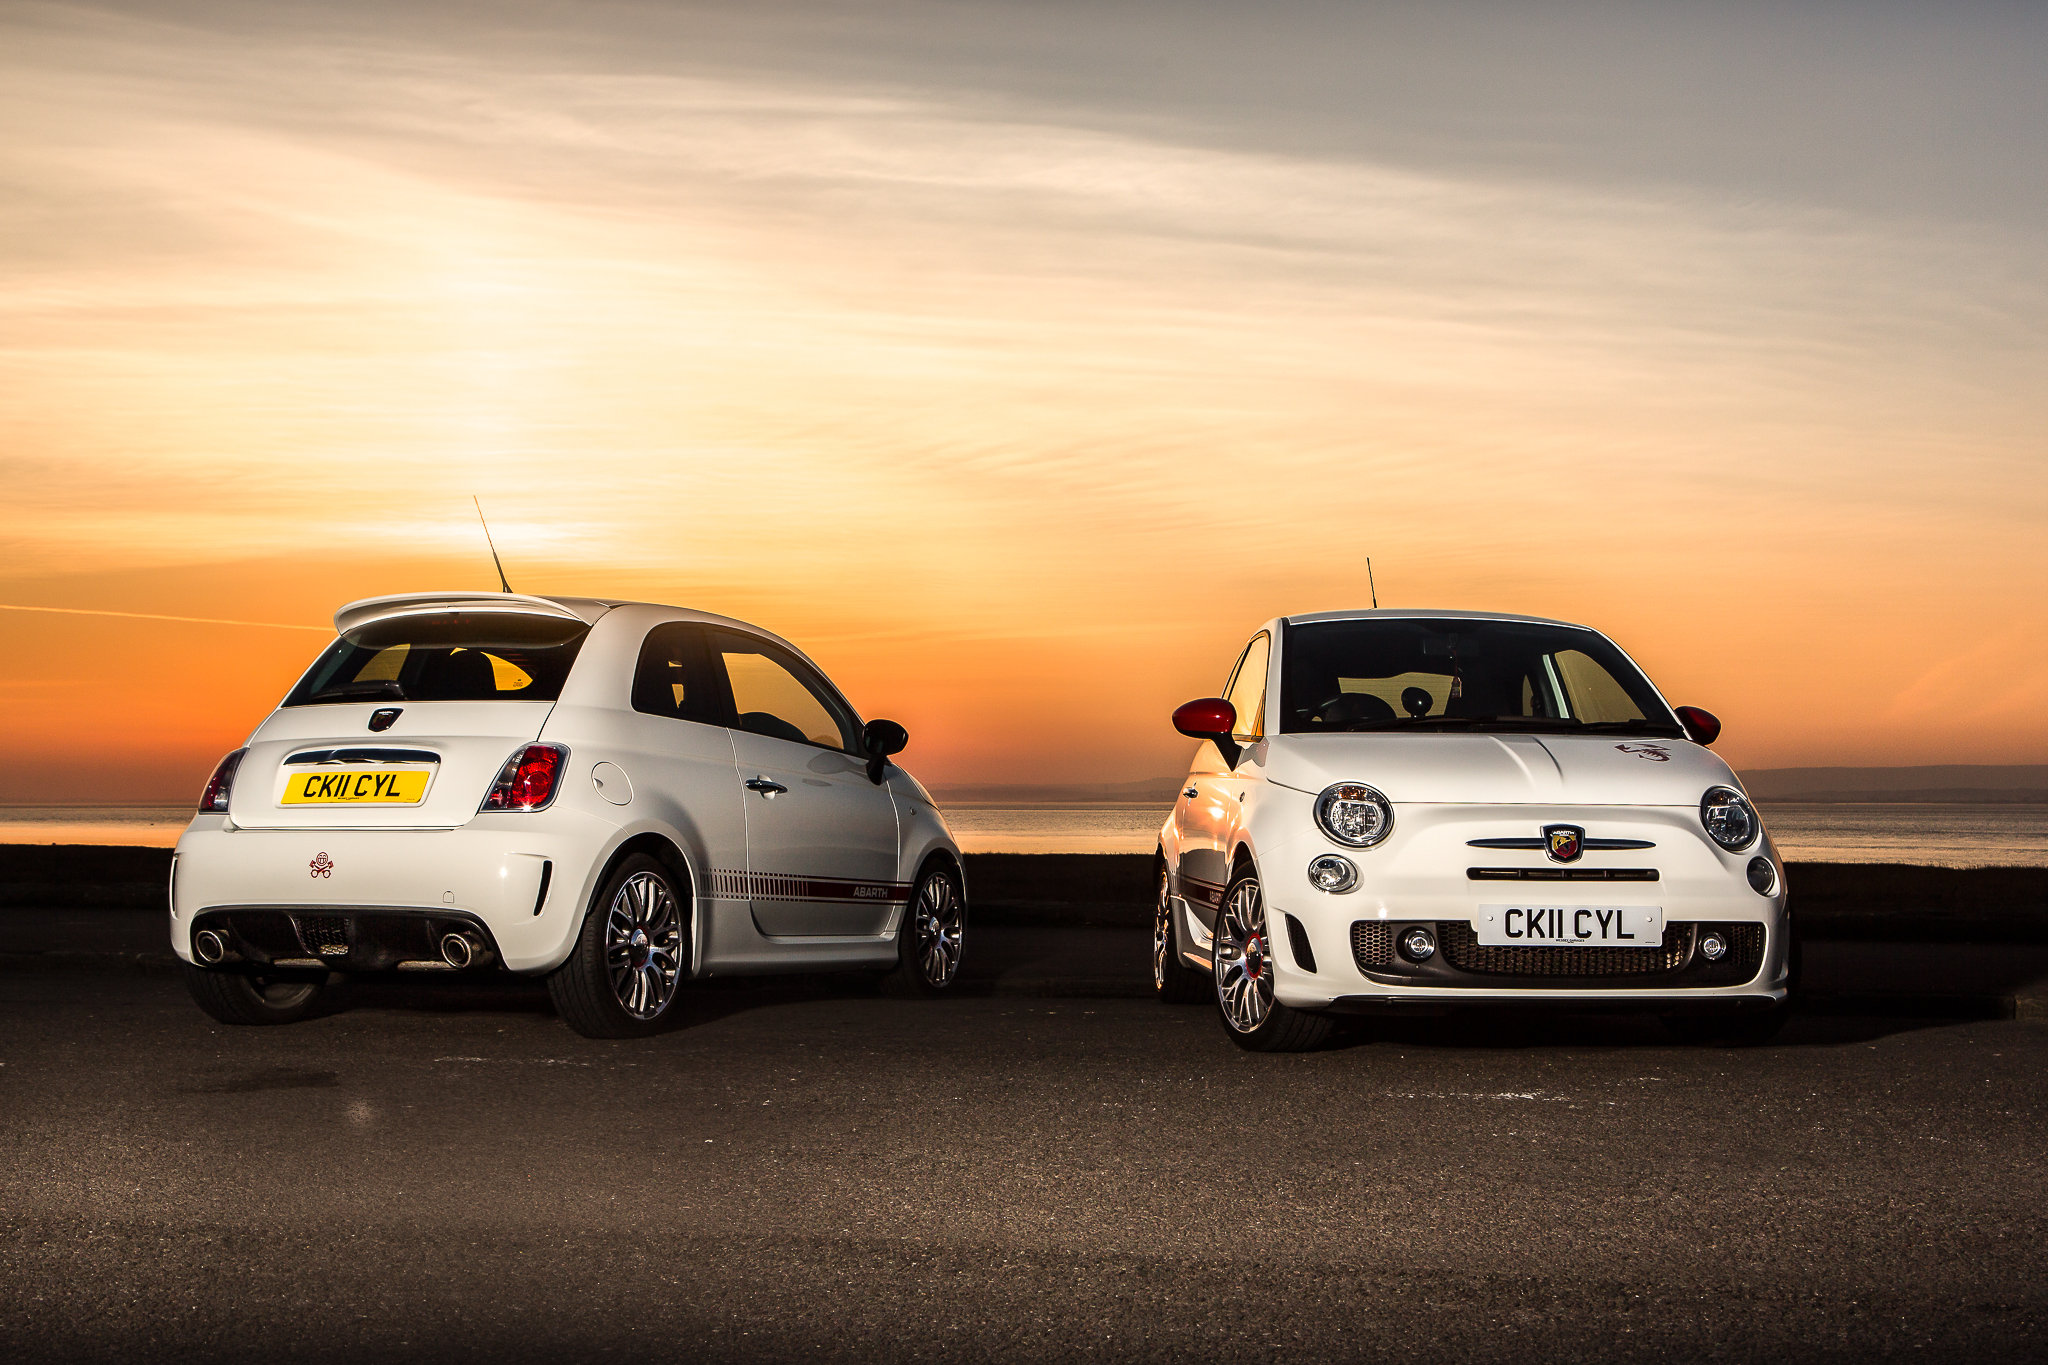
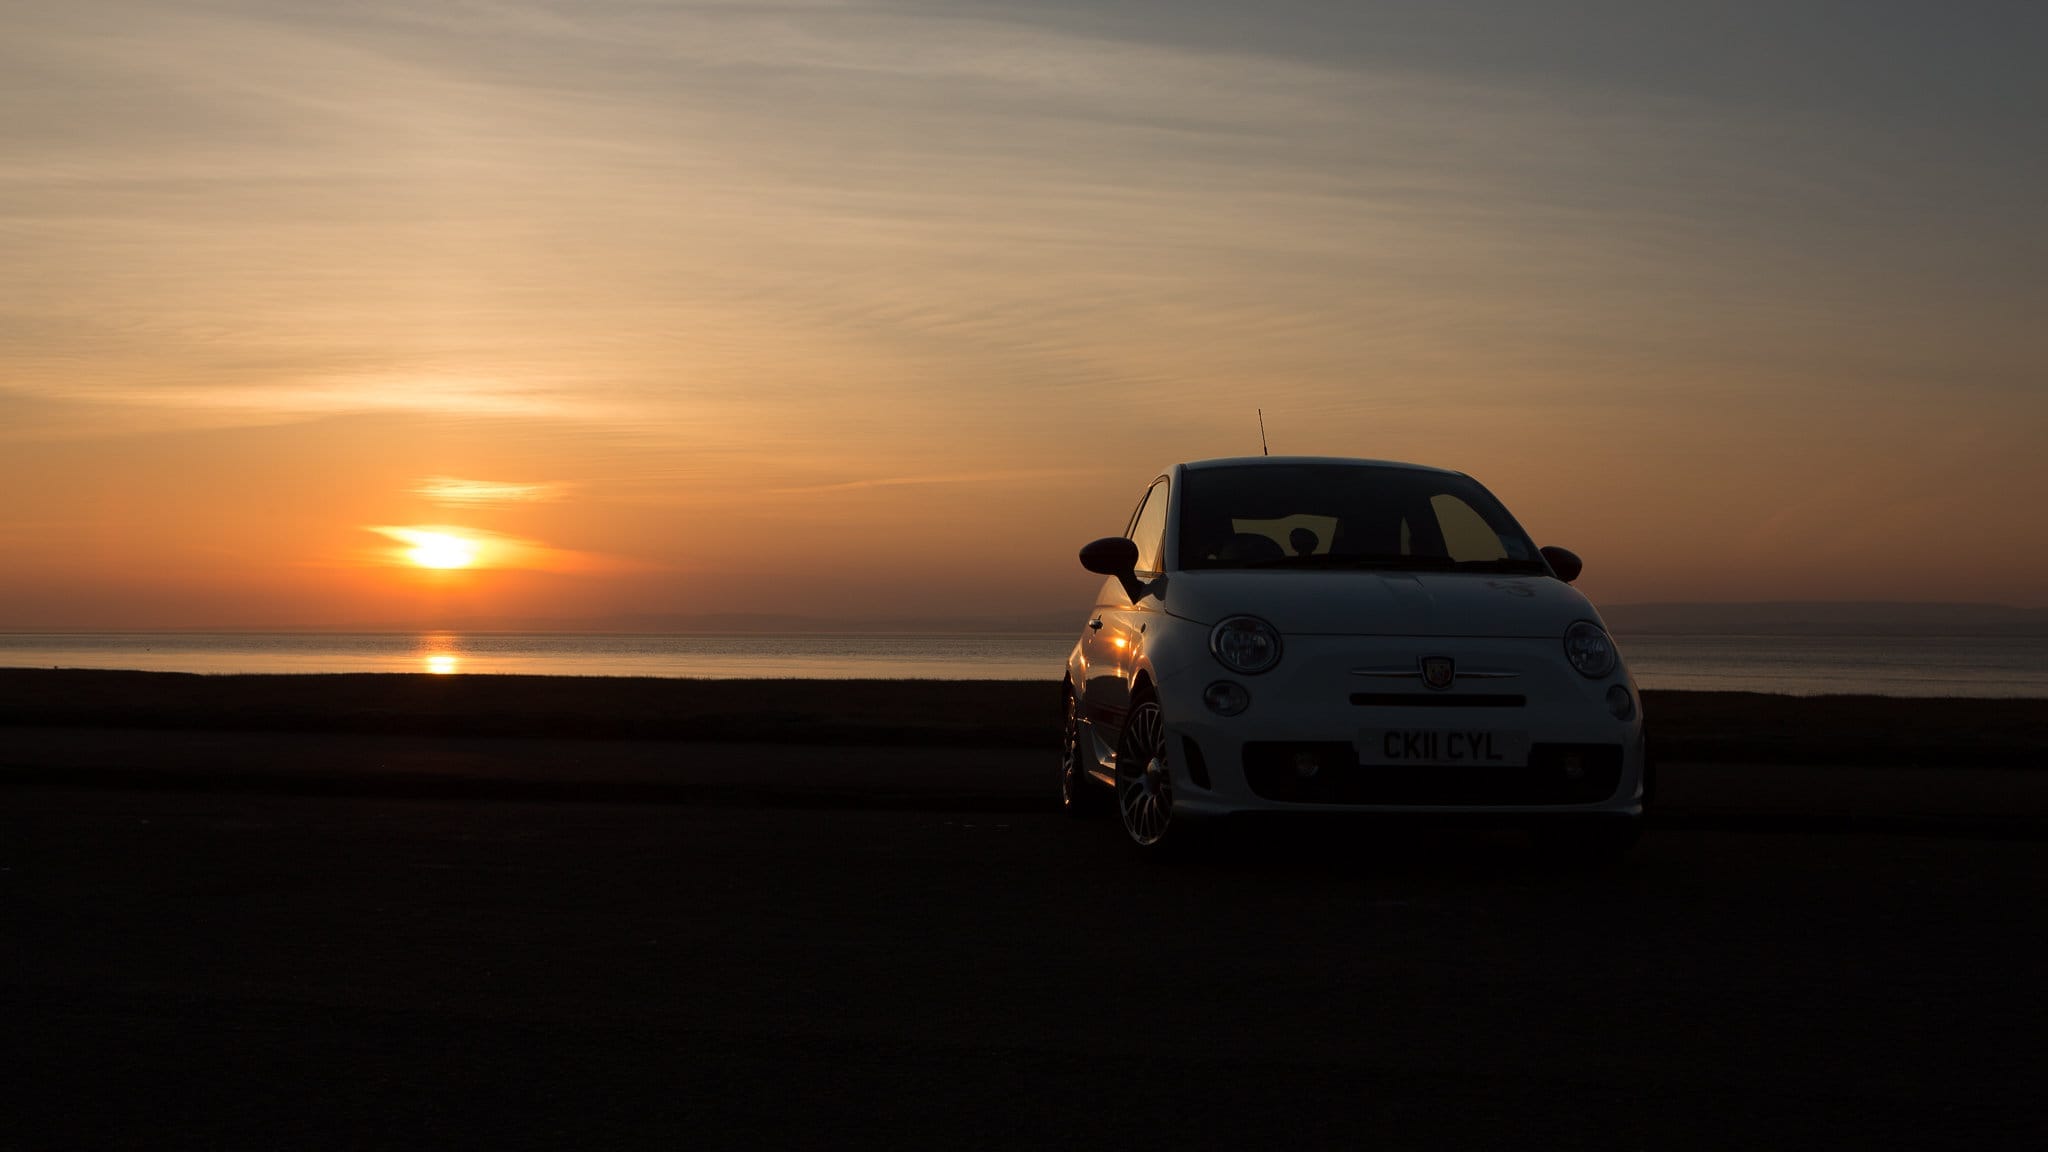
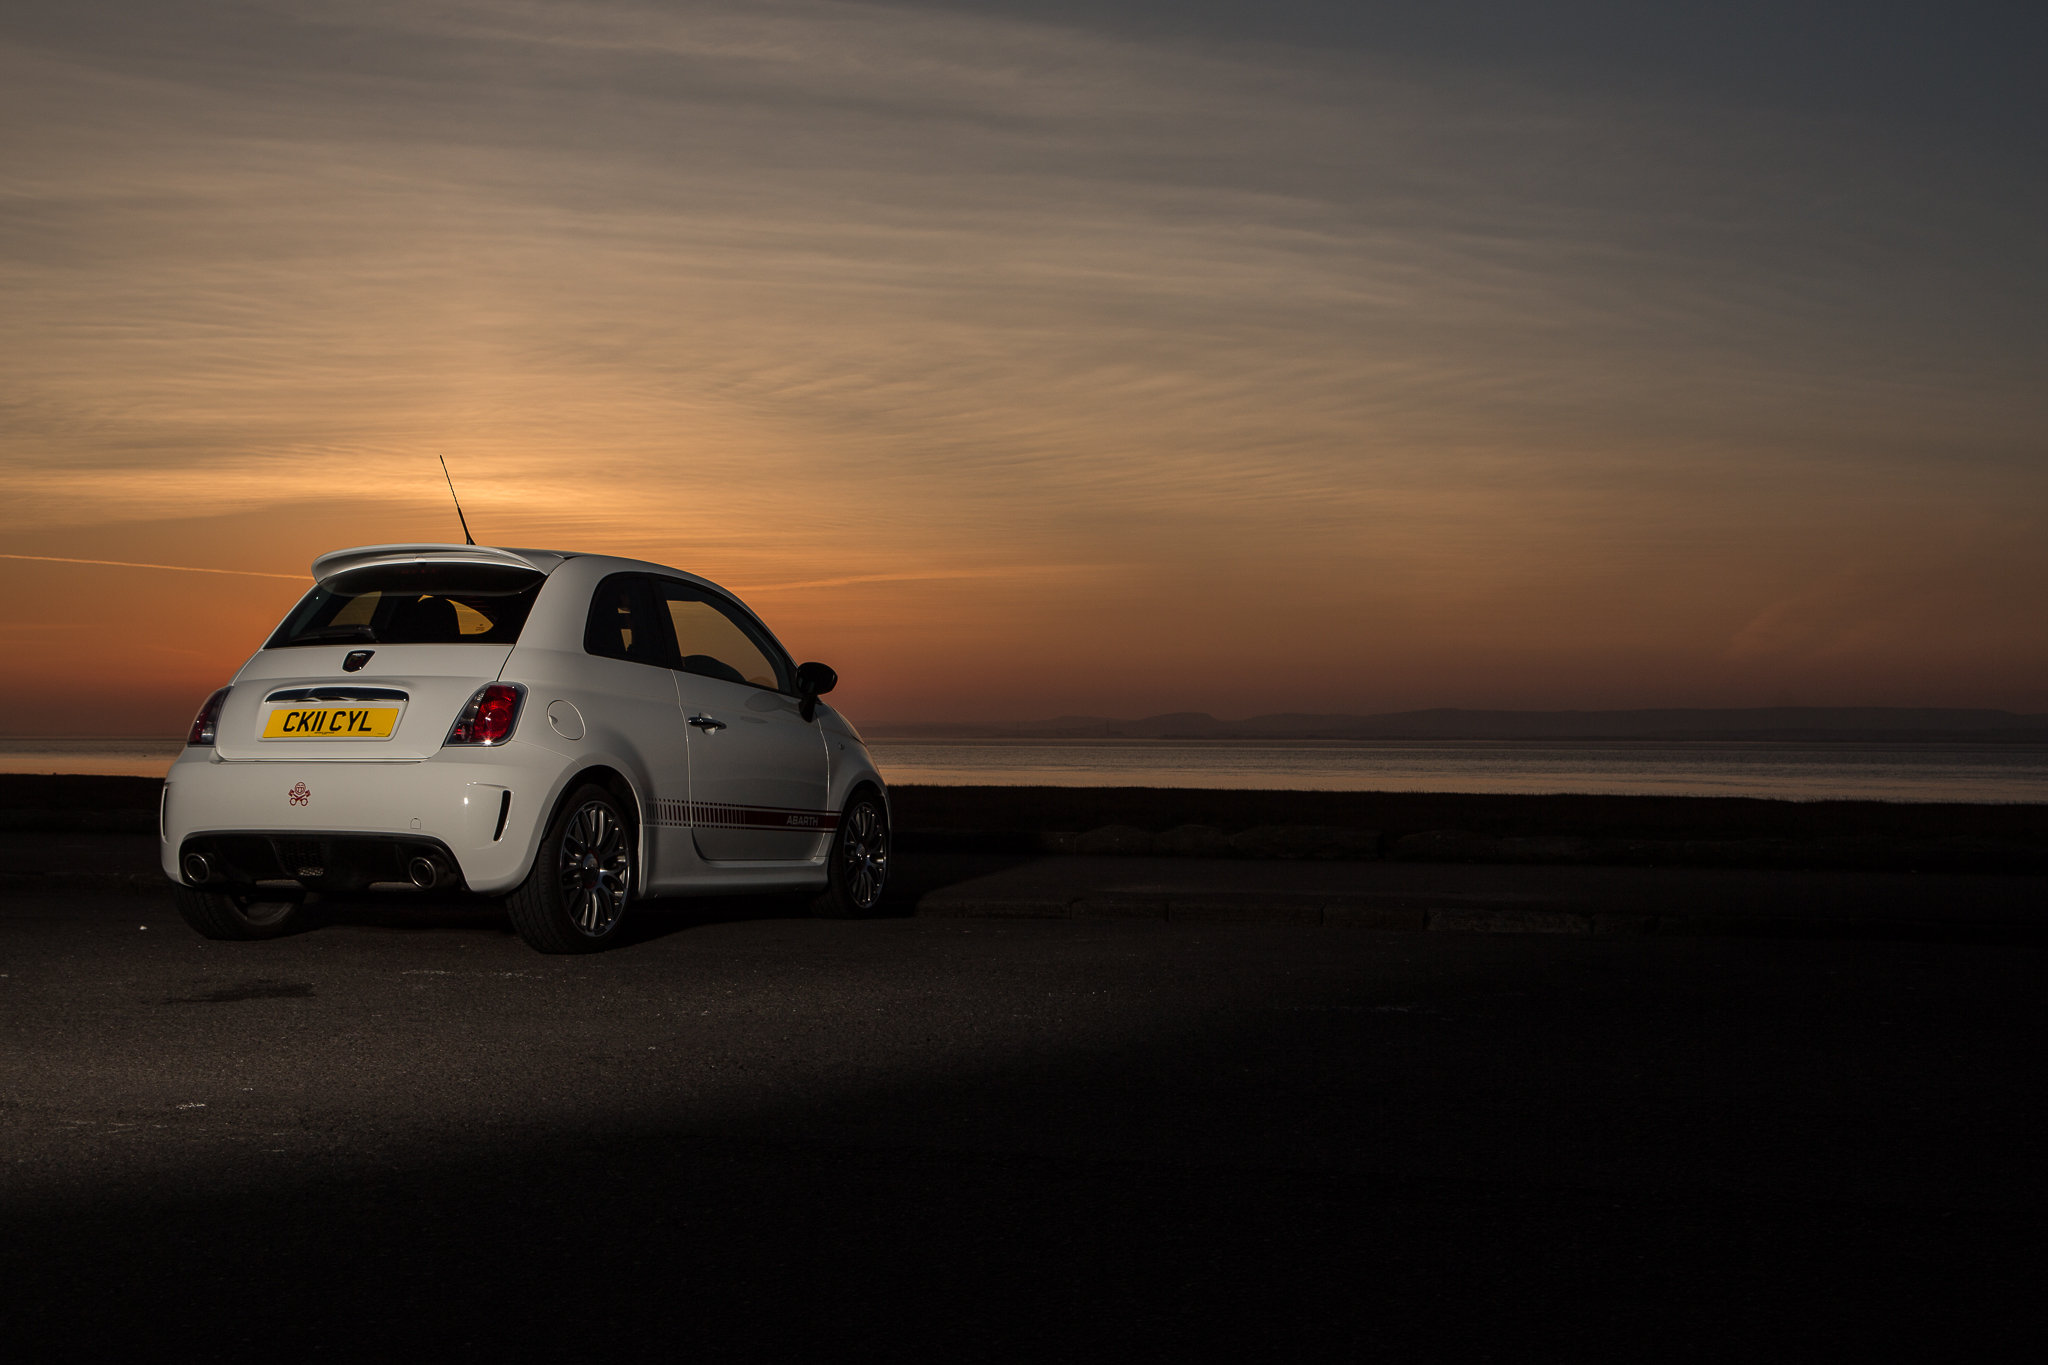
Earlier in the summer I shot this tidy little Fiat 500 Abarth down on the banks of the river Severn facing towards the setting sun. I wanted to make the image a little different so I decided to capture the car from 2 angles in the same shot.
To capture the colour and detail in the sky I had to underexpose by about 2 stops which left the car itself very dark.
So out came the Quadra! This time in a Maxispot – basically a big metal bowl reflector that creates a tight beam of light and throws it a good distance without much loss. This meant I could position to the light on the other side of the road and not inconvenience passing traffic – although it did get a few quizzical looks at the roadside.
As I was planning to combine 2 images, I was locked down on a tripod for this shot and framed widely enough to fit ‘both’ cars in.
You can’t see it in the images, but I a placed a lens cap on the kerb to mark exactly where to park for the second angle.
In post production it was simply a matter of layering the two images, masking out the areas I didn’t want and then applying a few contrast, colour balance and exposure tweaks. Here’s the final image again.
If you have only just found my blog, you can catch up on previous Photos of the Week here.
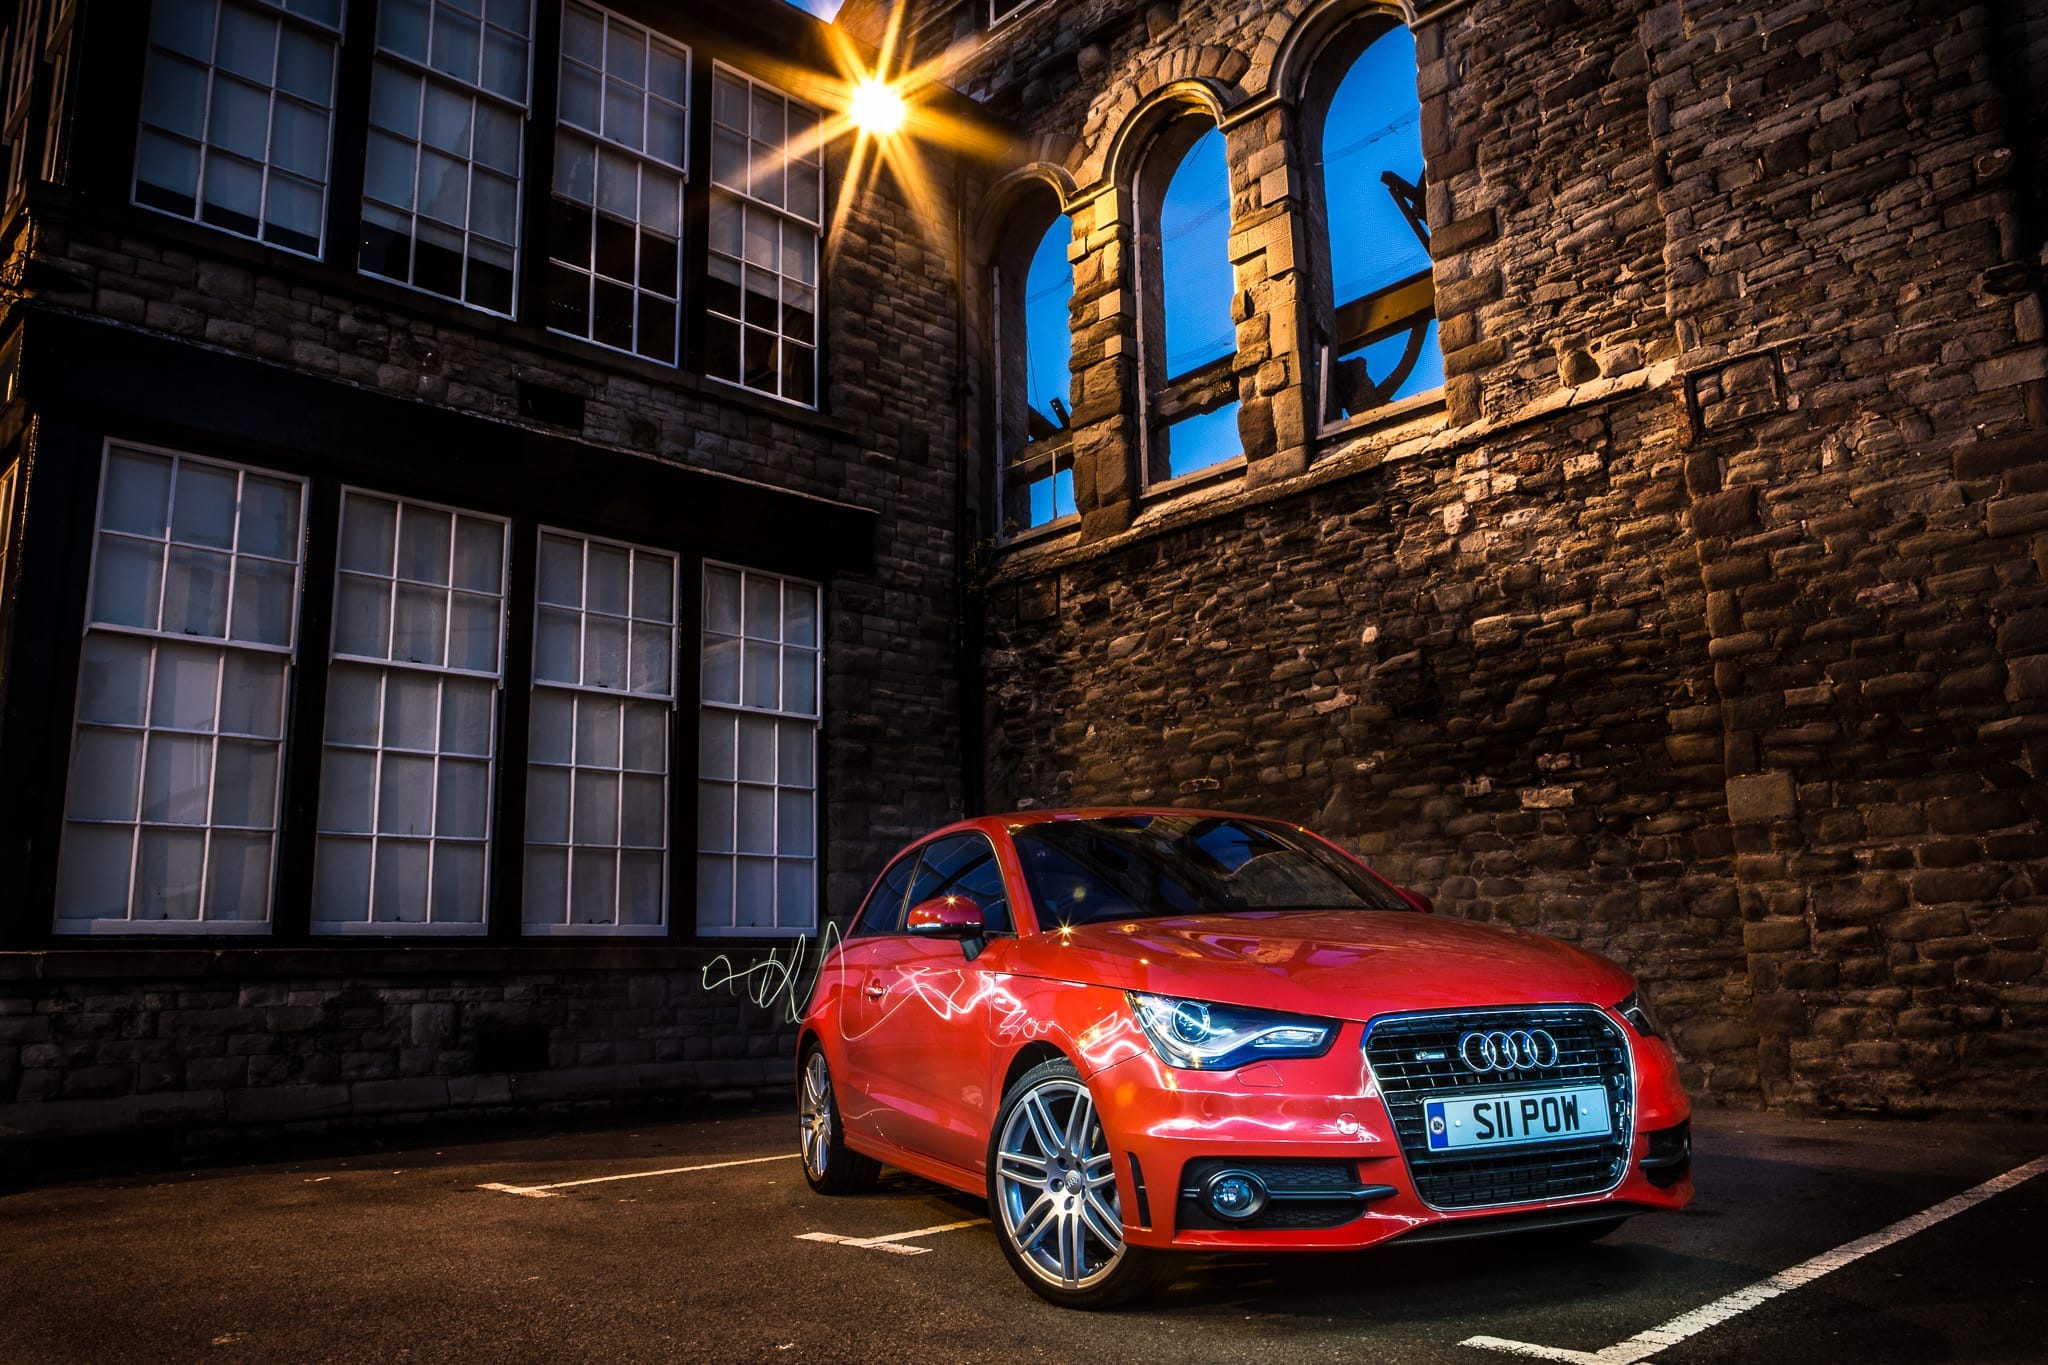
Today’s Photo of the Week is dedicated to Stephen Dowset who sent me a message on Facebook asking how this image was made. In camera or in Photoshop?
The answer is: Both.
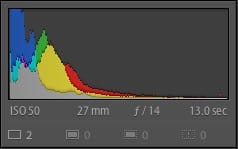
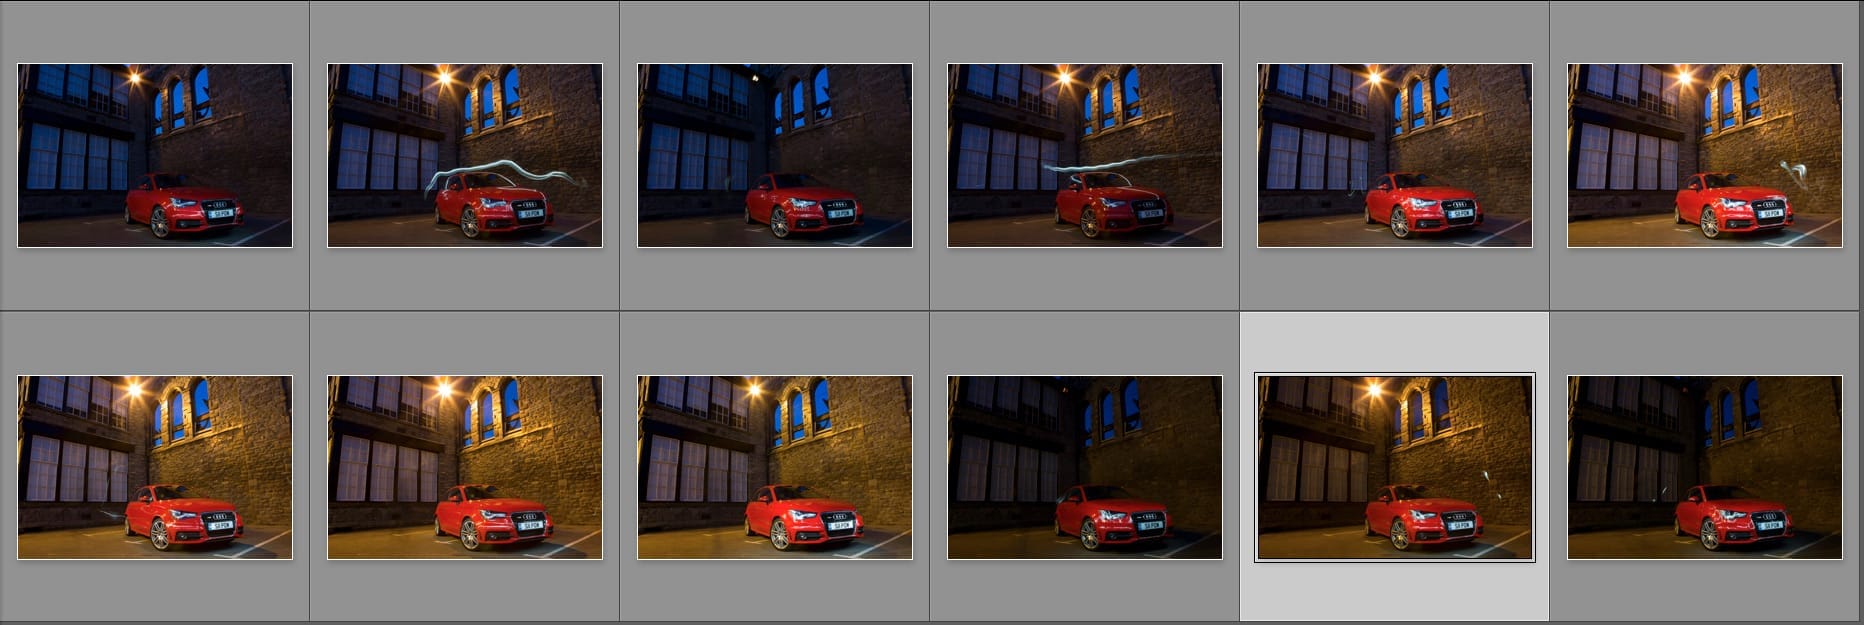
I have a more detailed write up on light painting cars and to be honest, the technique on this one is pretty much the same. The only real difference was the ambient light in the scene which dictated my shutter speed. 13 seconds at f/14 was the sweet spot and gave me time to cover about a quarter of the car per exposure. The main thing to remember is that you need to need to light the roof of the car from behind to stop it blending in with the darker background and to take more images than you think you need so you have plenty to chose from in post production. So after many clicks of the shutter and lots of running around waving a Quadra head (with modelling light on) I was left with a selection of images to sort through in Lightroom and layer up in Photoshop.
In this case I was shooting from a tripod so the images were already aligned but Photoshop is very good at auto-aligning layers if you are working freehand and have an assistant to move your lightsource.
Once in Photoshop, it was simply a case of switching all but the bottom layer to ‘Lighten’ blend mode (so only areas that are lighter than the layer below show up) and adding a few layer masks to cover up where my light, rather than it’s reflection in the car, had been captured. You’ll notice I left one of those “mistakes” in as I like how the light trail seems to come off the car and drift away.
The final contrast tweaks on the brickwork and the car were added in Lightroom.
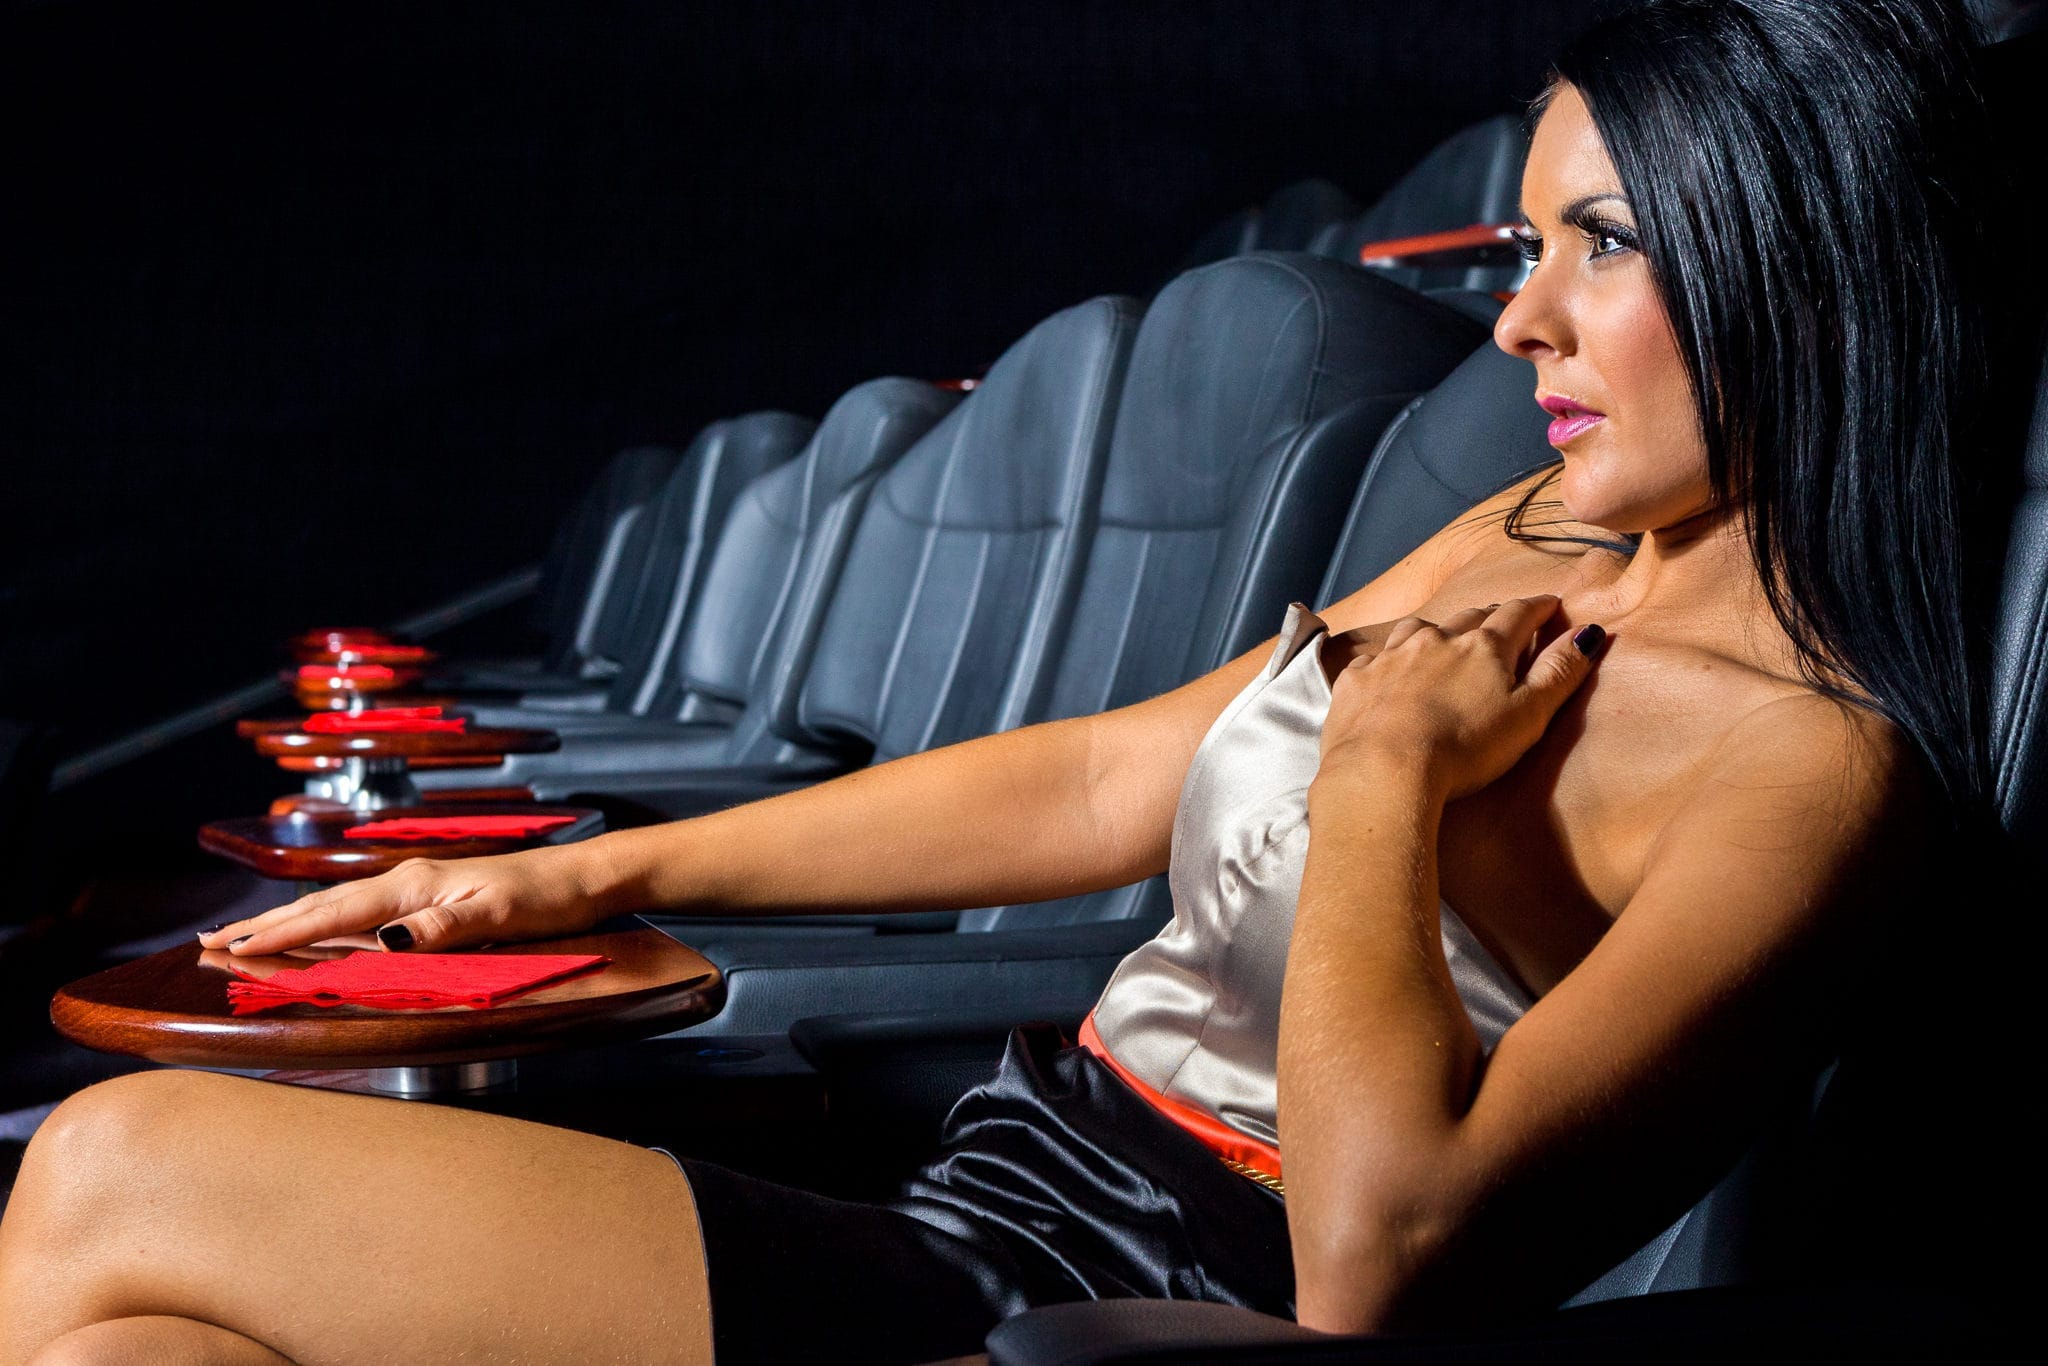
A couple of years ago I got the opportunity shoot in a local cinema’s luxury screening room. As testament to my recent post about when working for free works I shot some images of the cinema foyer while it was bustling for the management and in return my “payment” was a days access when it was quiet. No money, but a no brainier!
On to the image.
Quite a simple lighting setup here, just 2 Elinchom Quadra heads with standard reflectors and 30 degree grids. One firing directly at Jen, the other at the seats further down along the row.
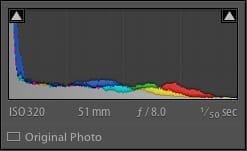
Looking at the EXIF data, you can see I was at ISO320 and down to 1/50th for my shutter speed the let some ambient light in to the shadows. My aperture was at f8 for no reason other than that’s what power my lights were set at from the last set up and we didn’t have long before the next film showing!
This shot was taken back in 2011 and (fortunately!) I’ve learnt a lot since then. I didn’t notice at the time, but now when I look at this image all I can see is the wooden table from the seat behind sticking out of Jen’s head.
It would have been so easy to correct in camera. I could have ducked slightly to hide it behind the seat next to Jen, I could have moved to the right slightly to hide it behind her head or I could have even angled my lights down to keep the next row in darkness.
Welcome to Photo Of The Week! This is a new idea I am trying out so I’d really like to hear your feedback. The plan is to post an image every Tuesday afternoon with a little bit of text about how it was shot.
Let’s start off with this image of Georgia. It was shot in a multi-storey car park in Birmingham – I am all about the glamourous locations! The blobs in the background are actually traffic lights and a few lamp posts on a junction about a mile away.
I shot this with a 70-200mm f4 lens, zoomed to 200mm (to compress the background and bring the lights as close as possible) and wide open at f4 (to blur them into nice large blobs of colour). If you check the EXIF data, you’ll see I was a quite a high ISO at 1/100th of a second. I needed to give the traffic lights in the background time to burn in but shooting hand held at 200mm stopped me going below 1/100th for my shutter speed. This meant I had to drive the ISO up to 1250. Luckily my Elinchrom Quadra packs can be adjusted down as low as 25 watt seconds and the 70cm Deep Octa softbox it was in (off to camera right) was soaking up about another stop of light, leaving Georgia perfectly exposed.


 Looking at the EXIF data, you can see I was at ISO320 and down to 1/50th for my shutter speed the let some ambient light in to the shadows. My aperture was at f8 for no reason other than that’s what power my lights were set at from the last set up and we didn’t have long before the next film showing!


Recent Comments