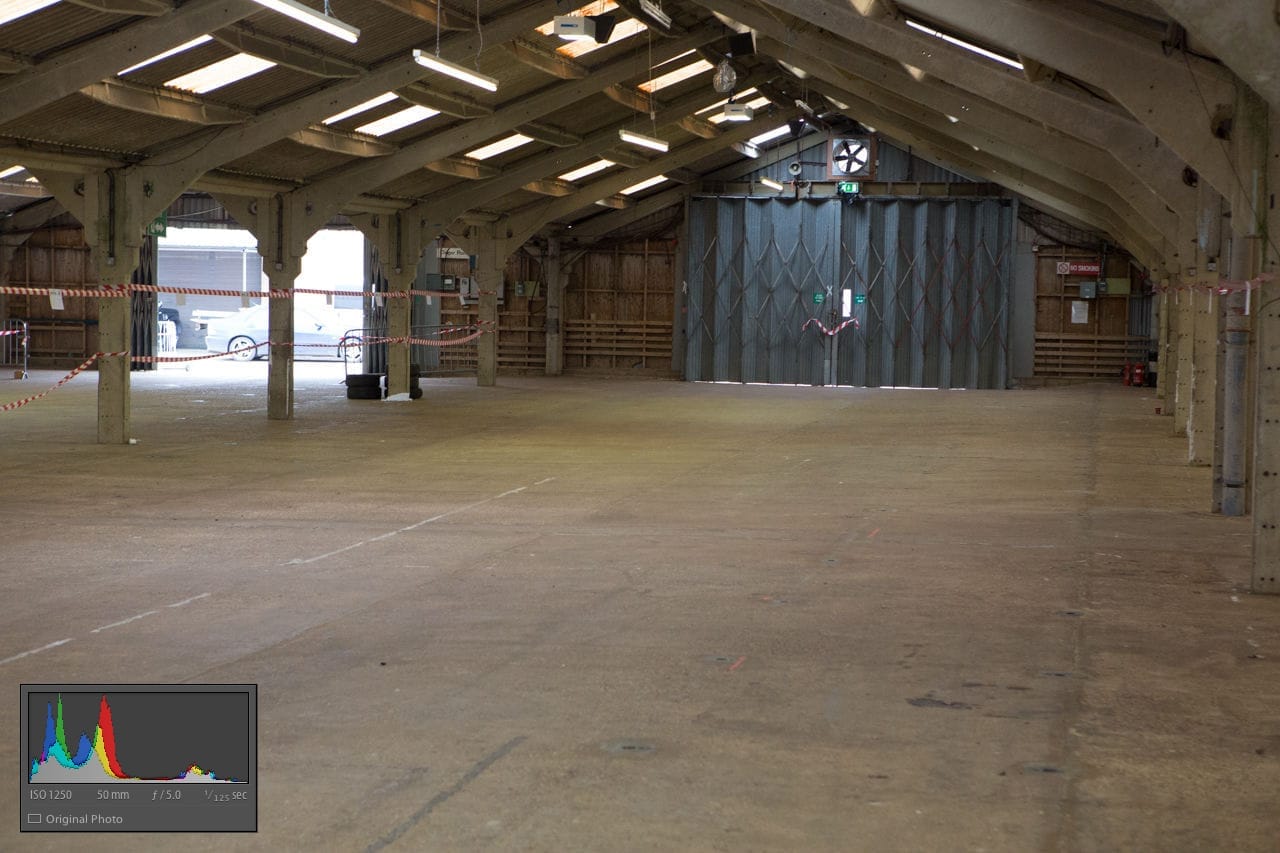
Here’s a photo taken earlier this year in a cattle shed near Coventry for today’s Photo of the Week. The event was Race Retro and between sessions on the mini rally stage a selection of classic rally cars gathered in the makeshift parc ferme.
When left to it’s own devices in AV mode, the camera wanted to take the exposure at 1/125th, f5 at ISO1250 so I knew I could overpower the ambient light pretty easily with just a speedlite. If I had to stop down to f16 I’d have had a problem, but the final image was taken at f7.1 – no problem for a 580EXII.
Once I had the exposure dialled in it was a case of adjusting the power of the flash (I think was on about 1/4 power) and then finding a spot where it looked good. The idea here was to make it look as if there was a pool of light spilling in from the skylights in the roof above the Mini Gem GTE.
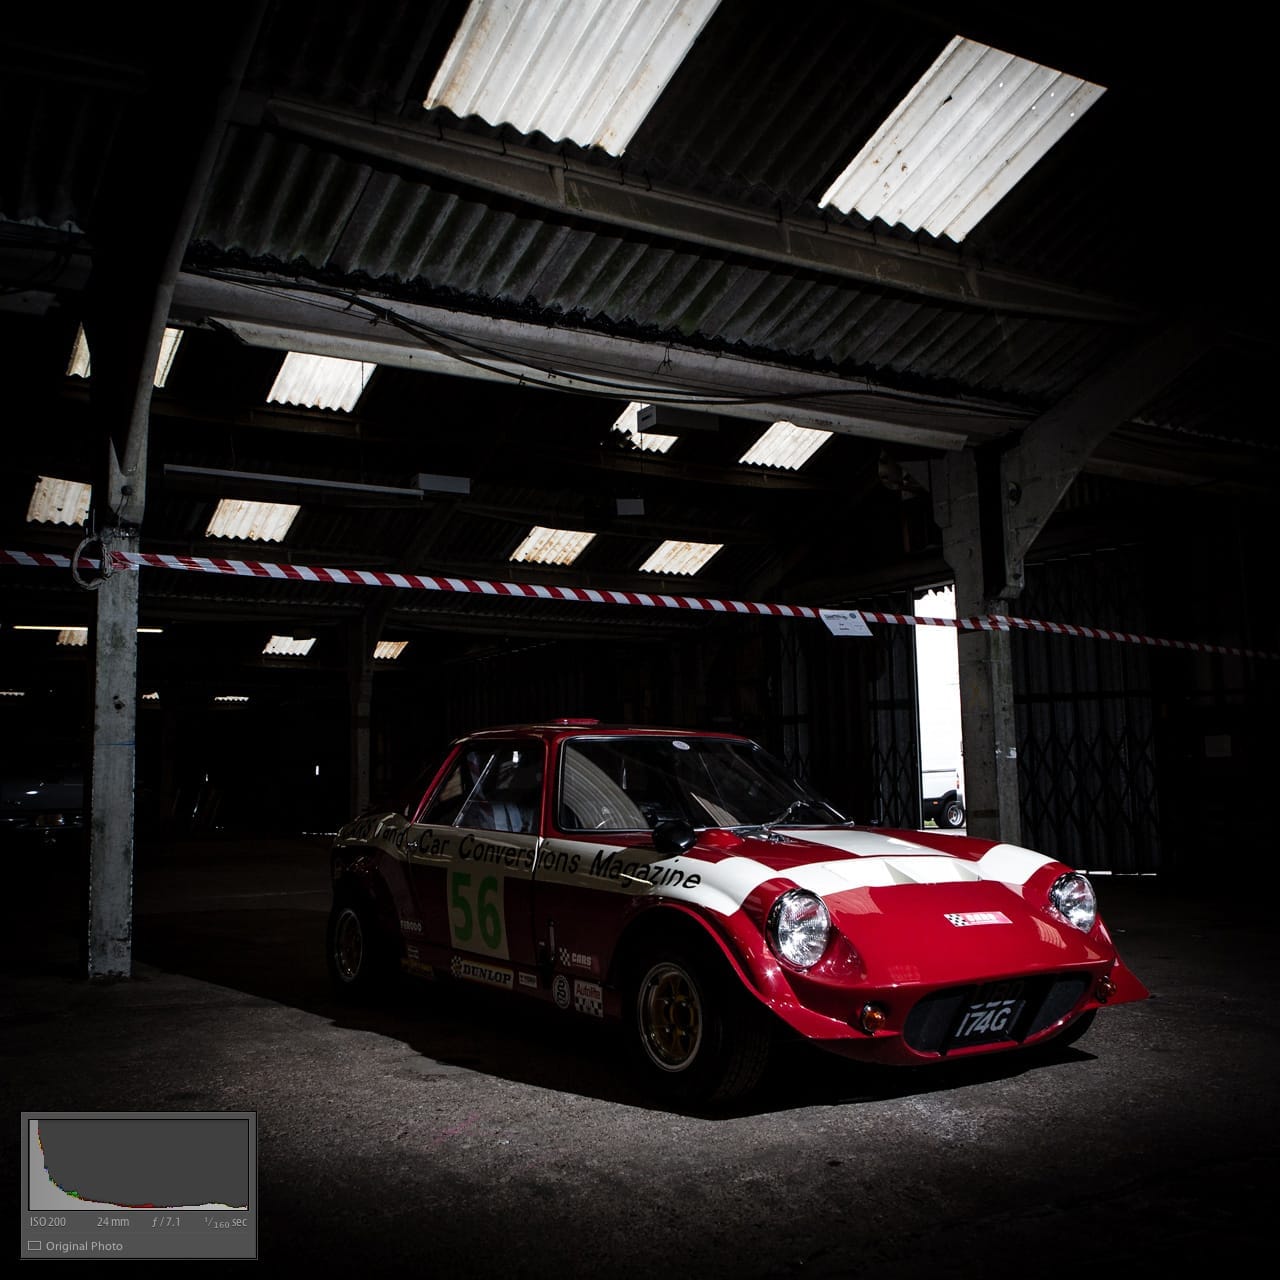
Over in Photoshop, the first task was to clean things up. Specifically the open barn door that’s distractingly bright and the reflective metal parts up in the roof space. This was done with a mixture of the Clone Stamp and just painting with the brush tool. I decided to leave the tape between the pillars above the car in as it matched the red and white paintwork so well.
The final job was a little colour toning and general exposure tweaking.
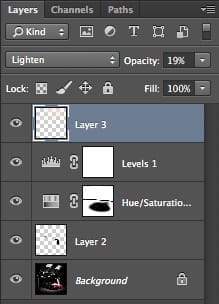
Starting at the bottom of the Photoshop layers panel on the left you can see the background is the original image. Layer 2 is the Clone Stamp work I did to fill in the open barn door.
The Curves 1 layer is a Curves adjustment layer that’s just to lighten the side of the car that was nearest to the camera. It’s a slight bump in exposure painted only onto the area needed with a layer mask.
The next layer up is a Hue/Saturation adjustment again layer masked so it only shows on the areas of the mask painted white. This is just desaturating the background whilst keeping the car and tape nice and bright.
Levels 1 is applying the colour toning. It’s not an obvious effect but its adding a little cyan to the shadows and warming the highlights a little.
And finally, Layer 3 is adding just a little haze around the skylights to simulate dust in the air. All this takes is some dabbing with a soft brush sampling a couple that’s already present in the light, a little Gaussian blur and a drop in opacity.
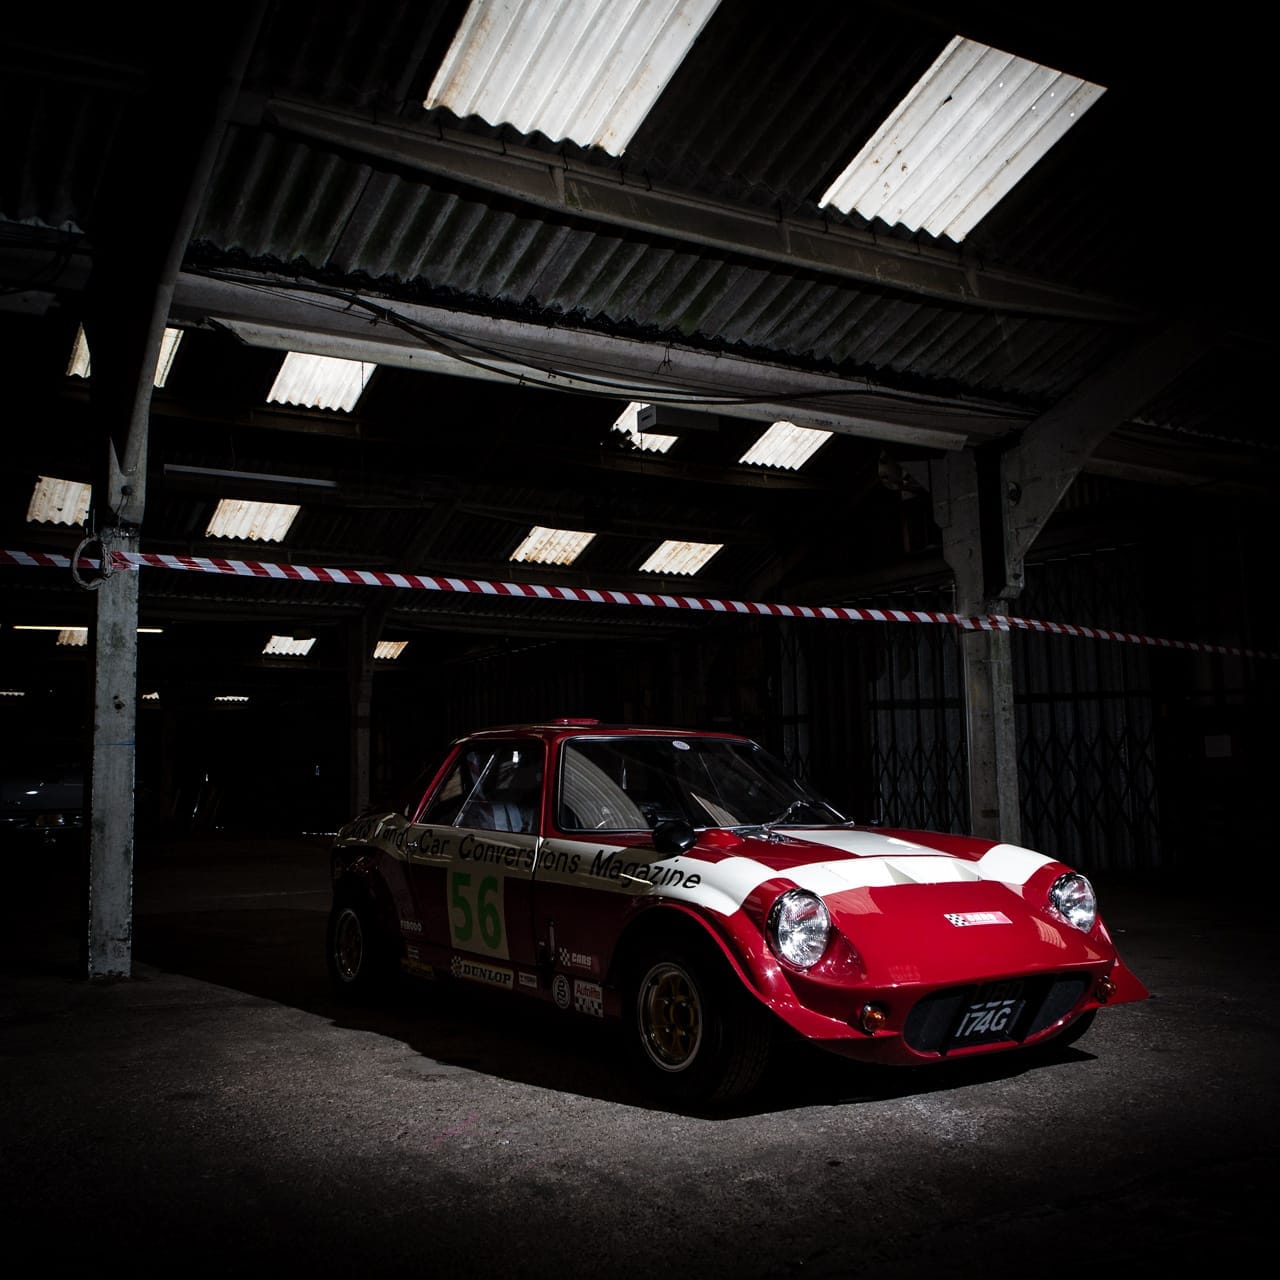
Here’s the final image. As always I’d love to hear what you think.
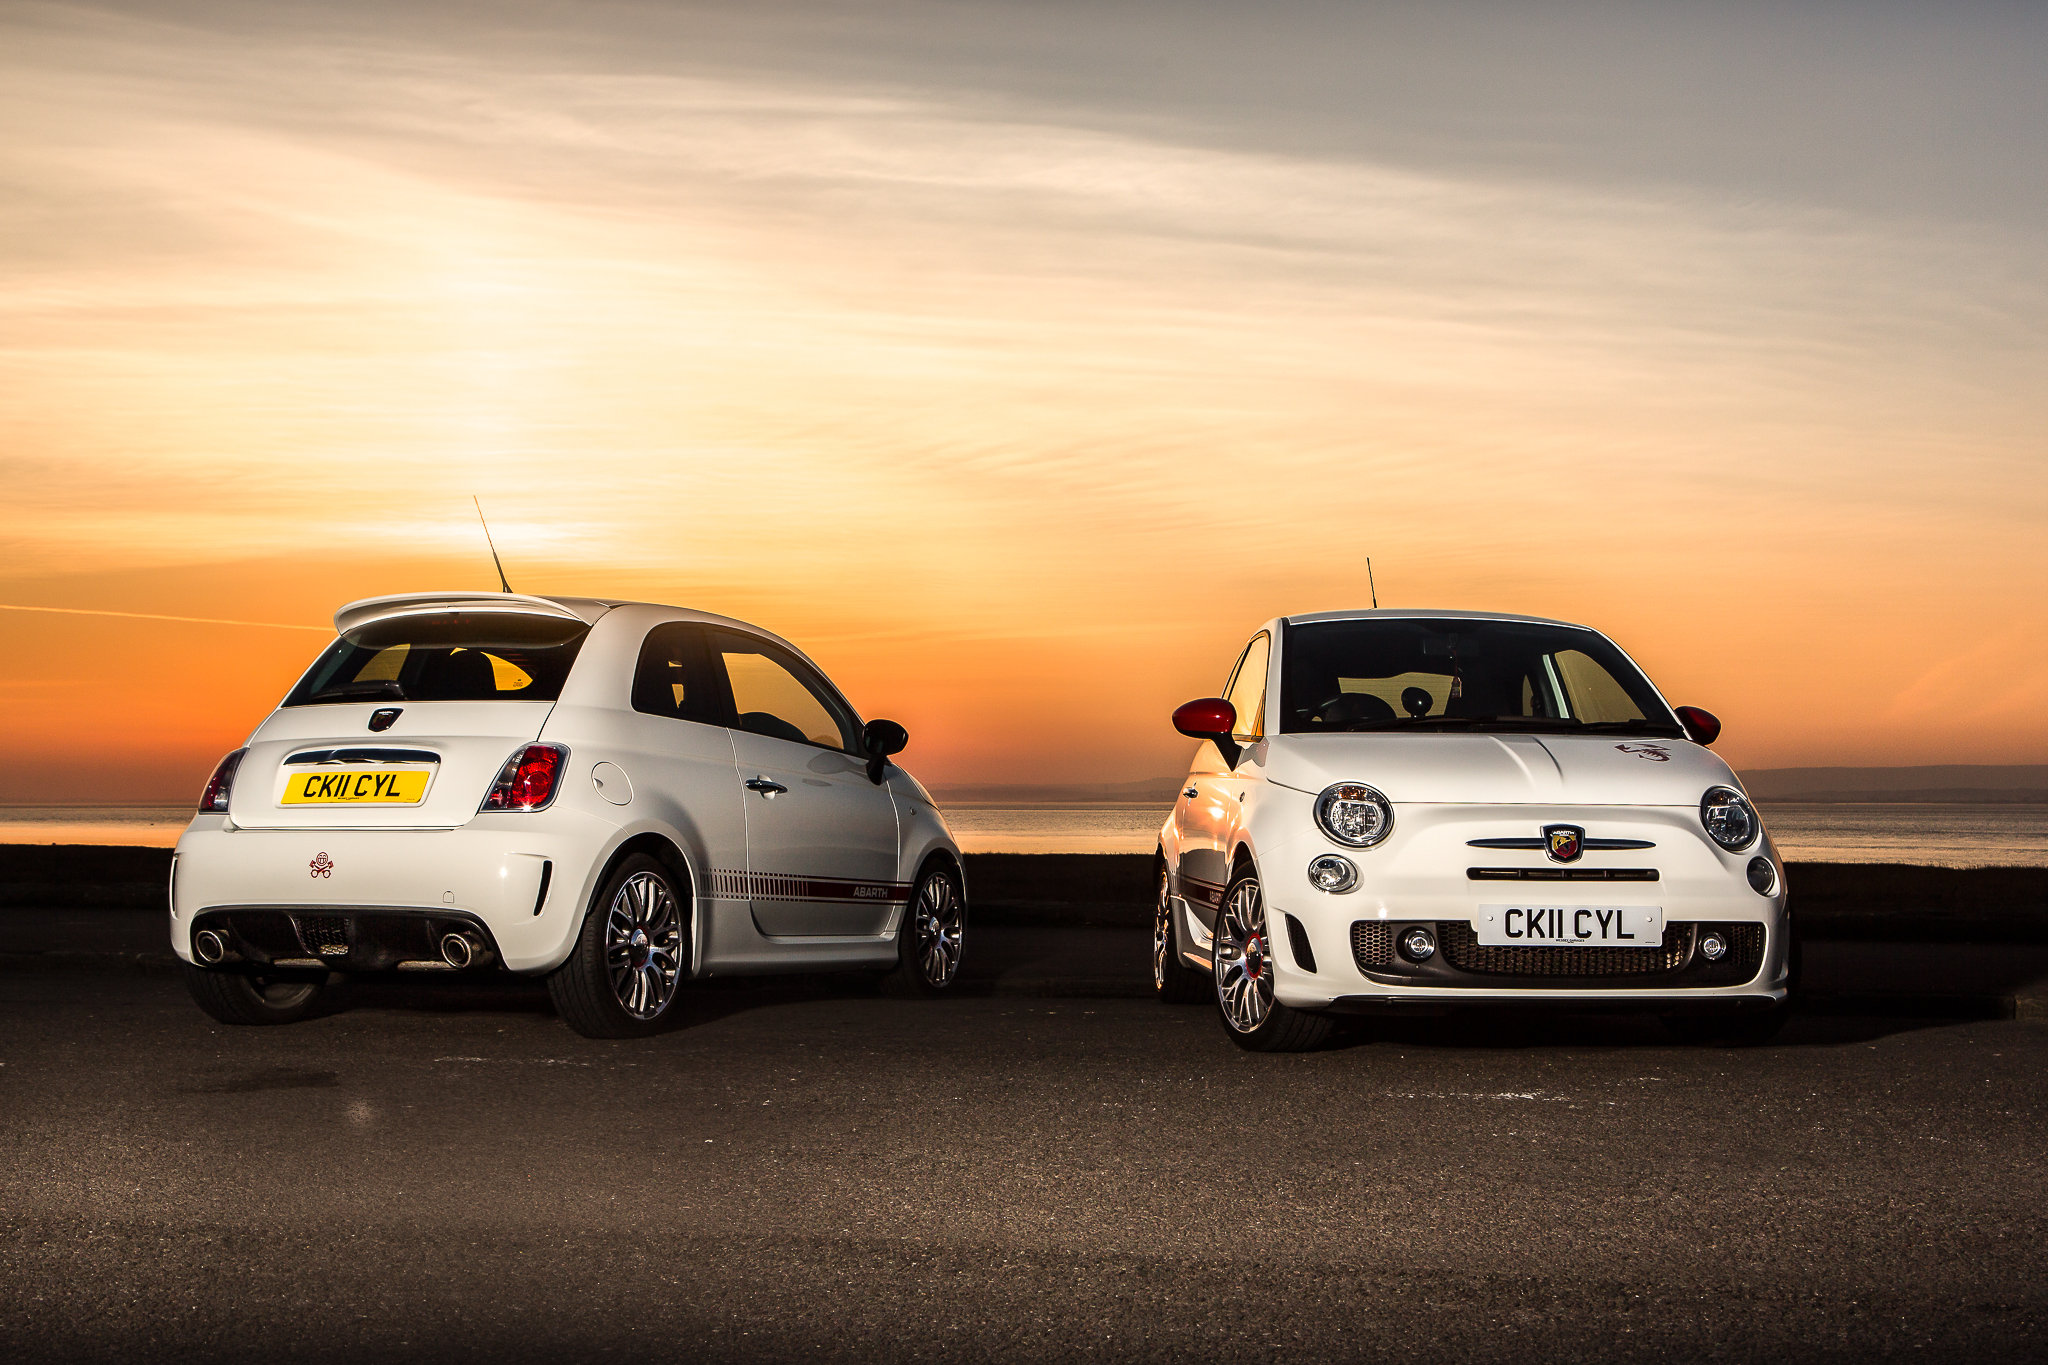
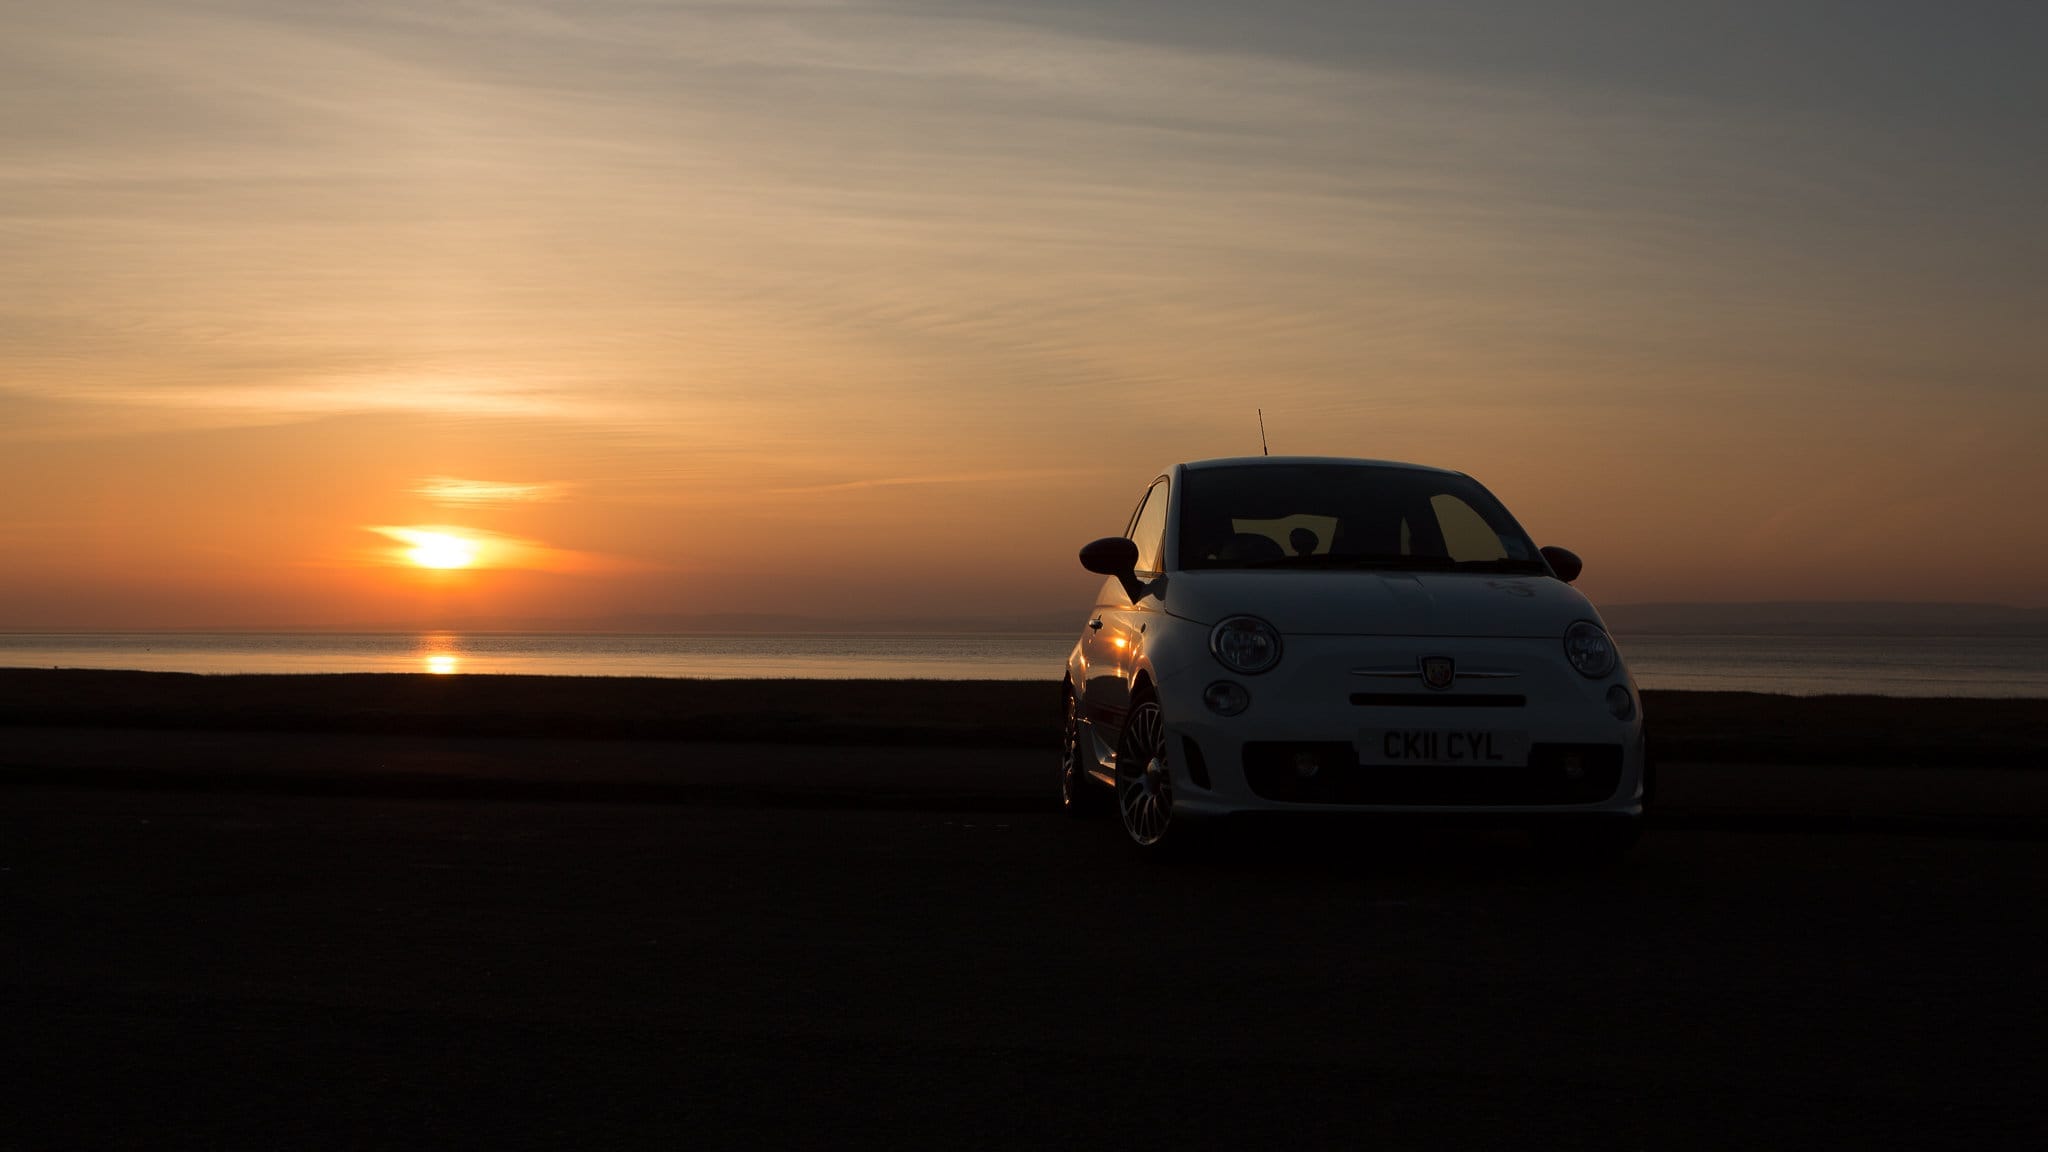
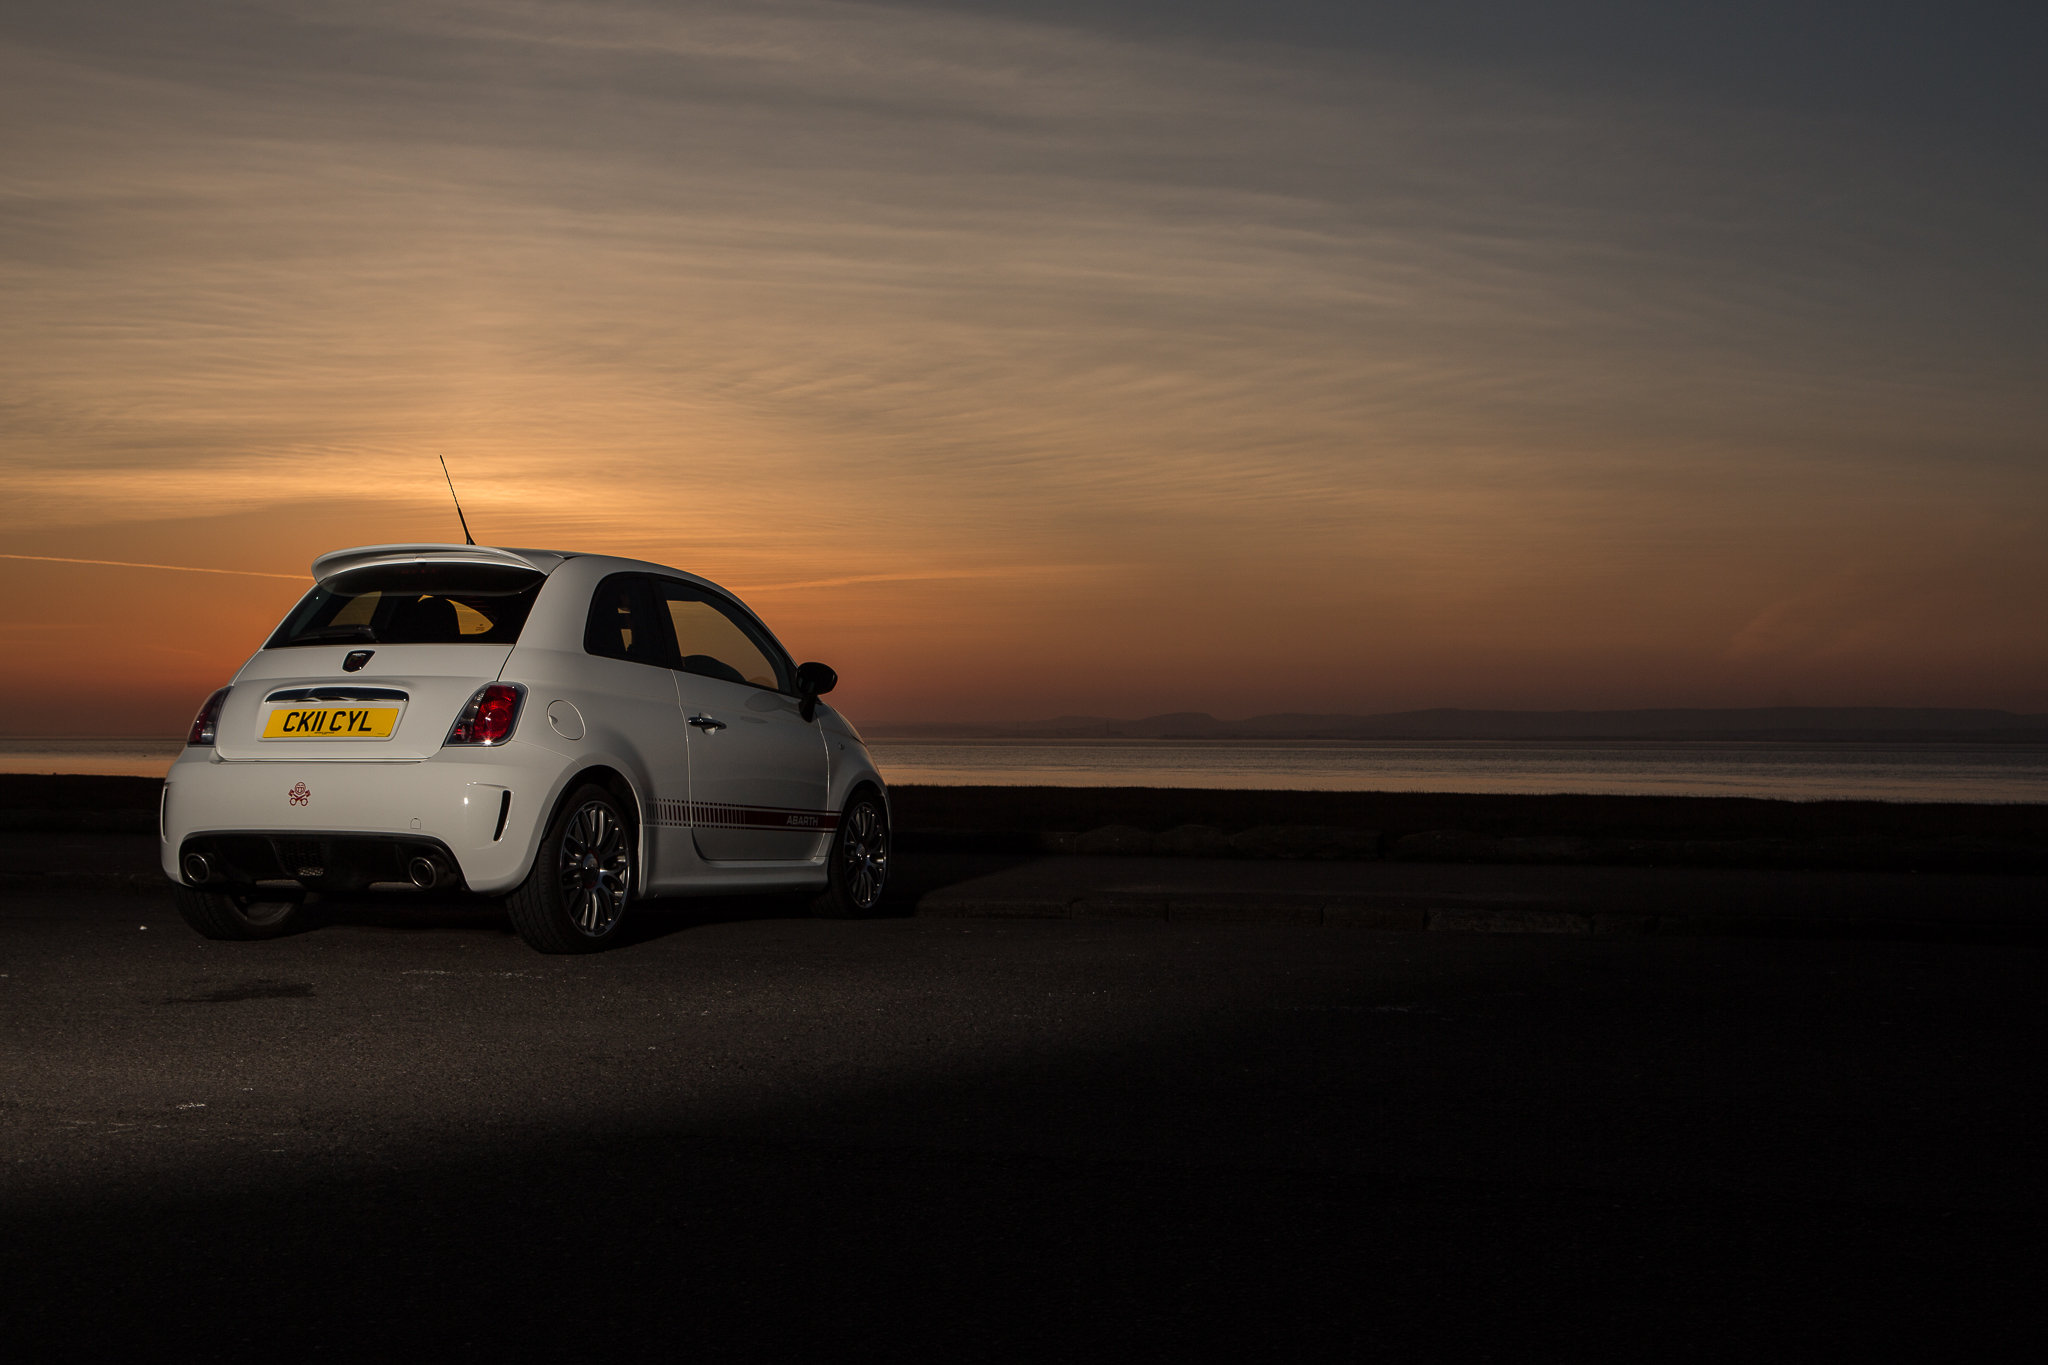
Earlier in the summer I shot this tidy little Fiat 500 Abarth down on the banks of the river Severn facing towards the setting sun. I wanted to make the image a little different so I decided to capture the car from 2 angles in the same shot.
To capture the colour and detail in the sky I had to underexpose by about 2 stops which left the car itself very dark.
So out came the Quadra! This time in a Maxispot – basically a big metal bowl reflector that creates a tight beam of light and throws it a good distance without much loss. This meant I could position to the light on the other side of the road and not inconvenience passing traffic – although it did get a few quizzical looks at the roadside.
As I was planning to combine 2 images, I was locked down on a tripod for this shot and framed widely enough to fit ‘both’ cars in.
You can’t see it in the images, but I a placed a lens cap on the kerb to mark exactly where to park for the second angle.
In post production it was simply a matter of layering the two images, masking out the areas I didn’t want and then applying a few contrast, colour balance and exposure tweaks. Here’s the final image again.
If you have only just found my blog, you can catch up on previous Photos of the Week here.
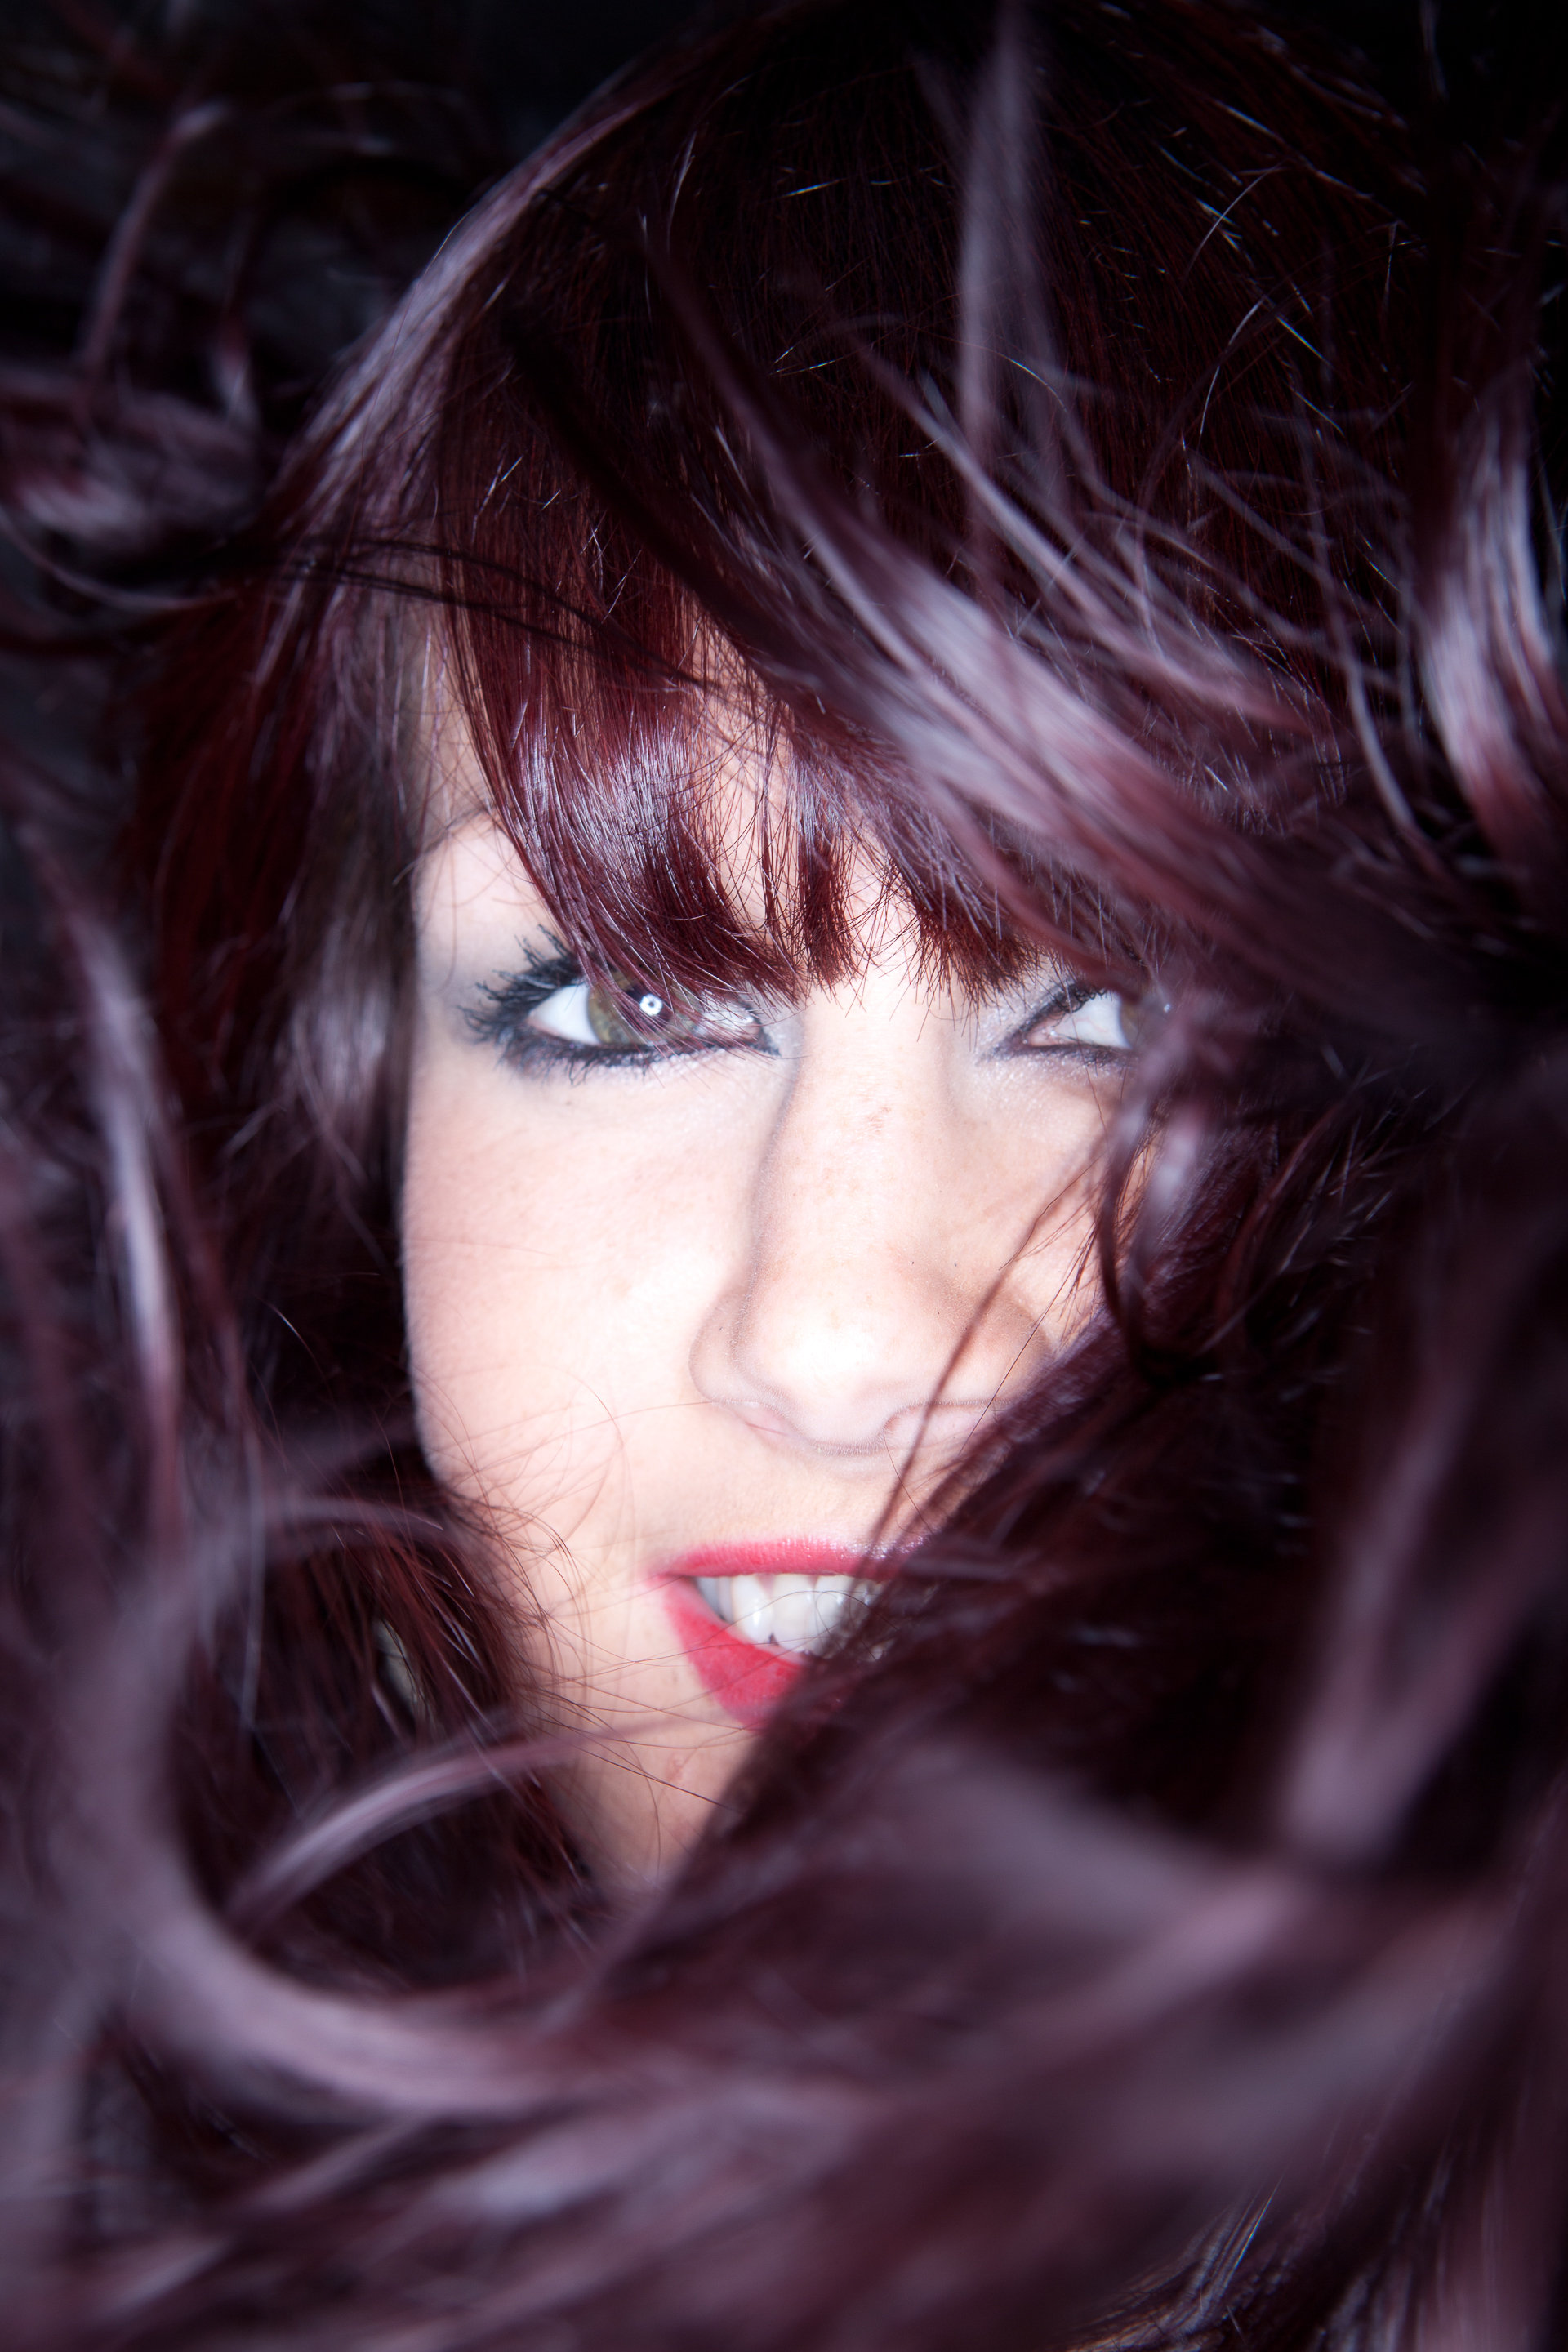
A happy accident for you this week. It’s one of those shots that had I tried to get it, I wouldn’t have. What we have here is the combination of a Quadra ECO ring flash and a huge (and I mean HUGE) leaf blower that was found lying around.
I moved in close, partly to crop out the surroundings (this was shot in a cluttered industrial unit) and partly to make the ring-shaped catchlight prominent in Gemma’s eyes. I took one or two test shots to get my exposure right, then had someone stand camera right and unleash the wind. I have a about a dozen frames of poor Gemma just looking windswept but among them was this one. Luck kicked in when part of Gemma’s hair whipped around towards the camera, framing her face and falling nicely out of focus.
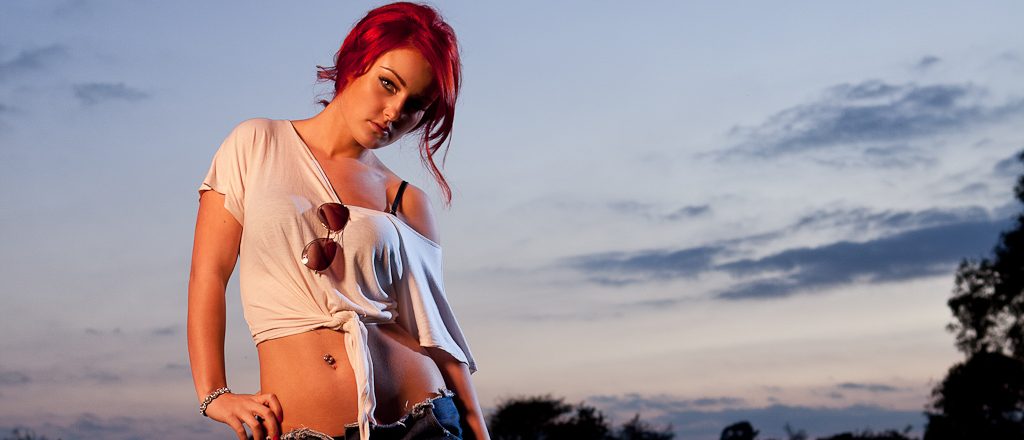
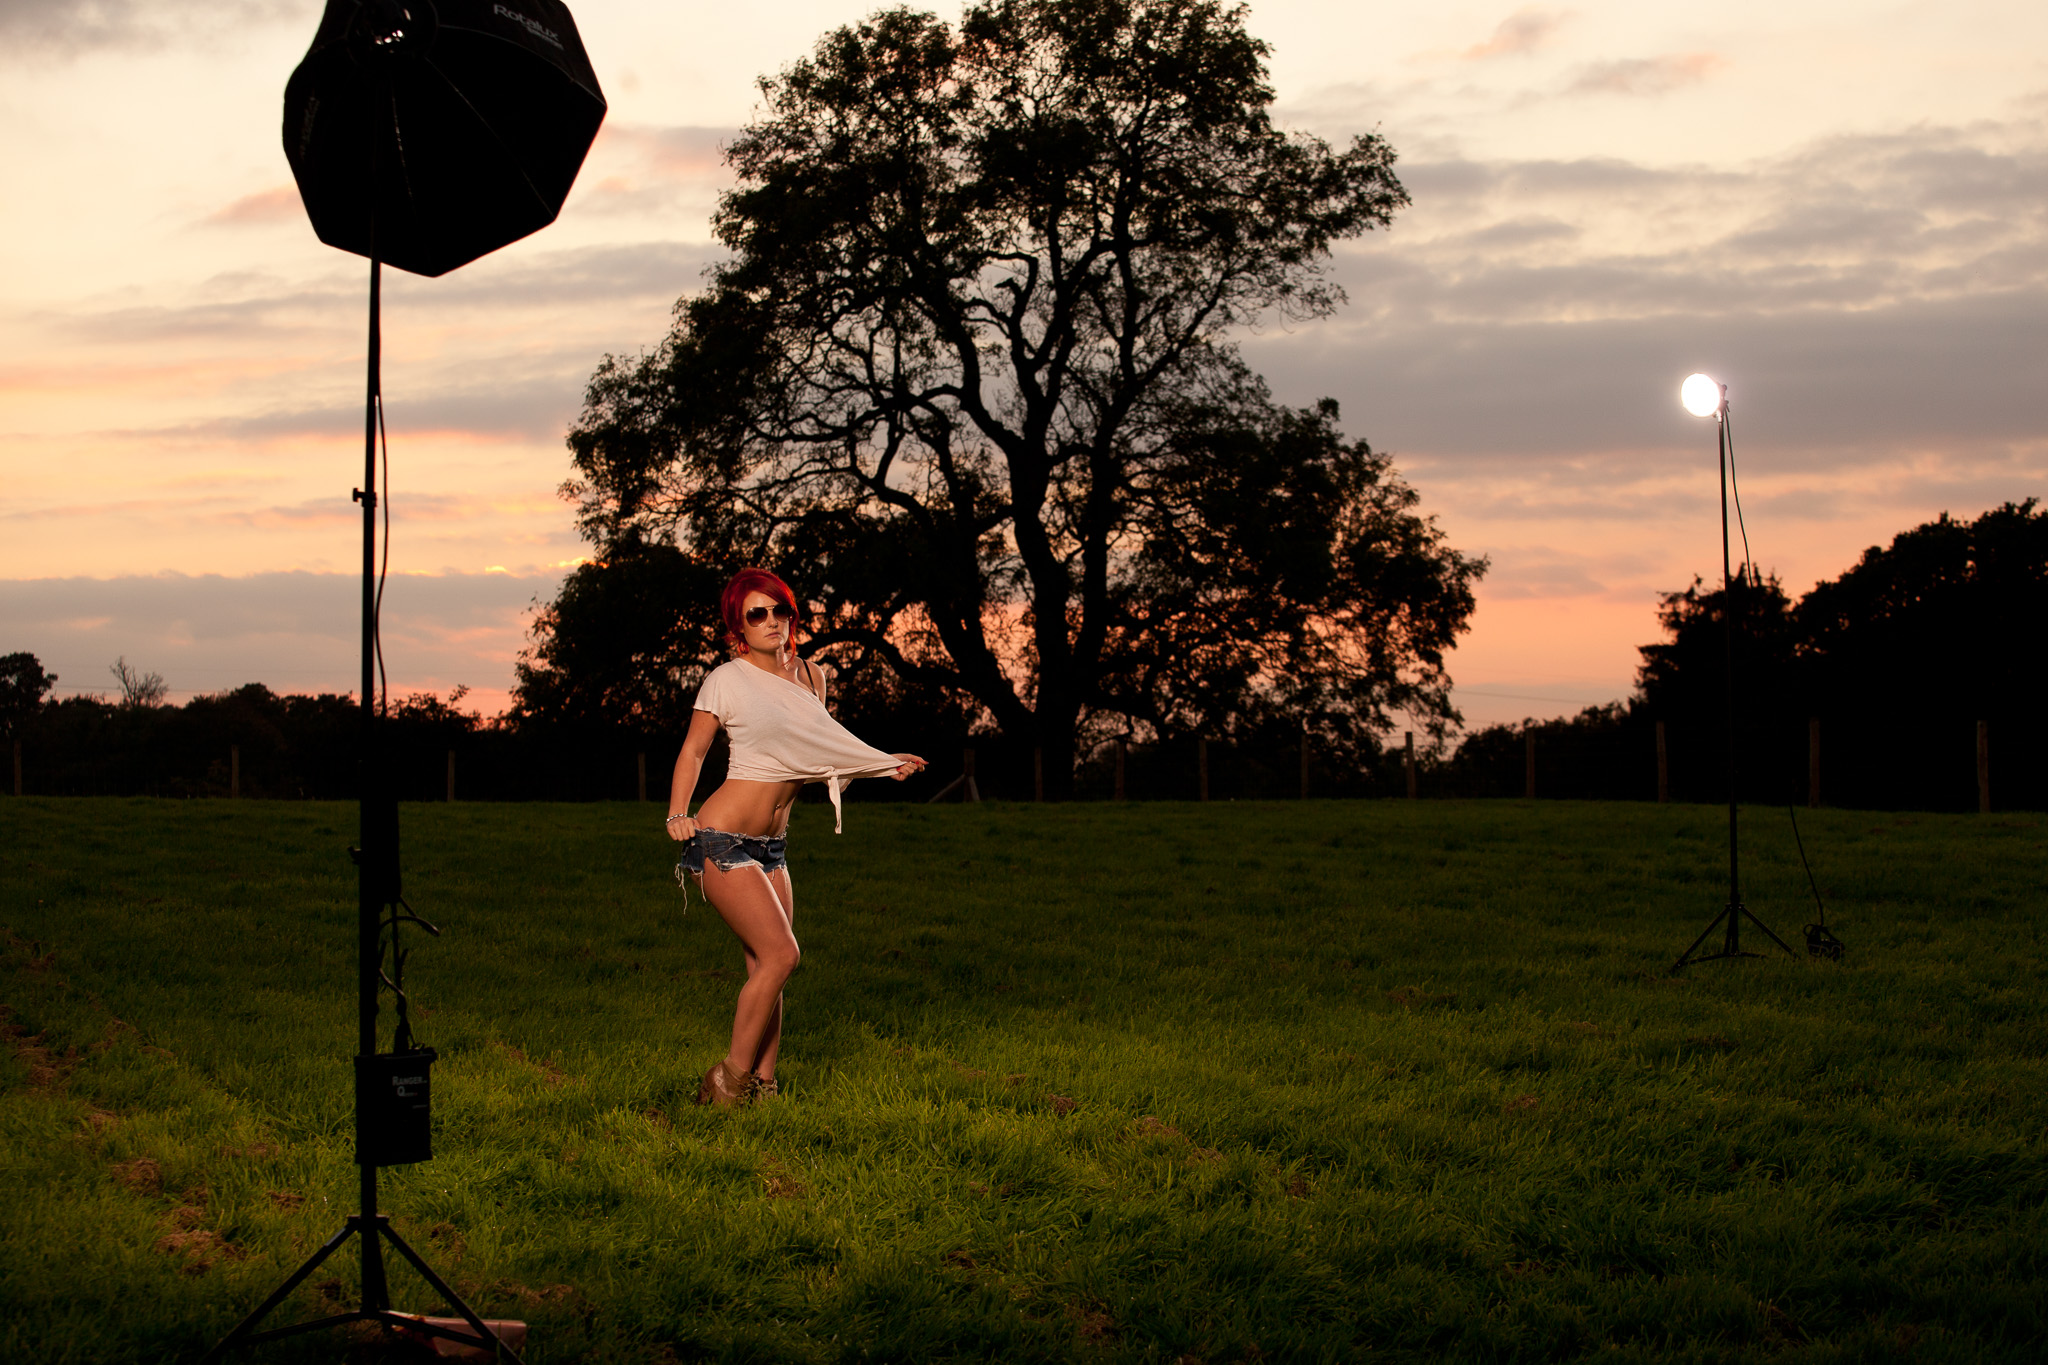
Sunset is my favourite time to shoot, not just because of the “golden hour” light you get, but because it’s the time adding flash to an image can change it the most. You can take a photo of your subject, under what looks to the naked eye to be pretty dull conditions, and then show them something on the rear screen of your camera that they can’t believe hasn’t taken hours in Photoshop.
It’s all about colour balance: Using a mixture of white balance settings on your camera and coloured gels on your flash will enable you to really bring out colour in the sky, especially useful when you don’t get the apocalyptic, fire and brimstone sunset you were hoping for.
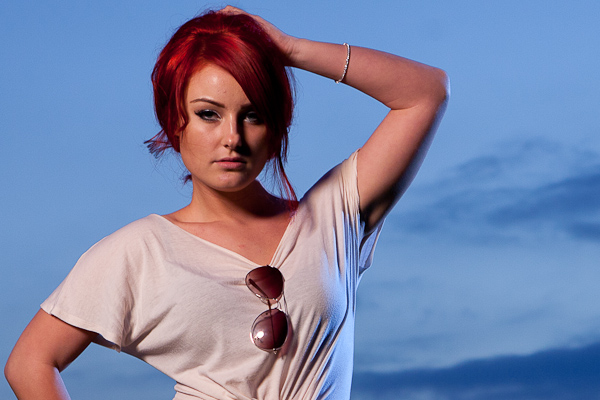
So for this set of images I gelled my main flash (camera left in a beauty dish) with one full and one half cut CTO gels. A CTO gel is a sheet of translucent orange plastic that’s designed to bring your daylight balanced flash up to the same colour temperature as a standard Tungsten light bulb. A “half cut” is a sheet that’s half strength. The “proper” use would be to match your flash to the ambient light, but it’s often used by photographers such as David Hobby (from whom I learnt this tip) to warm up skin tones to flatter your subject. A half or a quarter cut (an even less tinted sheet) on your key light will give your subject a healthy glow.
What if you add a full cut and a half cut to your flash, making it a really warm orange colour? If you don’t change your camera white balance to Tungsten you’ll have an over-tanned subject. You are adding one and a half cuts of orange to the light on your subject, then effectively taking the whole scene down by a full cut but changing your camera’s white balance. Tungsten mode on the camera will bring the full CTO light back to daylight colour temperature (plain white), leaving just the half cut left to gently warm your subject’s skin.
Here’s where it gets good! By setting your white balance to Tungsten you cool the colour temperature of the whole scene down. That brings the very warm light on your subject back to just above normal, but it also cools everything else in the scene. The areas not being lit with your super warm flash, go extra cool. In this case, the grey clouds turn blue.
1.5 cuts of CTO gel, camera on auto white balance
1.5 cuts of CTO gel, camera white balance set to Tungsten
So in less words: Light subject with very warm light. Adjust white balance to compensate. Get slightly warmed subject and cool blue background.
Want to take it a notch further? How about adding a second, un-gelled flash as a rim light? Position it directly opposite your main light and, because it’s un-gelled and therefore cooled down by your shift in white balance, it’ll appear to be throwing cool light in from your artificially blue background.
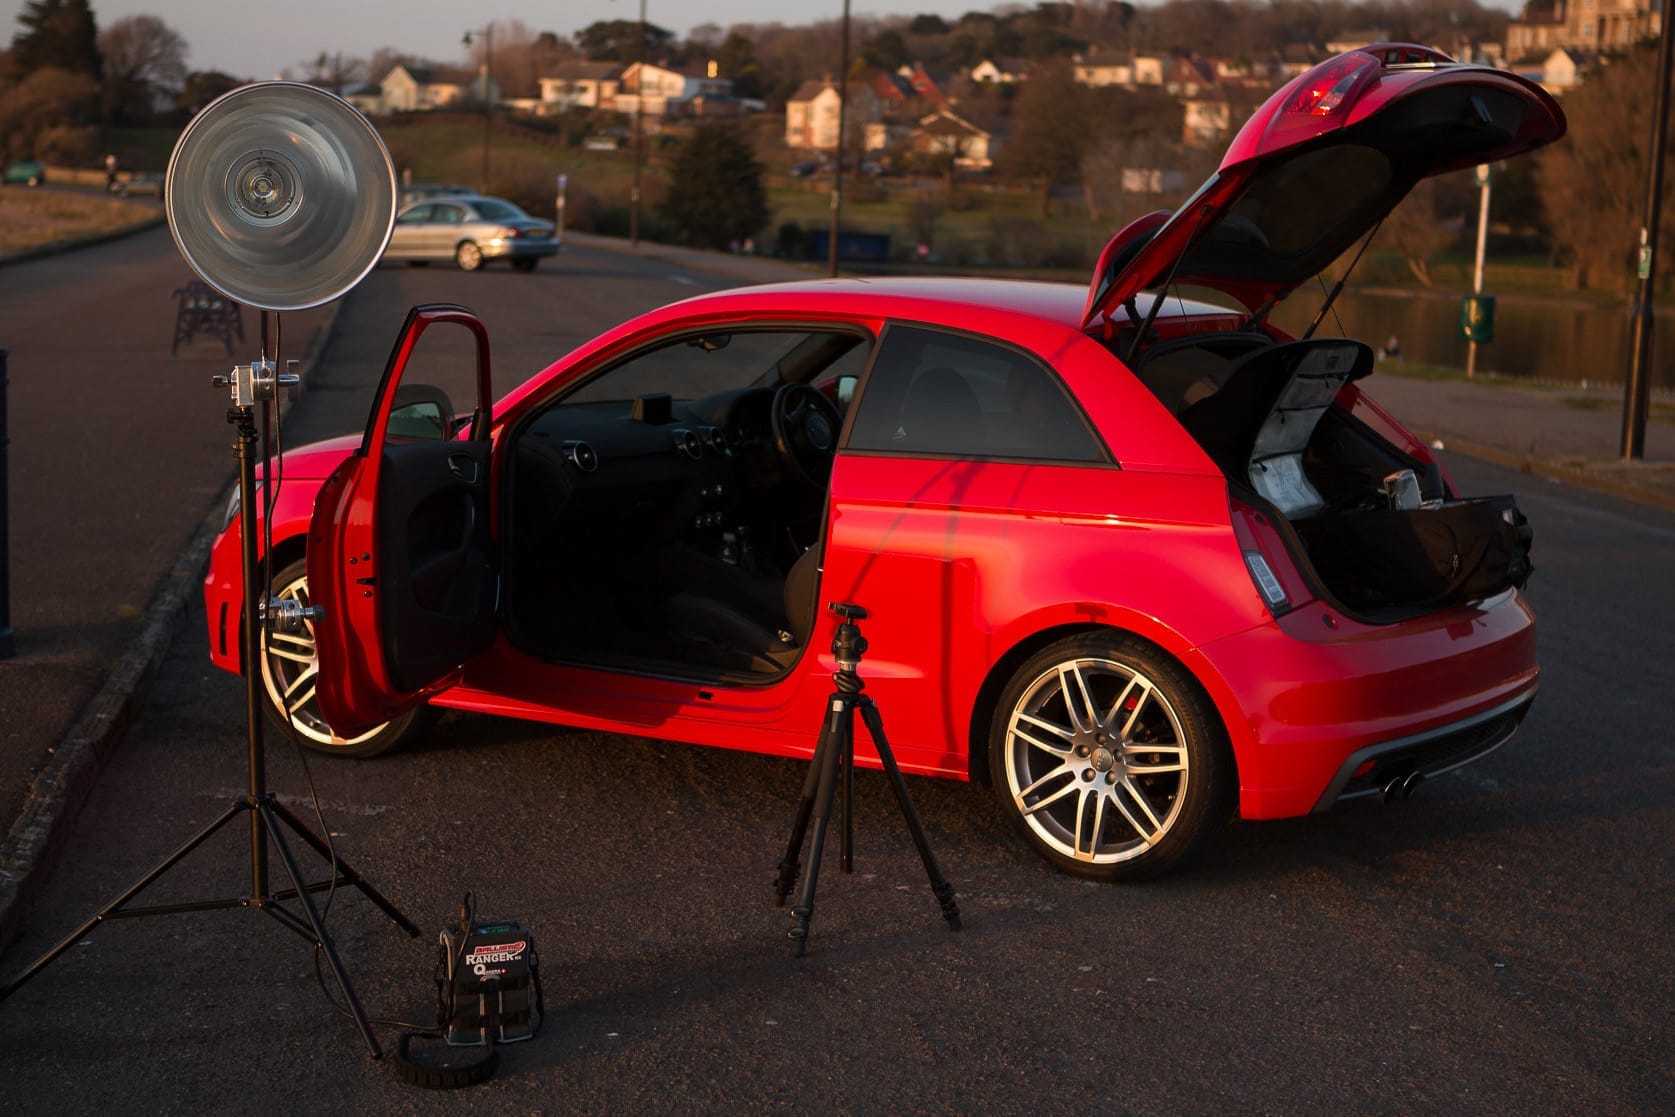
The image above was taken early in the shoot, before the sun dipped out of view and before I gelled the main light so there’s no colour shift in the sky, but it does show the layout of the lights. Soon after the sky began turning grey so the CTO gels were called into action. You’ll be able to see when in the gallery at the end of this post
Enjoy the behind the scenes video, and as usual if you have any questions, post a comment.
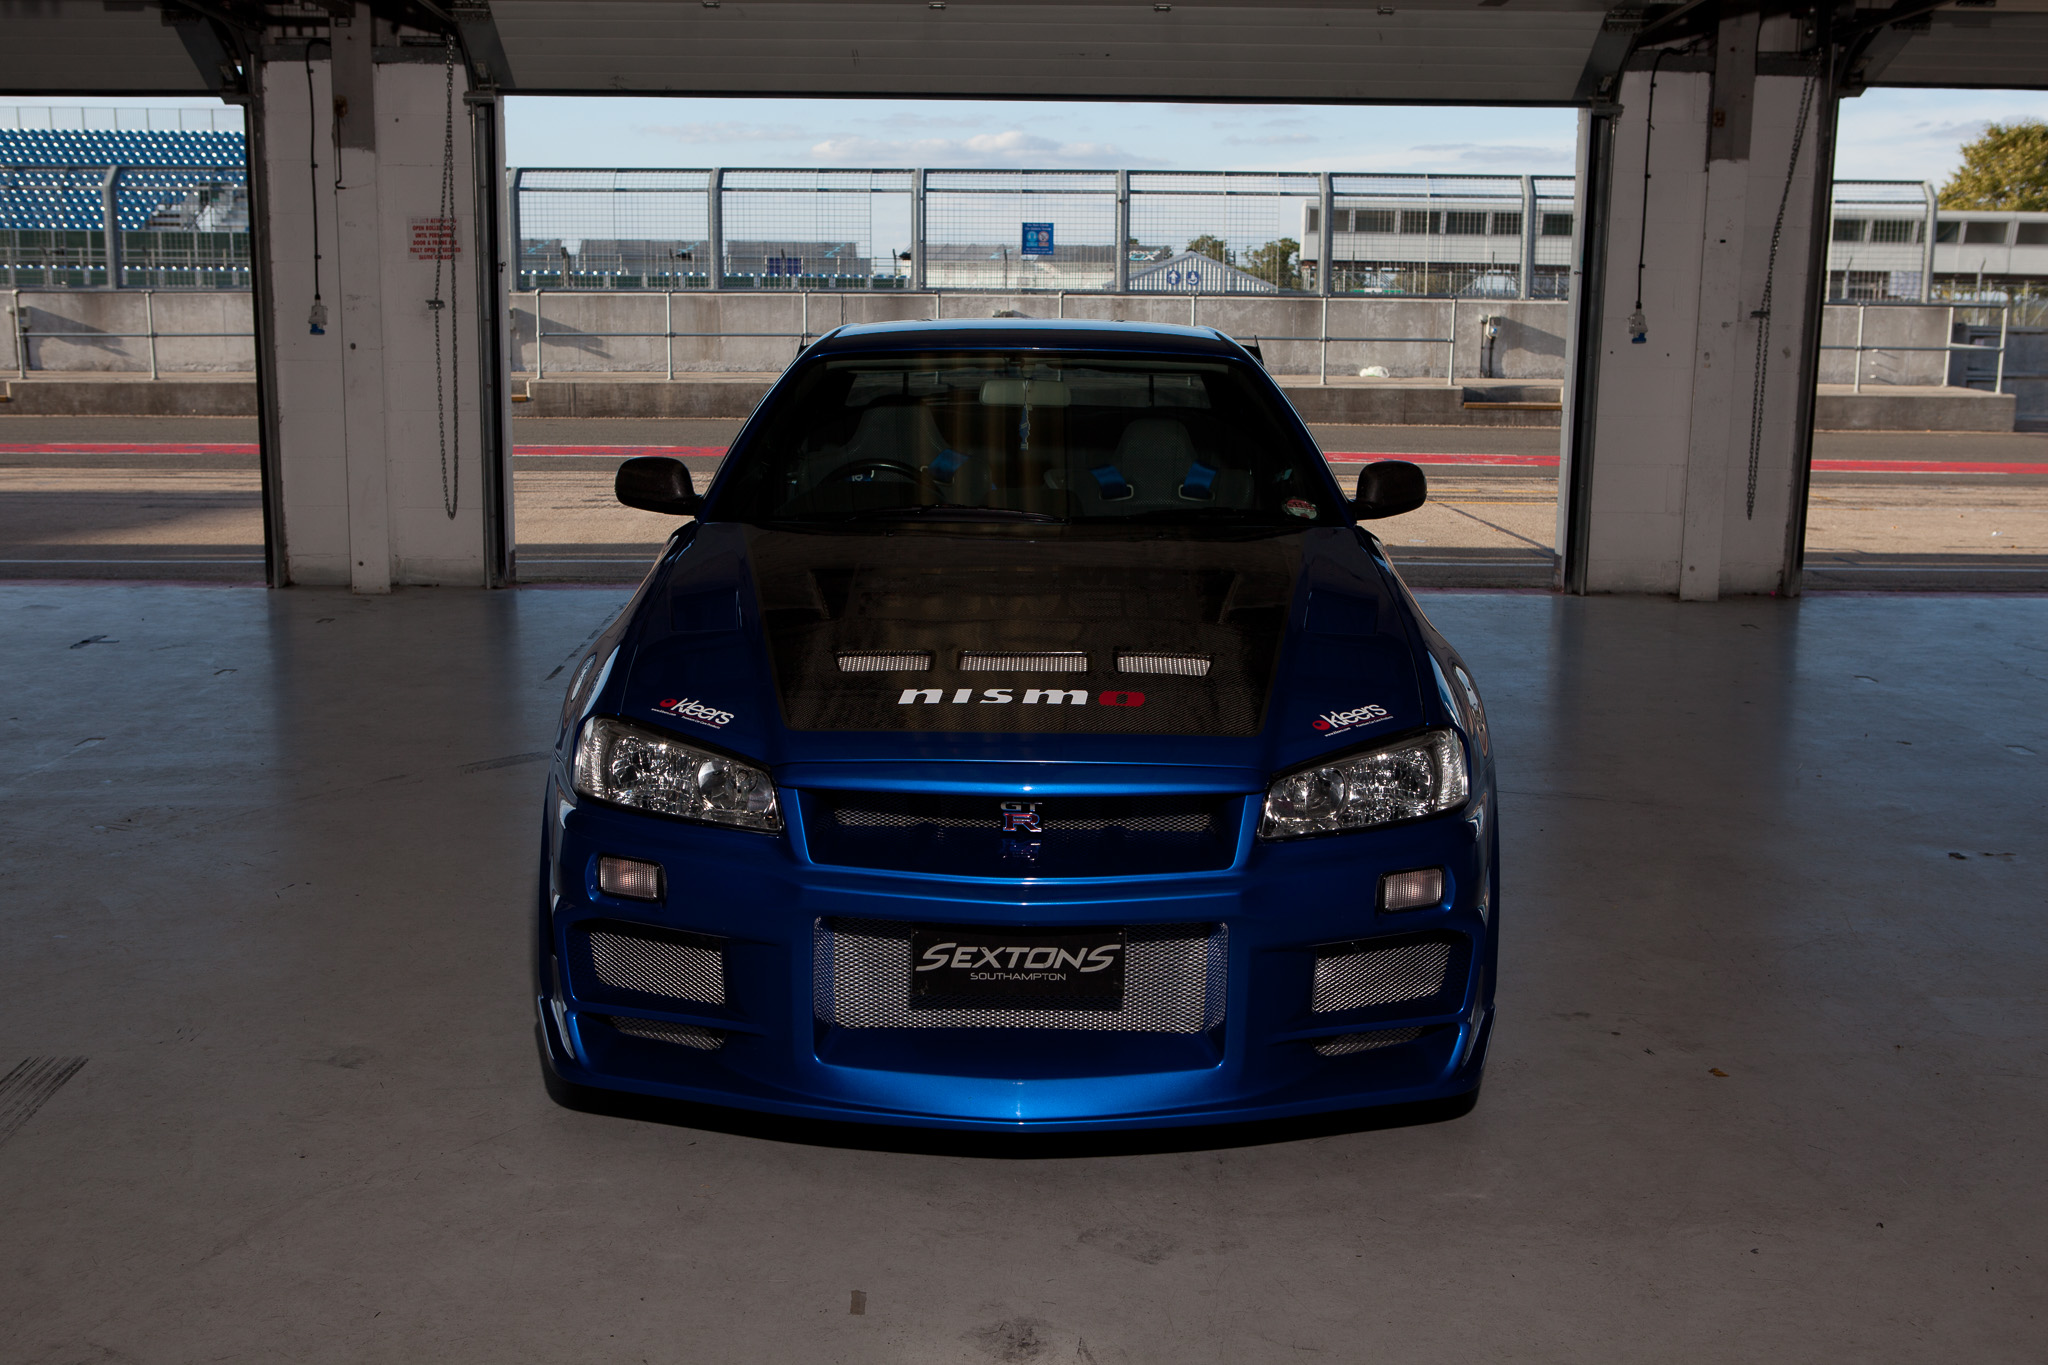
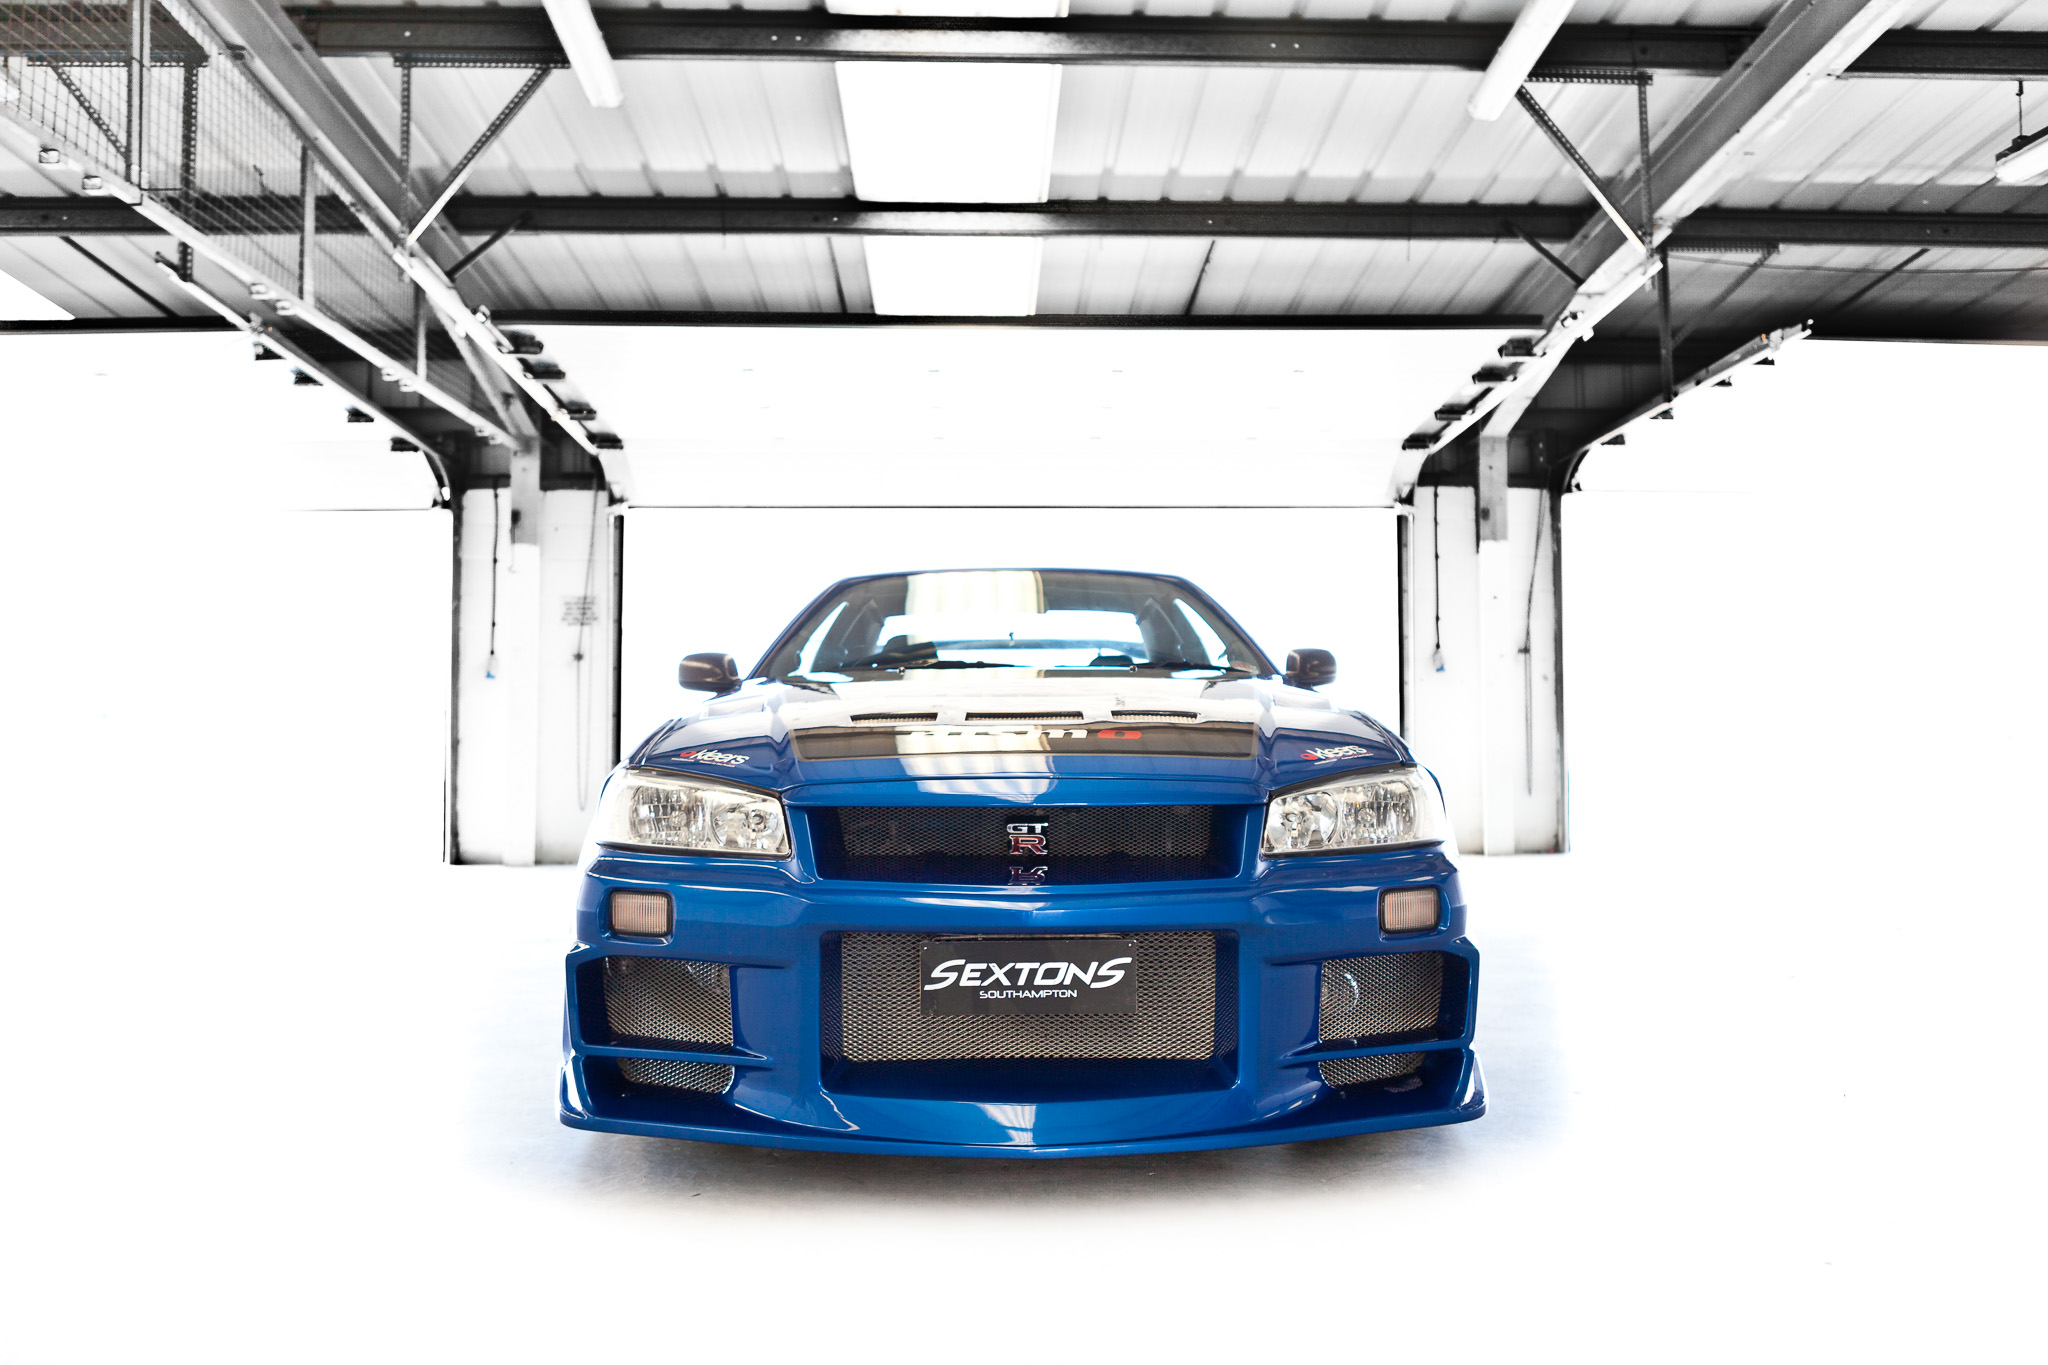
Last weekend saw Trax come to Silverstone and another chance to be to shoot in the famous Formula 1 pit lane. No planning, no preparation – just a beautiful car and an unlocked garage. Rather that just hitting you with the eye candy, I thought I’d de-construct a few of the shots and tell you what I did to get them. As always, start simple. At 1/160th (a safe sync speed on the 5DMkII using Elinchrom Skyports) at f/6.3 all ambient light was killed allowing me to add my own light. When shoot a car, you can get away with hard light, so this was lit with bare Quadra’s either side.
With the doors opened, and the car turned around, I exposed for the scene outside (1/160th @ f/8) to give the picture some context, then started adding flash to bring it up to the same level.
I quickly realised this wasn’t going to be very exciting though, so I killed the flash, opened up to f/2.8 and kept slowing the shutter until the car was properly exposed and the bright pit lane blew out. A bit of desaturation and floor clean up in Photoshop yielded this:
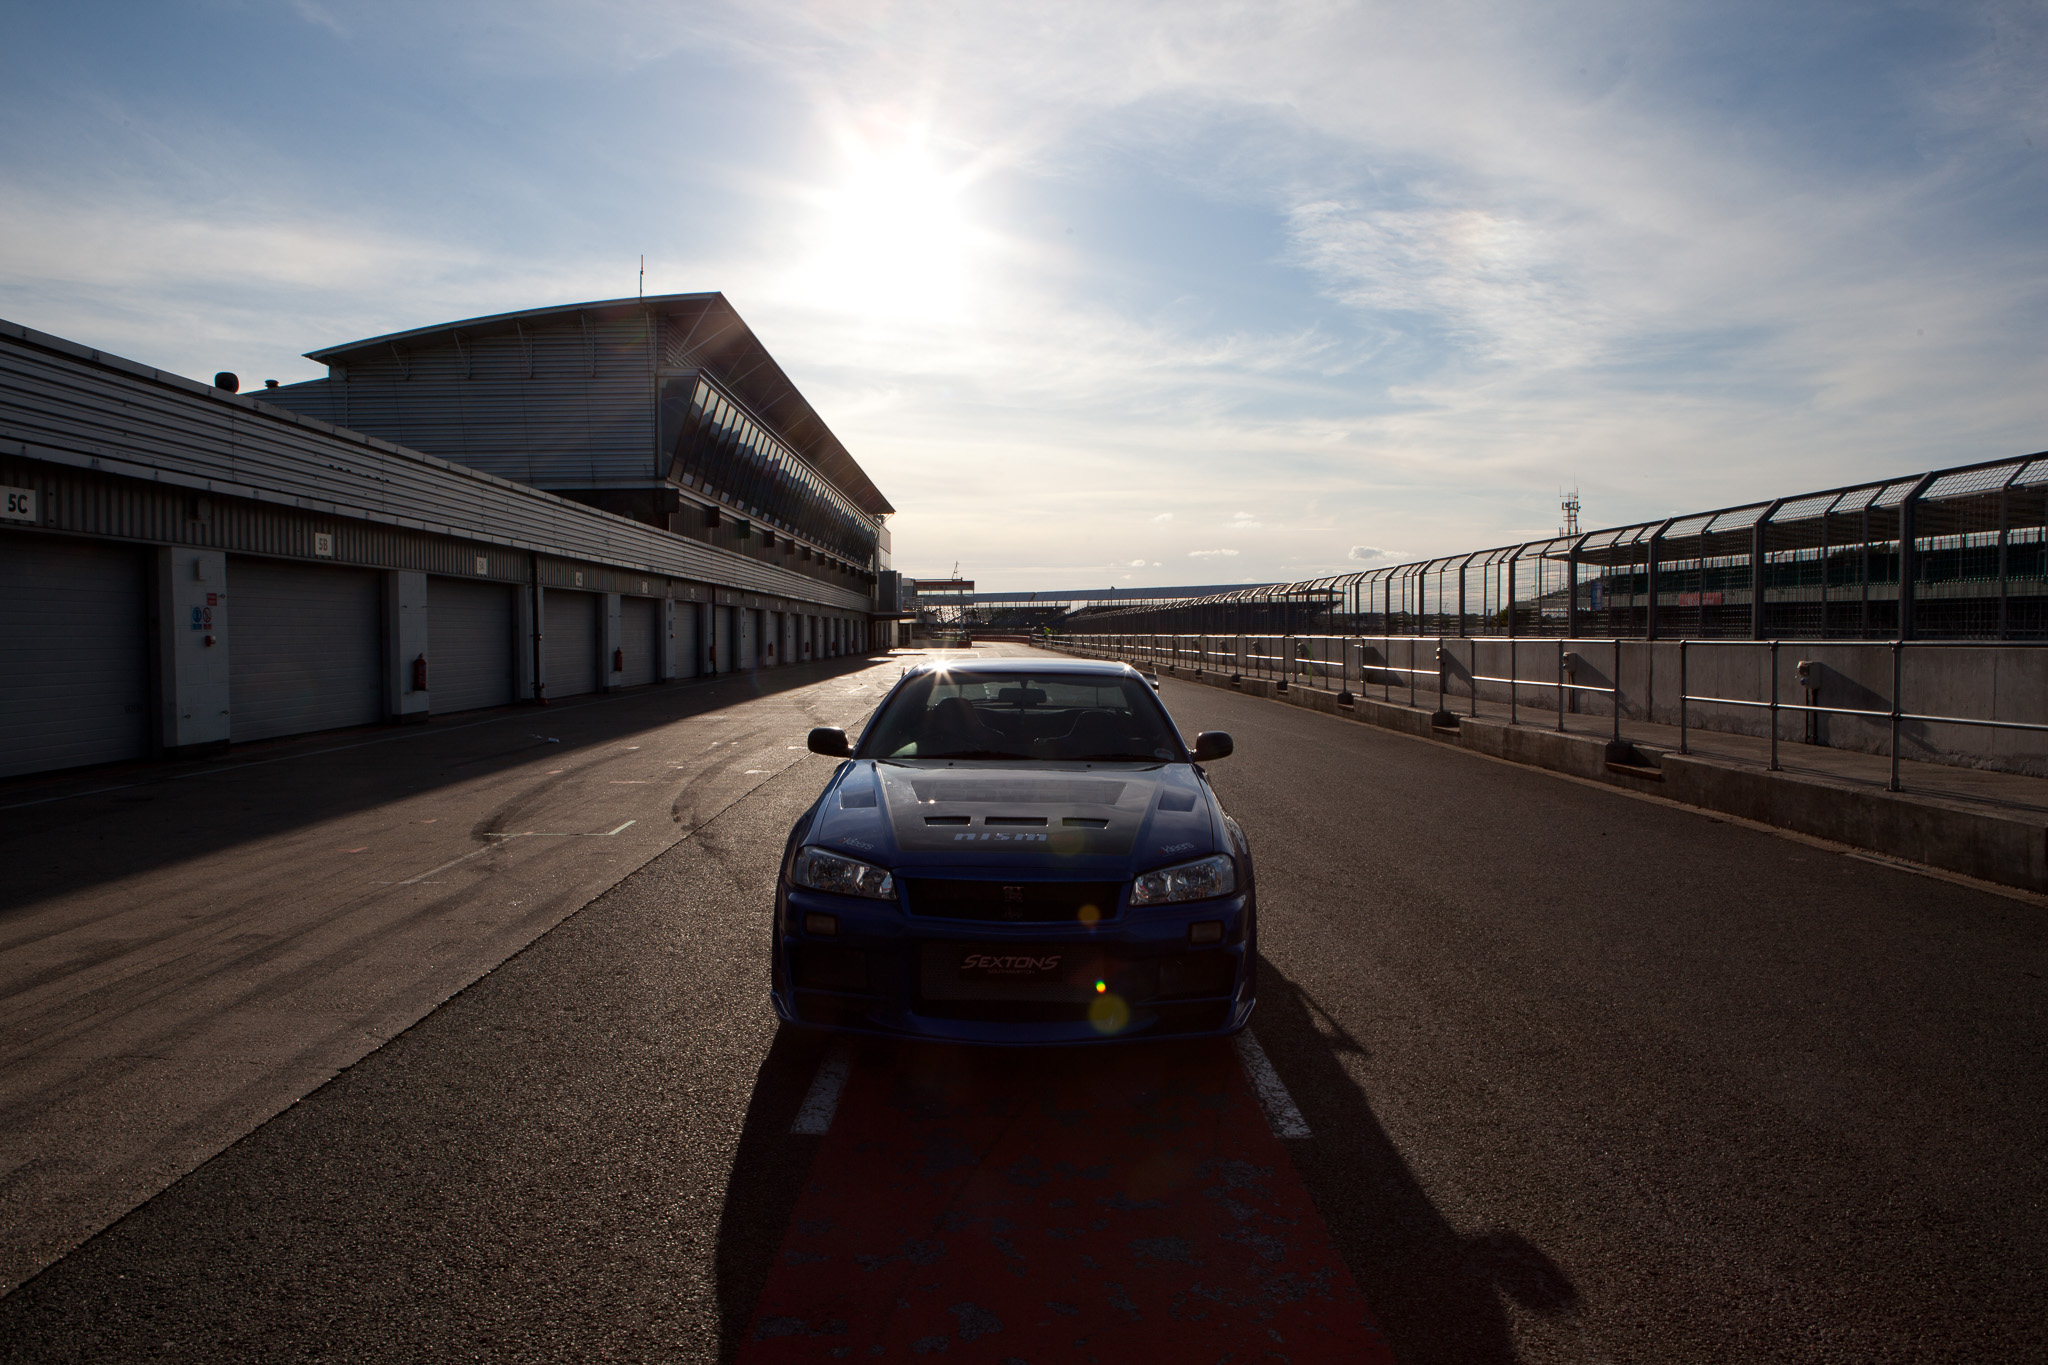
Time to move outside and shoot down the pit lane using the sun as a back light. To control to sun, and be able to keep it in the frame I had to stop down to f/16 at 1/160th which meant I had to crank my lights to full power (400WS) and bring them in fairly close.
If I’d had my 18cm reflectors I would have had a bit more leeway and would have been able to shoot wider. You can see here how close I needed the lights.
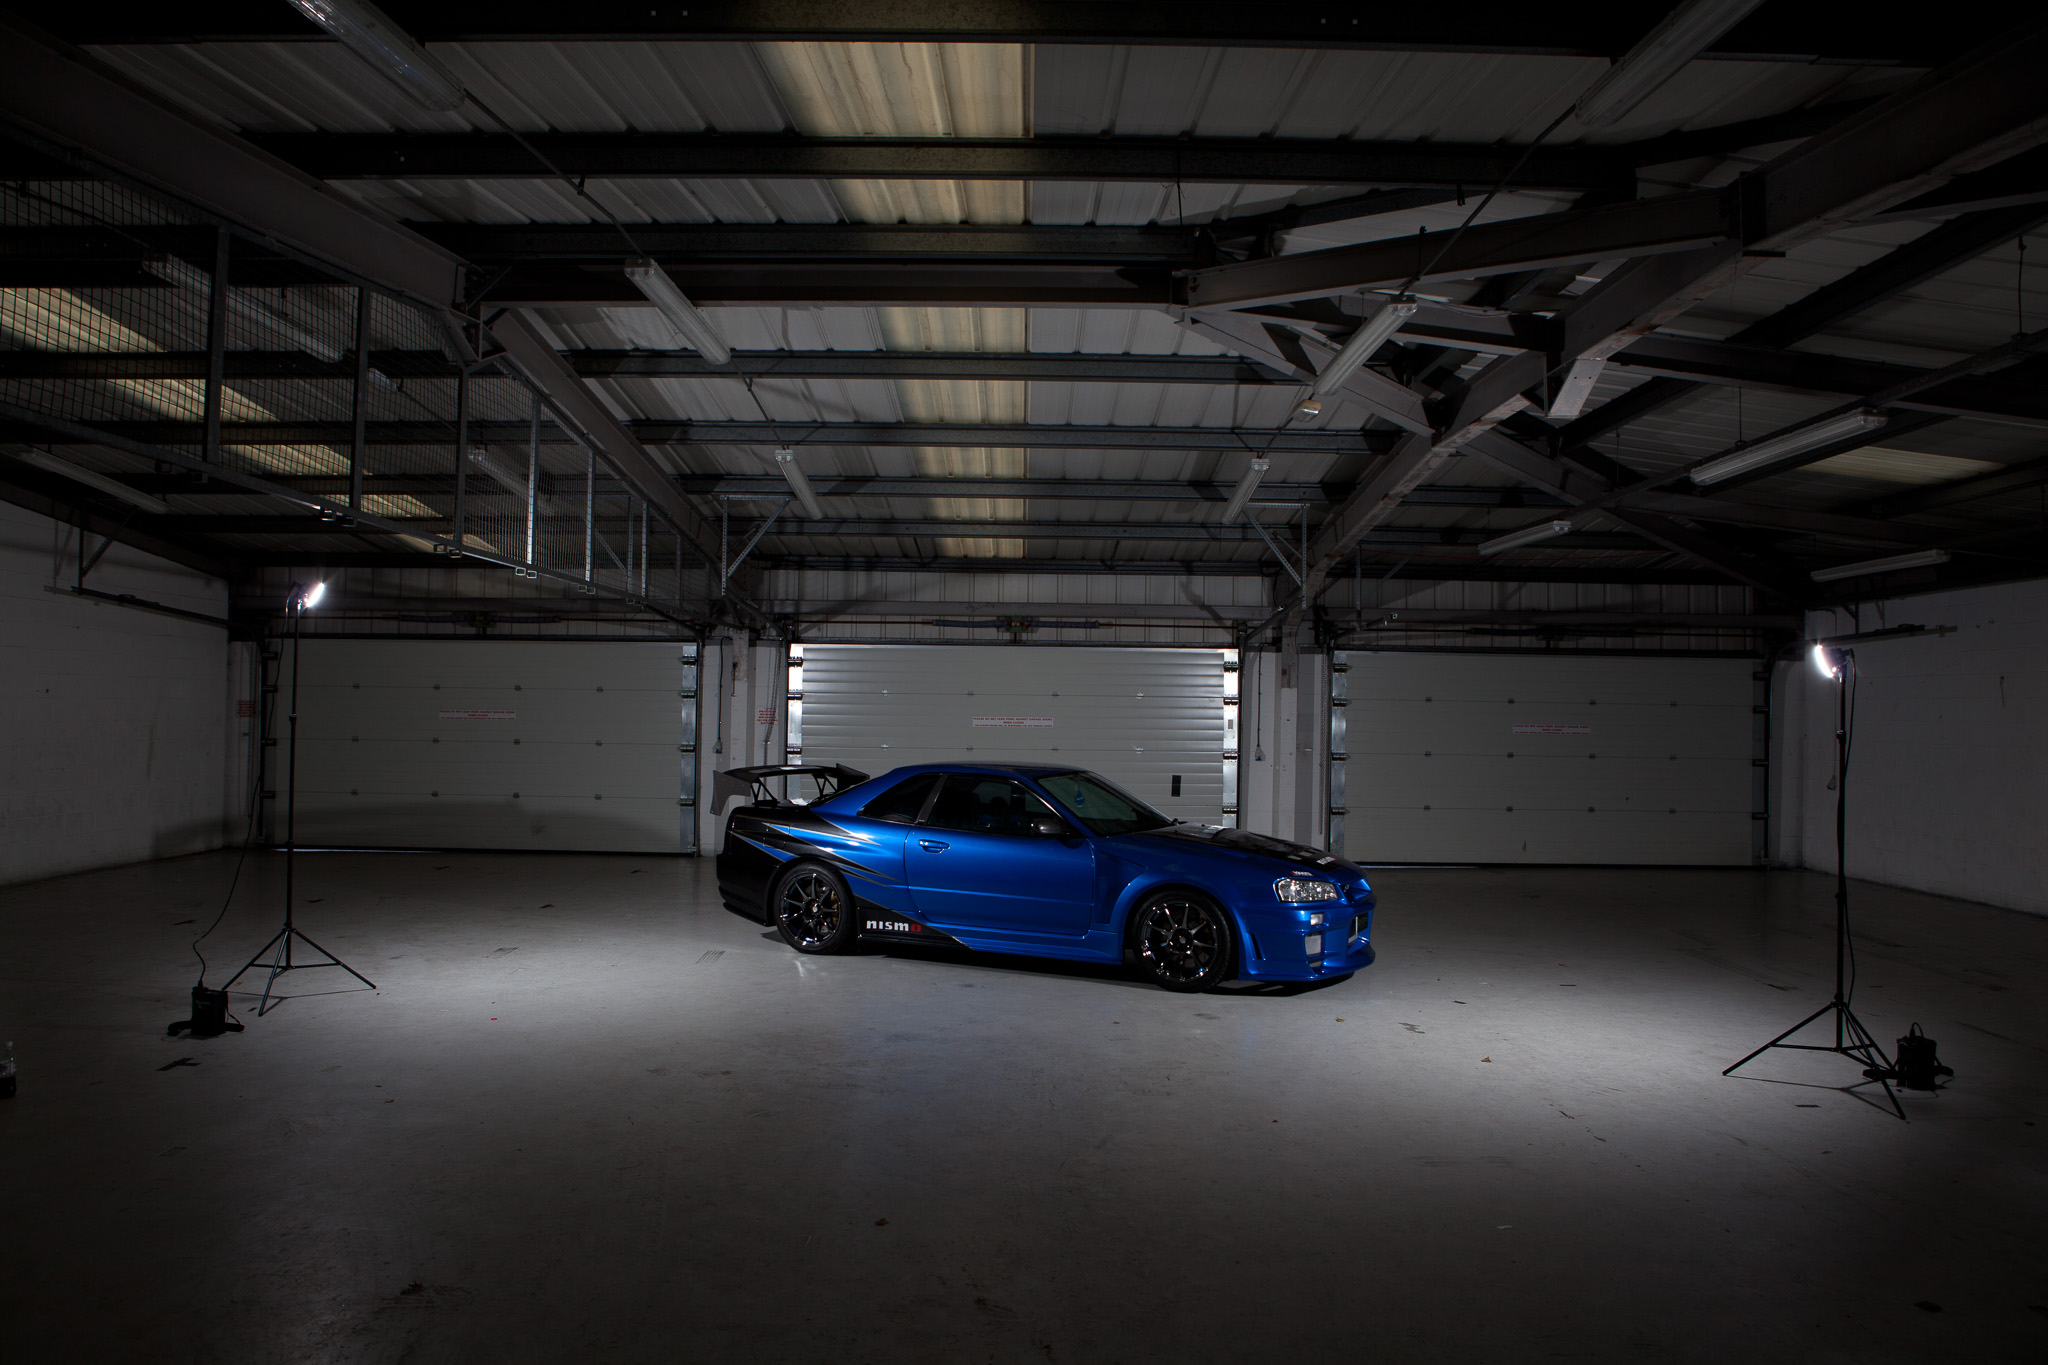
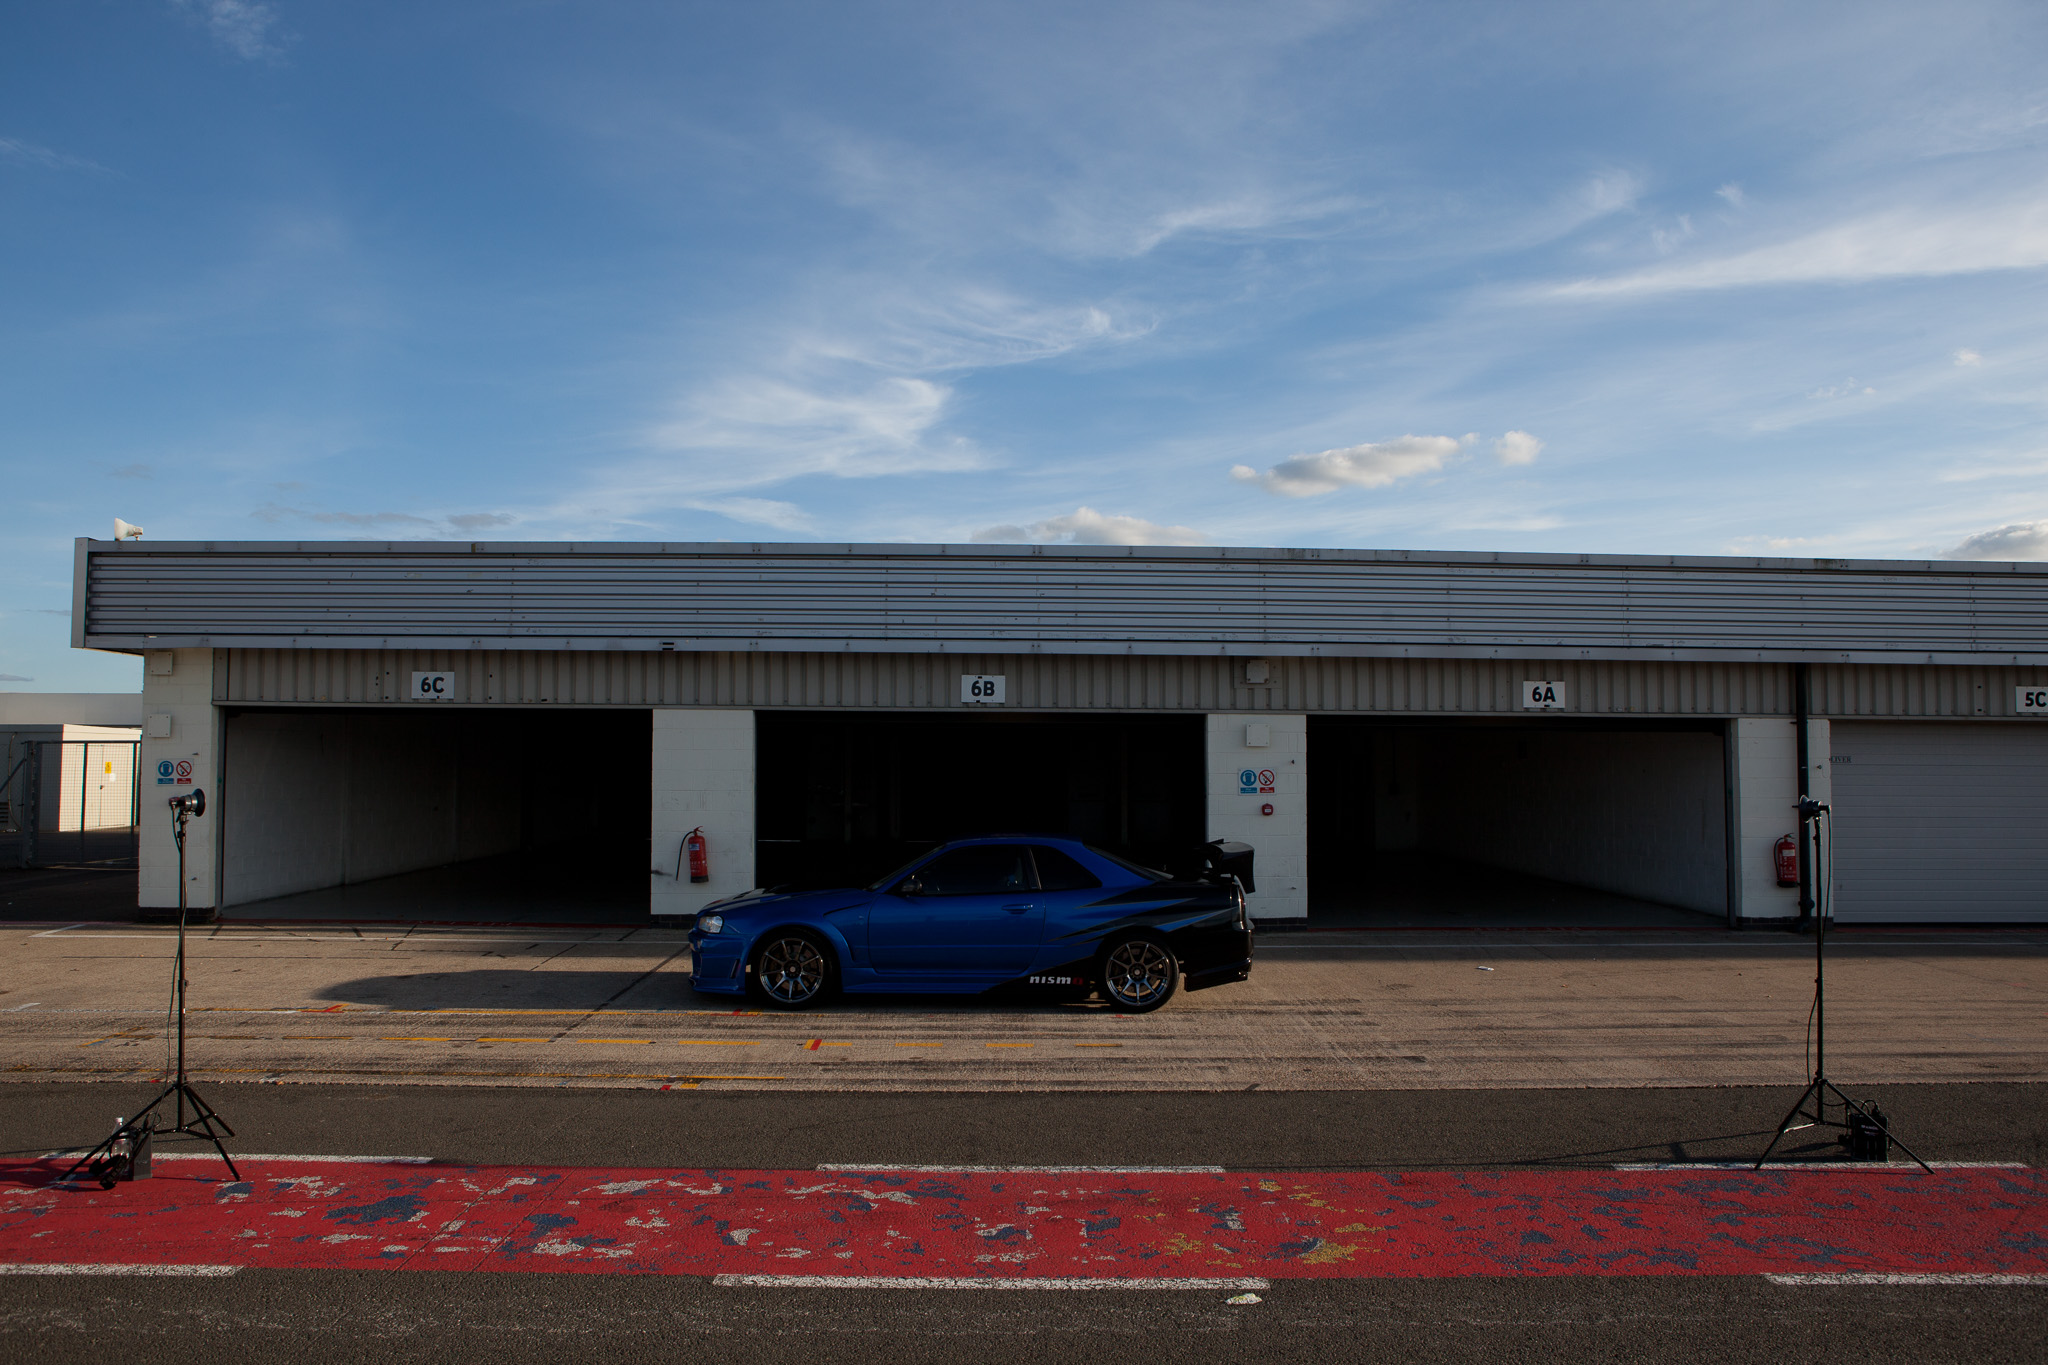
Then at the suggestion of Chris the owner, we tried a wide, side view as if the car had just driven in for a pit stop. I knew it was doing to be hard to light, but what the heck! Once again I set my exposure for the ambient light and under exposed by about 1 stop to keep some saturation and detail in the blue sky (1/160th at f/9 this time as the suns not in the frame). Here’s the shot unlit.
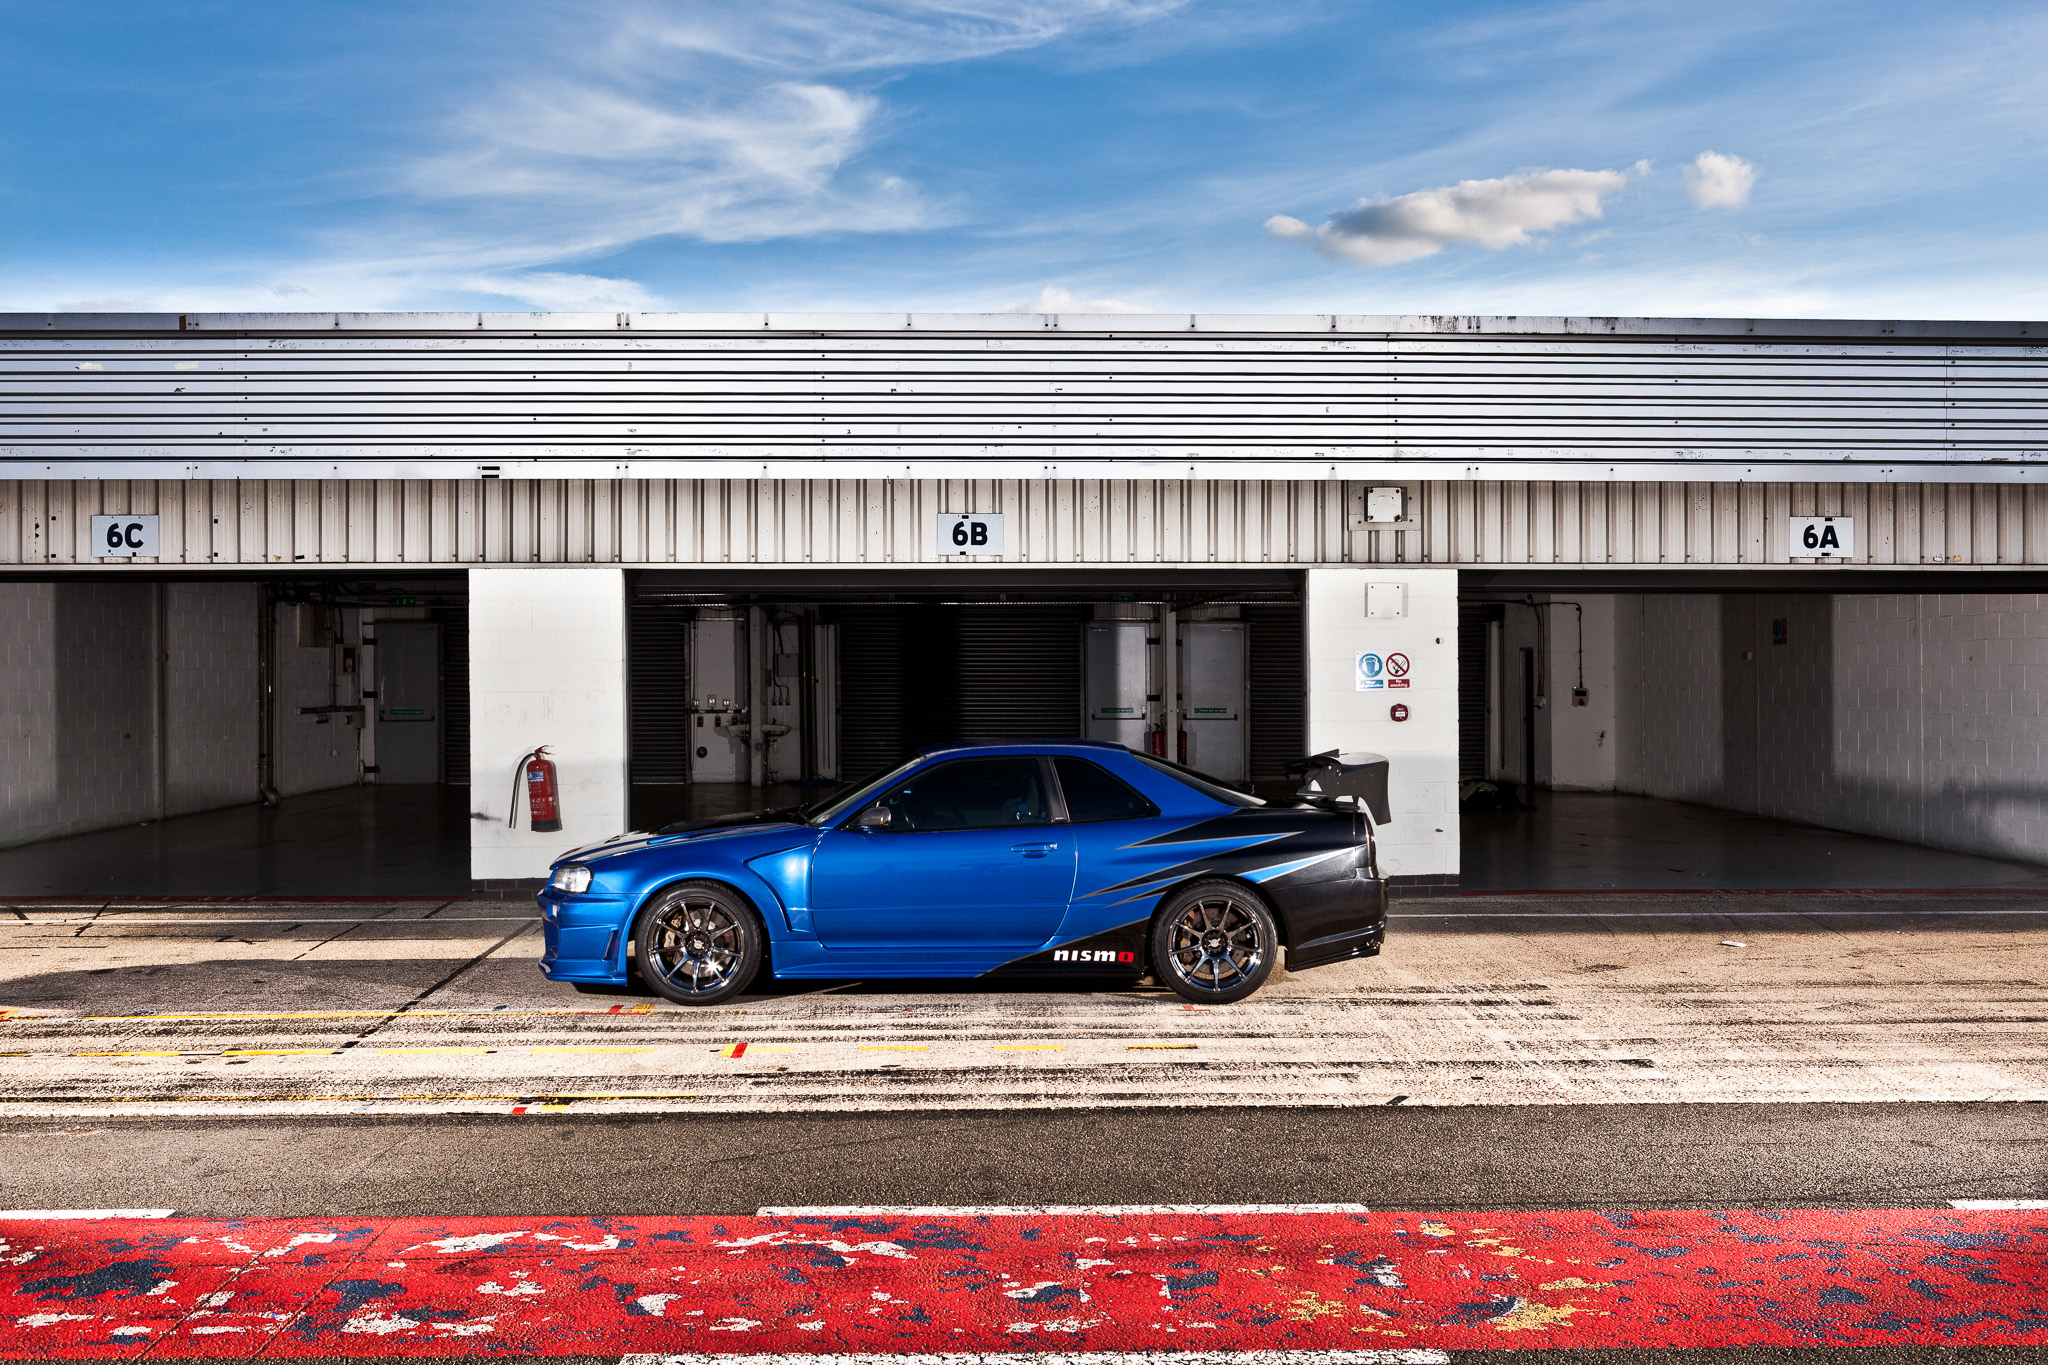
And with the same settings but with the flashes firing at full power again. I had to have the lights in a little closer than I wanted meaning I couldn’t quite get the end walls of the garage in shot. I’m rearranging my camera bags this weekend to make sure I always have the 18cm reflectors and some grids with me!
Everything in photography is a compromise and working within the limitations imposed by location, subject or gear is all part of the challenege. I’m still happy with the final shot:
Enjoy the final images, and as always, click on any image to see the big, high quality version.

 The final job was a little colour toning and general exposure tweaking.
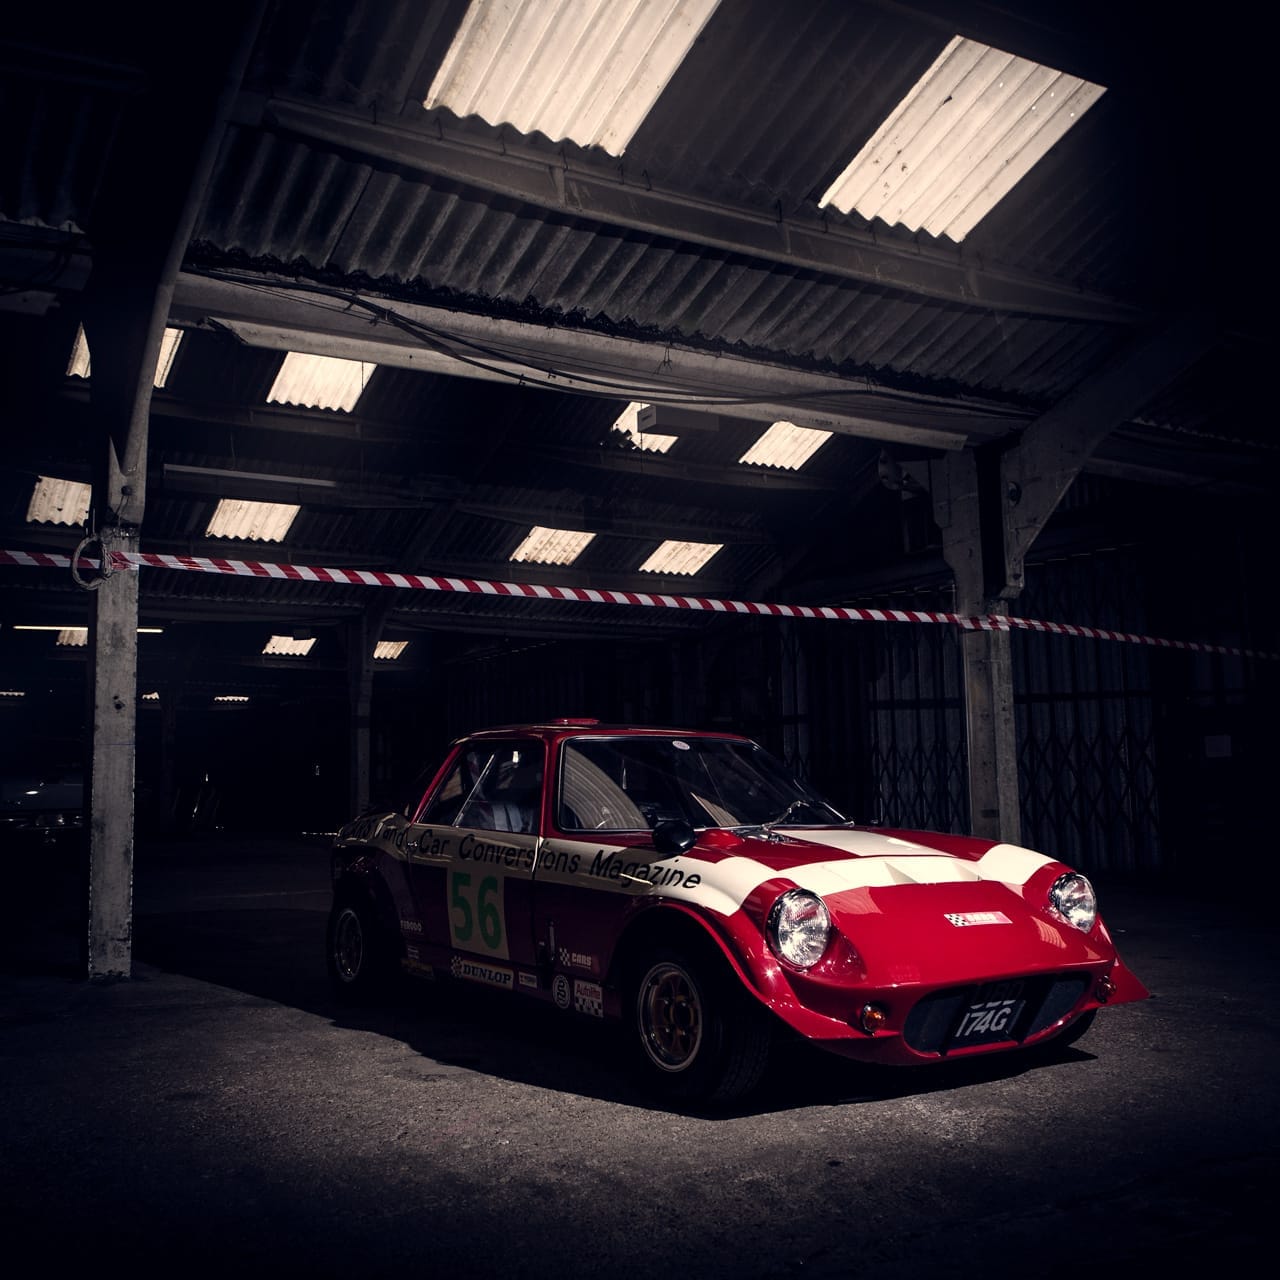


Recent Comments