Ultimate Street Car is one of the biggest weekenders on the modified car show scene and title sponsor, Marangoni Tyres had the busiest stand at the show. And on their stand they had Jen and Sarah who you may have seen on theblogbefore along with Torrs. I’d spoken with Sarah in the week leading up to the show and arranged to make a few pictures, but I have learnt that you can’t plan too much at shows like this. It’s a case of seeing what you have to work with and coming up with ideas on the spot.
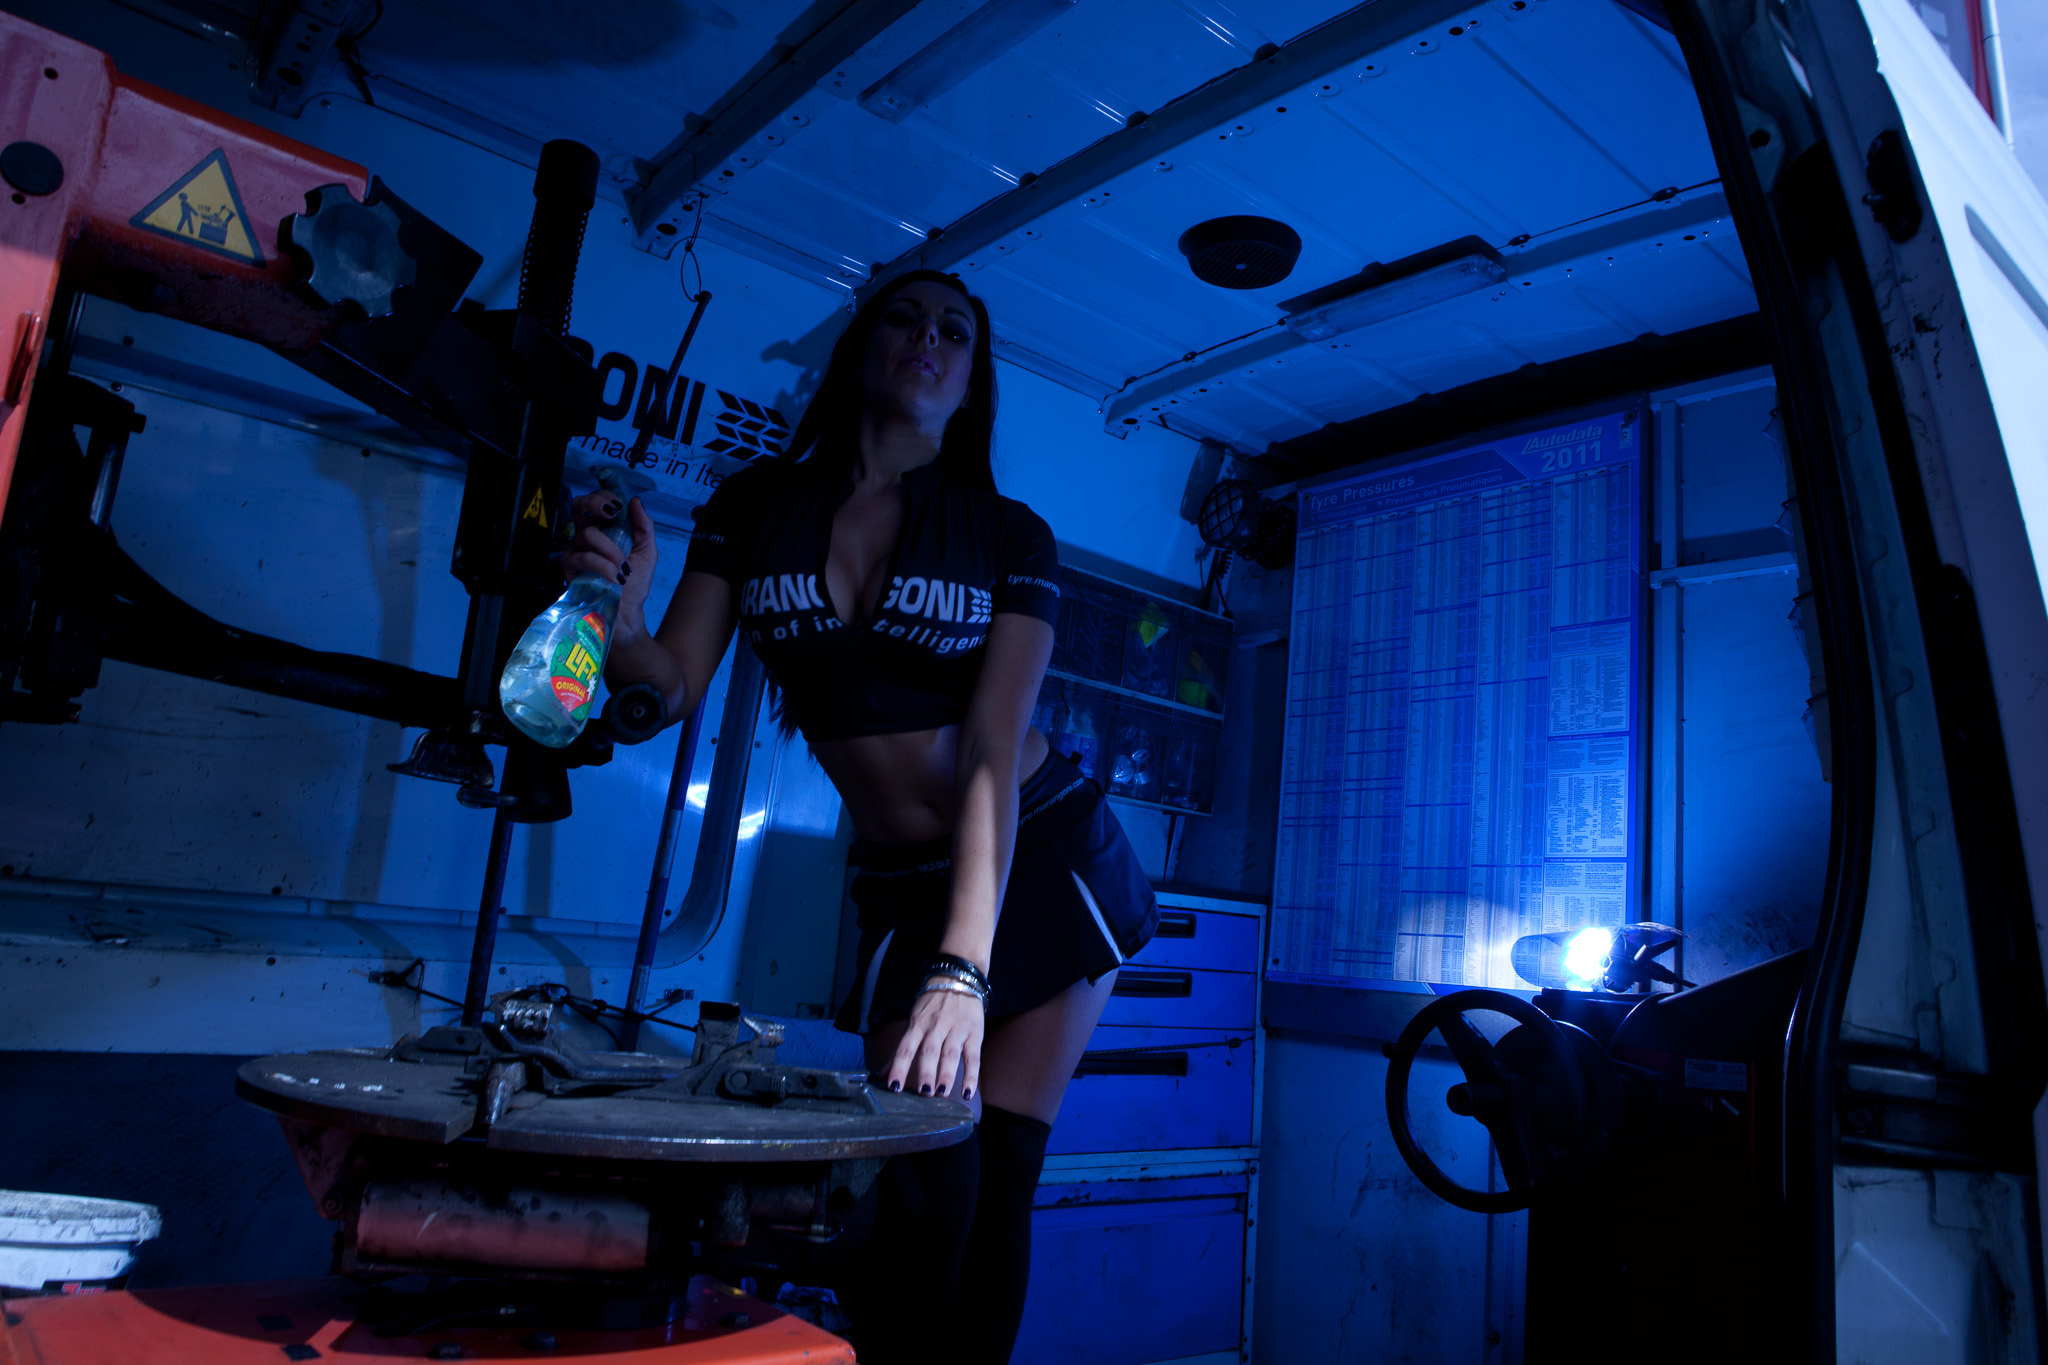
In this case the idea was pretty clear on arrival. Marangoni were promoting the fact their tyres are available from KwikFit and to the side of the stage was a fully kitted out mobile tyre fitting van. I think you know where I am going with this…
If the people running the stand and paying the promo girls are going to let me take their girls away from their main job for a while, I need to try and give some value back. In this case, producing some images emphasising the Marangoni/Kwik Fit connection worked for Chris, the man in charged, and the KwikFit fitters on site.
Five minutes later, the KwikFit guys were tidying the van, I was unpacking my Quadras while the girls wielded lip gloss and hair brushes.
So after a quick explanation of what we were trying to achieve it was time to test the lights. I do this one at a time to simplify things, getting one right before moving on to the next. I this case I set my camera about 2 stops below ambient to stop daylight spilling to the van too much and set the power on the blue gelled Quadra in the back of the van. It only needed to be set just above minimum power to get a nice rich blue colour – any higher and the colour got paler.
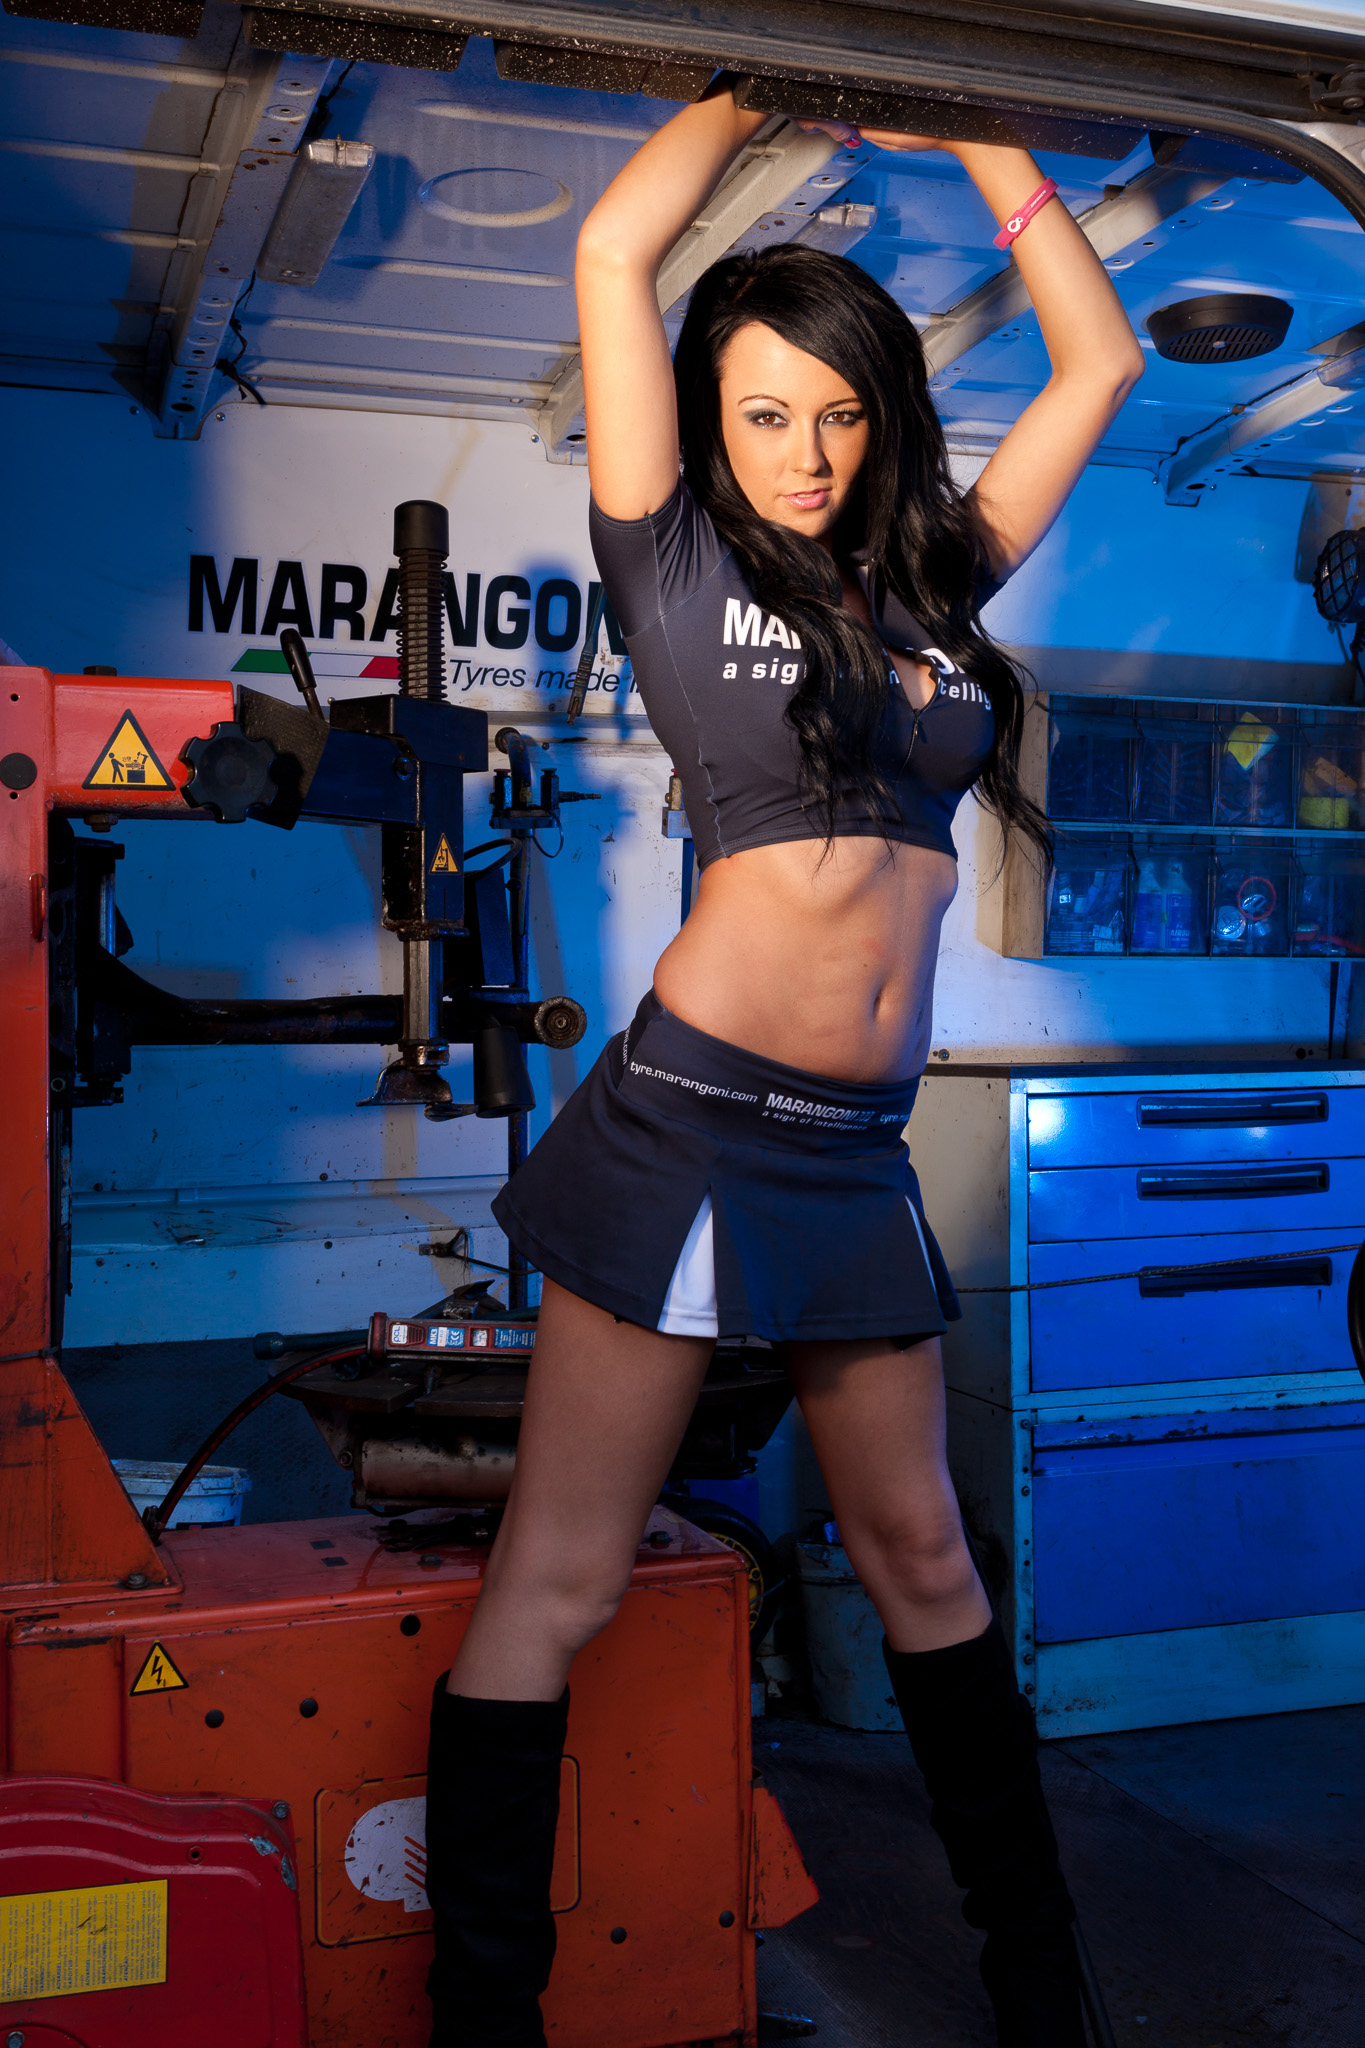
That’s a bare Quadra head back there (no reflector) as I wanted light bouncing around in the van to fill in the shadows and the sheet of blue gel is held on with… chewing gum! Outside the van was a CTO gelled main light with a 30 degree grid spot in the standard reflector to keep it from overpowering the blue interior of the van. This light was moved quite a bit during the shoot to make sure it was aimed correctly and to maintain the flash-to-subject distance as the girls moved about the van.
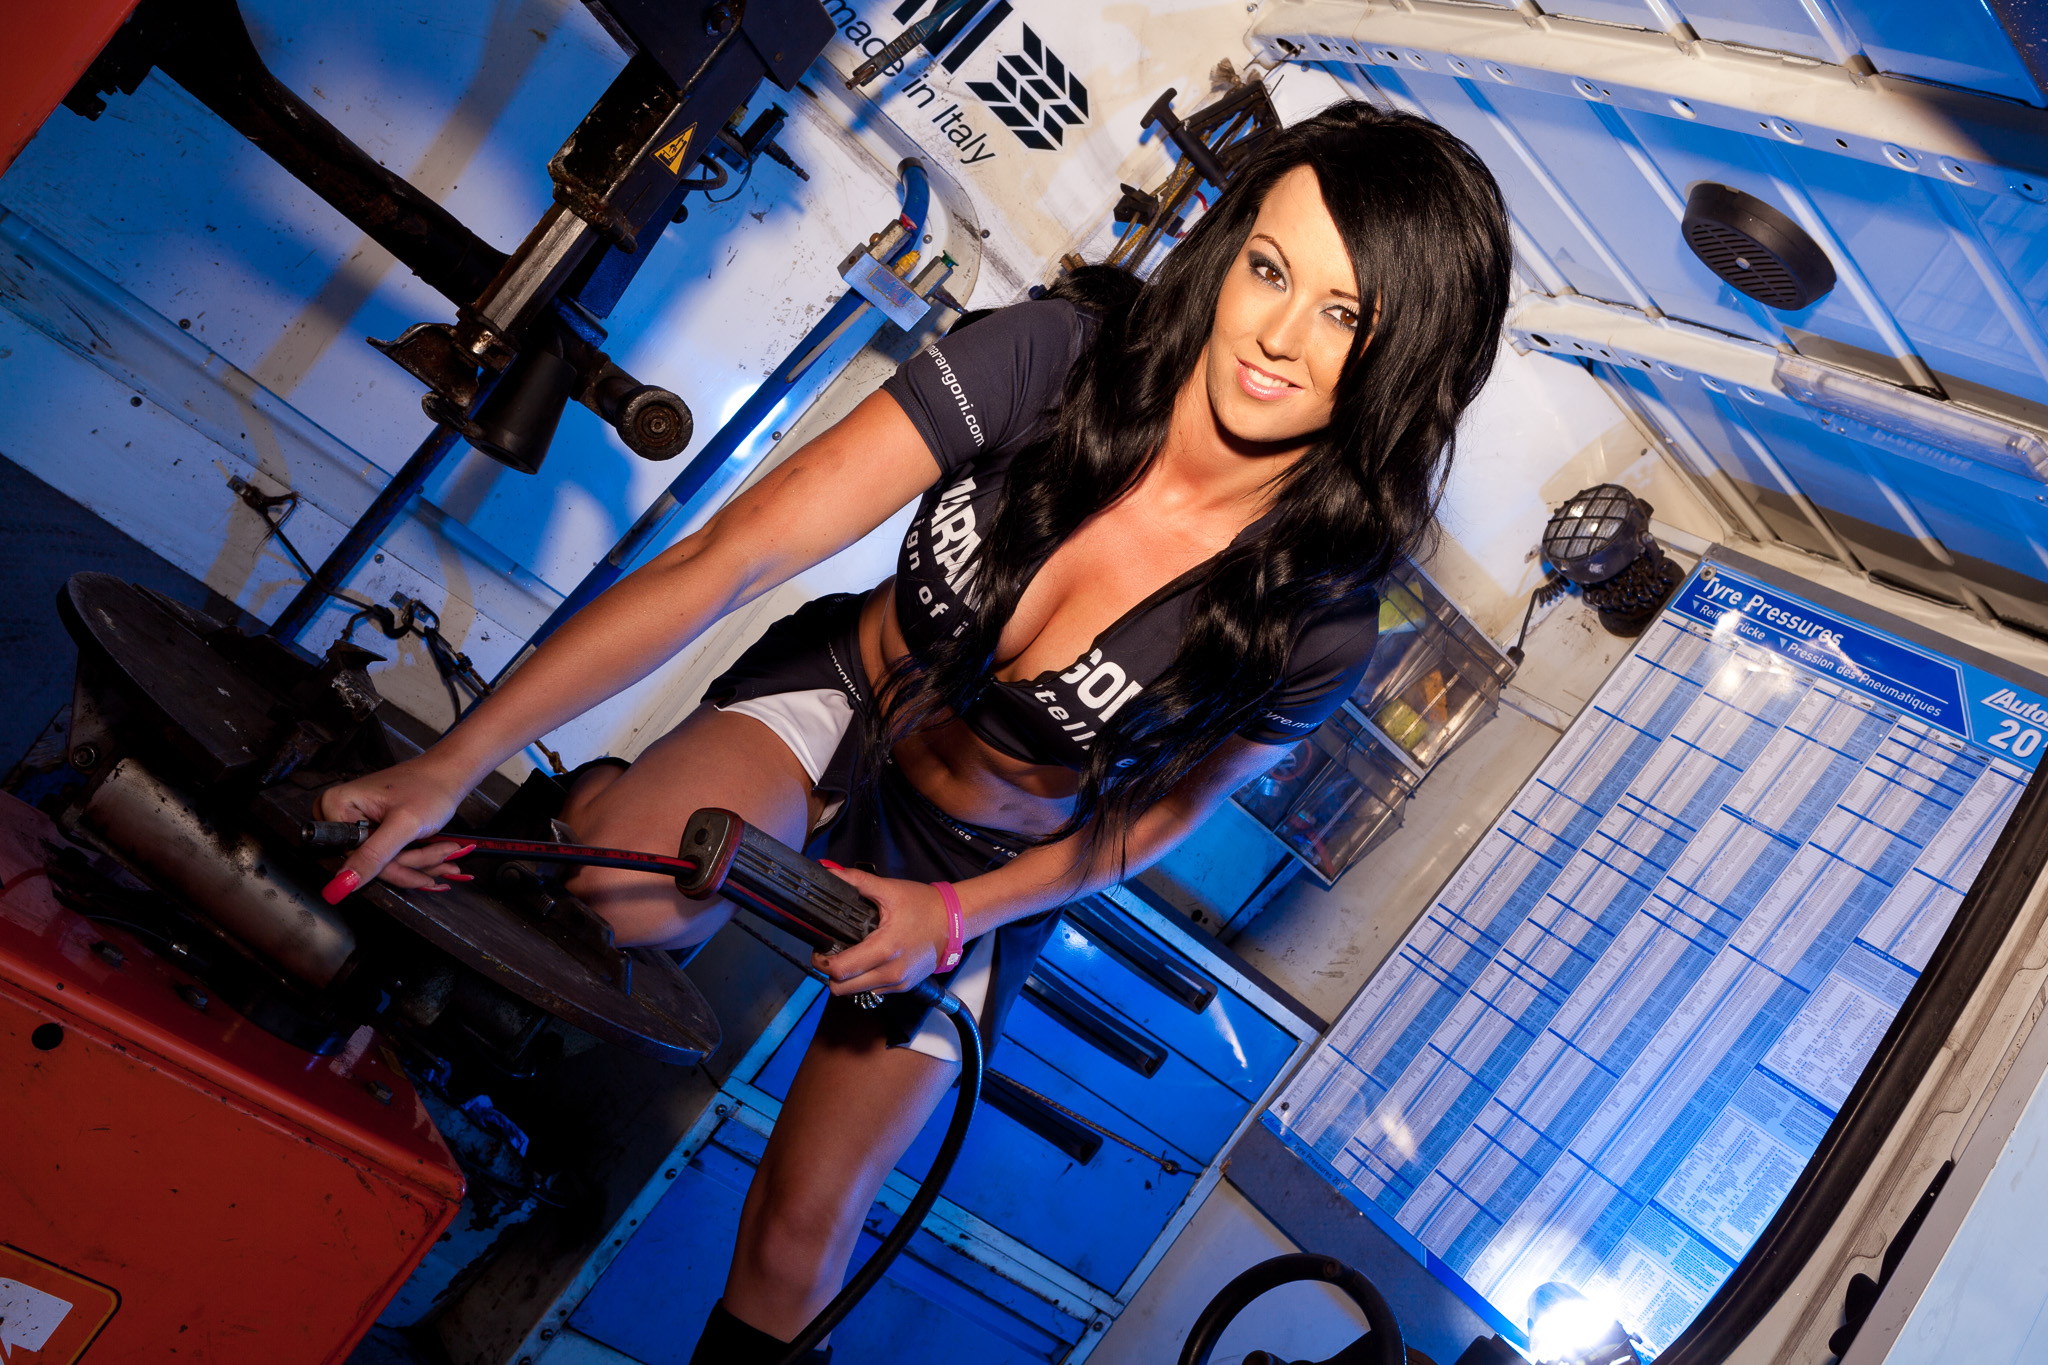
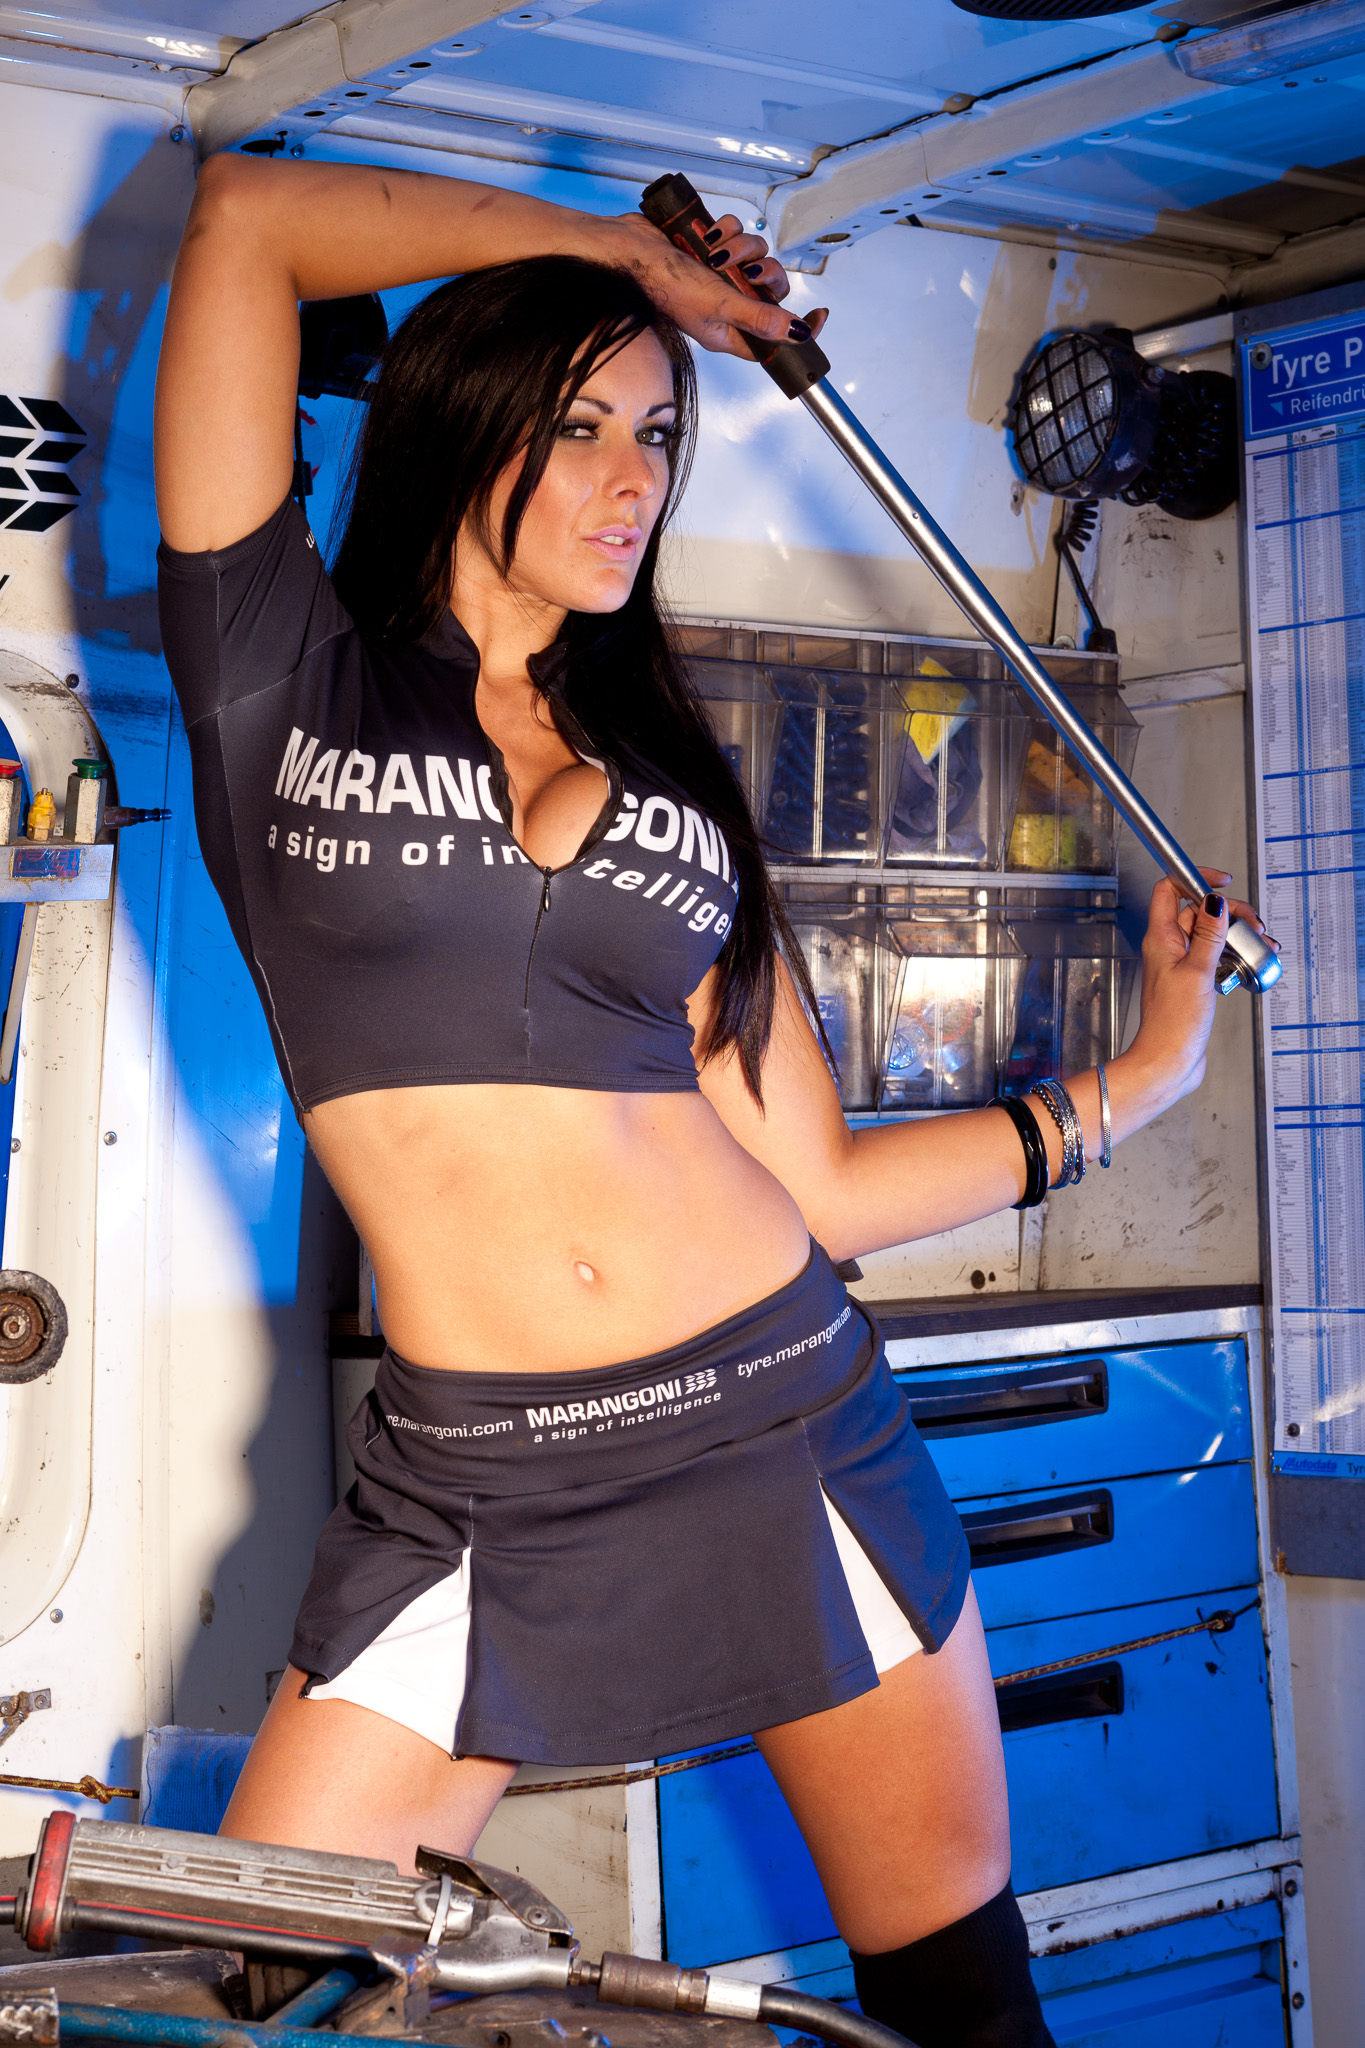
And finally… the final images, one of which is to be used in an upcoming Marangoni/KwikFit flyer.
I’ve known Emma for a few years and while we’ve done a few things at car shows, we have never shot together properly. Last weekend we put that right.
Not only did Emma make the trek up from the Portsmouth but I was lucky enough to have my long suffering assistant/producer/gopher/other-half Helen on hand to help as well as good friend and fellow photographer Darren “Skids” Skidmore to shoot some behind the scenes video and stills. Quite a crew!
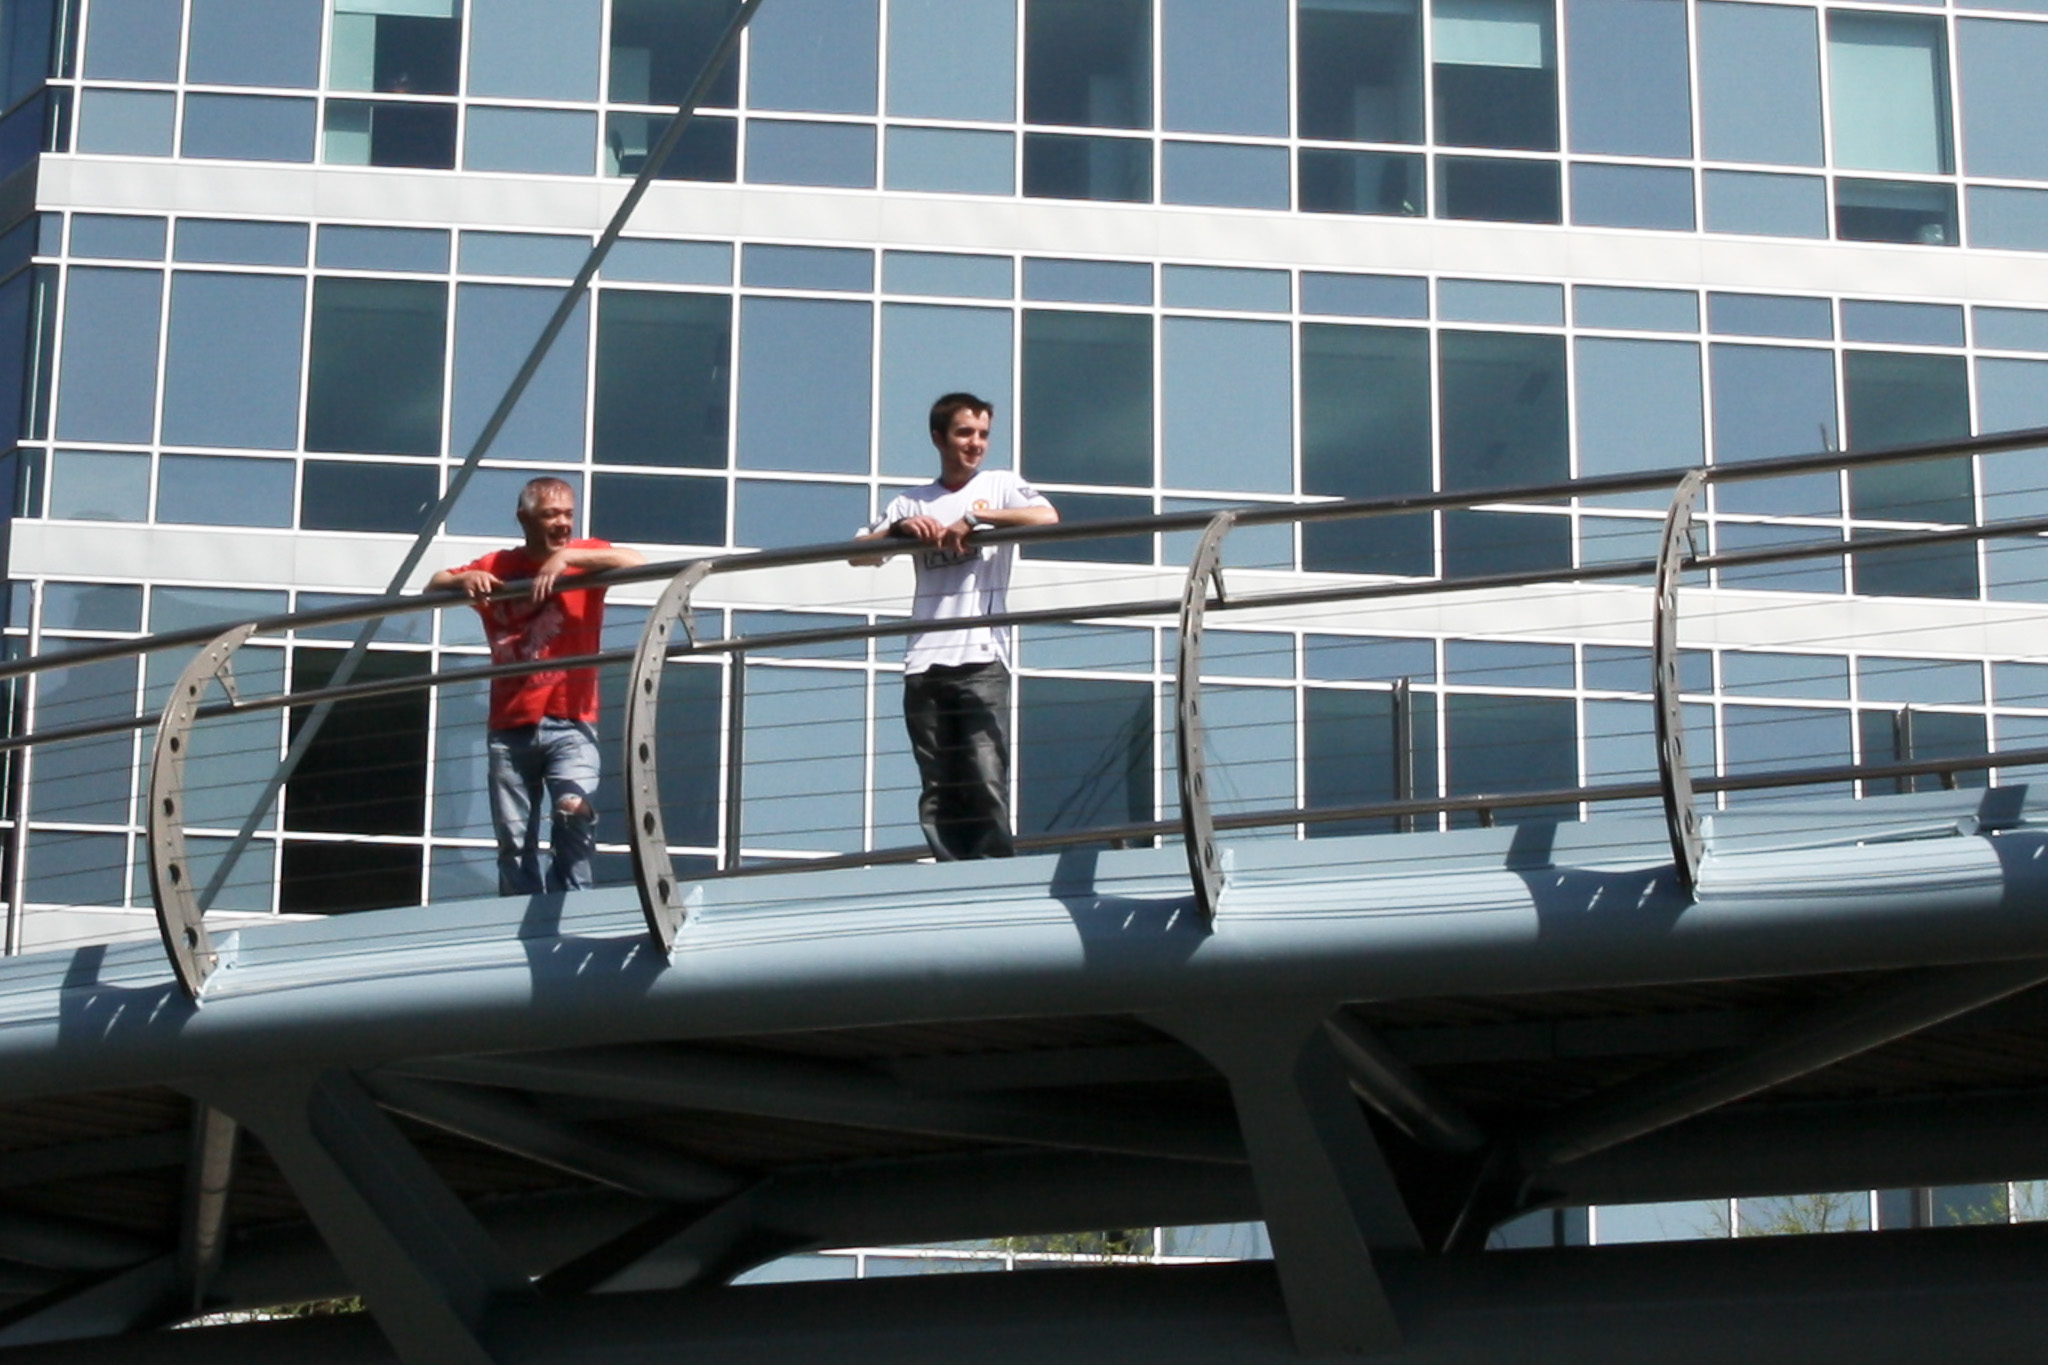
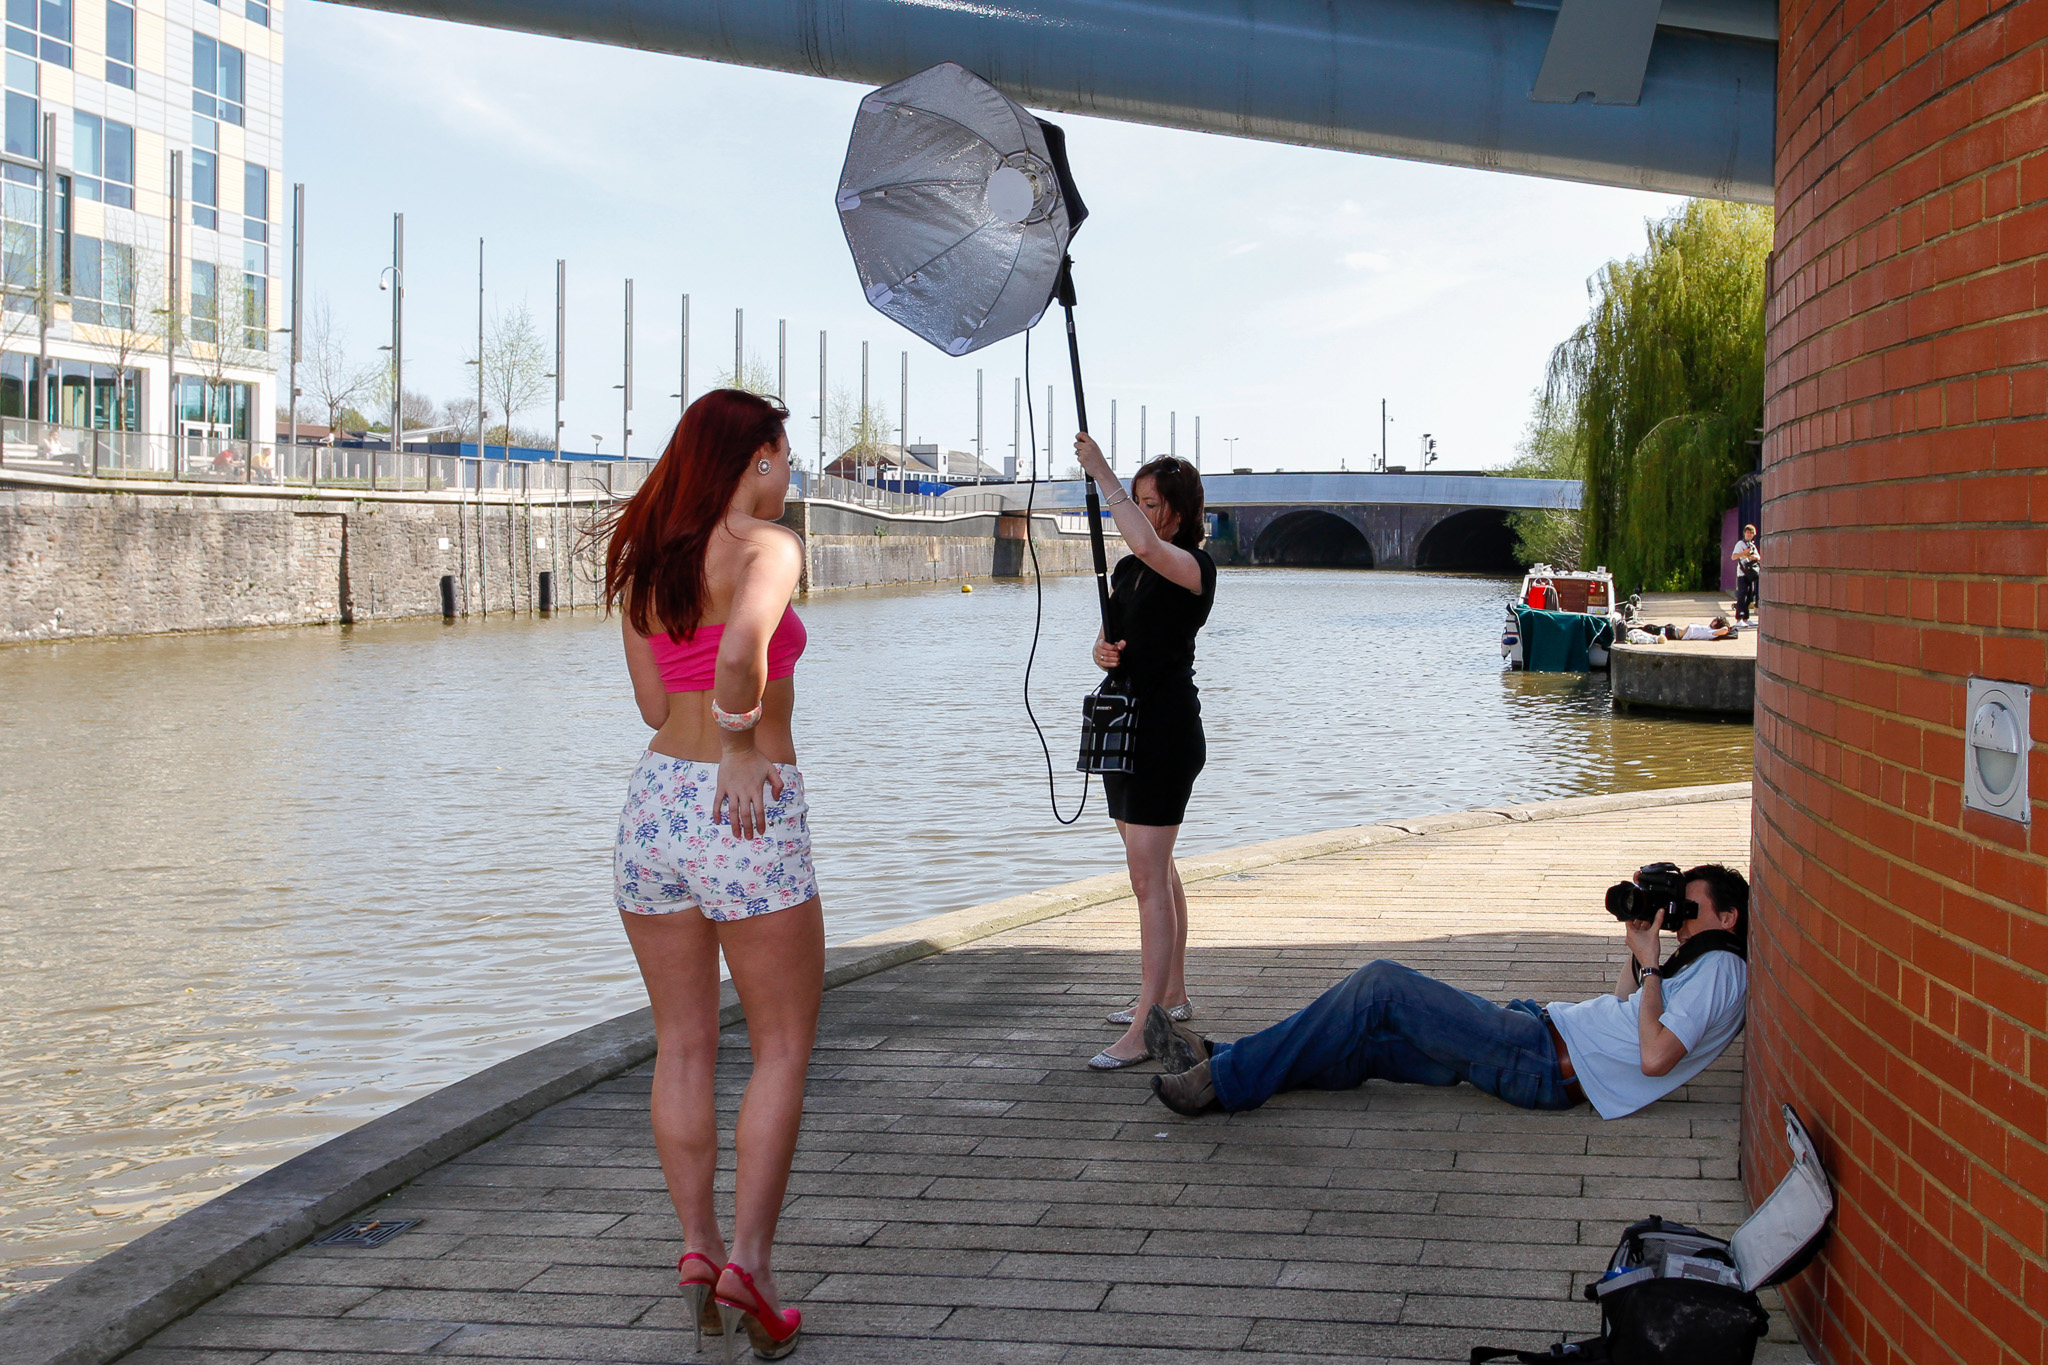
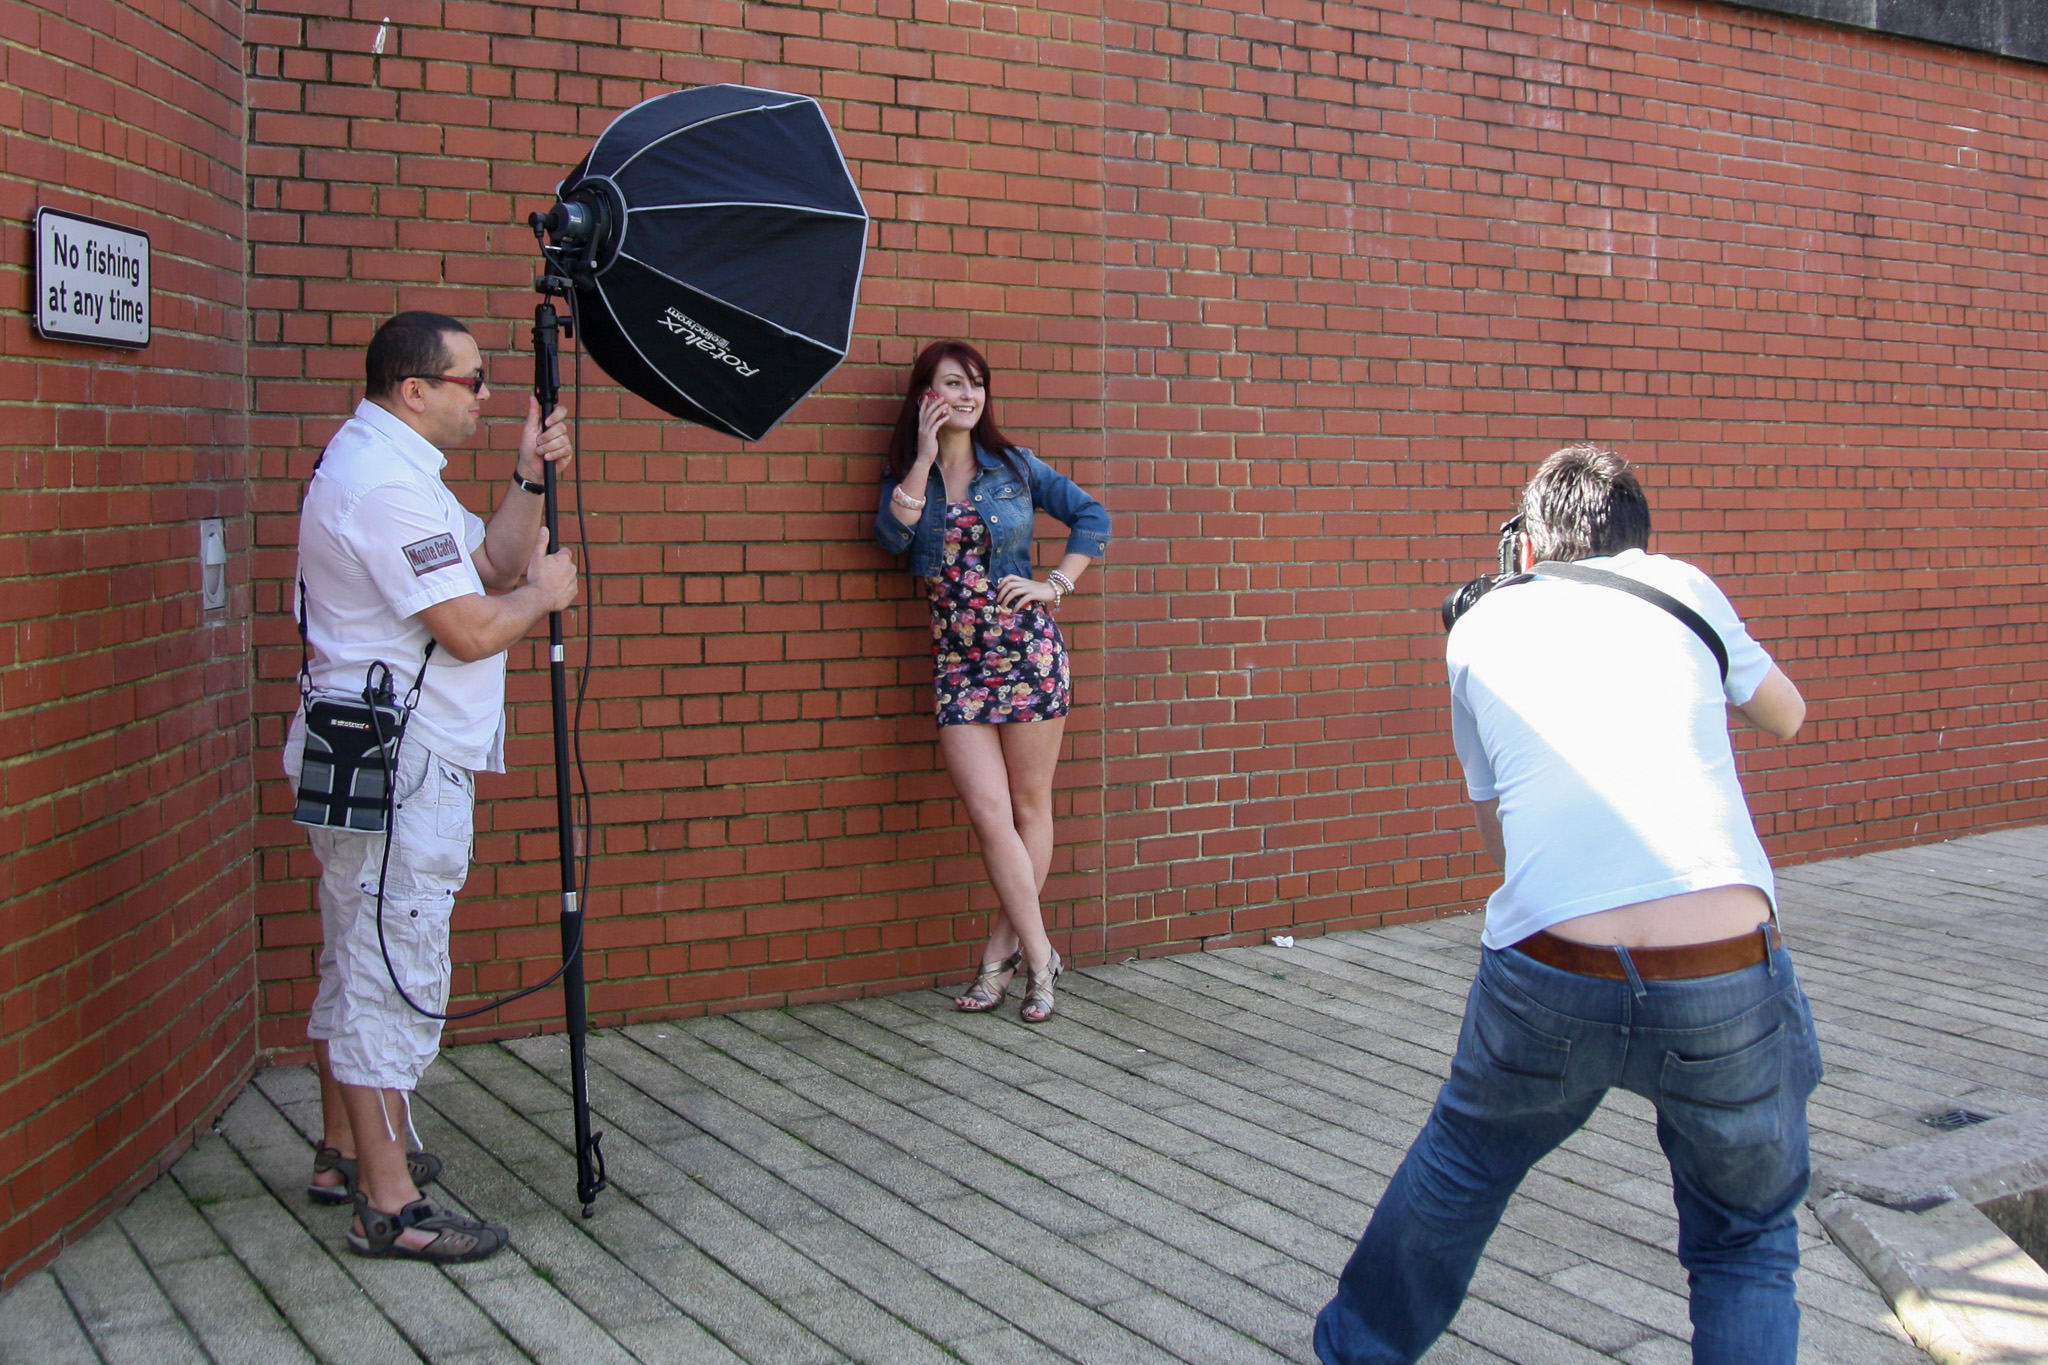
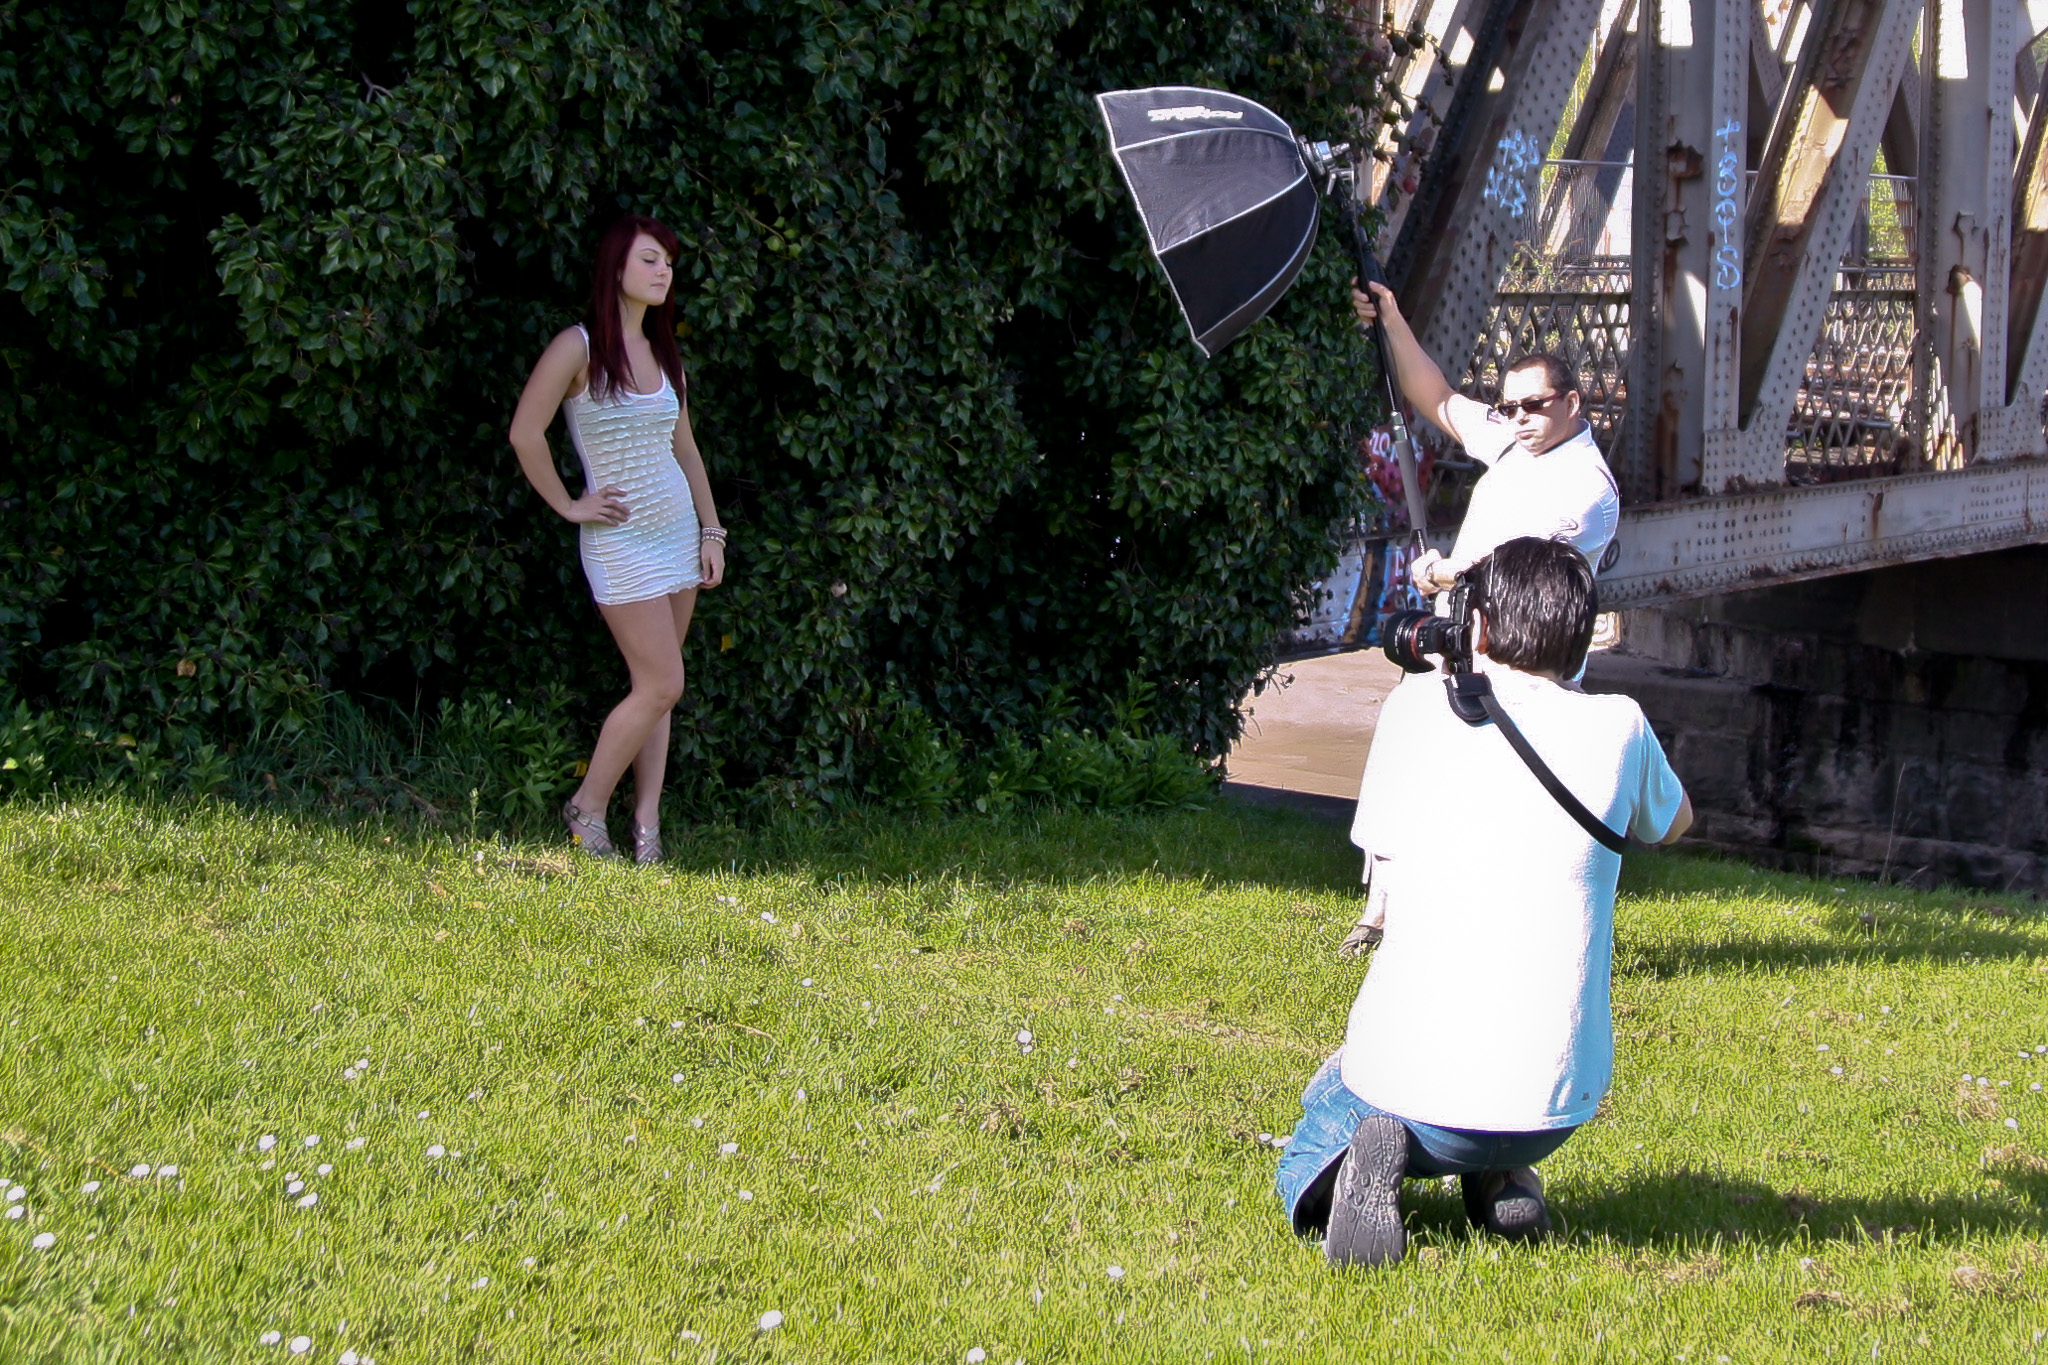
So after the obligatory coffee and a snack it was on to location number one. If you follow me on Twitter or like my Facebook page, you’ll know I’ve been out and about location scouting recently so I already had a few versatile spots I knew would work. The First of those was under Valentine Bridge for a little urban portraiture. I exposed for the buildings in the background which left Emma around 2 stops under exposed in the shade of the bridge so a Quadra head and the Deep Octa were brought in for fill.
Midweek this area is bustling with office workers on breaks, especially on such a beautiful day, but on a Saturday there are just a few passers-by…
which Emma soon tuned out!
Over zealous security guards are always a concern when working on privately owned land like this so we kept everything hand held.
And no, that wasn’t a comfortable shooting position!
I always like to get as many looks as I can while at a location so Emma got changed into another outfit and we turned everything around and shot against the red brick wall behind us.
A completely different look for about 5 minutes work. Note to self – Buy a better belt!
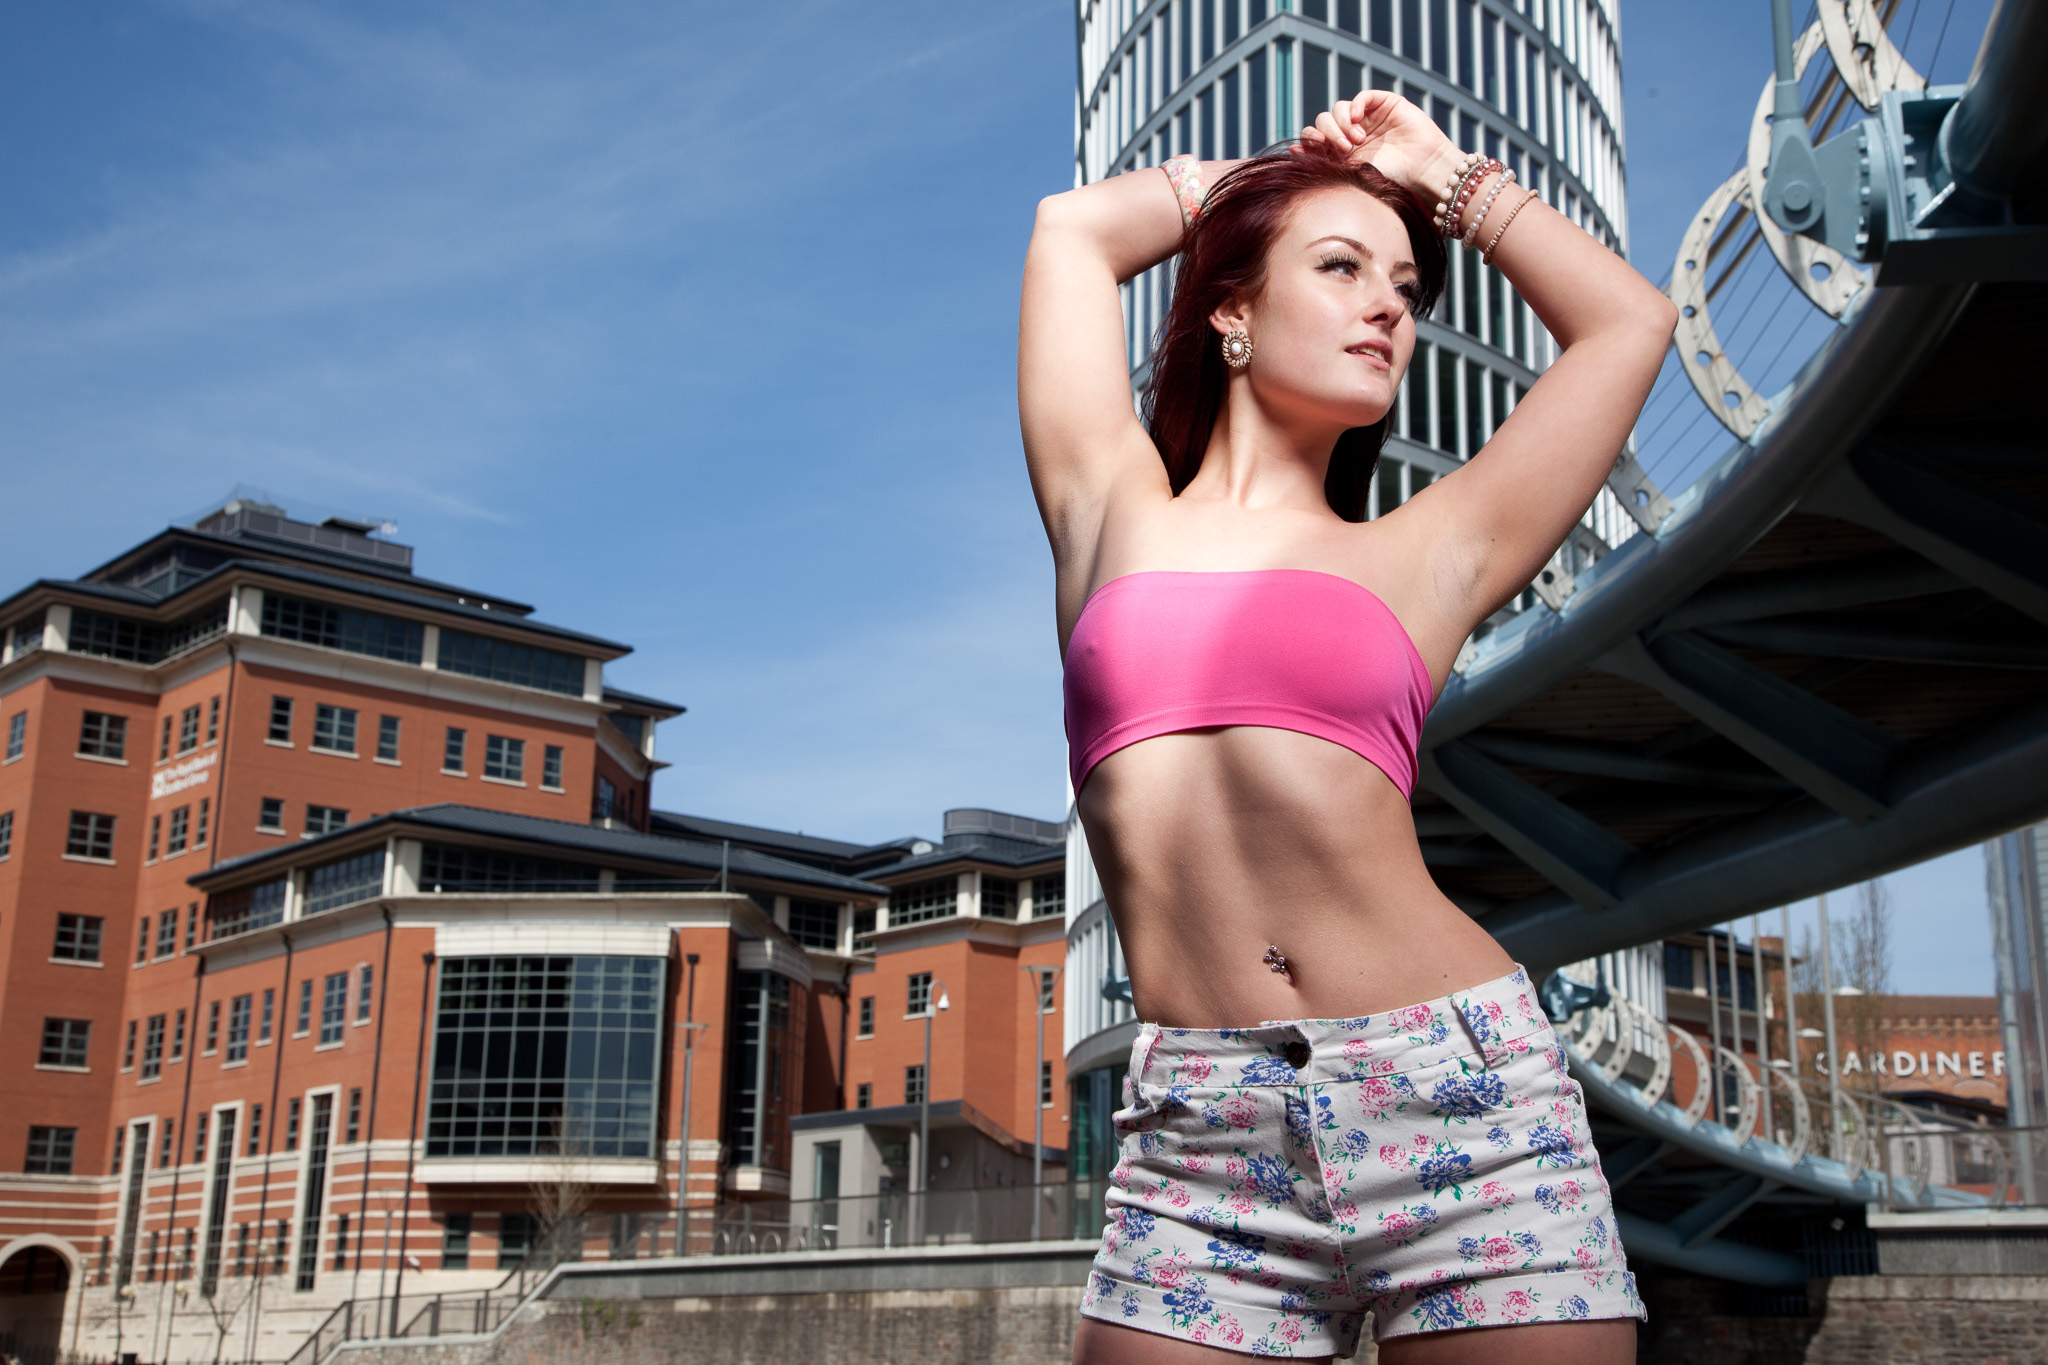
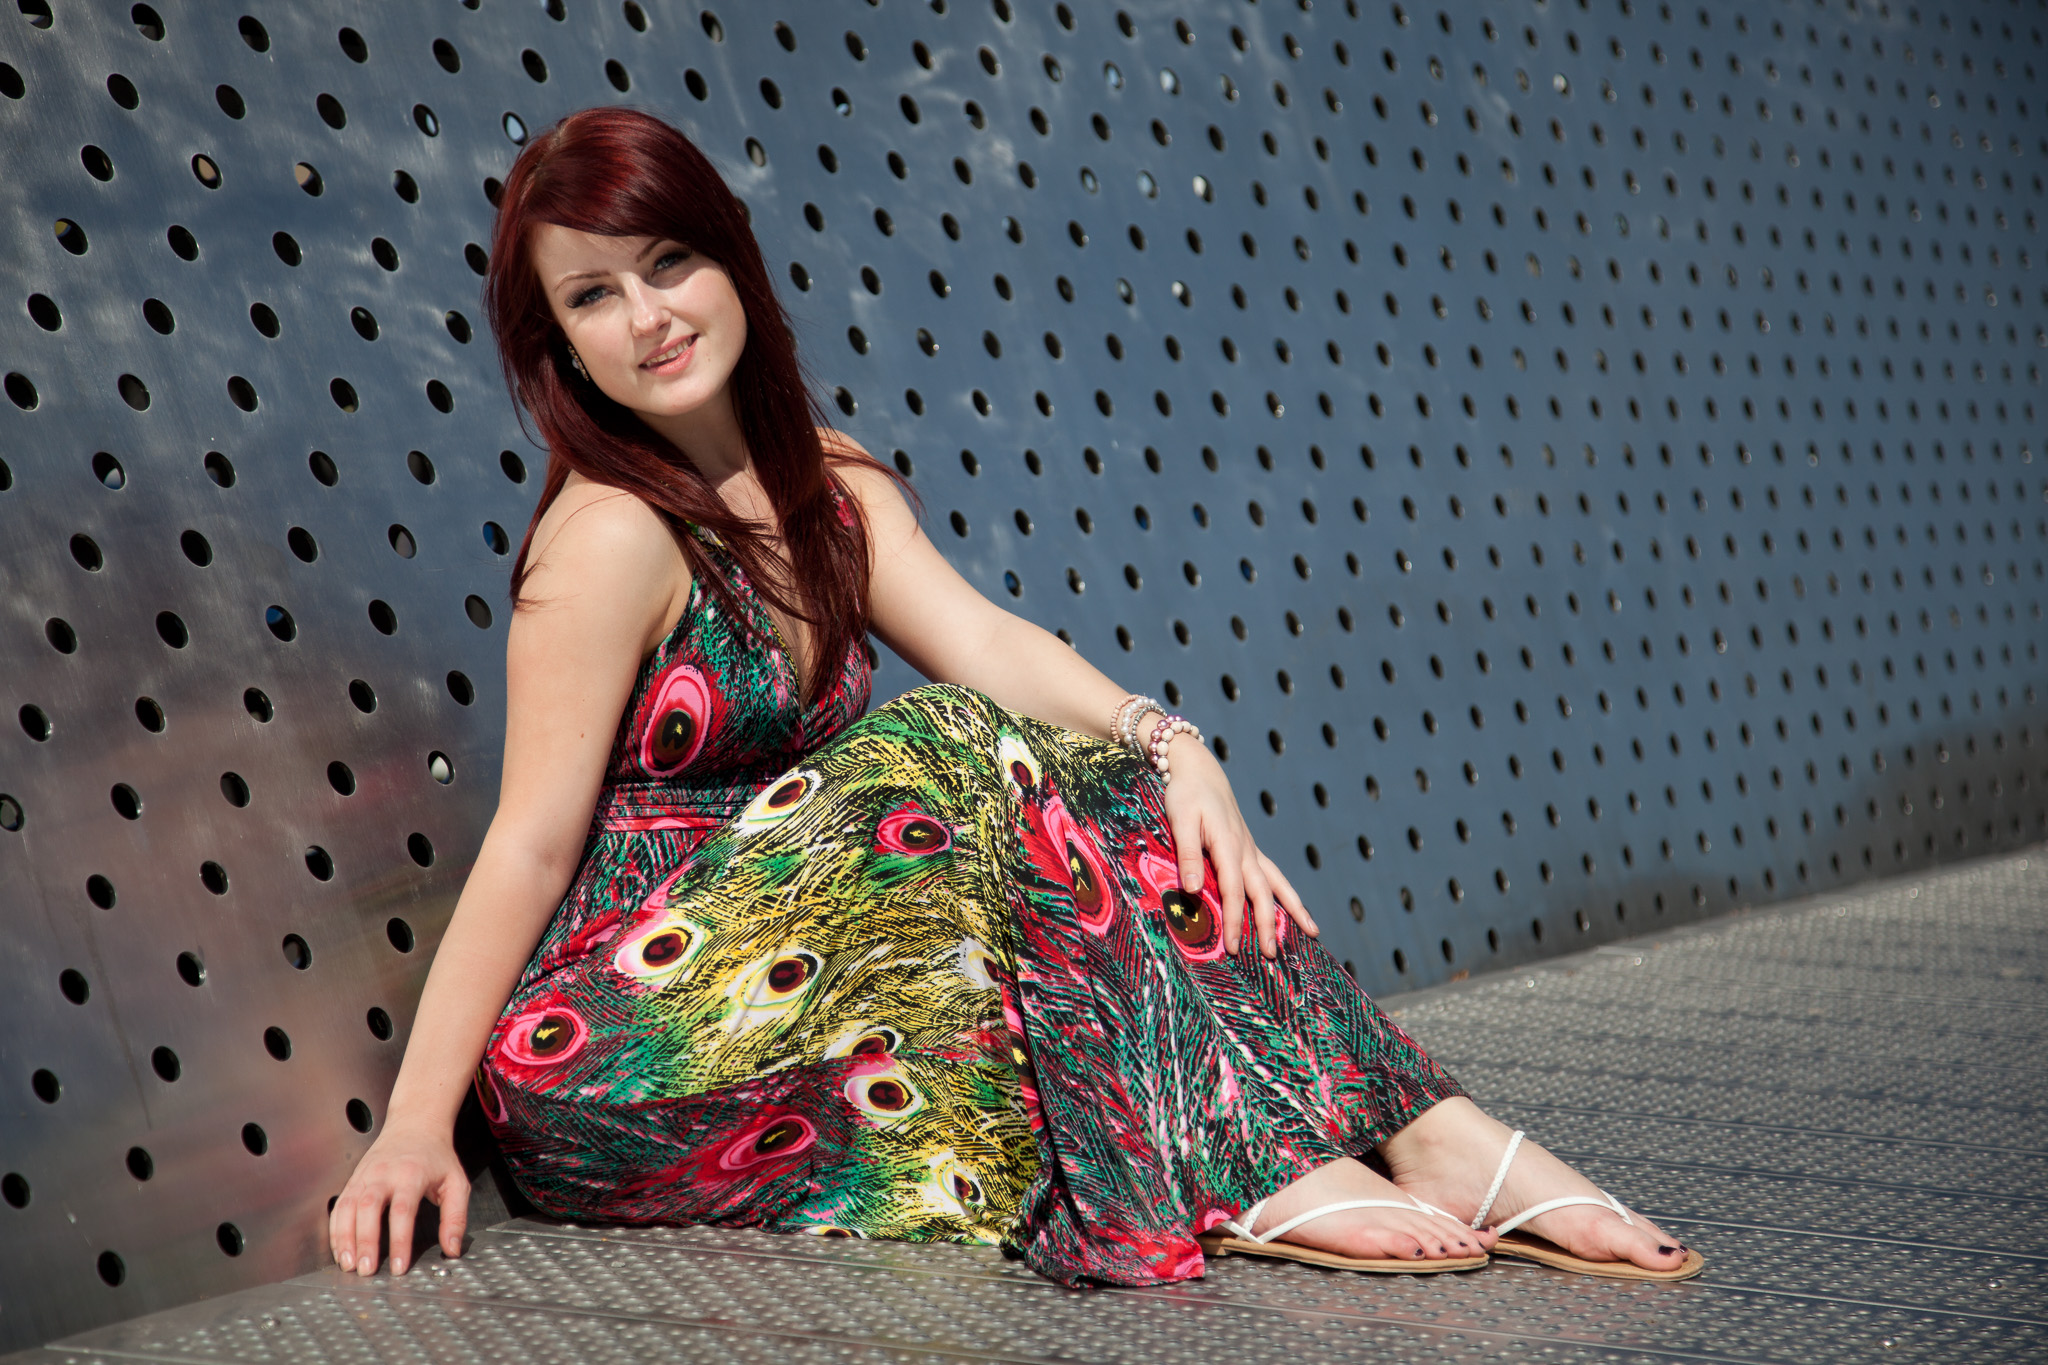
On to location two – another bridge a few minutes walk up river. Known locally as “the cheese grater”. Admittedly more by luck than judgement, the sun was in the perfect position to light Emma directly and provide its own fill for the shadows by reflecting off the side of the bridge.
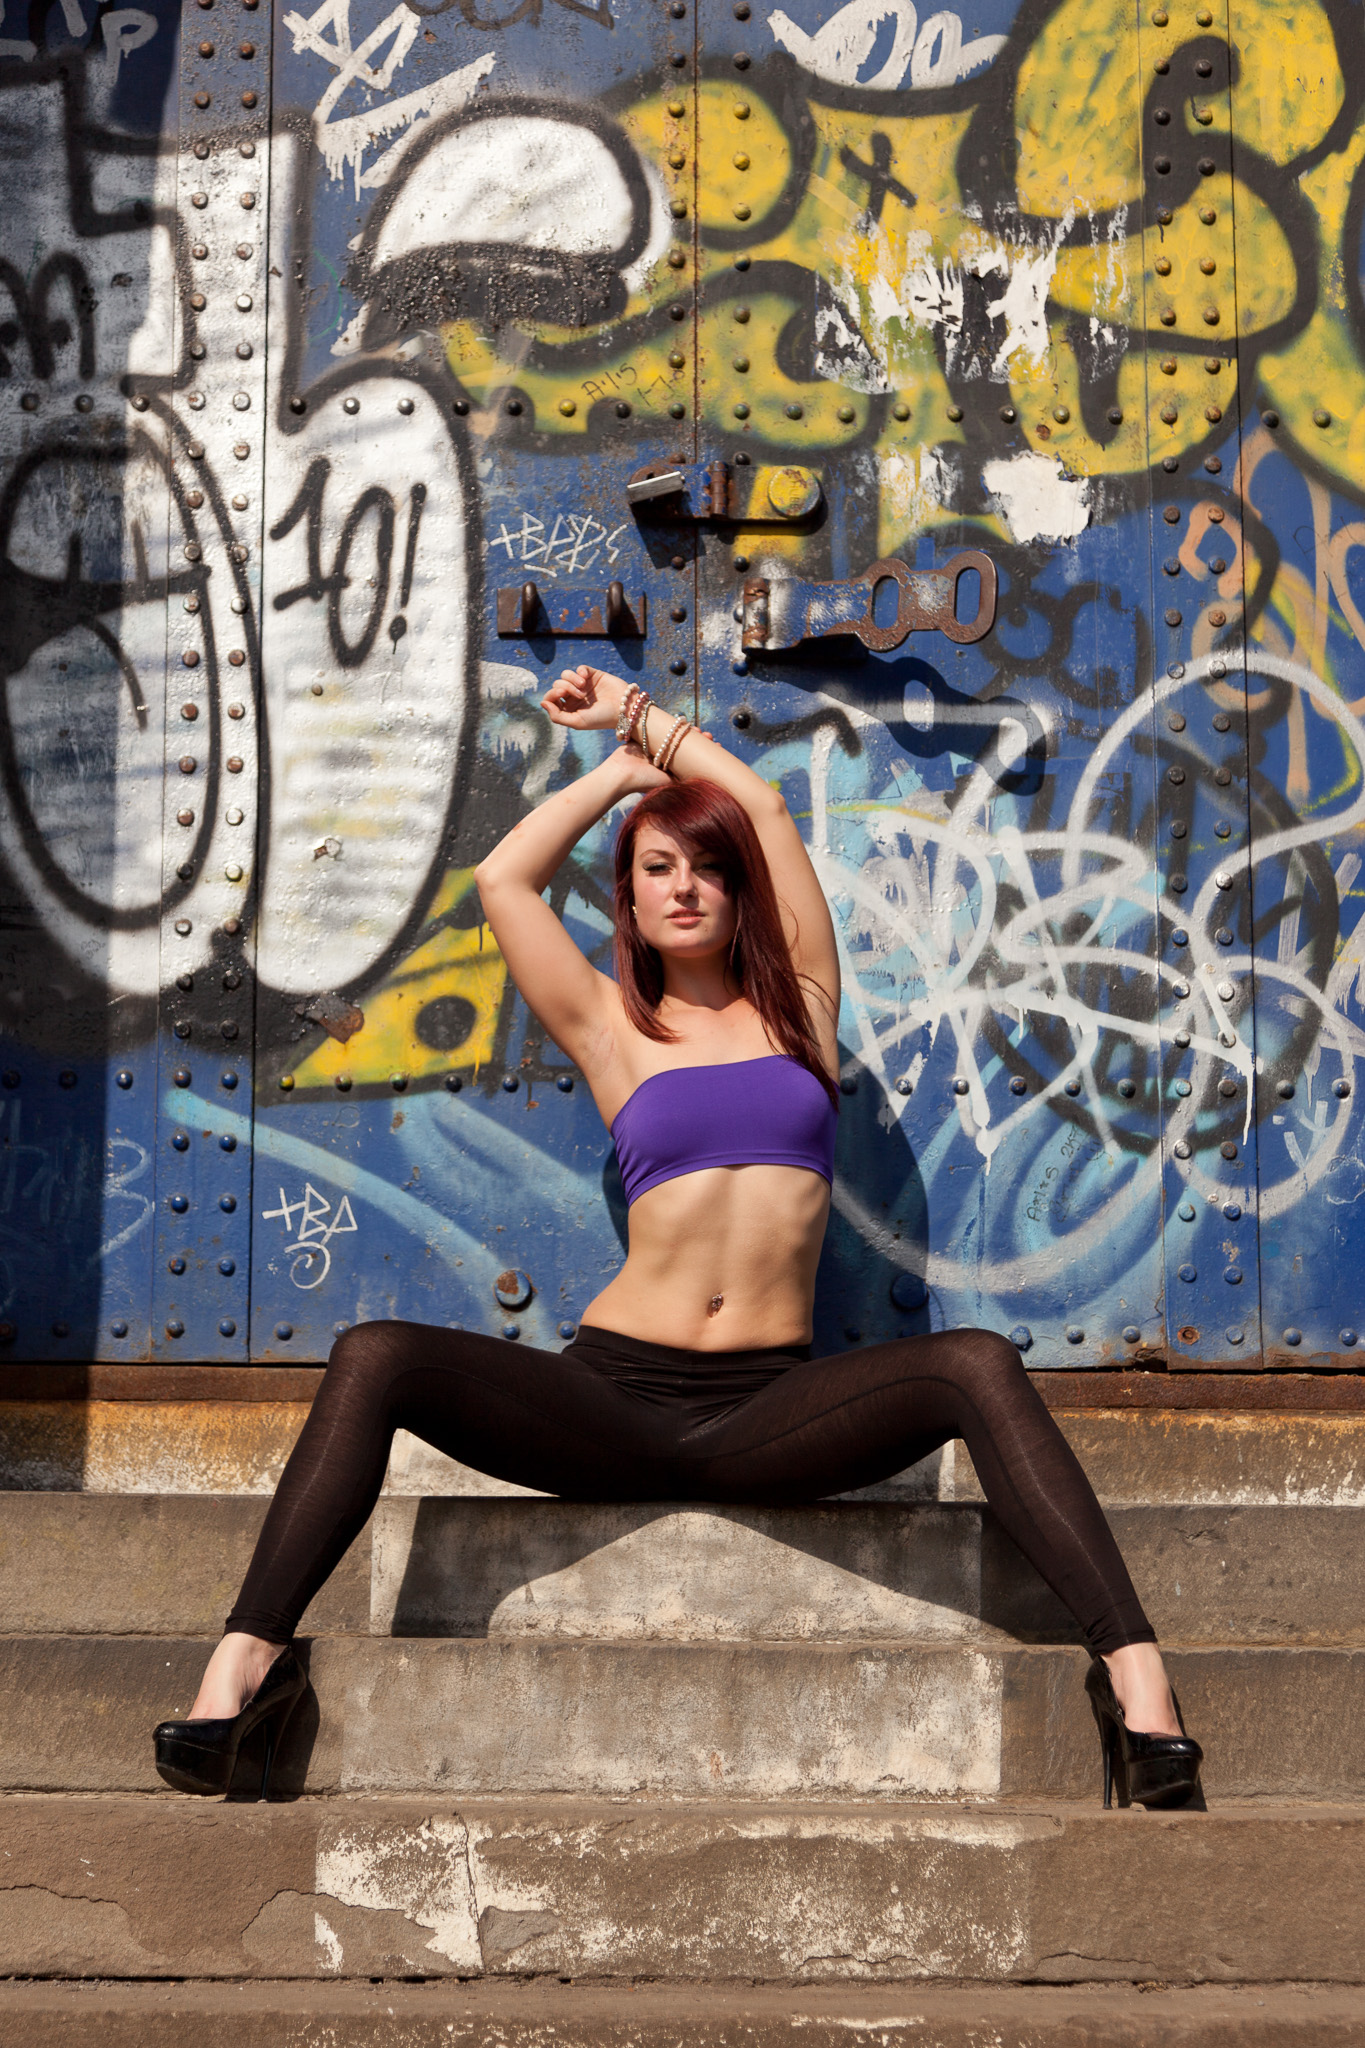
With some solid images in the can it was time to move to the far end of Bristol’s floating harbour and the old red brick warehouses on The Cumberland Basin.
Nothing fancy here, just natural, direct sunlight which sat well with the graffiti.
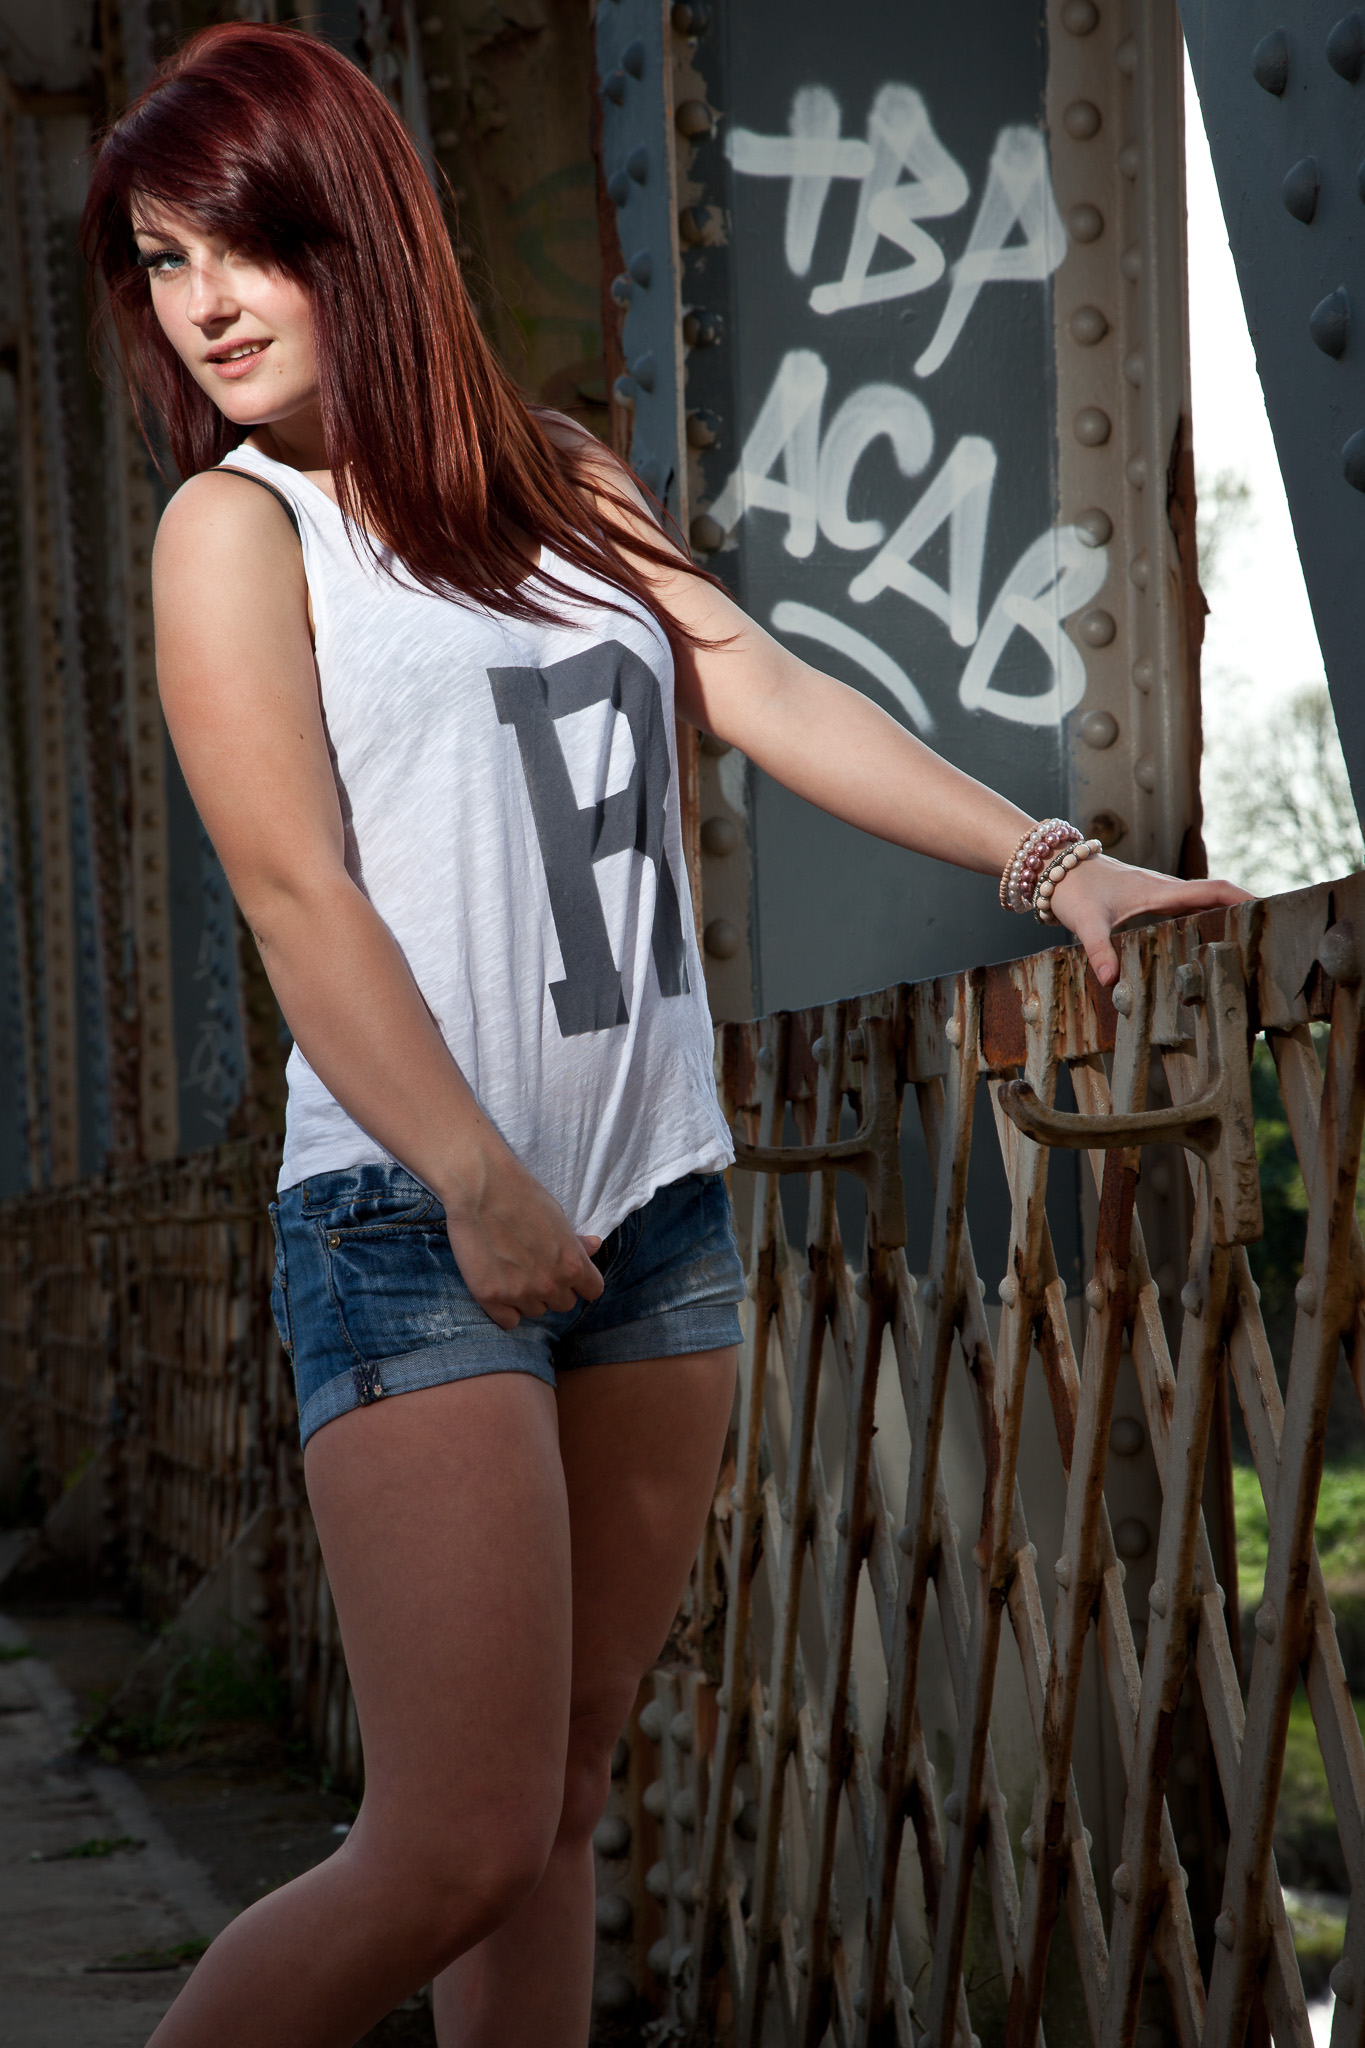
A short walk and a swift outfit change later and Emma’s is rocking the American high school kid look on a rusting iron bridge.
This is a fairly busy short cut for dog walkers, joggers and cyclists but it’s quite surprising how respectful people can be when they come across a scene like this. Many were reluctant to walk through the scene, even if I didn’t have the camera to my eye.
Simple lighting on this one again, just a Quadra head with an 18cm reflector to give a sharp fall off of light and draw the viewer to Emma’s face. Such a hard light source wouldn’t work for every subject but Emma has great skin and can carry it off easily.
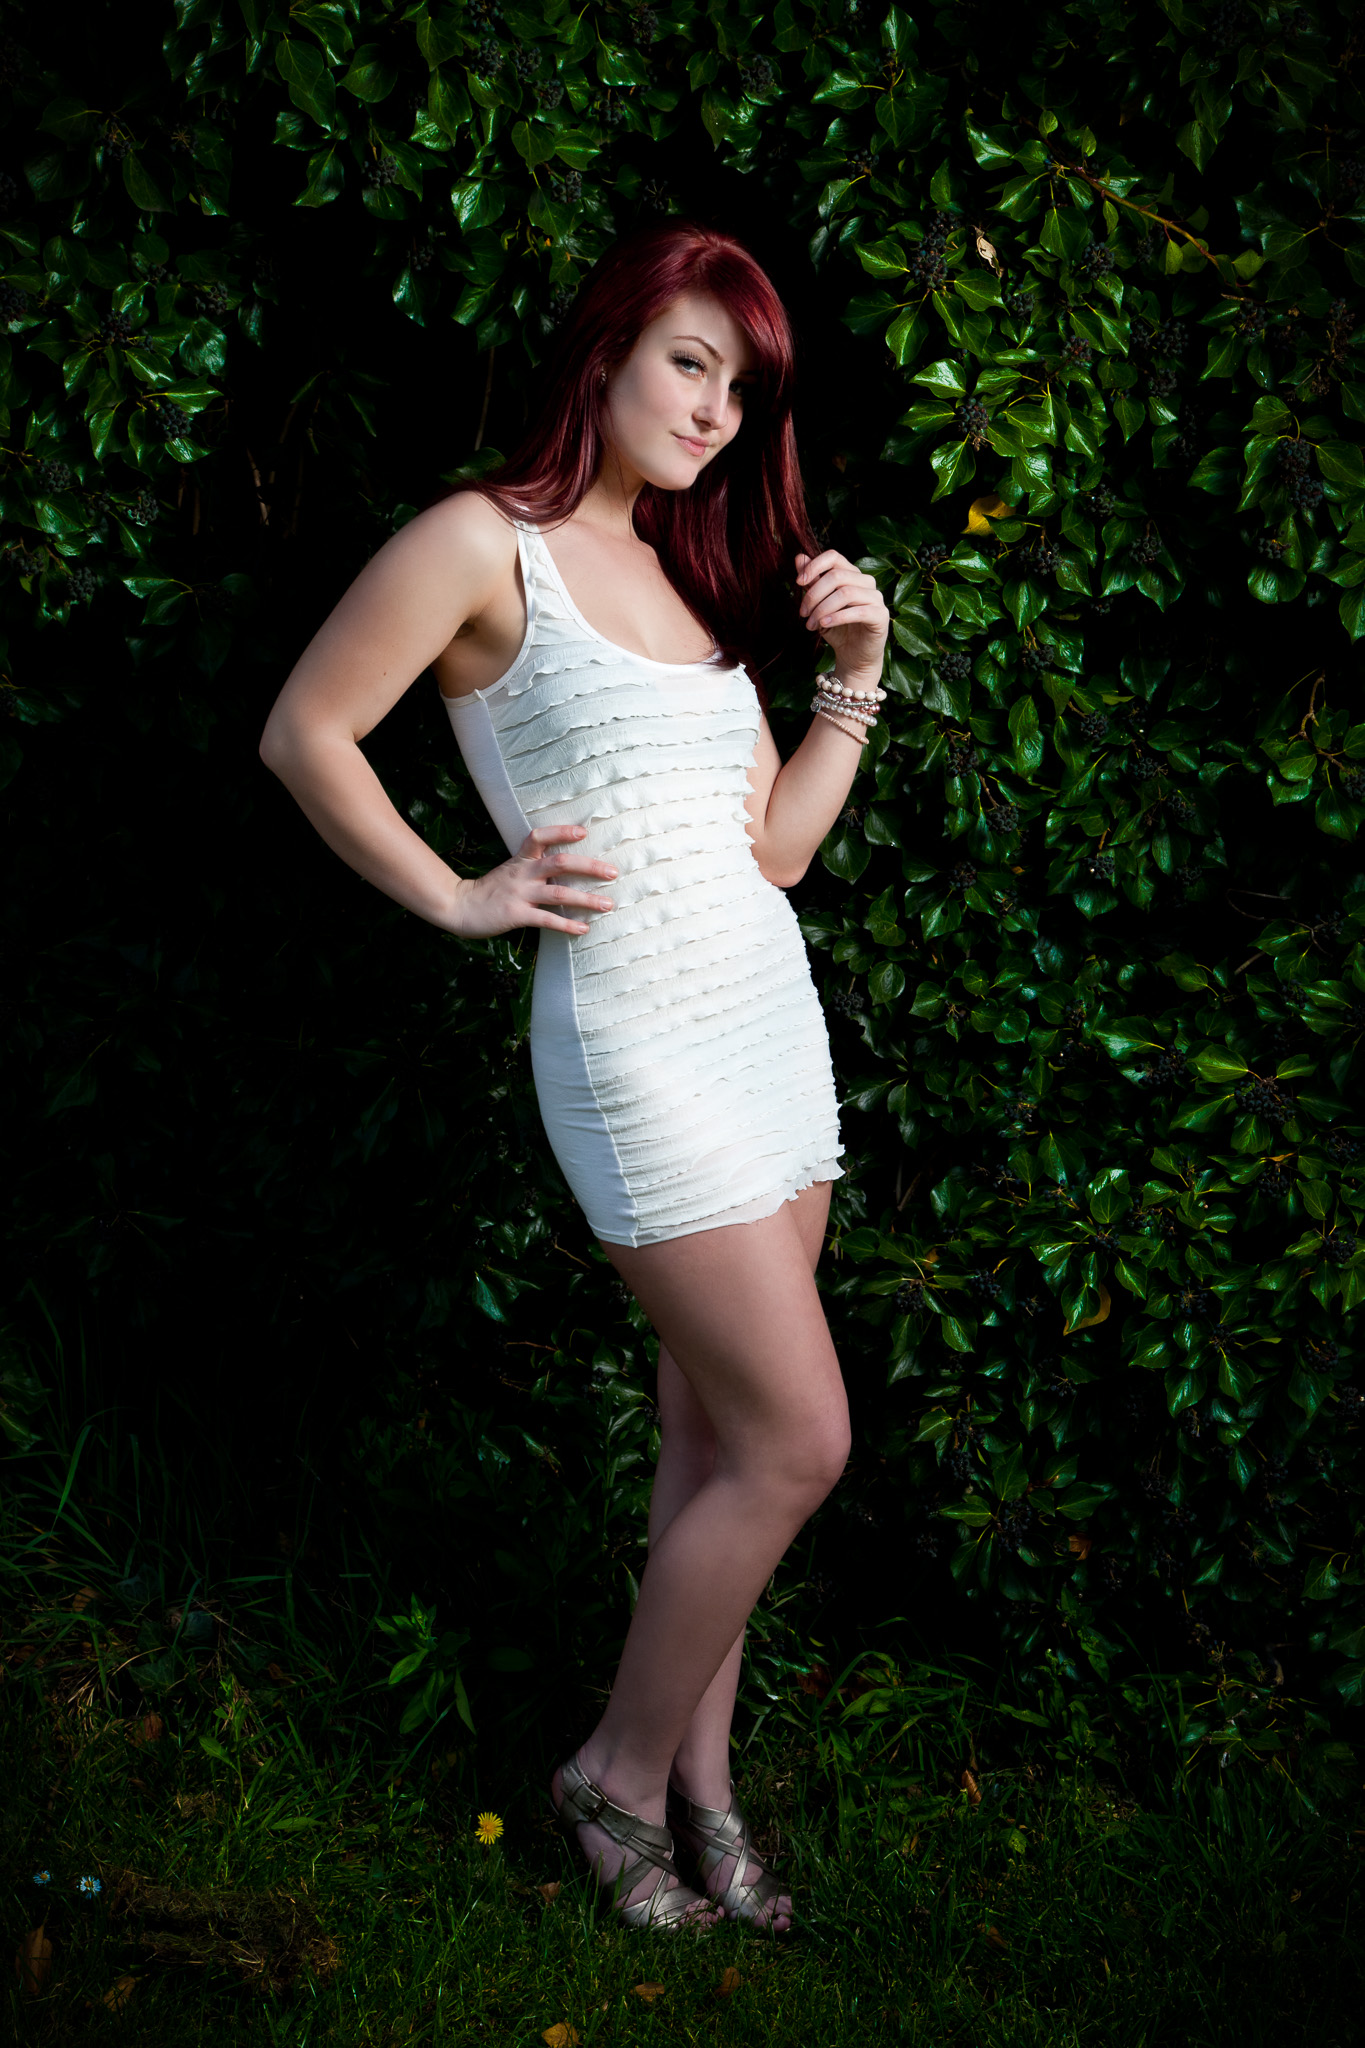
Just around the corner was another pre-scouted location that I’ve wanted to use before but it’s always been too muddy. I find it easy to fall in to the trap of thinking a good location needs to be large, like an epic view or impressive structure, but this patch of ivy in the middle of an industrial landscape works brilliantly.
As you can see, the Deep Octa came out again for this shot, and again the front diffusion material stayed in the bag – I wanted a slightly more specular light to bring out the shine in the leaves.
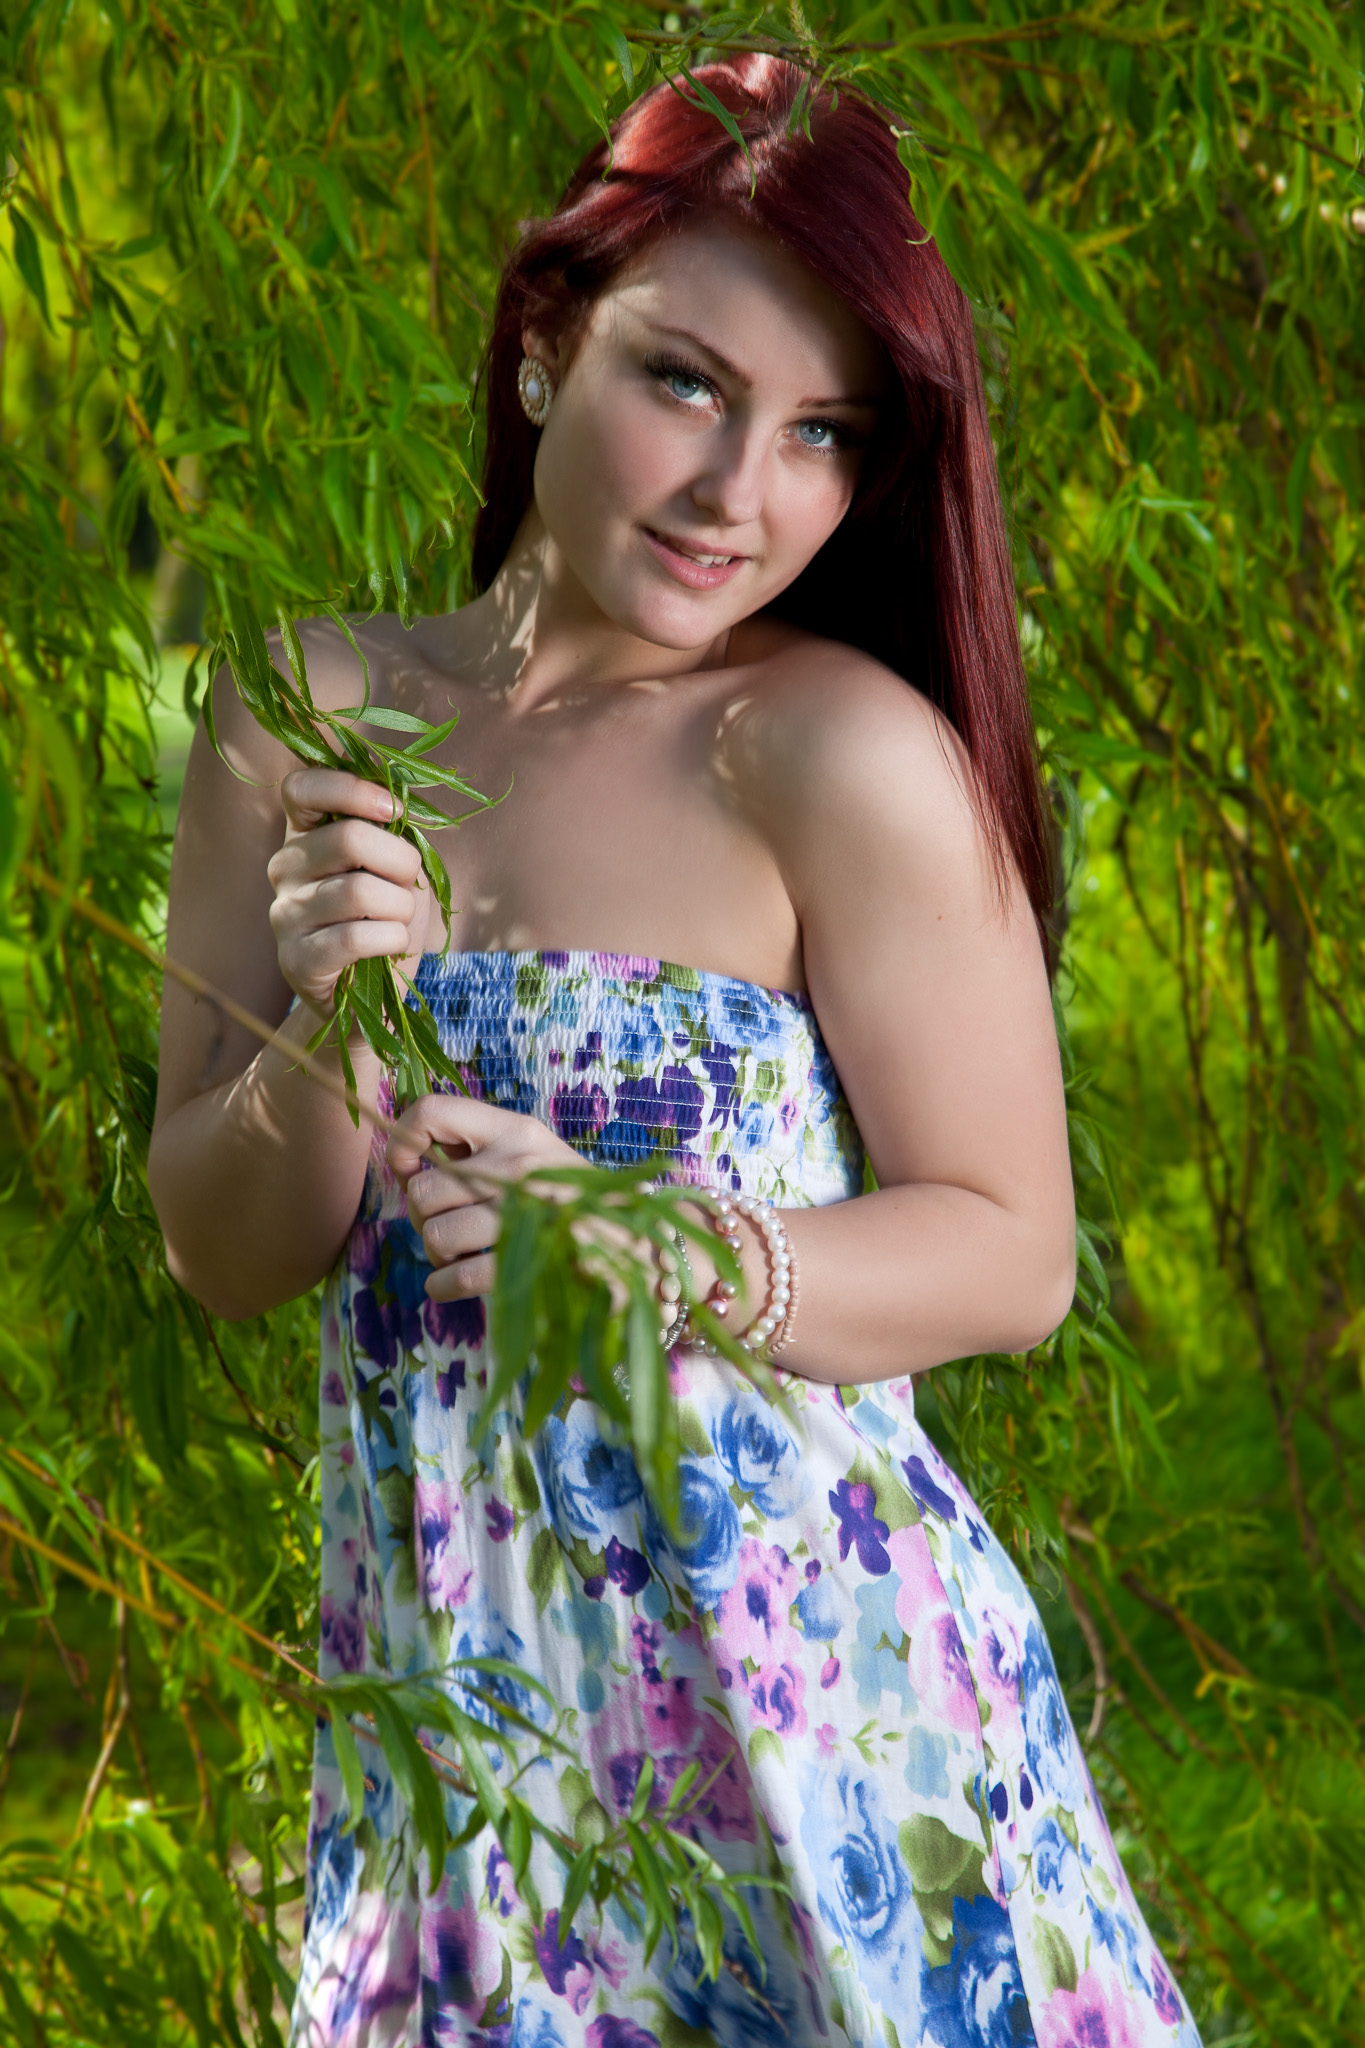
We’re were on a mission by this point – we just had one more location and one more look to shoot but the call of a beer and some food was strong! Emma is great at choosing outfits to match locations and as soon as she saw the weeping willow, she pulled yet another dress from her seemingly bottomless suitcase.
Going back to what I was saying earlier about locations, it would have been easy to have turned 90 degrees to the right here and shot with Bristol’s famous Clifton Suspension Bridge as a background, but the branches of the willow tree on the river bank made a much more suitable setting for the innocent look we were after. By now it was beer o’clock so we took a break for a few hours.
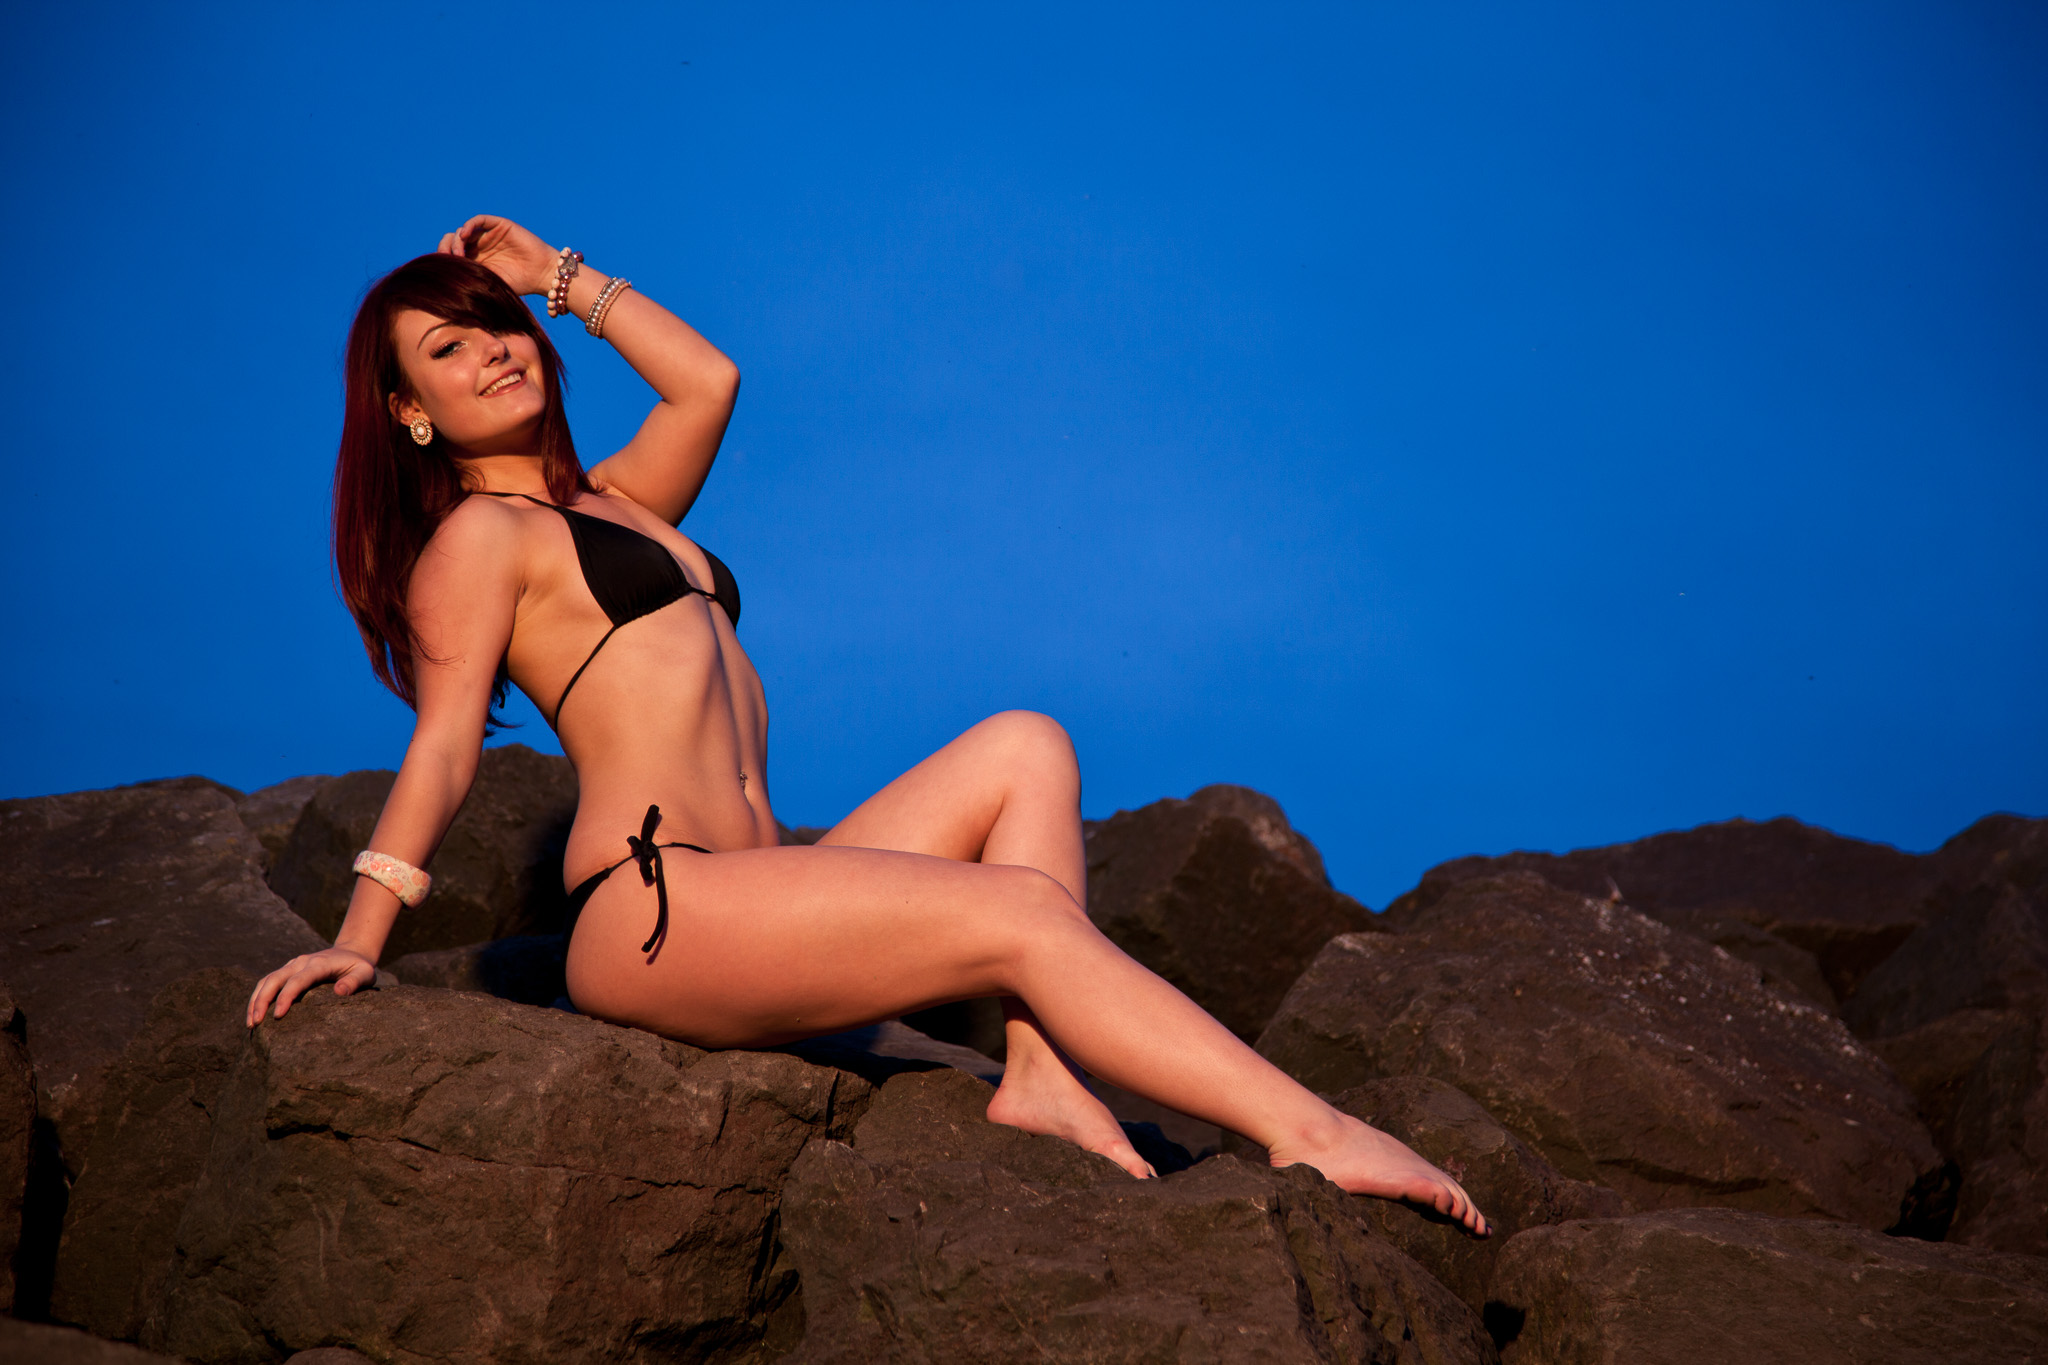
Up until we trekked out to the banks of the River Severn, the weather had been perfect without a cloud in the sky so we were pretty confident we’d get a beautiful sunset to finish the day off… fail. Epic fail! Just at the last moment clouds bubbled up from nowhere and we were left with this:
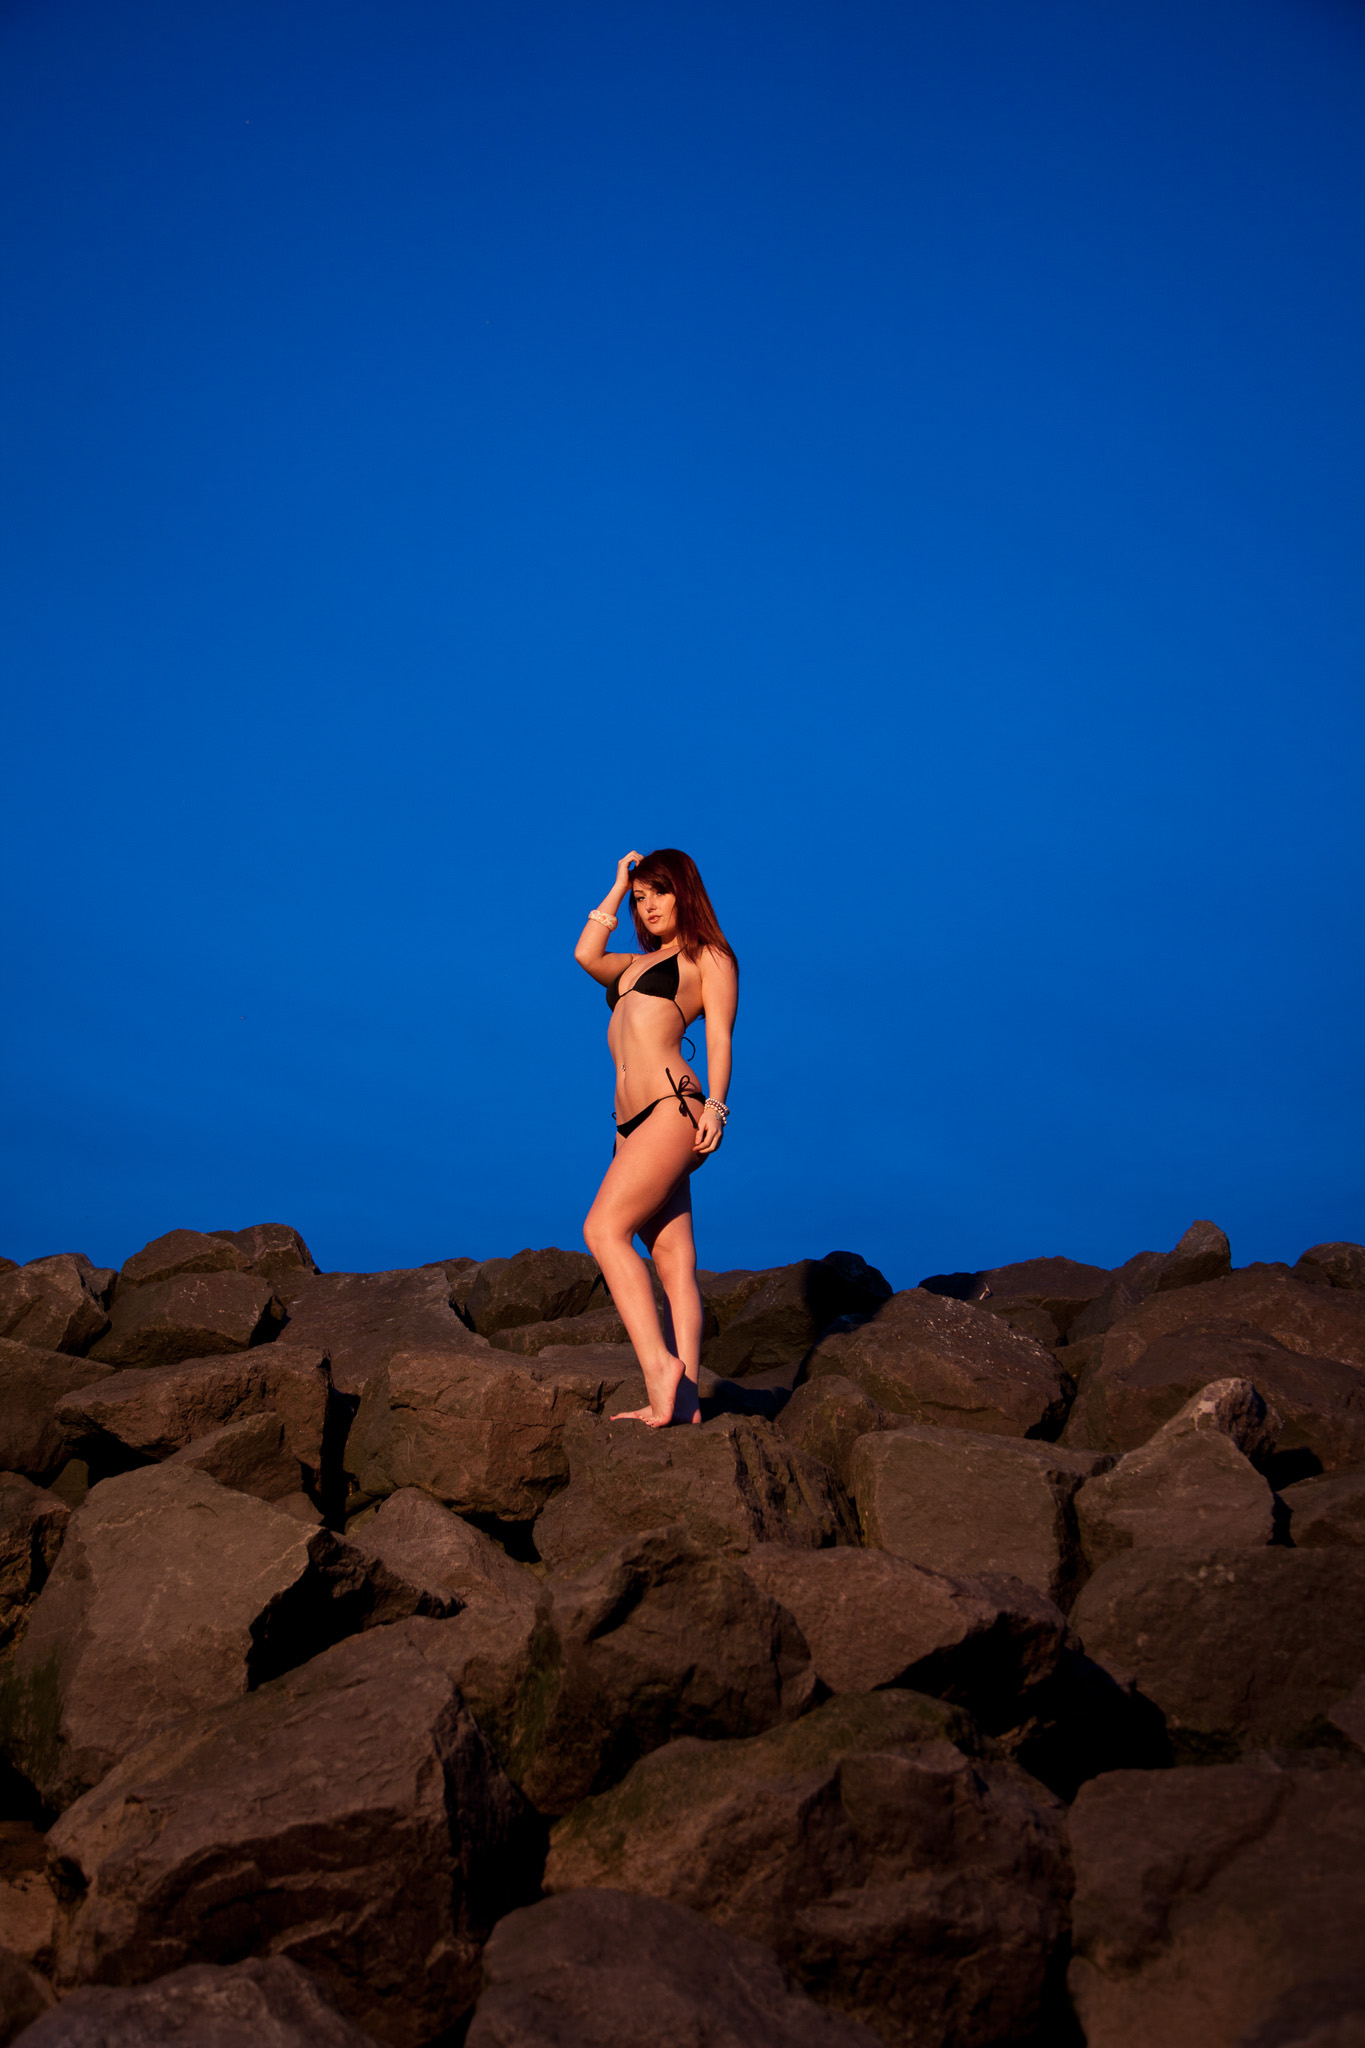
Ok, not quite the Ibizan vista I’d envisioned but it’s Severn Beech and you work with what you’ve got! After raving about how good this location was going to be after the previous nights location scouting, I knew I had to pull something out of the bag now I’d dragged everyone down there. The sun had let me down, but what I did have was a willing model, some warmth in the rocks and my own portable sun. So while brave Emma donned her bikini, I set about creating sunset with a Quadra head mounted high on a light stand and a CTO gell. With the cameras white balance on Tungsten and the flash head firing in warm light, the dull grey, post sunset sky turns blue. (I’ve written about this concept before called Working the CTO)
As Emma herself said, “it’s amazing what you can do with a big sweet wrapper”!
With 8 distinct looks in the can, the call of the bar became too strong and we called it a wrap!
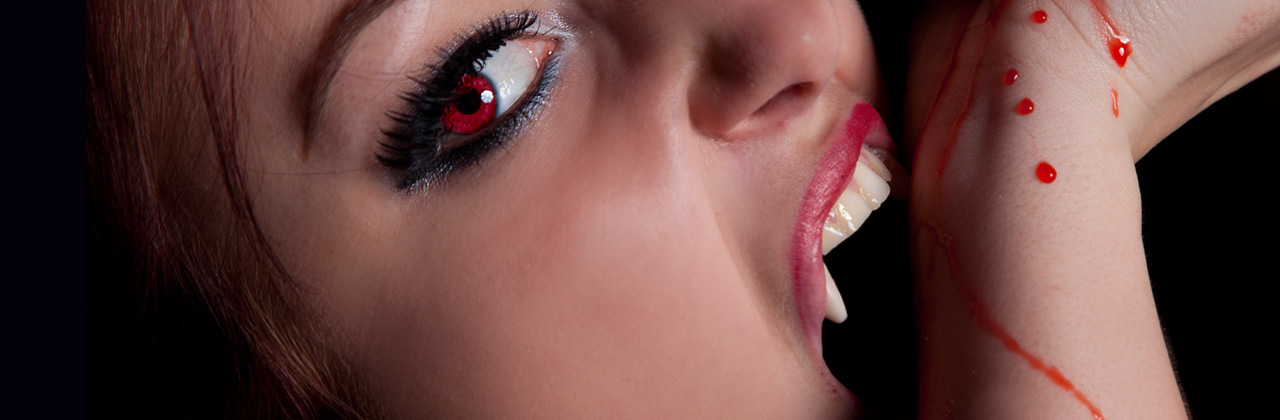
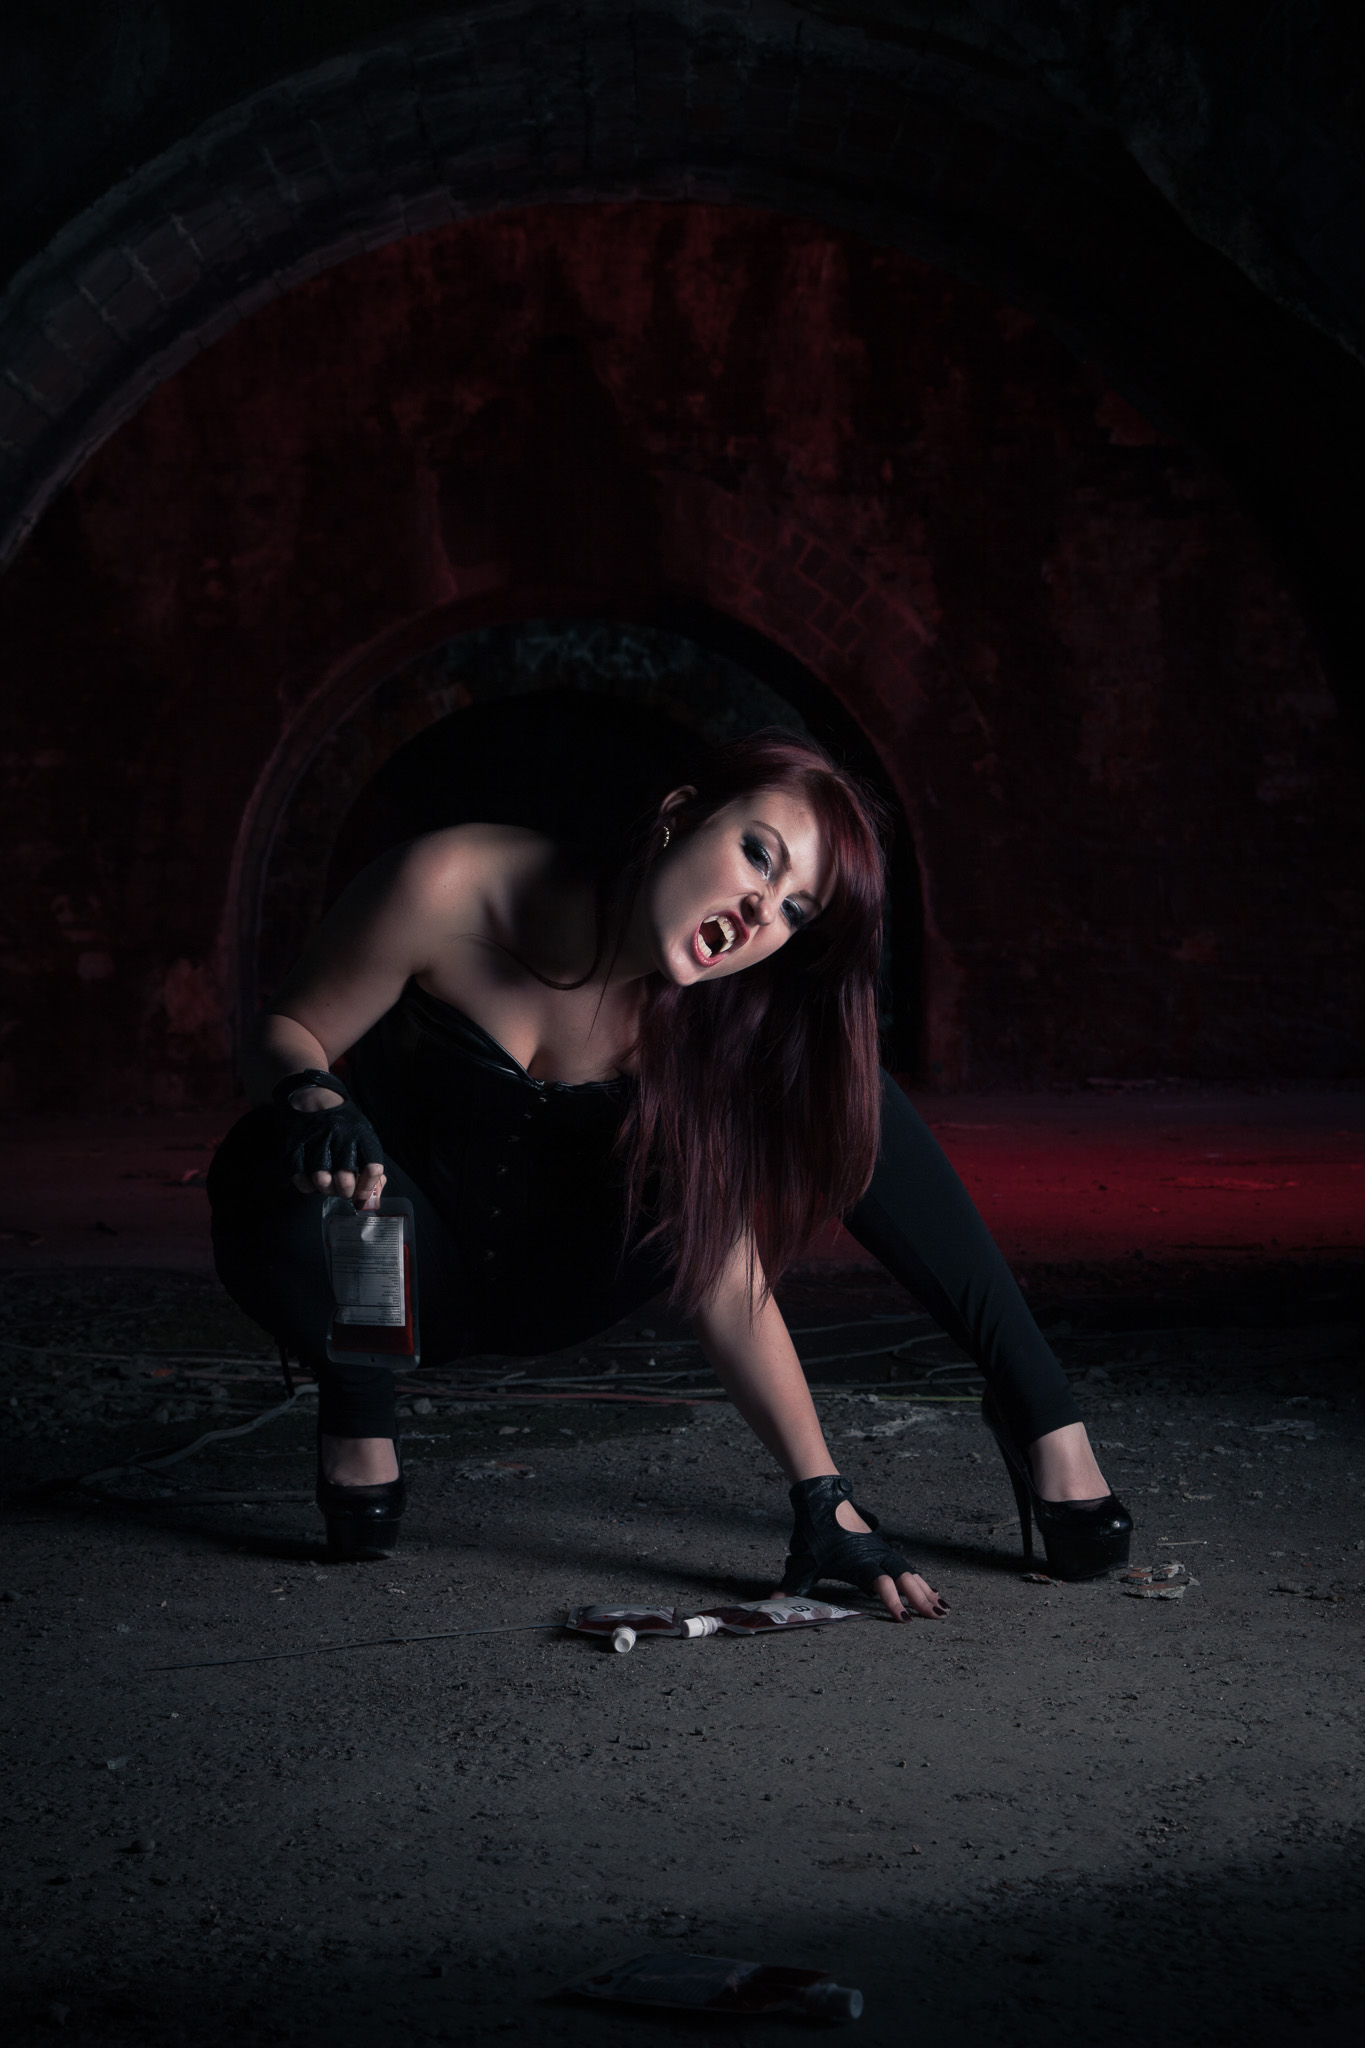
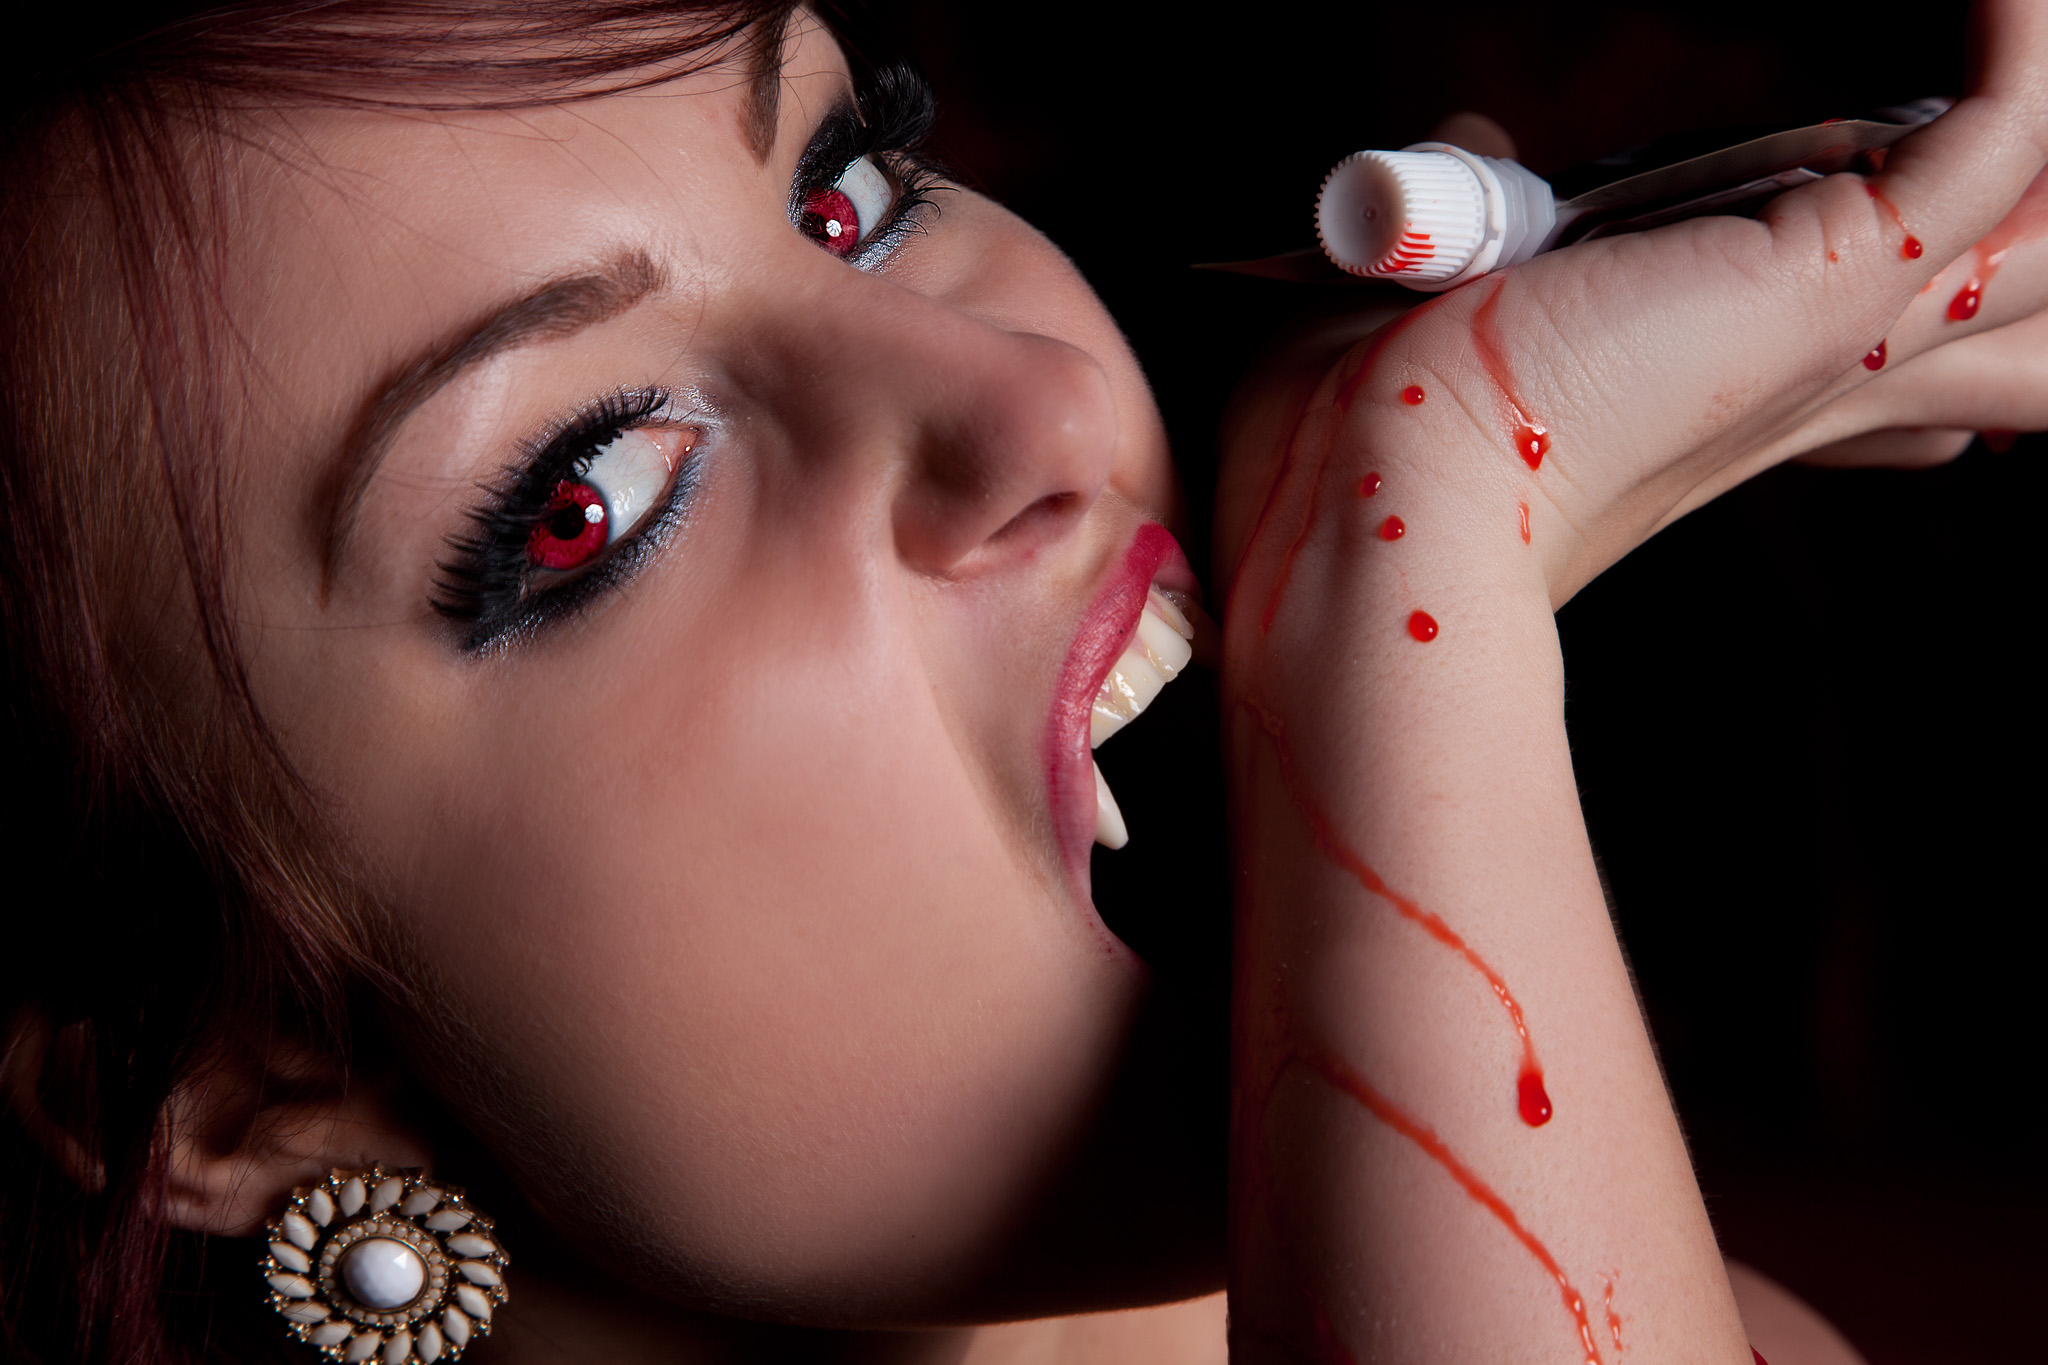
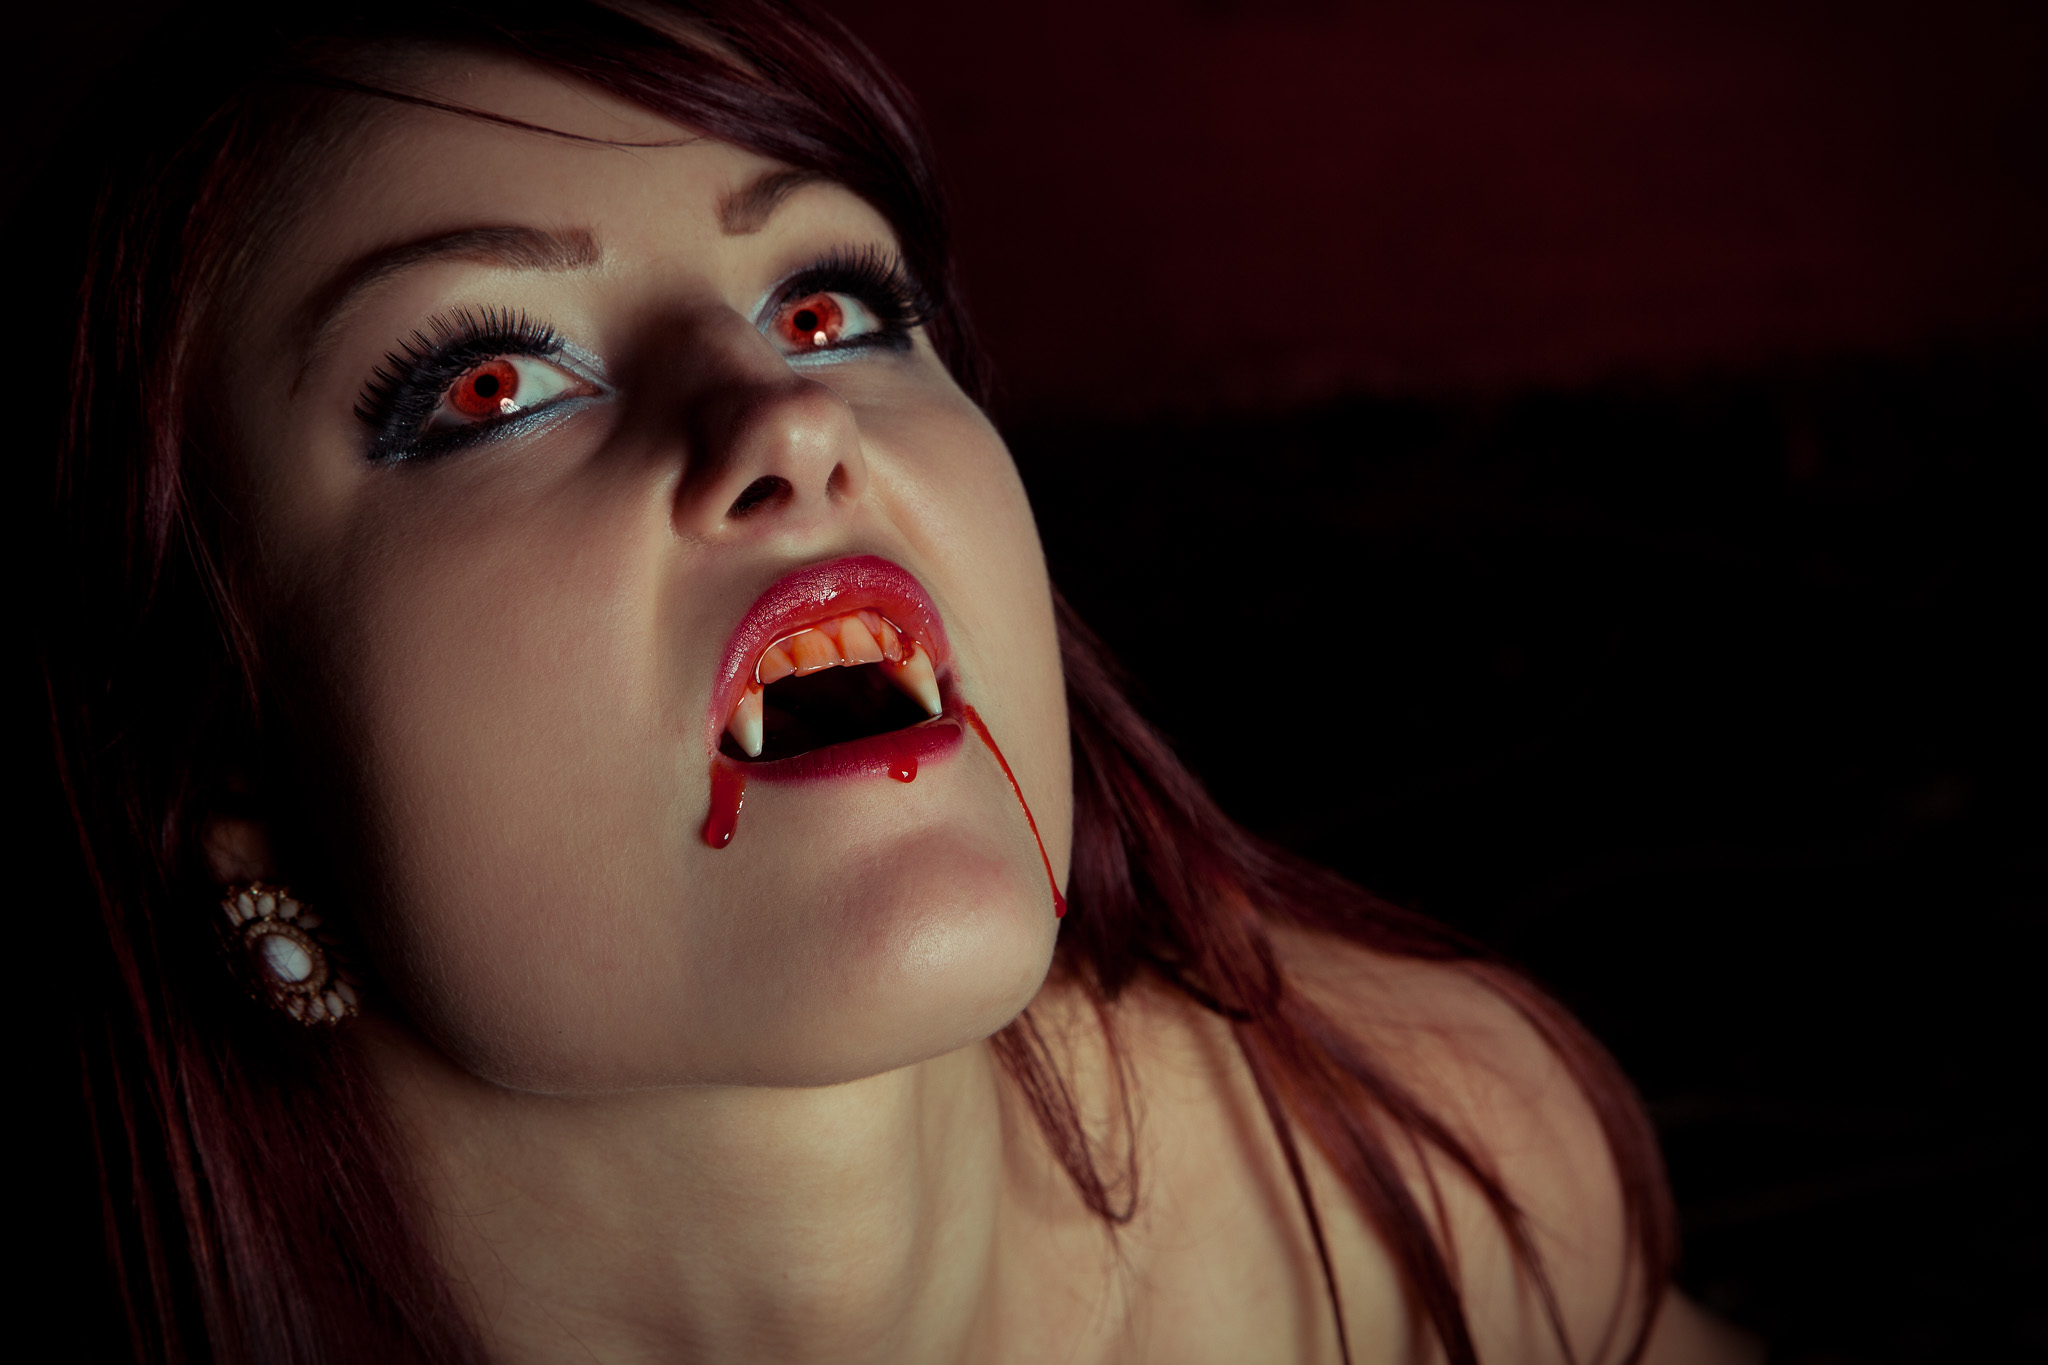
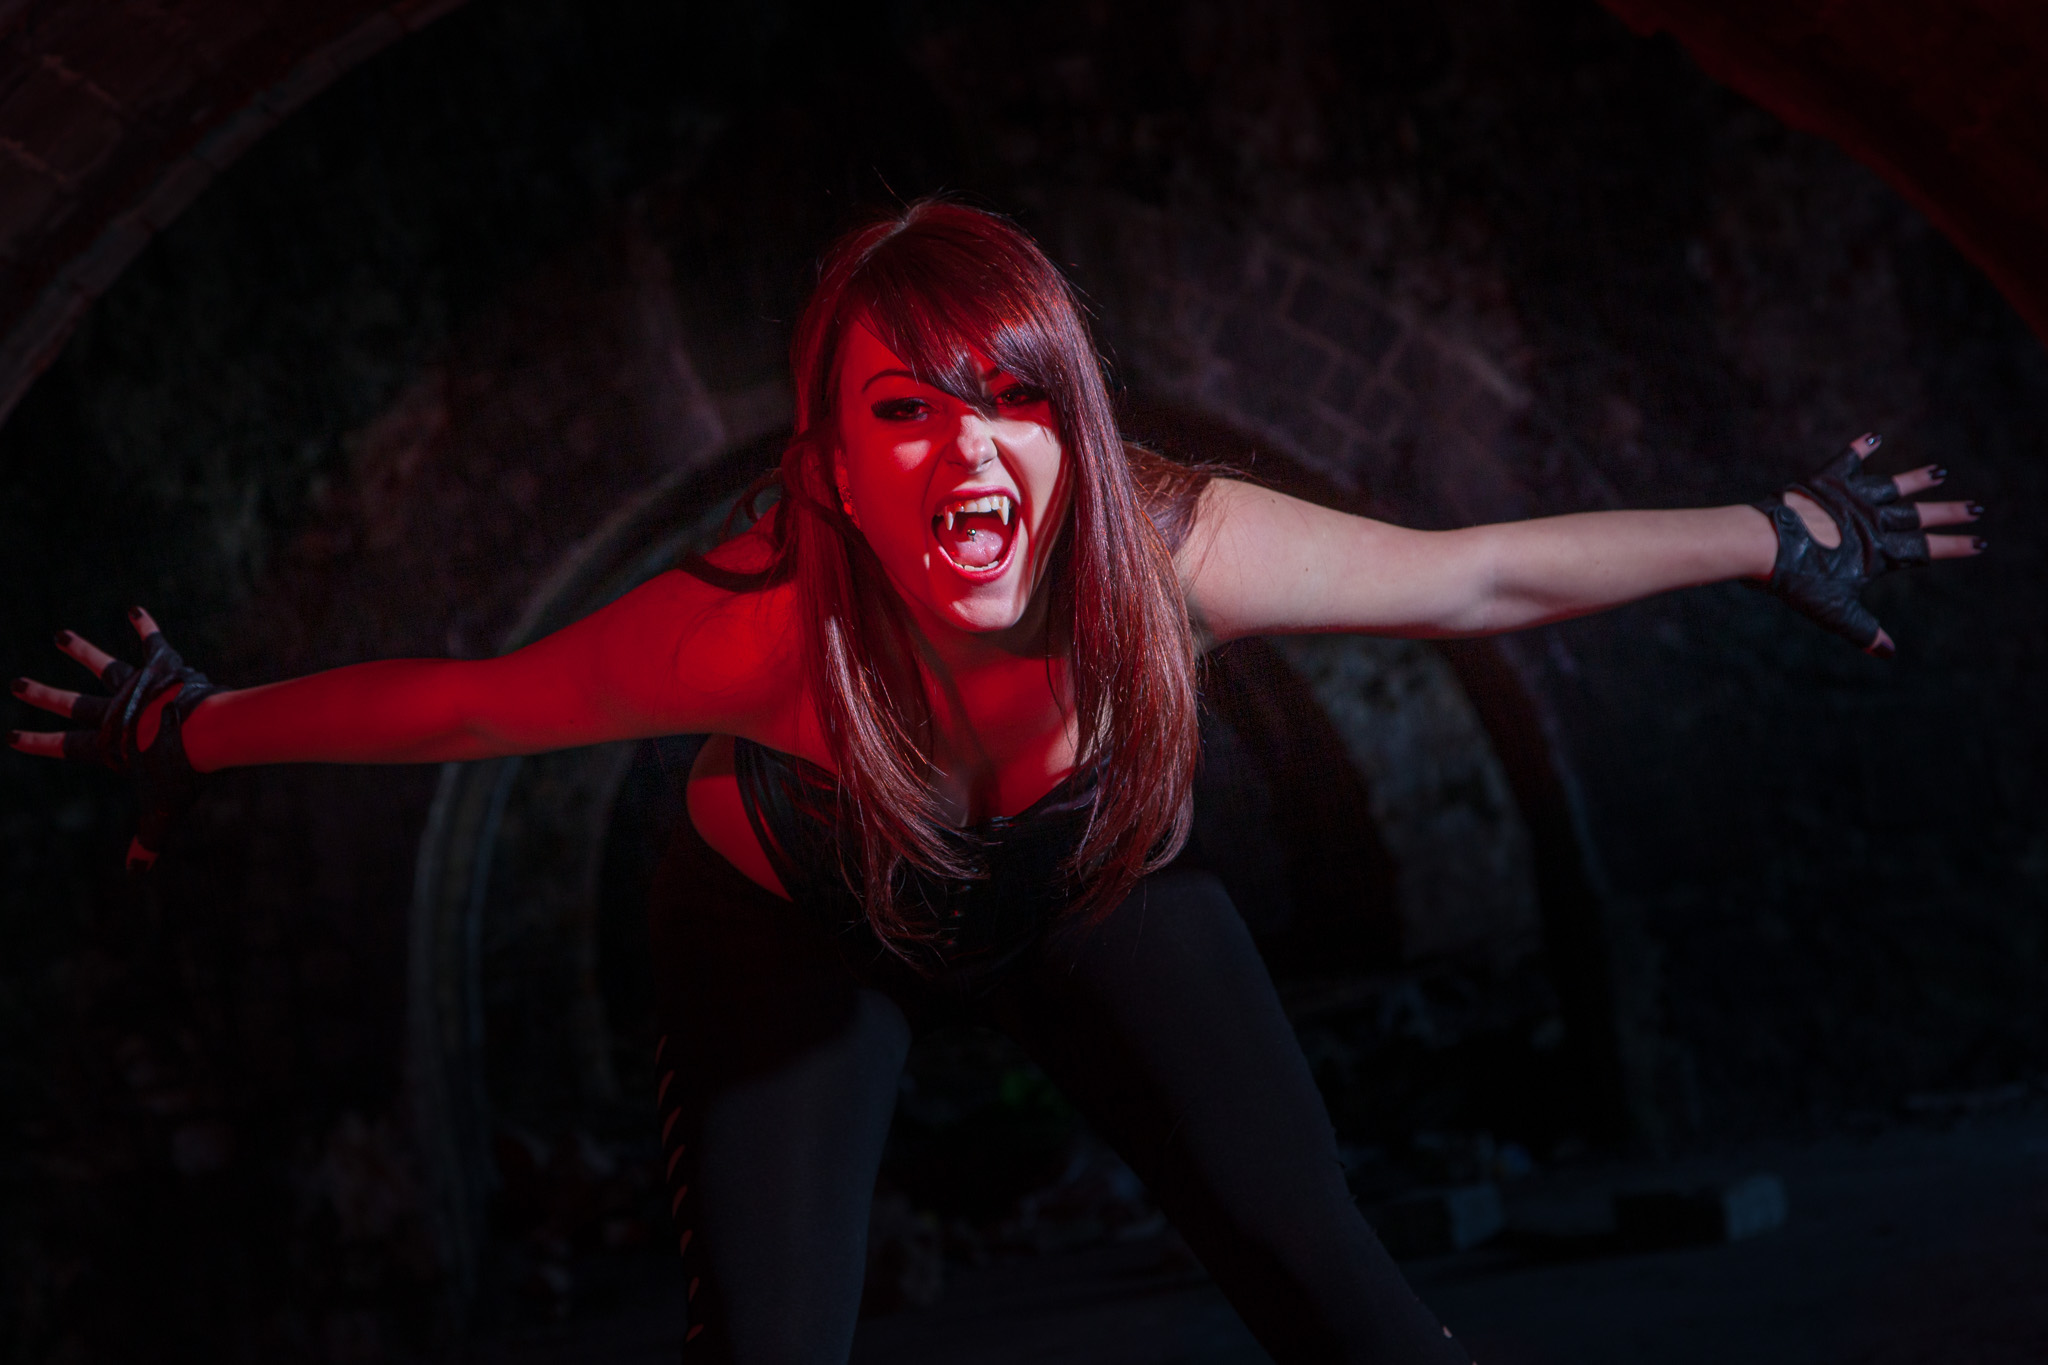
Sunday was vampire day! This was the original reason Emma came to Bristol so I had to get something good. Luckily, with Emma in costume and in character that was never in doubt. With the fangs in place and the fake blood flowing I knew I could get theatrical with the lighting. The key again was the Deep Octa as it gives a rapid fall off, lighting just what I wanted it to. I could then play with a few ideas for the background including letting some ambient burn in spookily or go all out Hammer Horror and use a red gelled flash.
I’m just pleased Emma was cleaned up and de-fanged before the PCSO came along to send us on our way!
So there you have it – a behind the scenes look at what a location shoot with me is like. If any photographers reading this would like to work with Emma (and I highly recommend you do!) check out her website and her PureStorm portfolio.
Thanks also to Helen and Darren for being able assistants and taken the behind the scenes photos.
If you have any questions, as always hit the comments.
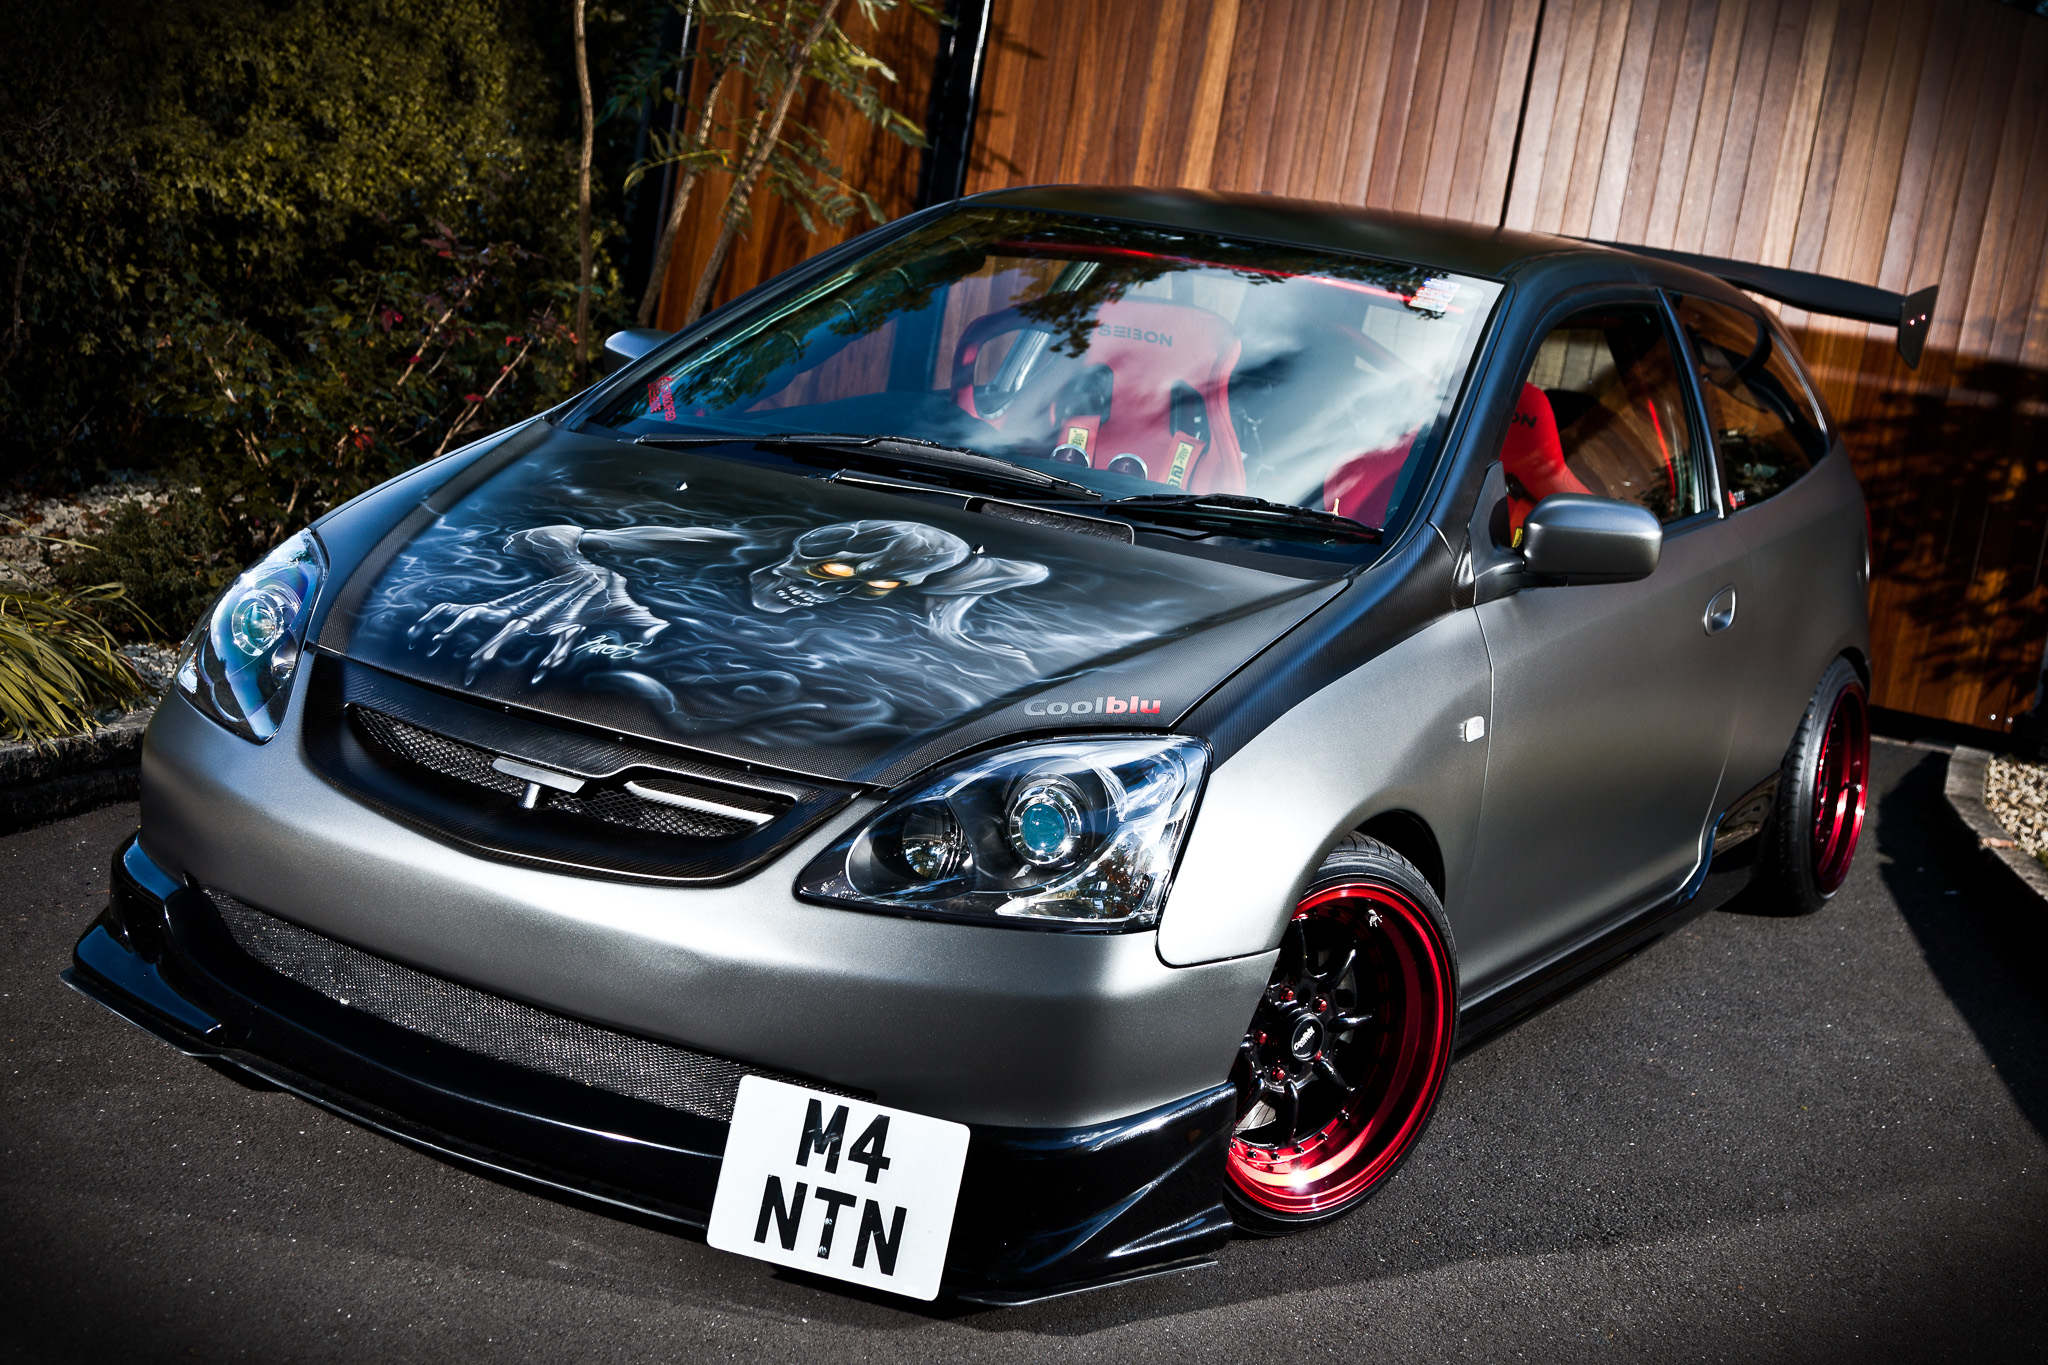
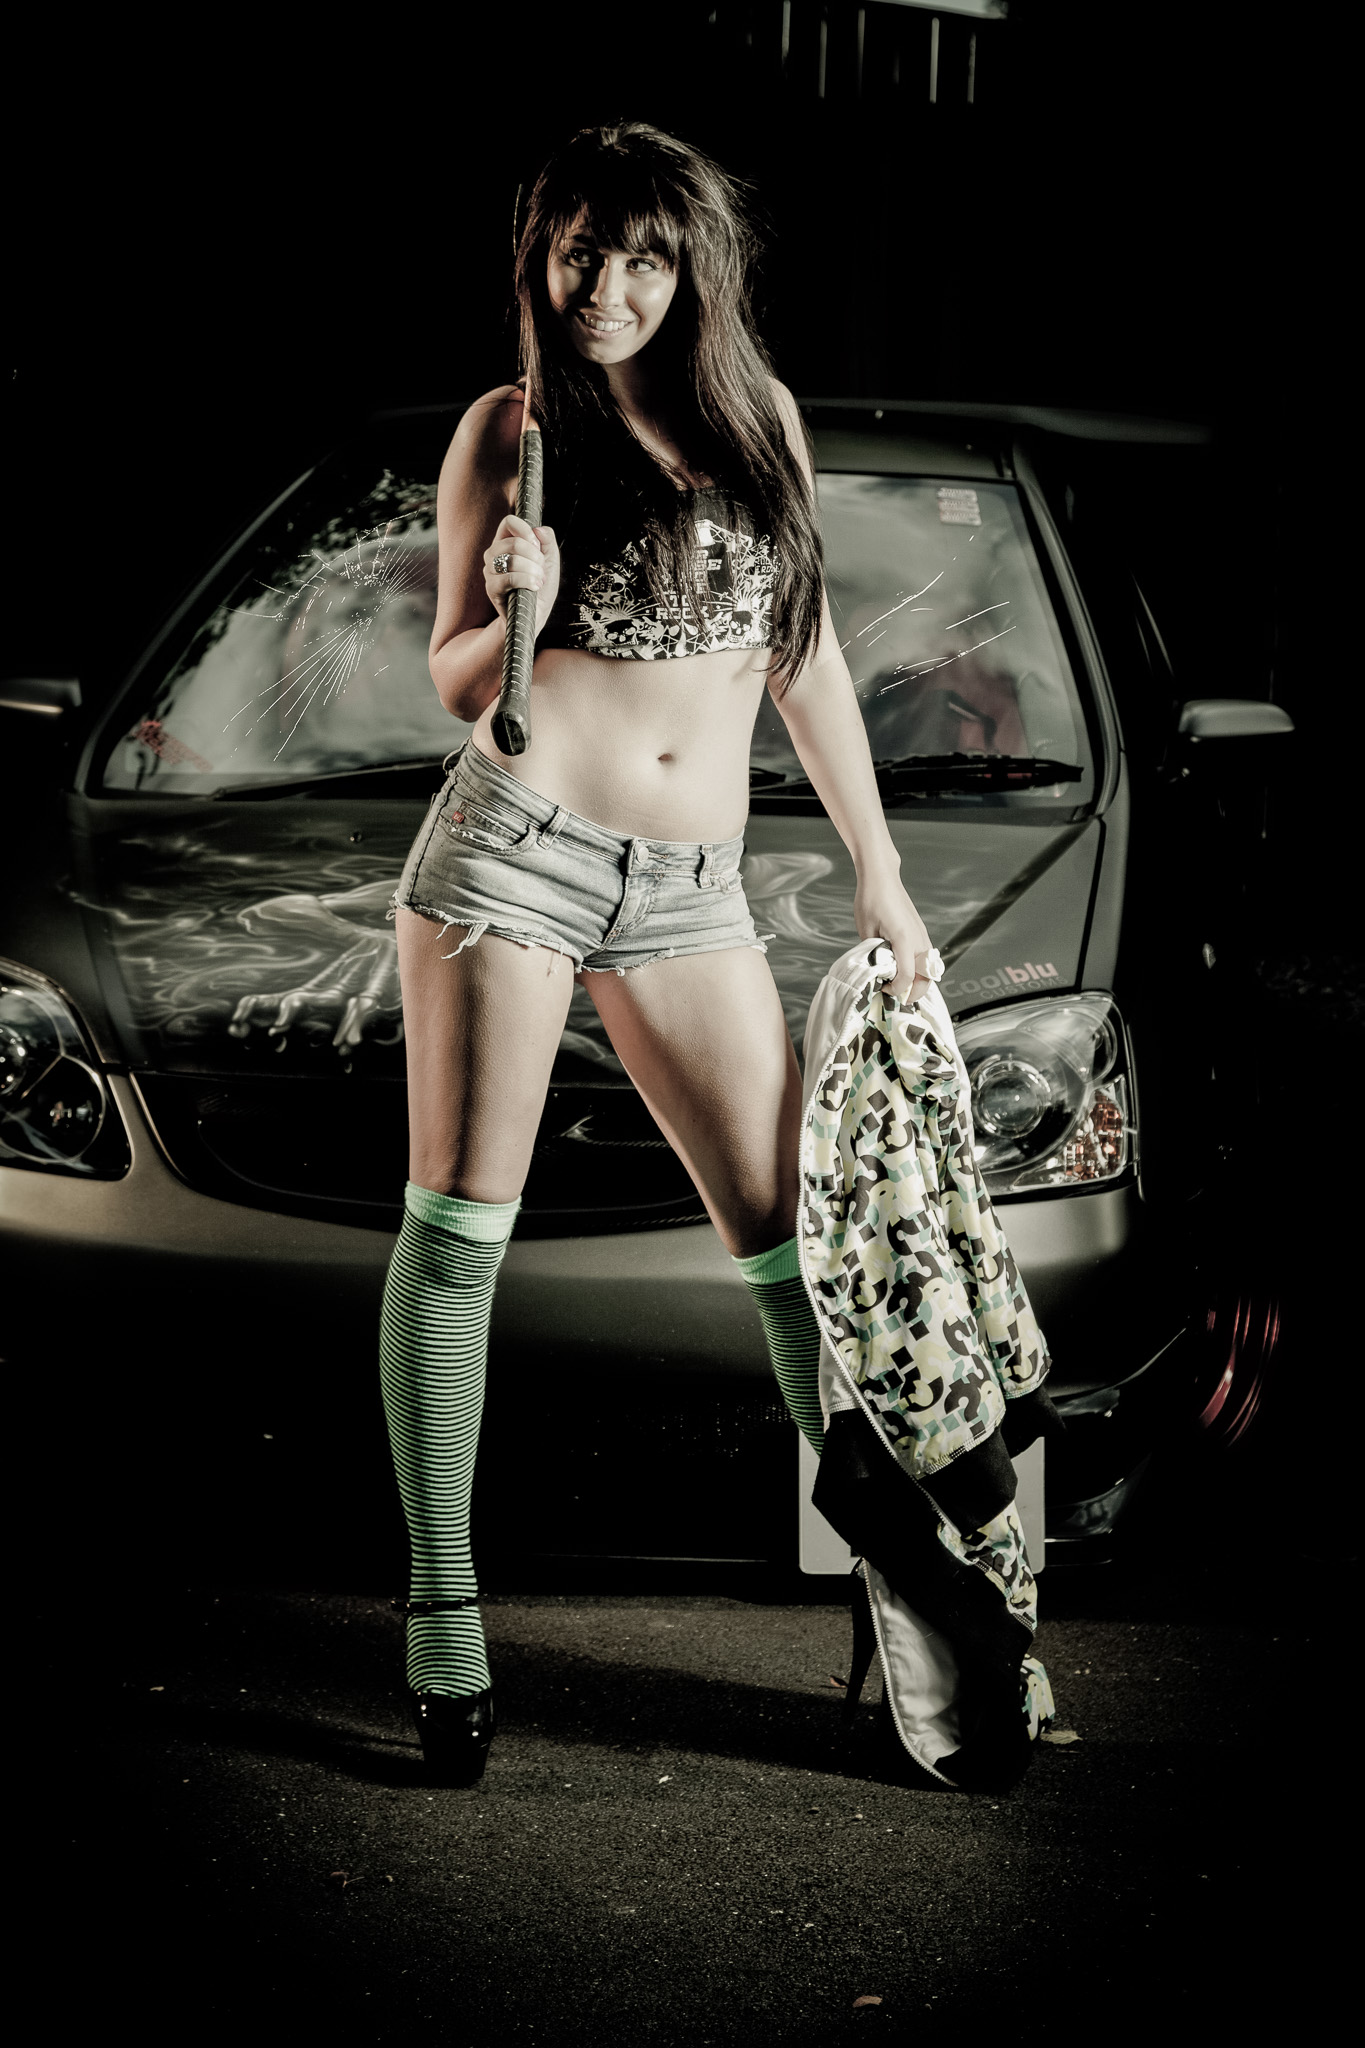
Ash Manton’s Type R Civic has been part of the UK modified car scene for several seasons and keeps coming back with a fresh look each year. It’s current stripped out, carbon clad, airbrushed look has just won it the cover feature in Max Power.
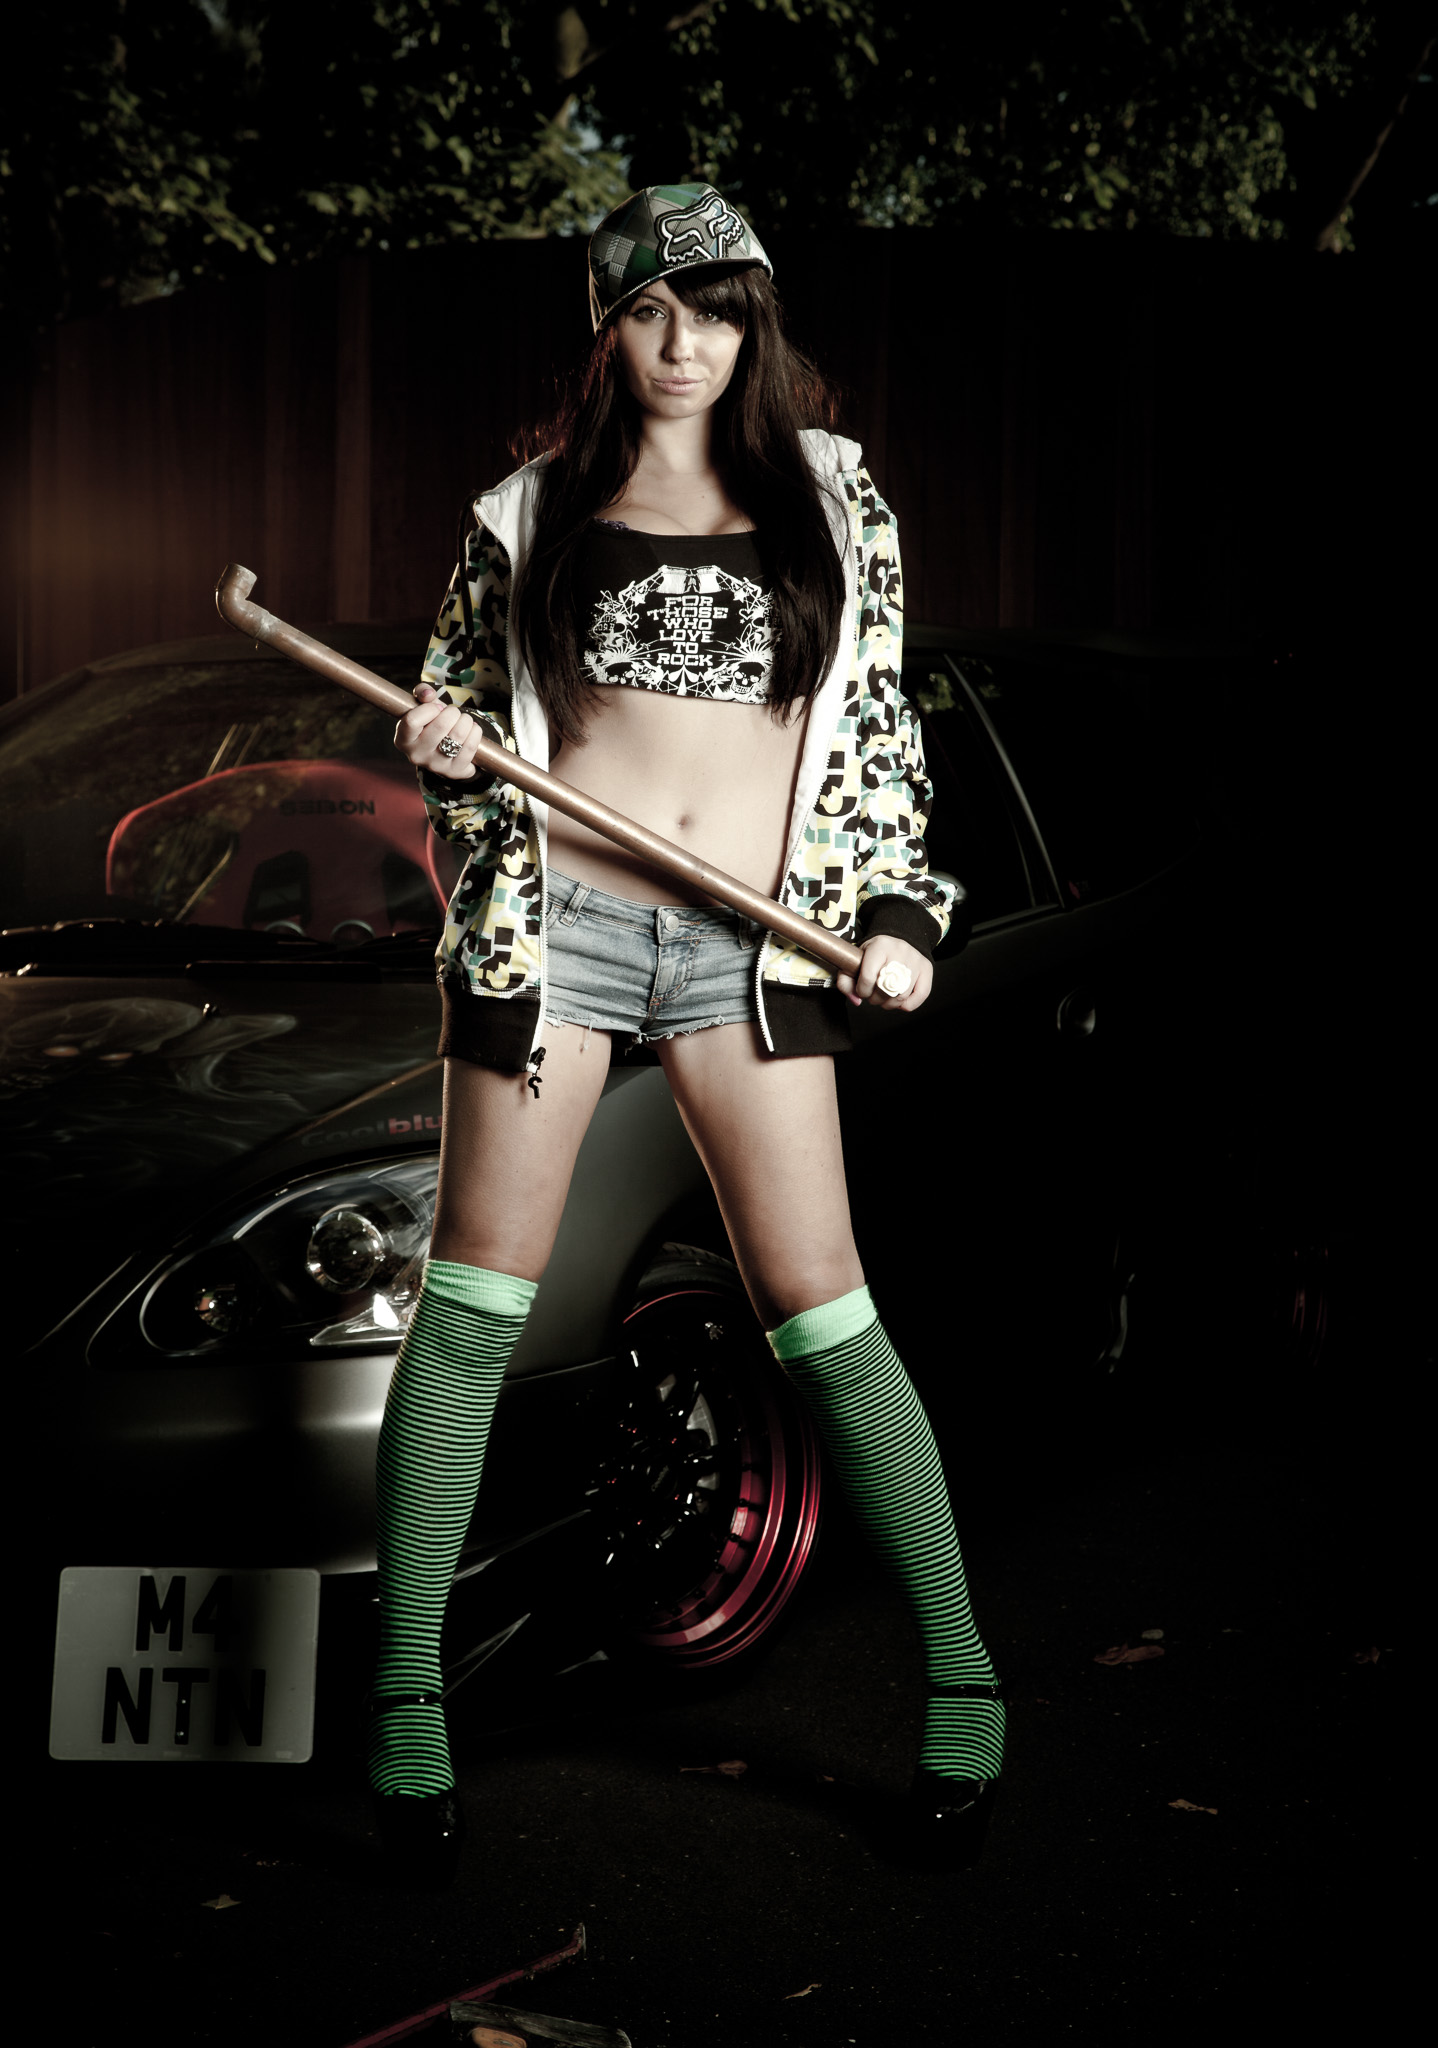
As it’s had the Max photo shoot treatment, I wanted to try something different. Enter Georgia Graham, Ash’s girlfriend, showing that hell really does hath no fury like a woman scorned!
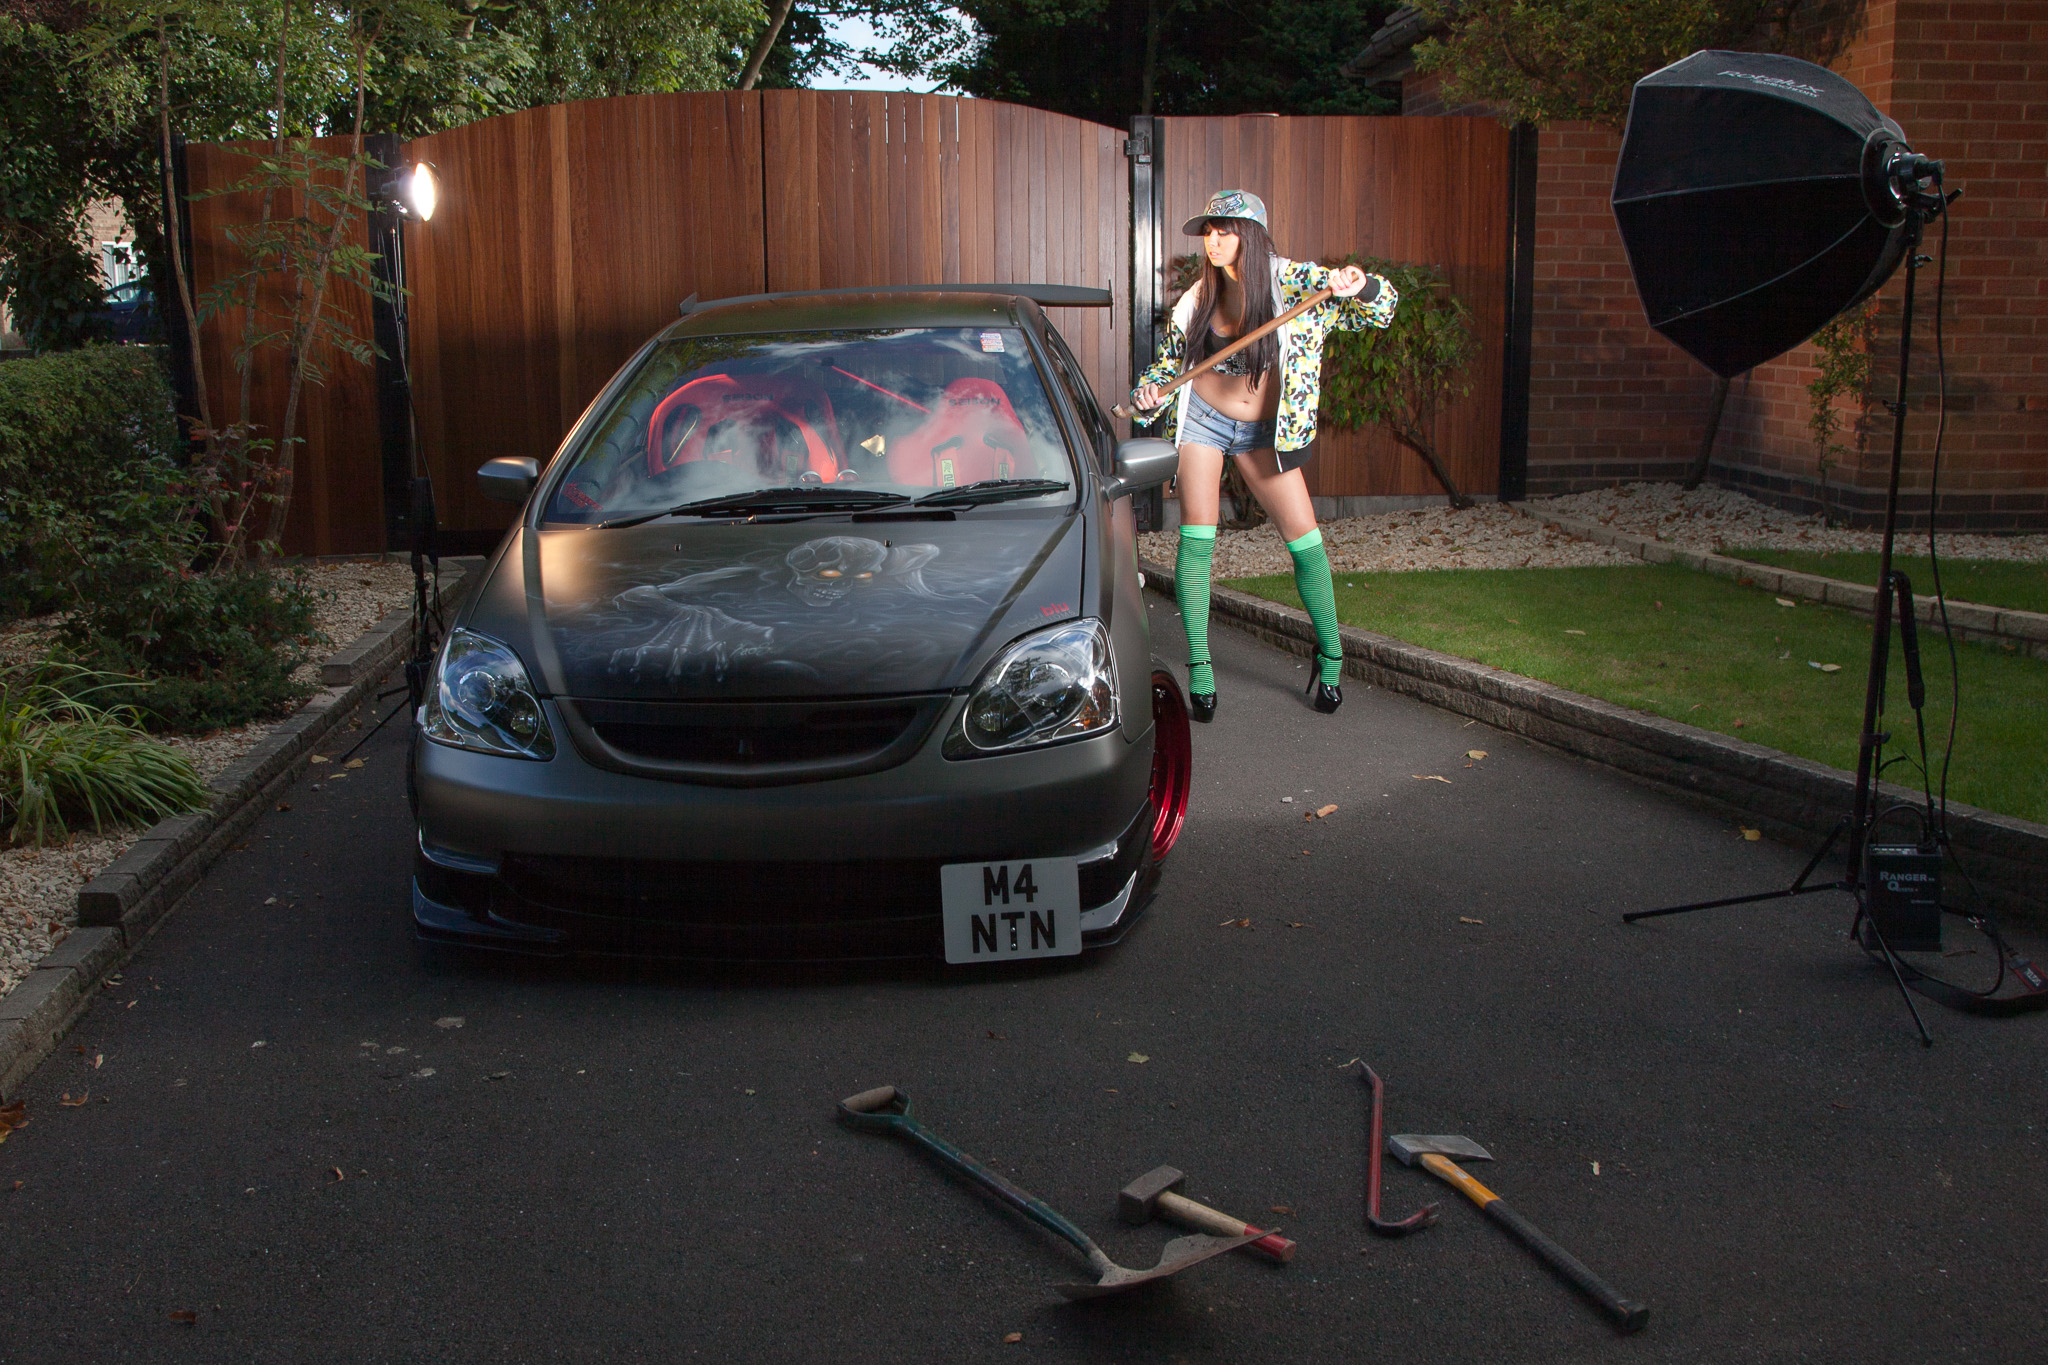
The plan here was to go for a dark and moody look so out came the Quadras again to enable me to stop down far enough at my max sync speed to take the daylight – f/9 at 1/200th did the job. One bare, CTO gelled strobe was positioned camera left adding a rim light to both Georgia and the car to separate them from the dark background and a second strobe, in a 70cm Deep Octa in “beauty dish mode”, as the main light.
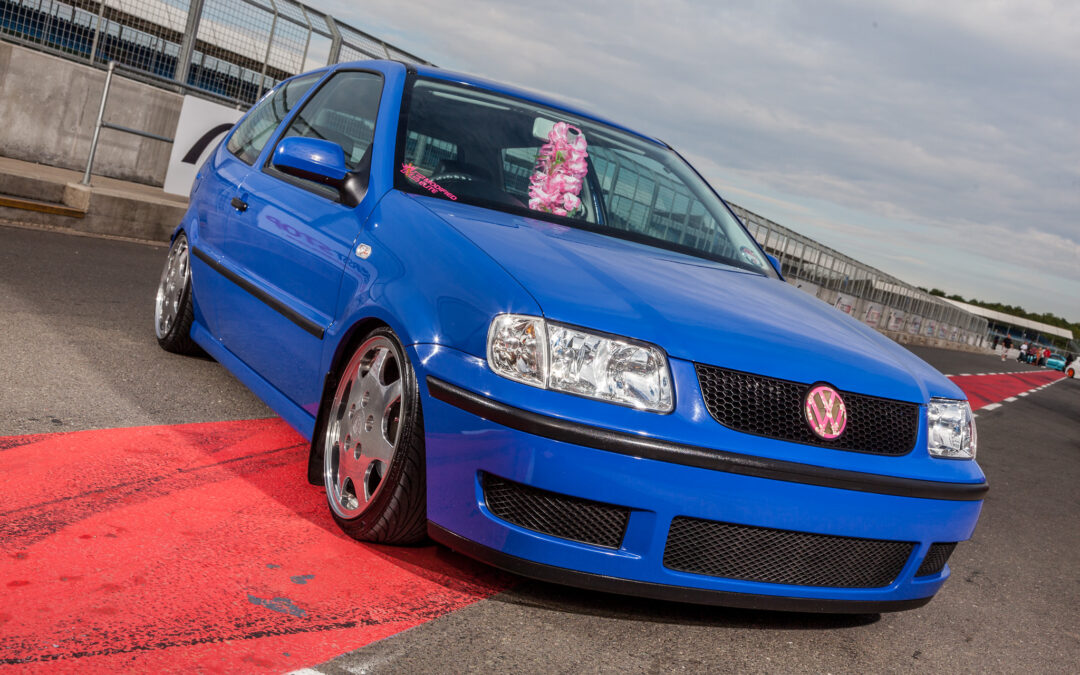
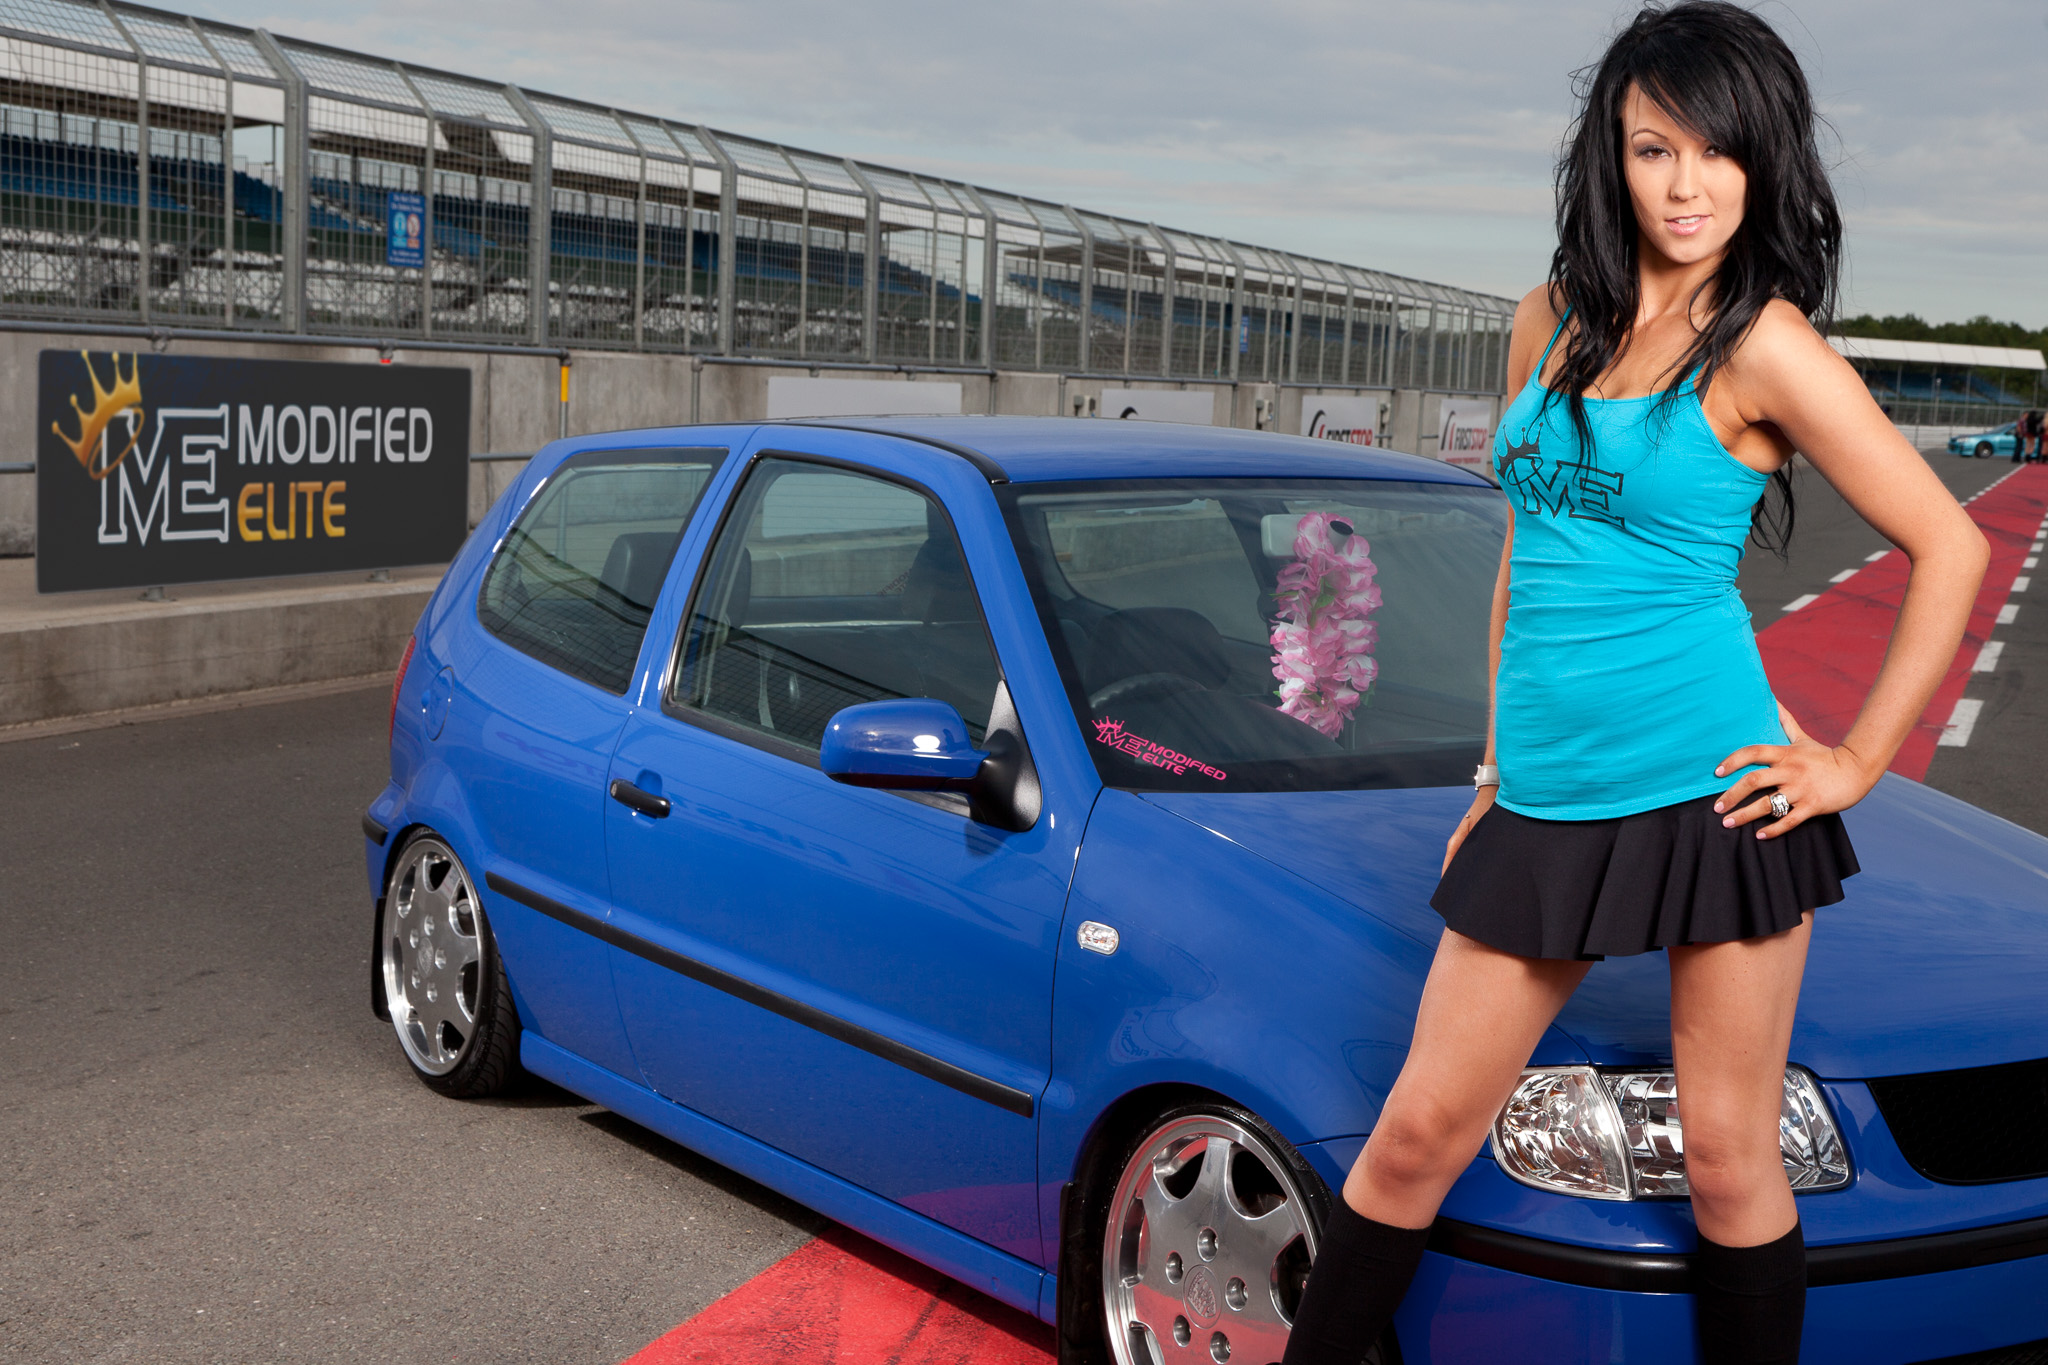
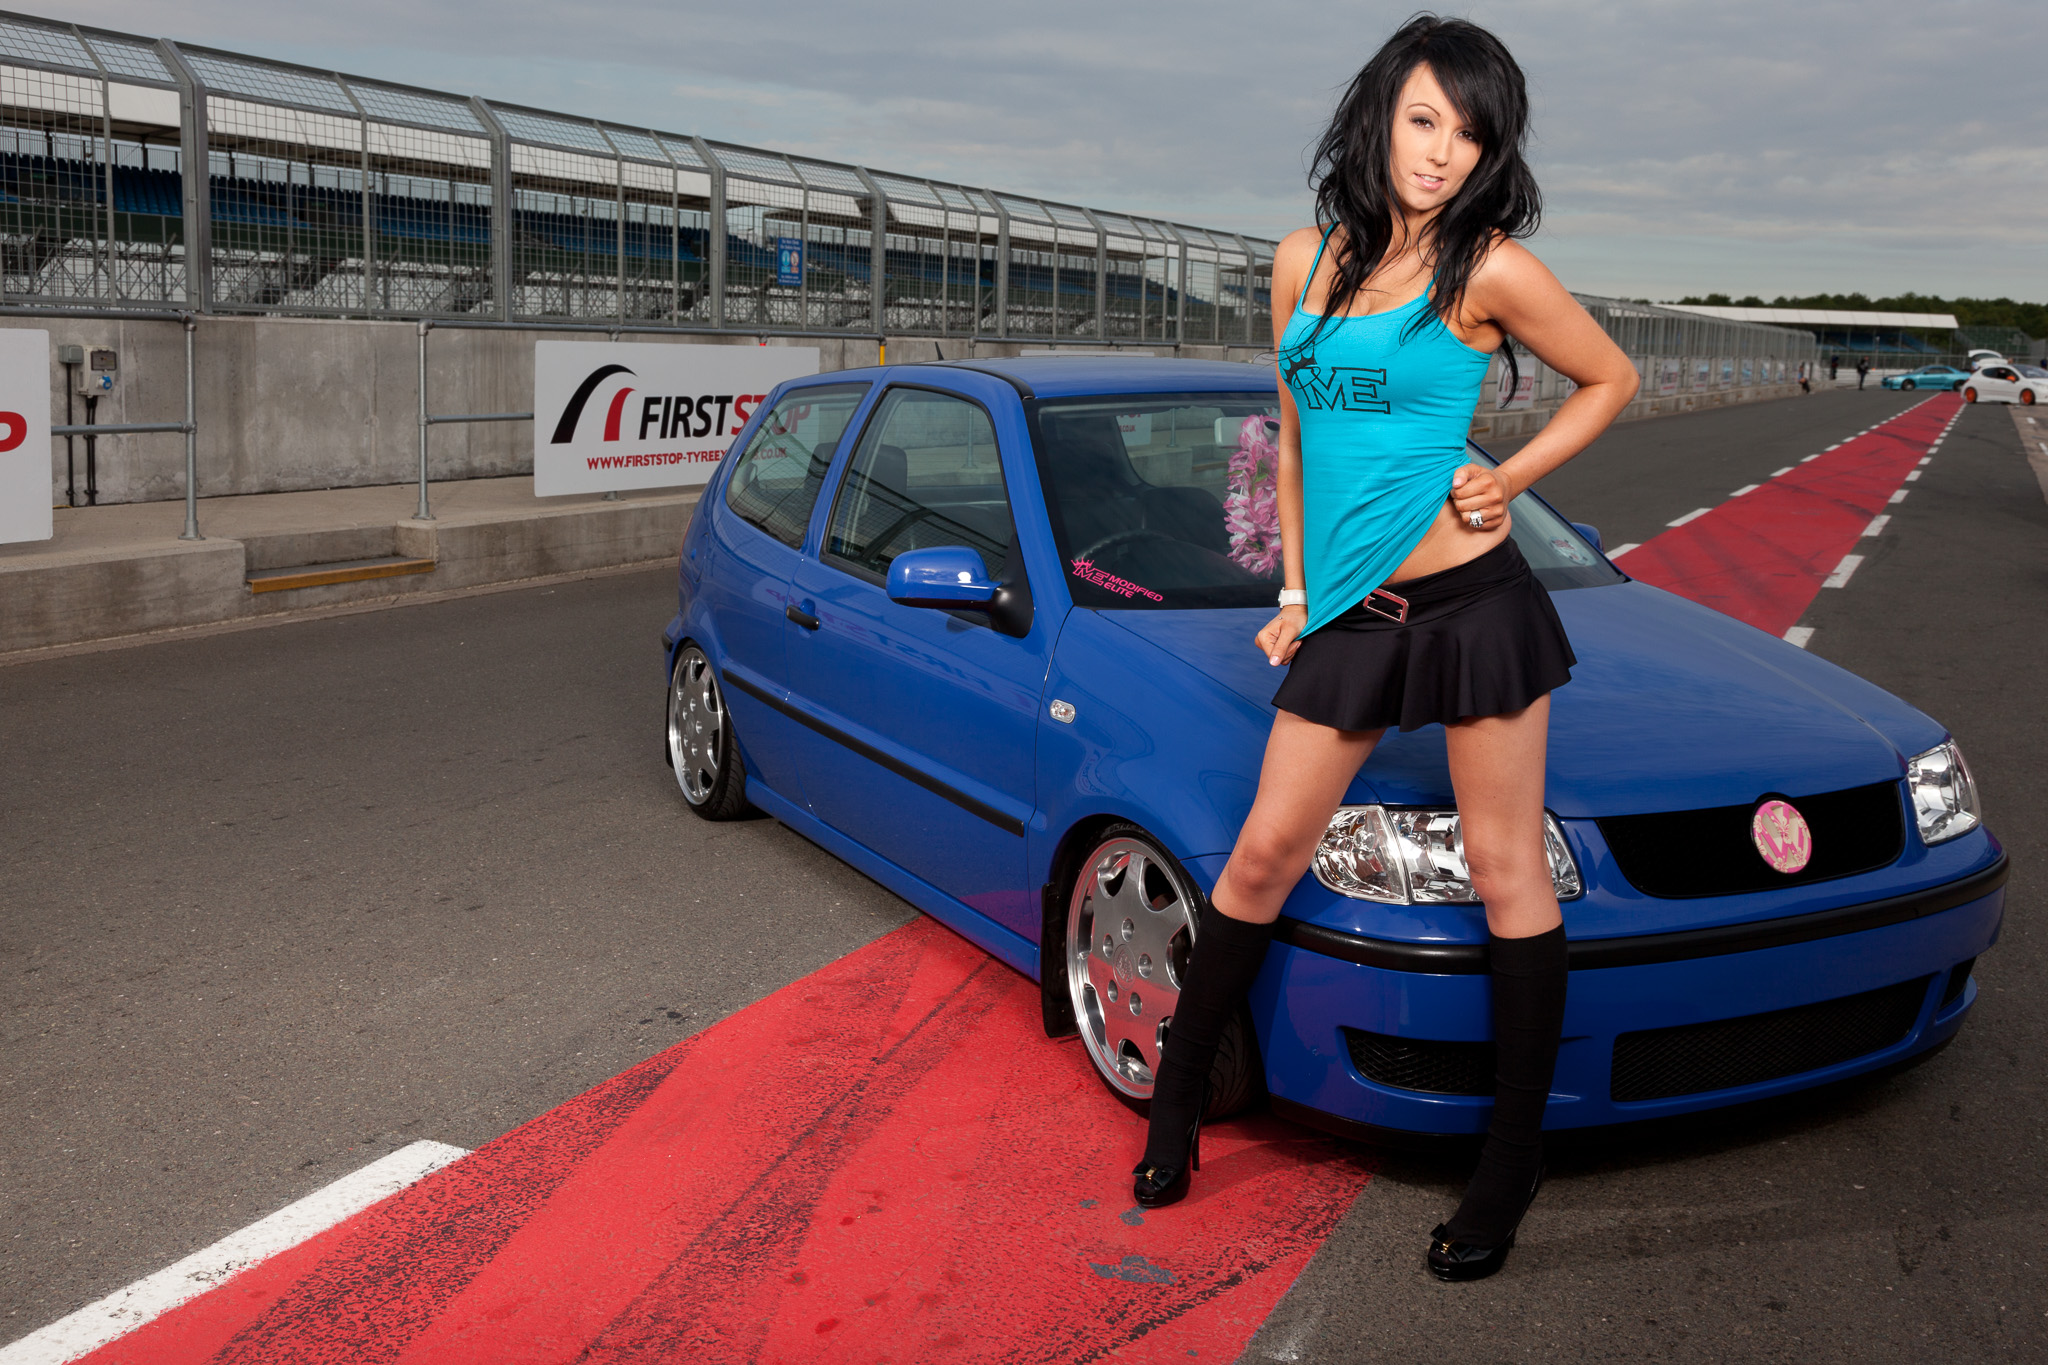
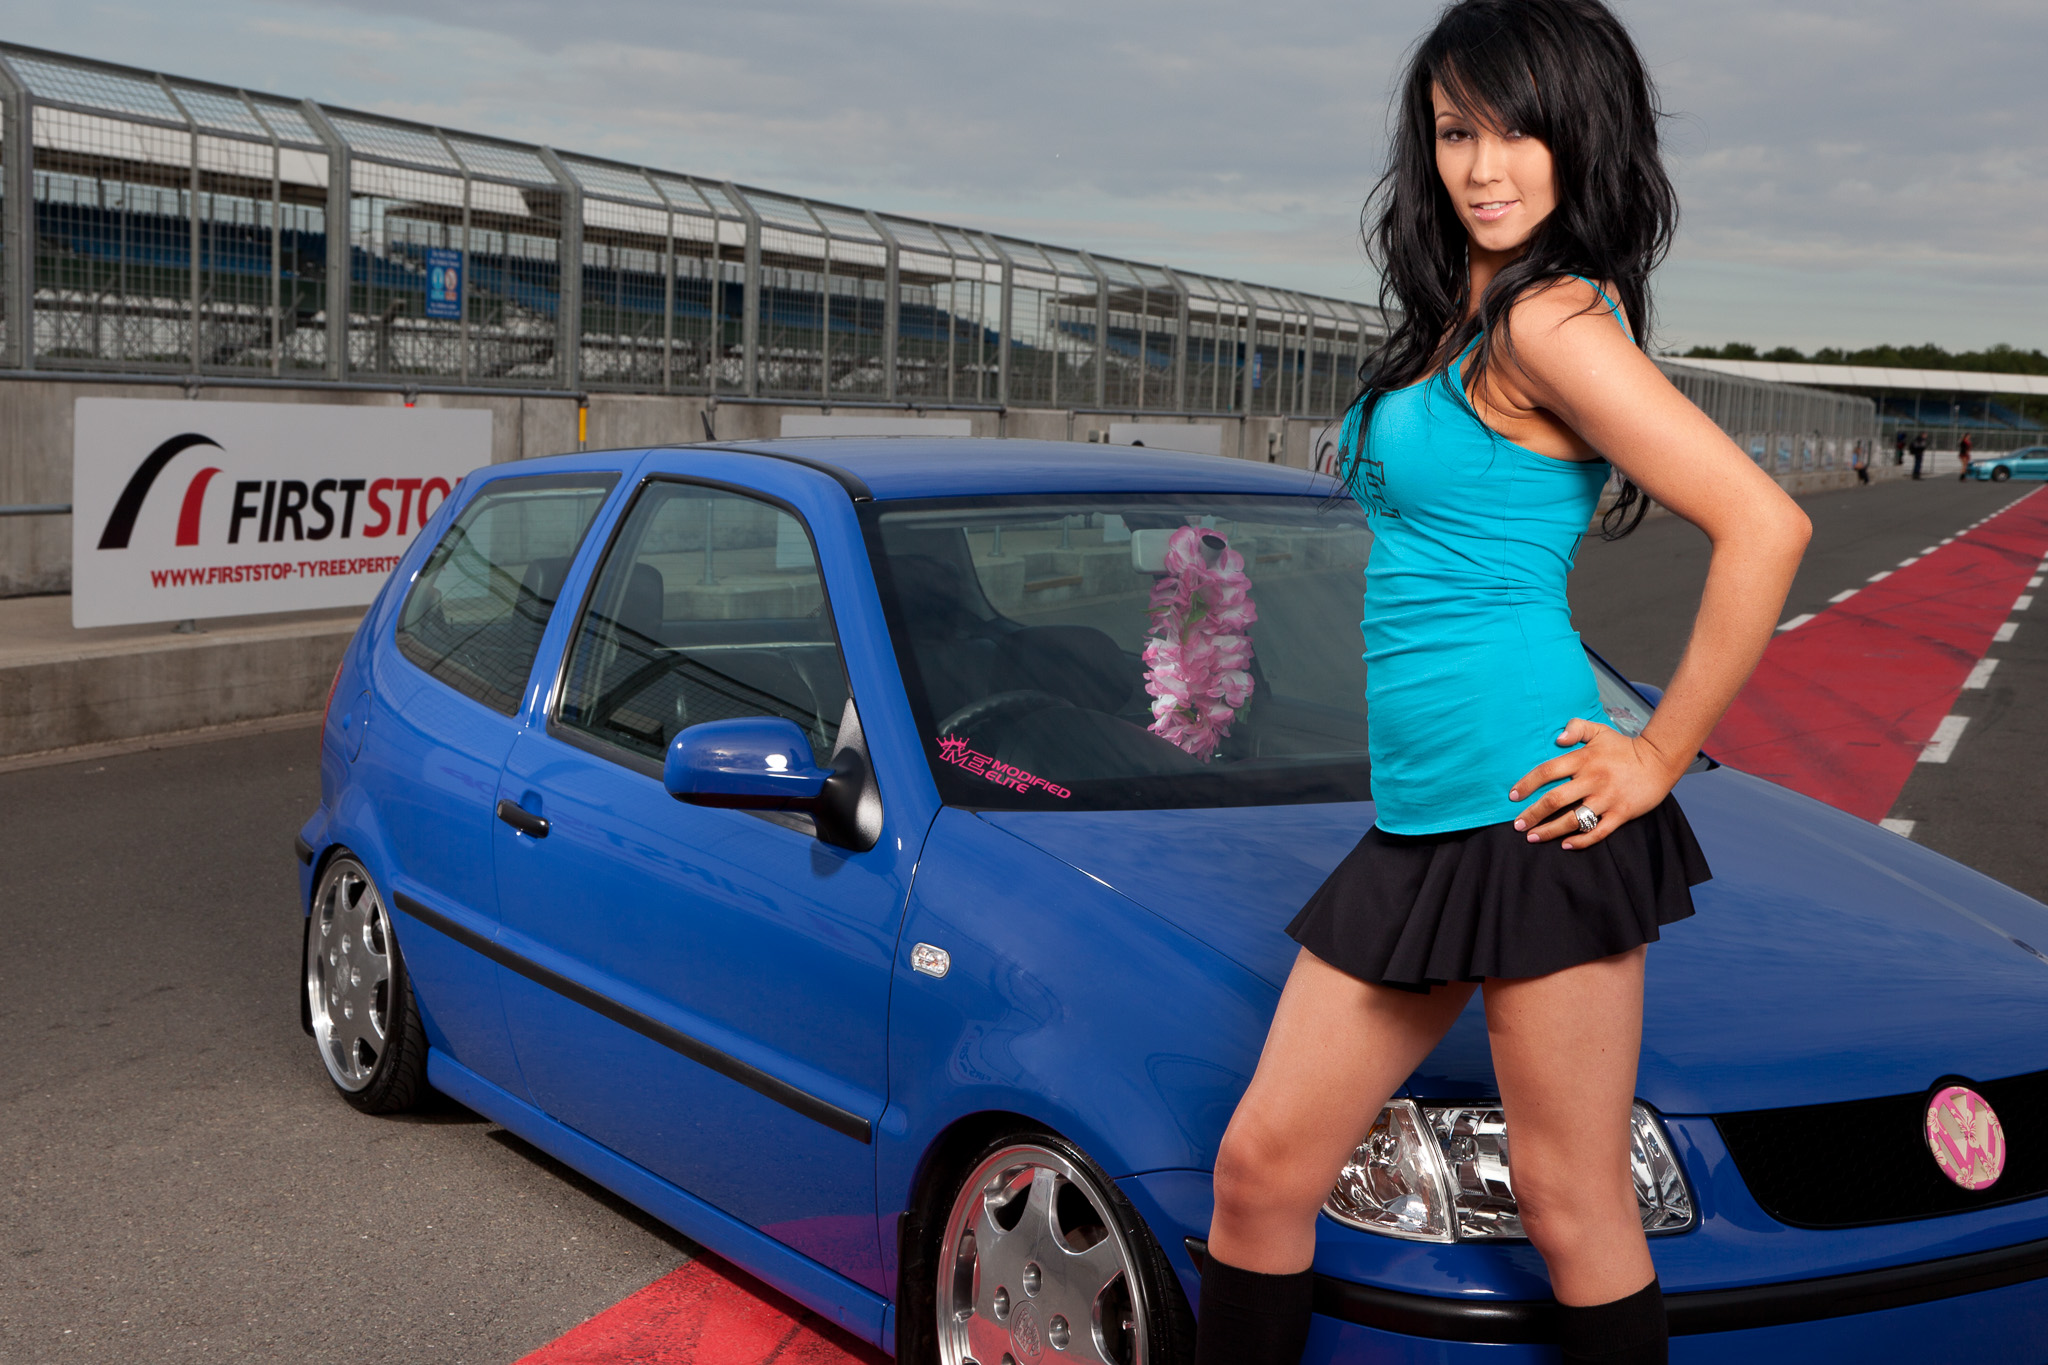
When you are at the World famous Silverstone circuit and you’ve got access to the pit lane, it’s just plain rude not to use it as a location. Especially when you’ve got the lovely Sarah and her equally lovely VW Polo as your subject.
The plan here was twofold – firstly I wanted to get some good shots in the can for Sarah and secondly I wanted to find out just how well my new lighting rig coped in a typical car show situation. Fortunately, it passed with flying colours.
To work in this situation, a lighting rig, for me at least, needs to be;
Light enough to carry: No matter how close you can park, it’s always a distance to anywhere you would want to shoot. I’ve got both heads, both packs and all cabling in a Crumpler Company Gigolo 9500 bag. With my light stands, a few modifiers, and some grip equipment in a fishing rod bag, I am able to move the whole lot short distances on my own. Although this time I had help from Chris Wynne and Darren Skidmore.
Quick to set up: You’ve got to move quickly at a car show as you’ve likely borrowed the girls from a trade stand or a car from a Show n Shine area so time is limited. Another box ticked by the Quadras. The heads are small enough for a Manfrotto Nano 001B stand to support with the pack hanging to add stability and the Elinchrom Deep Octa goes up swiftly. Cheaper eBay softboxes take a while to assemble though.
Power: I don’t always get to choose when a shoot is going to happen and areas in shade aren’t always the best looking locations, so I need some punch to overpower and control the ambient light. For this shoot the solution was to use 3 hot shoe flashes for example. At 400w/s the Quadra packs aren’t the most powerful, but still had plenty to tame the light spilling into the pit lane in this case. Although I’ve yet to try, I am certain 2 bare heads could handle full sun.
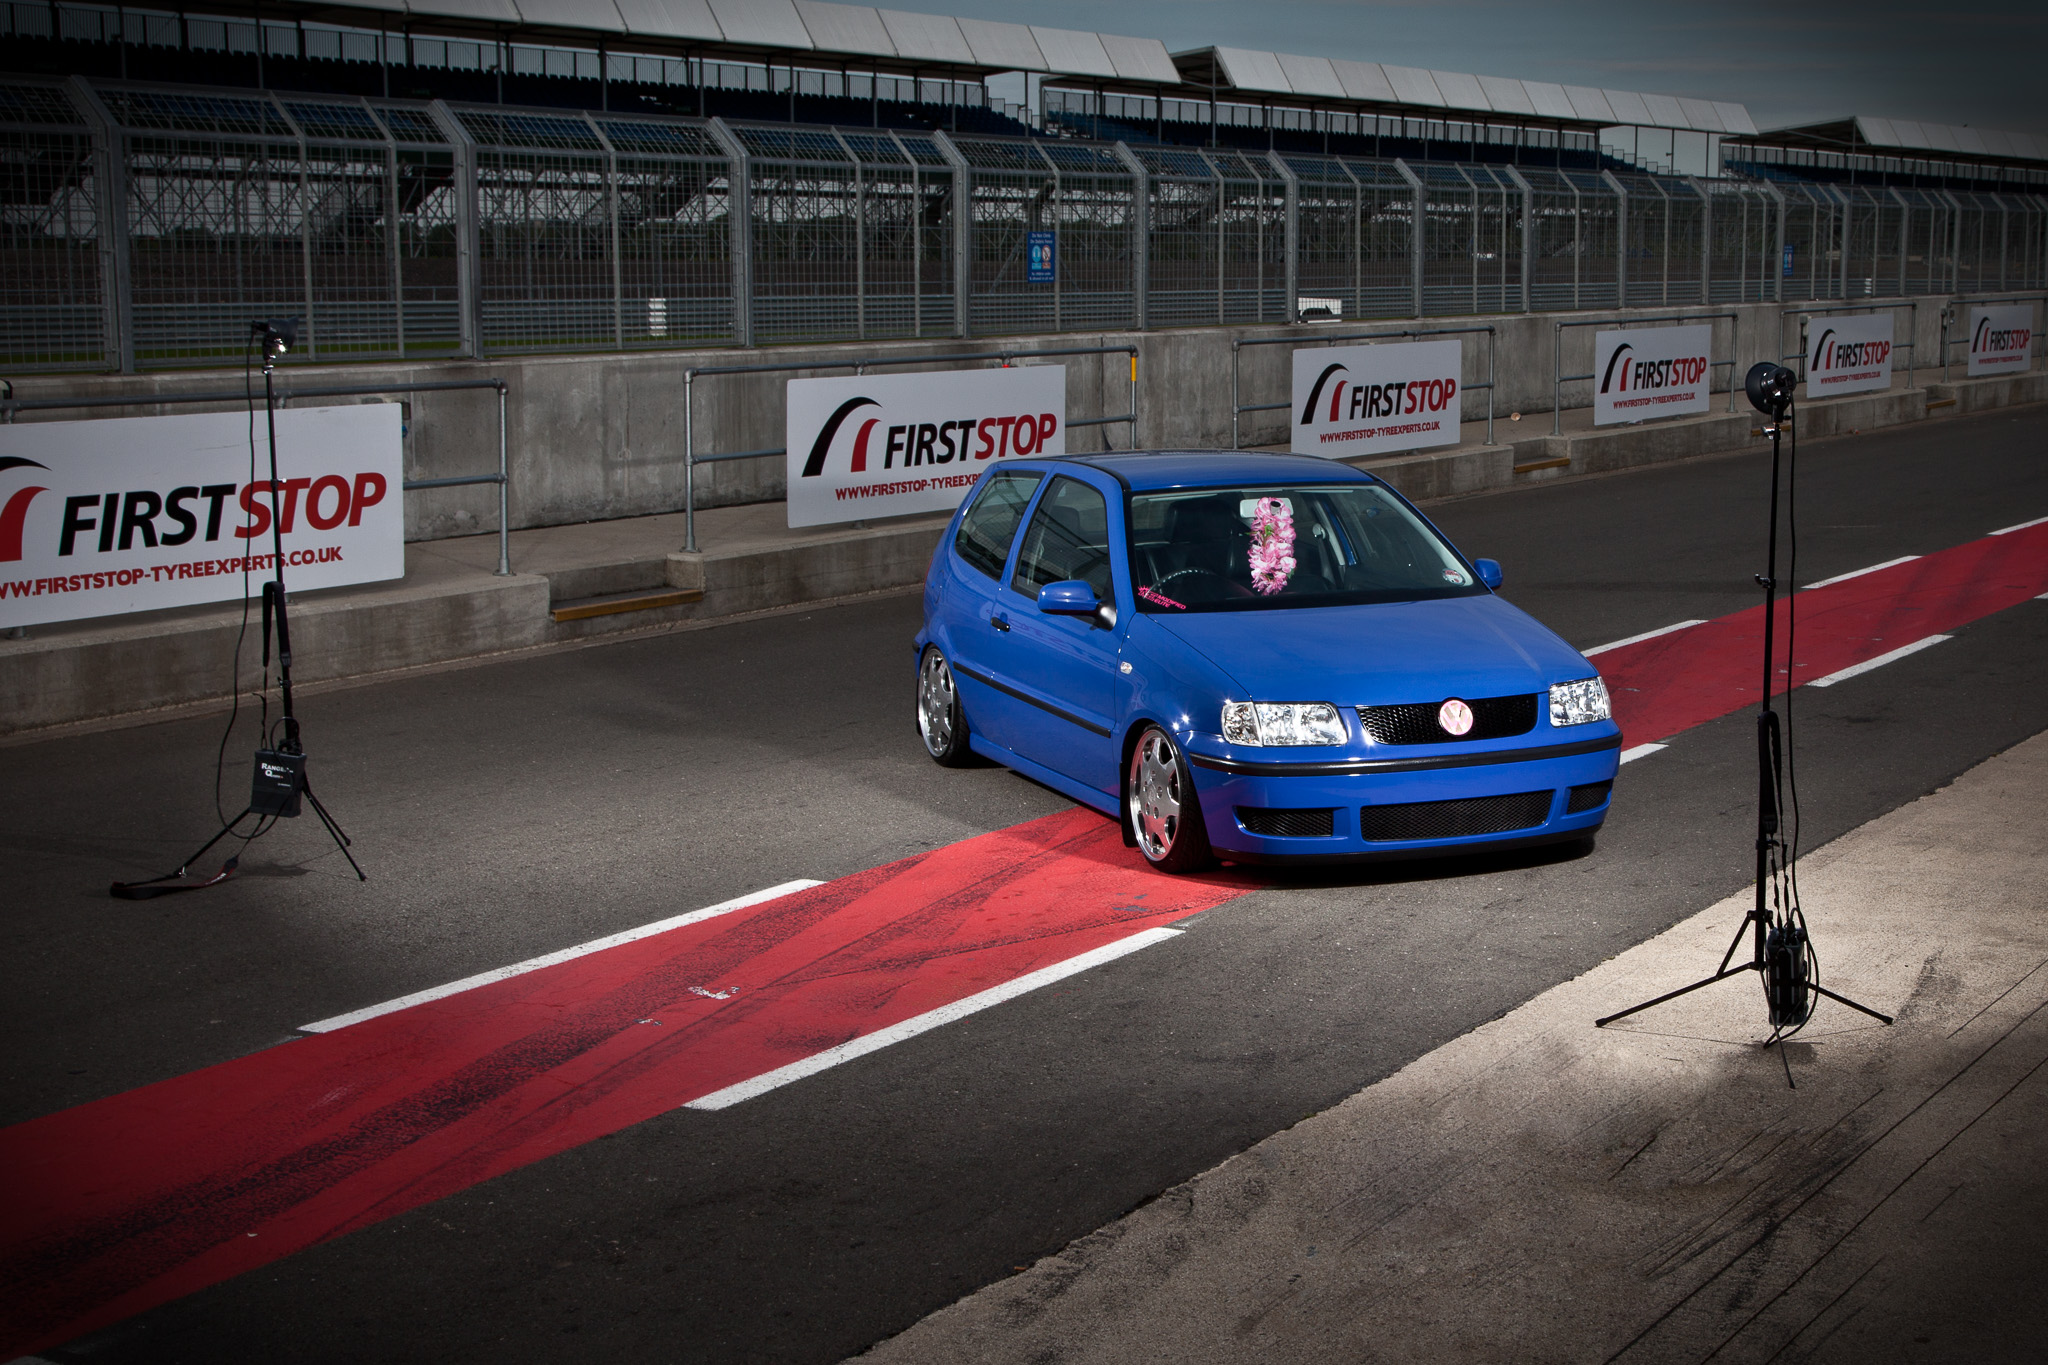
Enough talk, onto some images! Firstly to underexpose the pit lane enough to be able to add my own light I had to shoot at around f/18 at my max sync speed. I should probably take this opportunity to mention the Elinchrom Skyport Speed controller syncs withe the receivers in the Quadra packs at my max sync speed of 1/200th without trouble.
All I had to do now was bring in the lights. A simple, bare head setup for just the car and the Deep Octa softbox (in beauty dish mode) added to the camera right flash for the shots with Sarah.
Here are a few more images fr the shoot, feel free to leave a comment.
OK, so you’ve read strobist.com, and joined the Strobist Flickr group. You’ve gone on eBay and bought your “Cactus Triggers” or “Poverty Wizards”. Now it’s time to put it all together – Just how does tab A slot into tab B? Well here’s what I have settled on.
I currently have the Phottix PT-04TM wireless flash triggers, bought from HKSupplies on eBay. These triggers may not be 100% reliable, but I am getting very few non fires and even fewer miss fires. They are no Pocket Wizard, but they only cost pocket money.
The PT-04TMs are intended to mount onto your cold shoe or umbrella bracket or screw onto the standard thread atop a light stand with the flash mounted on top. The trouble is, this makes the whole assembly very tall and unwieldy and I found the flash would flop forwards and finish up illuminating my light stand very nicely!
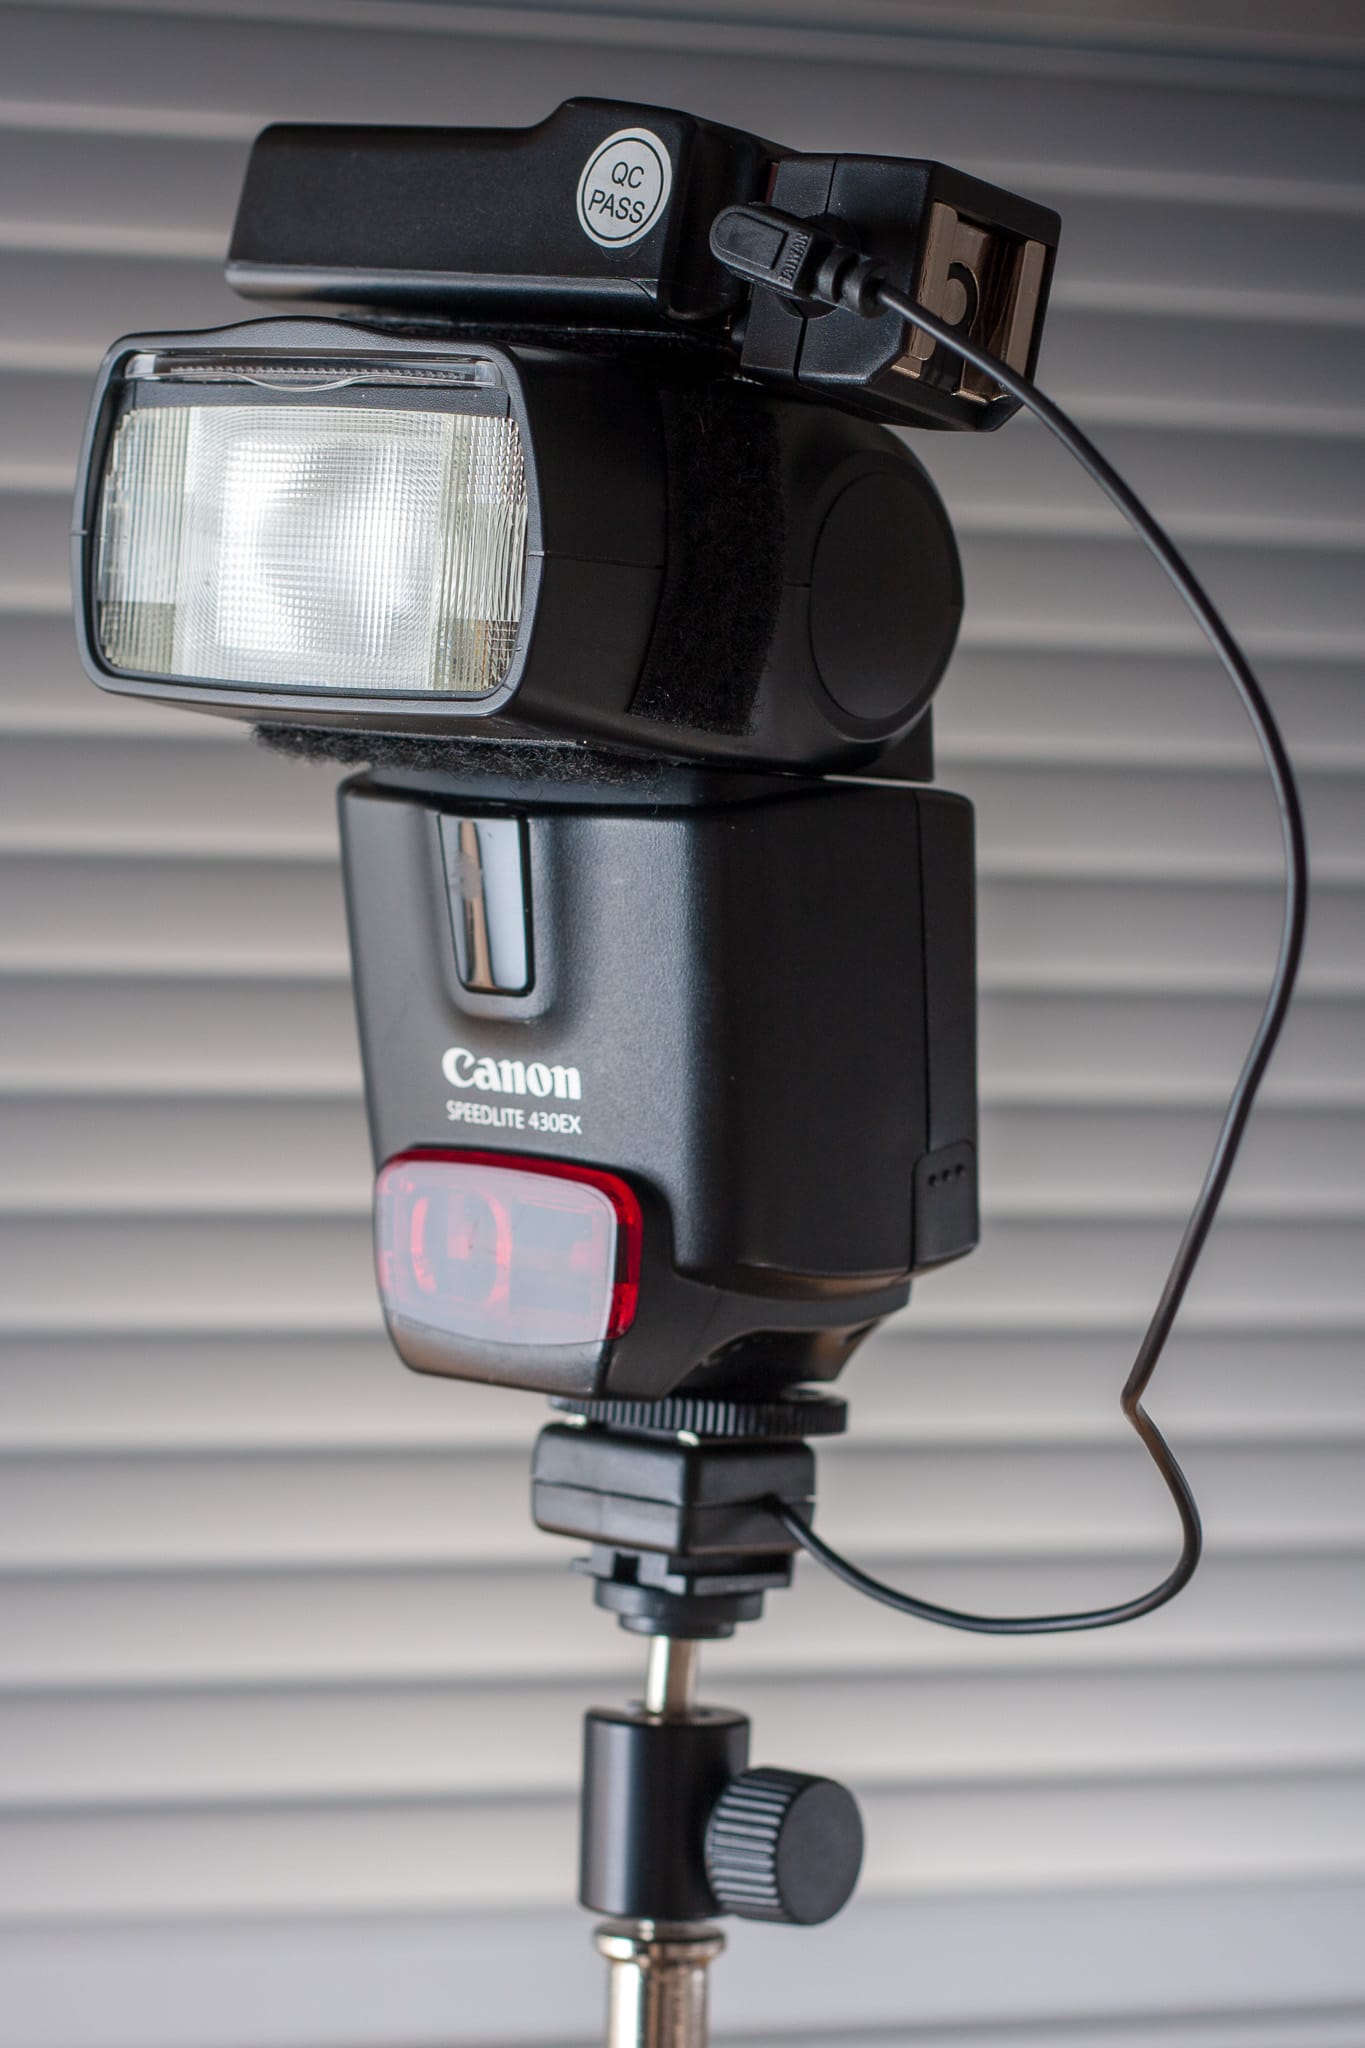
So I set out to try and find a way of lowering the overall height to reduce the leverage. Here’s what I came up with:
Obviously there’s the flash. Then there’s the PT-04TM, with the plastic foot removed, velcro’d on top (you do have velcro on your flash head don’t you?)
Attached to the hotshoe on the receiver is a cheap hotshoe to PC sync adapter (designed to let you use a PC sync cord with a camera that has a hotshoe but no PC sync port) bought for a few pounds from eBay. If you have the slightly newer receiver that has a PC sync port on the side, you don’t need this.
Moving down to the bottom of the flash we have a Kaiser 1301 Hotshoe Adapter (designed to let you use a flash that has no PC sync port on a camera that has no hotshoe).
So basically, when the receiver triggers, instead of going straight over a hotshoe to flash connection, it travels over 6″ of wire first. There’s nothing clever happening, it just makes everything more convenient.
The Kaiser 1301 Hotshoe Adapter has another benefit: It has a normal foot so you can use it with all your other umbrella mounts, but it also has a standard 1/4″ screw thread on the bottom for mounting onto any standard light stand, tripod, or in my case, a very small, very cheap Hama 5011 ball head.
It may not be the tidiest setup, but it work for me… at least untill I can get my hands on some of those Pocket Wizard Flex/Minis!


Recent Comments