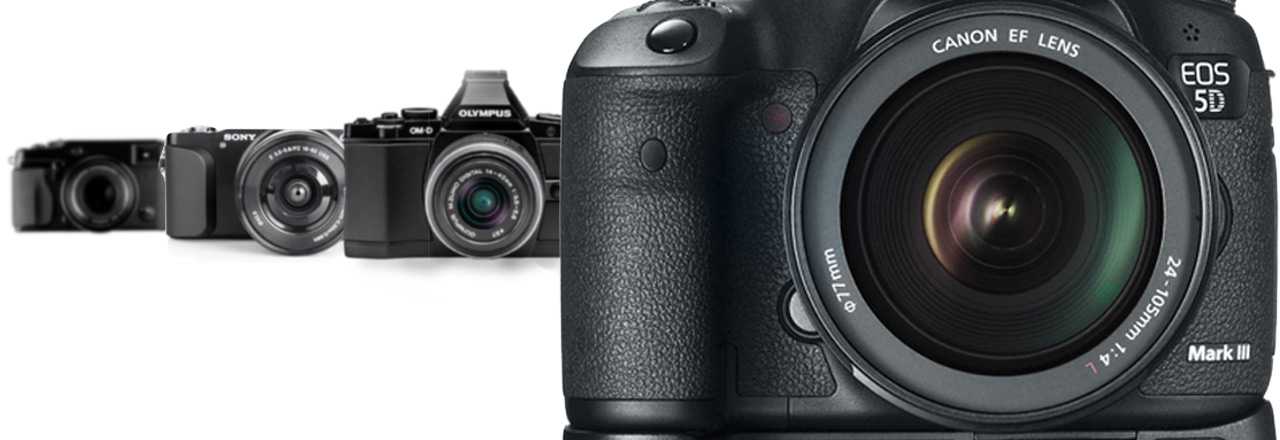
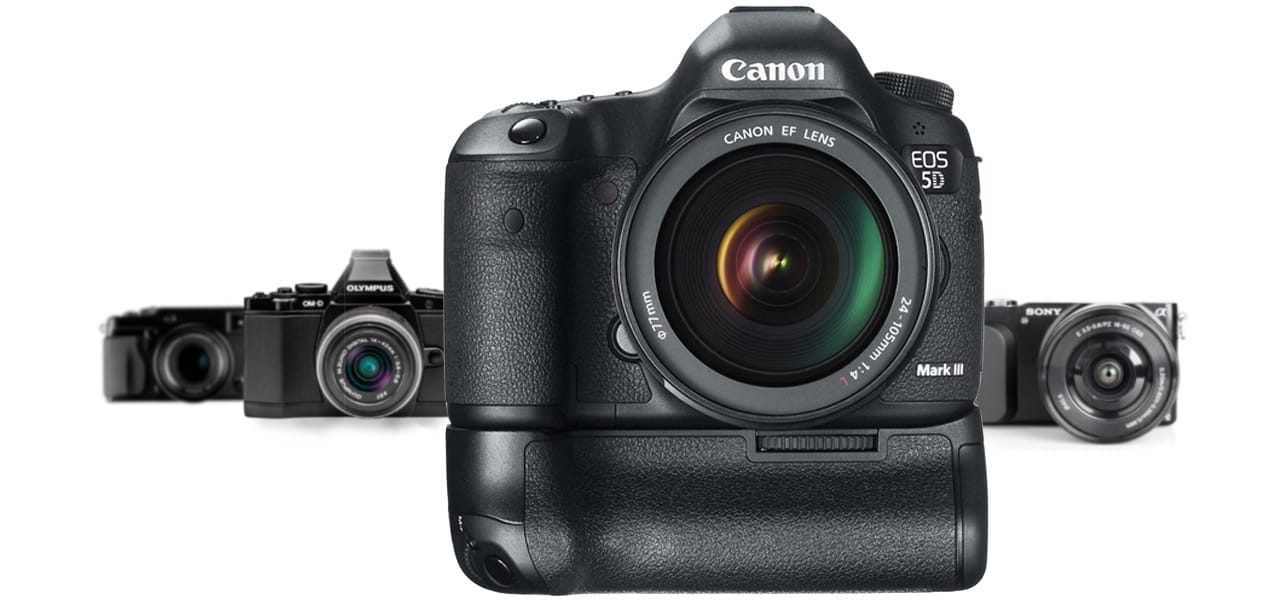
There seems to be a sudden rush towards compact system cameras at the moment, at least if you follow some of the more social media savvy photographers. I can see why a smaller, lighter camera would be appealing but I find the cries that the DSLR is a dead a bit over the top.
I can’t recall ever seeing anything like this before, even in the fickle world of photography. Trends have come along and there has been much bandwagon jumping but there is something that feels a bit disingenuous about this one. Photographers that have made the switch to Micro Four Thirds or the Sony or Fuji systems seem almost evangelical. These people, who have previously proclaimed that it’s “not about the gear, it about the photographer”, are now running around the globe shooting with a mini camera telling us all to ditch our DSLRs today. I have even seen photographers saying they can offer a better service to their clients now they have made the switch. Really? Why should clients care about, or even understand the difference? Something just doesn’t sit right.
I must have missed the point at which full frame cameras with their excellent low light capabilities and shallow depth of field stopped being the thing to aspire to own.
Case in point: I’ve been an avid listener to the This Week In Photo podcast for years and it wasn’t that long ago the host, Frederick Van Johnson, made a bet with co-host Ron Brinkmann, that crop sensor cameras would soon become extinct and everything would be full frame. Fast forward to now and Frederick is waxing lyrical about his Olympus OMD with an even smaller sensor than those crop bodies. And he’s not the only one but when did the size and weight of your camera become the main factor to consider? These cameras are capable but simply not as good quality as a full frame DSLR, no one disputes that and when pressed on the topic the response is “it’s almost as good!”
Almost? No thanks. I don’t want to compromise on quality or have my kit impose restrictions on what I can do. Sure, a little Fuji X100S would be a nice to carry around on a daily basis but I’m not about to follow Trey Radcliffe’s advise and sell all my Canon gear and invest in 3 Sony NEXs. Why does it have to be either/or?
This is may be cynical but here’s my theory. Anyone wanting to build a large audience and become a celebrity photographer needs “a thing”. It used to be organic. David Hobby was the small flash guy, Zack Arias was the one light guy but those things have been done. There’s a rush for the next big thing and it seems to be small and mirrorless.
I have dabbled with a few compact system cameras and while they are great fun, they just don’t do it for me. I like my full frame DSLRs with their heft, fast auto focus and big glass. Maybe I am missing something but so far no one has been able to tell me why these new cameras are better, aside from being smaller and lighter. My iPhone is small, light and always with me, and it can make calls too! If I’m going out with the express intention of taking photographs I’ll throw my 5D over my shoulder.
I am all for new technology opening up new possibilities and mirrorless cameras are definitely interesting and have a future but they aren’t the be all and end all of photography. So maybe my “thing” is to not go small. To stick with my big, “antiquated” DSLR. The be the “full frame” guy?
This is how I feel about the topic today but I can’t promise I won’t suddenly and dramatically do a 180 degree change in direction if someone makes a good case in the comments…
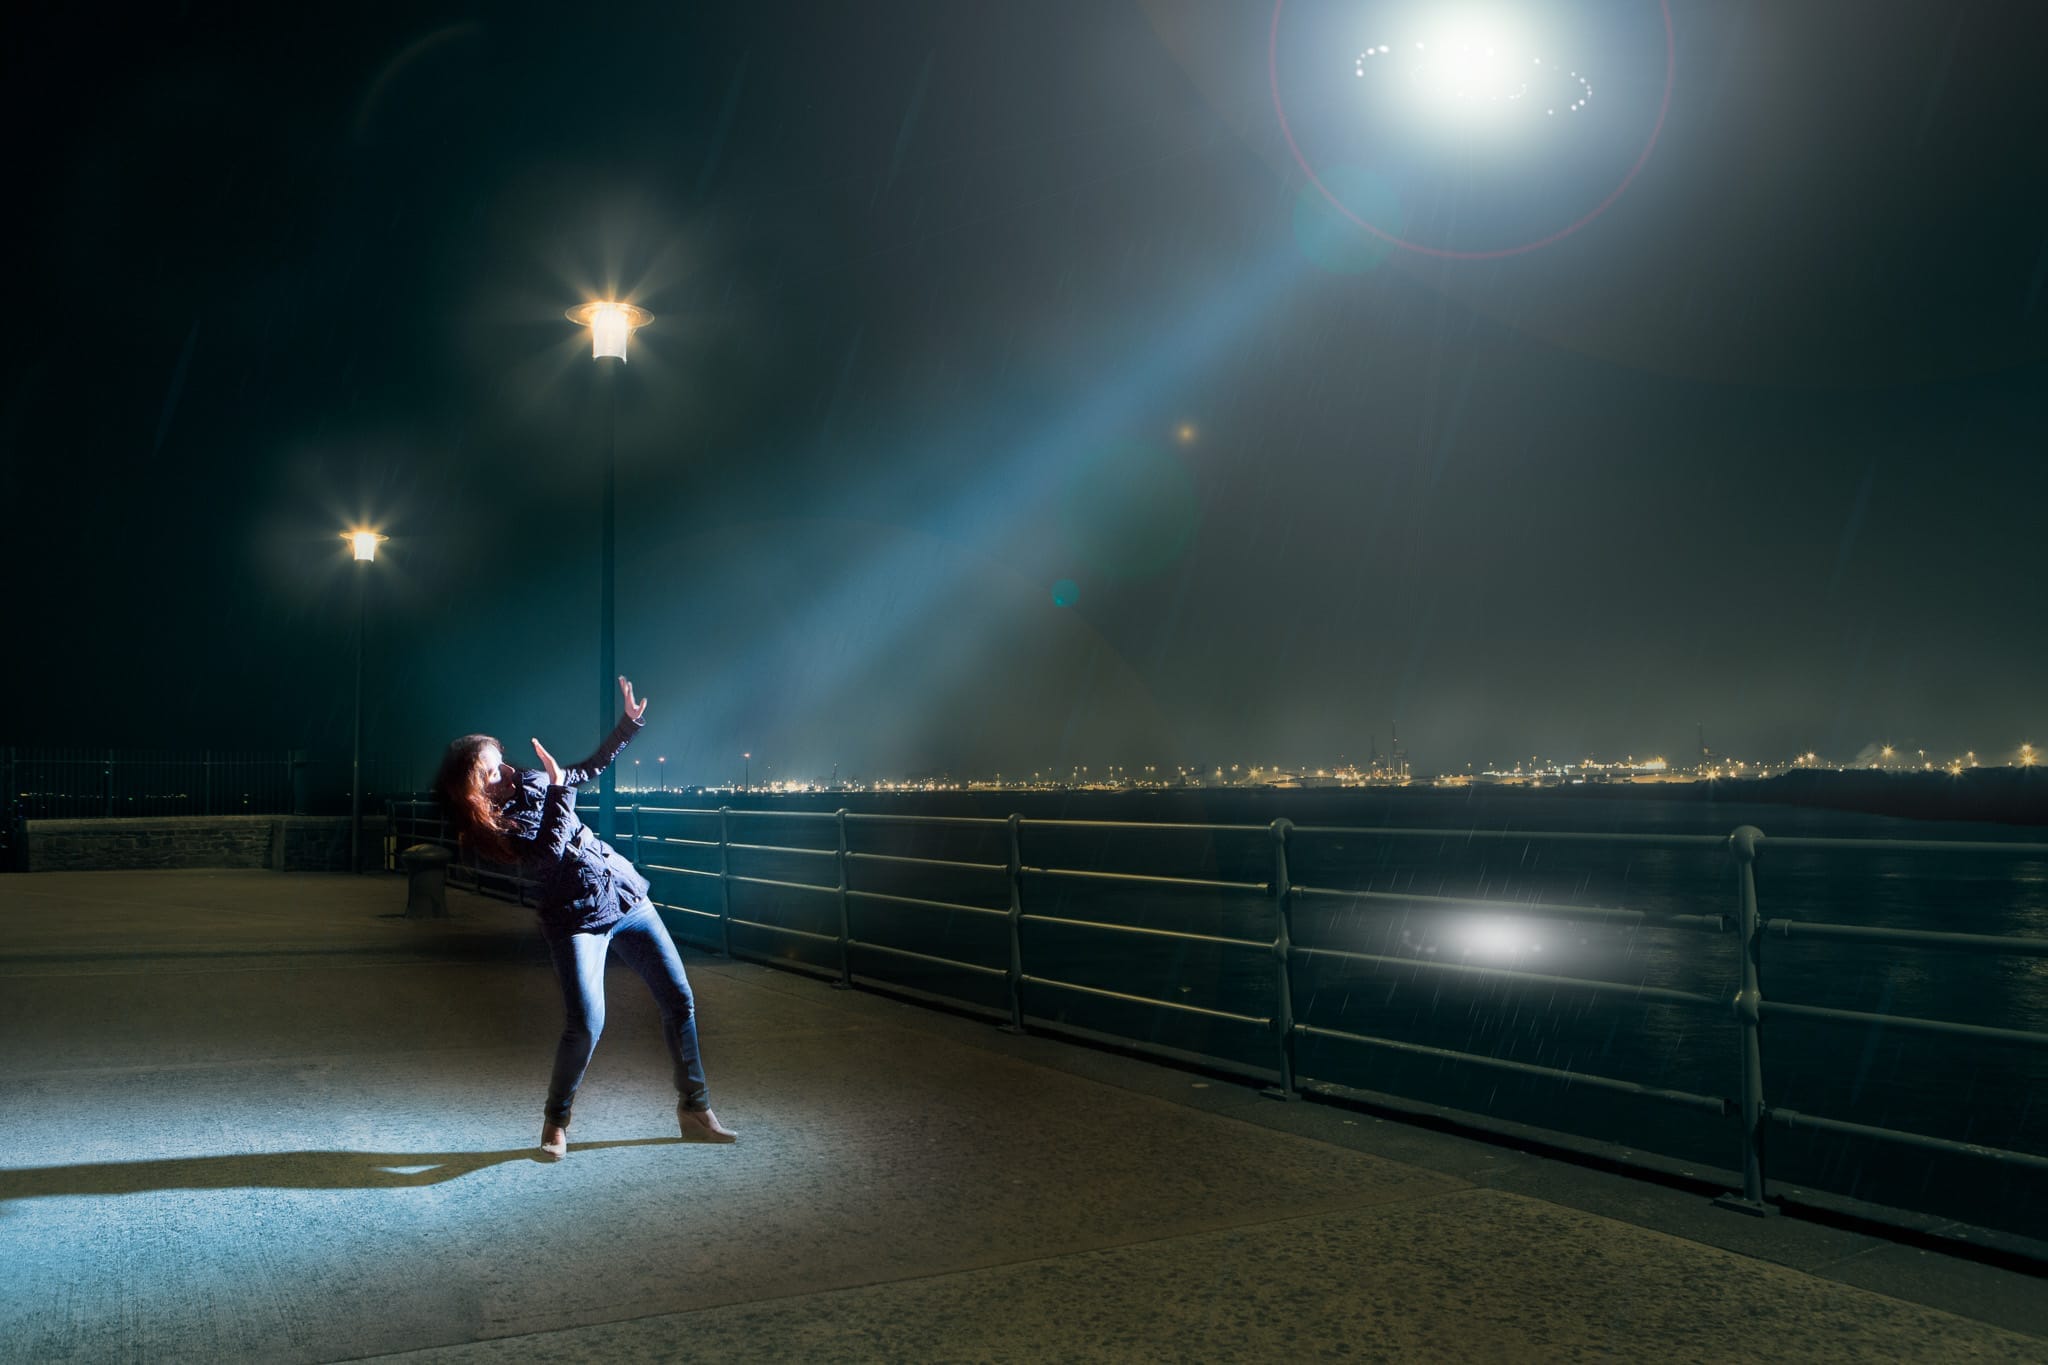
I have been watching a lot of the free YouTube videos created by Aaron Nace and the Phlearn.com team recently and I’ve been feeling inspired to push what I do in Photoshop a bit further. My goal with this shot, taken this weekend, was to go full-on Hollywood sci-fi blockbuster.
Just down the road from me is this view, where the marina ends and the Severn Estuary begins with a huge industrial area making a suitably dystopian background. This is the scene as is, shot at 2.5 seconds with an aperture of f/7.1 to add a subtle starburst effect to each light source. Because of the low light I was locked down on a tripod to avoid any motion blur.
With a few different exposures of the same composition in the can to chose from later, it was time to bring my ever-patient other half Helen into the scene. Despite the life boat keeping station just offshore she got into the role and threw a few “Oh my God! Aliens!” poses.
Lighting was about as basic as it gets. I was using an Elinchrom Quadra with a 7″ reflector and a 30° grid but it was on such low power I could have easily achieved the look with a speed light and a Honl grid or even something a little more Strobist. You can see the light in the above image, about nine feet in the air to camera right. One of the beauties of shooting from a tripod is you can easily remove things like light stands from an image by shooting multiple exposures and using layer masks in Photoshop.
Speaking of Photoshop, this is where the real heavy lifting with this image was done. As planned. This wasn’t a case of fixing what I could, and should, have got right in camera. This was about adding a specific look and this is where the techniques I picked up from Aaron came in.
There are three main Photoshop edits here.
I won’t make this into a full tutorial as Phlearn have already done a fantastic job but I’ll give a quick outline of each step.
Step 1: Colour Grading
Until recently I have done any split toning of my images in Lightroom. Split toning means adding a different colour to you shadows and highlights. In this case I went for a cool greeny blue in the dark areas of the image and a warm yellowy orange in the highlights using Solid Colour adjustment layers and the Blend If options in Photoshop’s Layer Styles.
Step 2: Beam of light
This is just a selection drawn with the polygonal lasso tool on a new layer, filled with white and Gaussian blurred. The thing that that makes it more believable is the fact it done on three layers, each is a slightly narrower, slightly brighter, slightly less blurred beam.
Step 3: Clouds around the light sources
Light is invisible. You only see it when in interacts with something else and when talking about alien tractor beams over water this is going to be mist. I created this with Photoshop’s Render Clouds feature, Gaussian blurred them a little then painted them in around each source of light with a layer mask to make the beam a little more solid and convincing.
So all in all, about 10 minutes to set up, another 10 to shoot and a couple of hours in Photoshop but the majority of the work went in to planning and pre-visualising the image before even leaving the house.
I’d love to hear what you think of the final image. Am I wielding Photoshop like a scalpel or a sledgehammer?
Cameras are everywhere now. Everyone has a pretty decent one in their phone or even an entry level DSLR and they are snapping away constantly. On Facebook alone there are 300,000,000 images uploaded each and every day. That’s not a typo. Three. Hundred. Million. Photos! A day! Add to that the tweets and the Instagram posts and you reach an unfathomable number of pictures being created daily. And that’s amazing! I love that more and more people are enjoying photography and I don’t care that these images are badly composed or blurred or overexposed. It doesn’t matter. There is a certain magic in the snapshot, it’s about the moment and not the photograph itself.
But there is a downside to all these snapshots. Being exposed to this many, and I’ll be blunt here, bad images has lowered the public’s expectations of what a good photograph should look like. After seeing 10,000 terrible photographs, when something slightly less terrible comes along it gets hailed as “awesome”, “amazing” and “the best photo ever”. It’s not. It’s better, but it’s none of the above. If you’ve eaten nothing but beans for 6 months even the cheapest hamburger will taste like a gourmet meal.
Usually what makes people react like this is a sharp image with a shallow depth of field that’s been shot on anything with a bigger sensor than an iPhone. Yes, it looks a lot better than most images online today purely because of that, but that doesn’t make it “amazing”. It does however make it easy for the person that took it to start believing the hype, and the next thing you know, they are making business cards and trying to charge for their services. But that’s another blog post…
If you are a photographer, someone in love with the art and pouring their heart and soul into every image, all this praise being lavished on average work could drive you crazy. Don’t let it. Even though mediocre has become the new good and people are constantly bludgeoned with poor photographs, hold on to this one thought: if your work really is good it will be recognised. When something genuinely amazing comes along people know it when they see it (although they may need to invent new superlatives as they have wasted all the others).
So keep putting you best work out there. Don’t dumb down, settle for less or stop trying because you think no one cares. Push yourself harder to raise the bar even higher. Show the world what “awesome”, “amazing” and “the best photo ever” really looks like.
It works both ways though. Remember to take it with a pinch of salt when people praise your work unless it’s someone you really admire. Don’t fall in to the same trap and remember you can, and should, always do better.
Today’s Photo of the Week is a panorama I shot for a national cinema chain.
The pano is made from these 7 individual shots merged in Photoshop.
You can see form the EXIF data that I shot this with a wide angle lens, at low ISO for less noise and at a fairly slow shutter speed thanks to being set up on a tripod. I always shoot in manual when taking a panoramic shot by taking a meter reading from a fair average part of the scene. If I left the camera in Aperture Priority the exposure settings would have changed as I panned because there are varying amounts of bright signage and dark ceiling in each frame.
Shooting at 1/4 of a second meant I could keep the ISO nice and low for a clean file and meant that anyone moving would be slightly blurred, both obscuring their faces and giving a busy feel to the image.
As Photoshop is so good at aligning images into a pano, I often shoot them handheld with the camera in portrait orientation (to allow more room for error) but when working off a tripod, I was safe to shoot landscape – after a few test swings back and forth to make sure I was level.
Once Photoshop had done it magic with layers and masking I was left with this image which I round-tripped back into Lightroom for a few levels tweaks and a crop to give the final image at the top of this post.
Tuesday’s Photo of the Week involved adding a skyline as a finishing touch. For this image, the Skyline was the centre of attention.
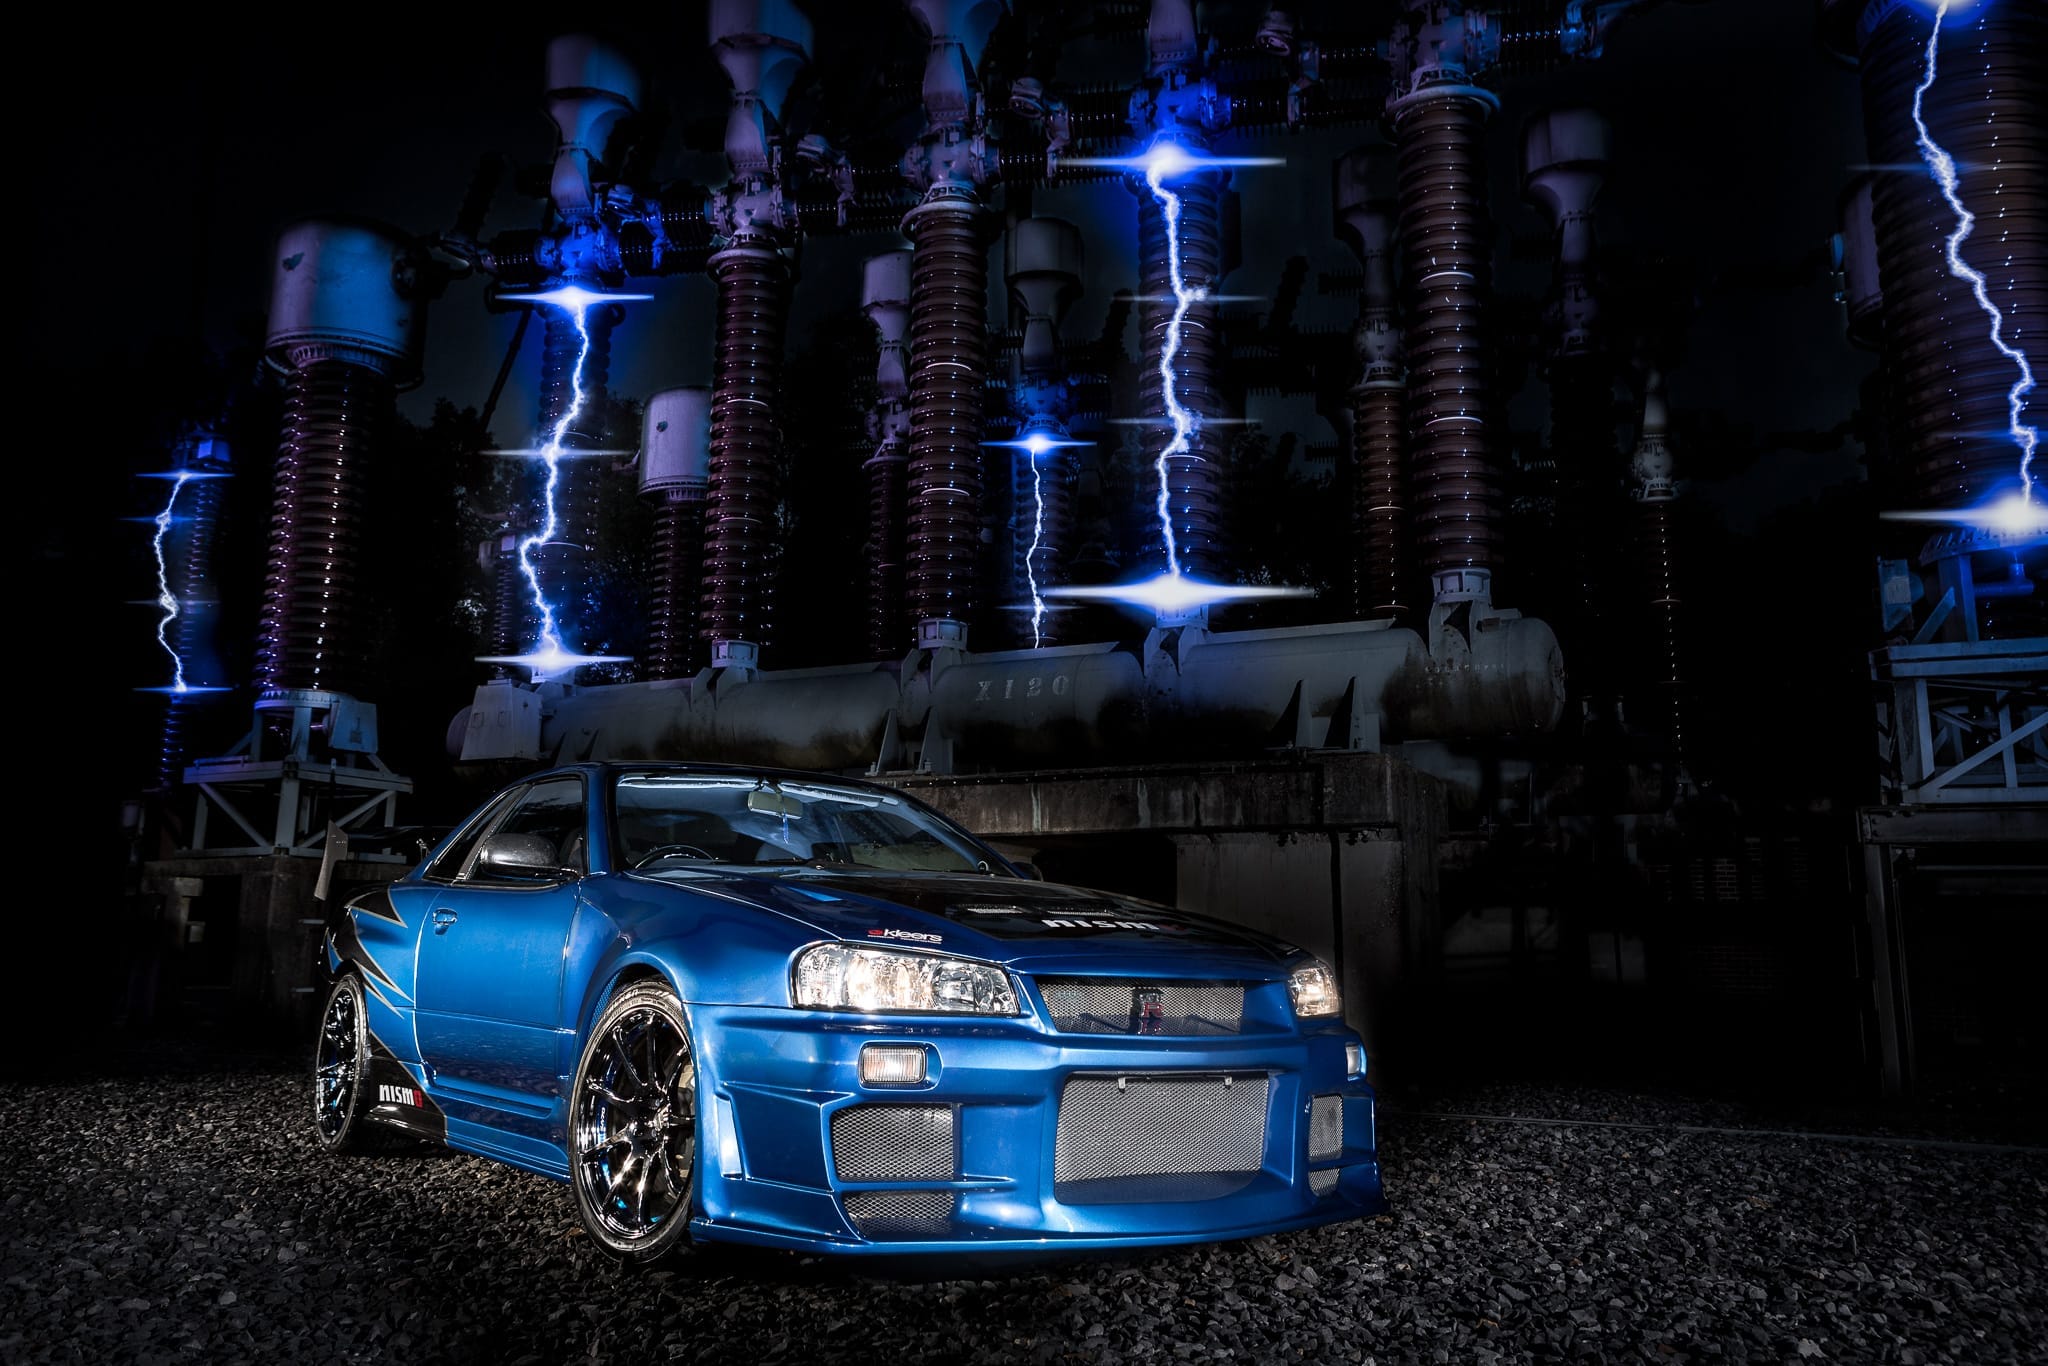
This is The Sextons Skyline, aka SKY101, aka The Heff’s car and if you have spent any time at car shows around the UK, you will have seen it before. I’ve known Chris, the owner, for a few years and when he called me and told me about a location he had in mind I was heading south the next weekend.
With a car this aggressive looking and a location so dramatic, it would have been wrong not to go all out and make the shoot quite theatrical. Because of the location I was working with as little kit as possible so this whole shot was lit with a single strobe and even though my SkyPort radio triggers worked flawlessly, if I raised my Elinchrom Quadra any higher than 2.5 metres, it started to flash uncontrollably. A little scary! Considering the substation typically handles 400,000 volts of electricity, I was impressed I didn’t have to fall back to the old flash sync cable I’d packed just in case.
Despite the huge amounts of electricity involved, the substation handles it in a very understated way. You can hear the crackle and feel it in the air but photographically speaking, there not much to see, so I hammed things up a little. OK… a lot!
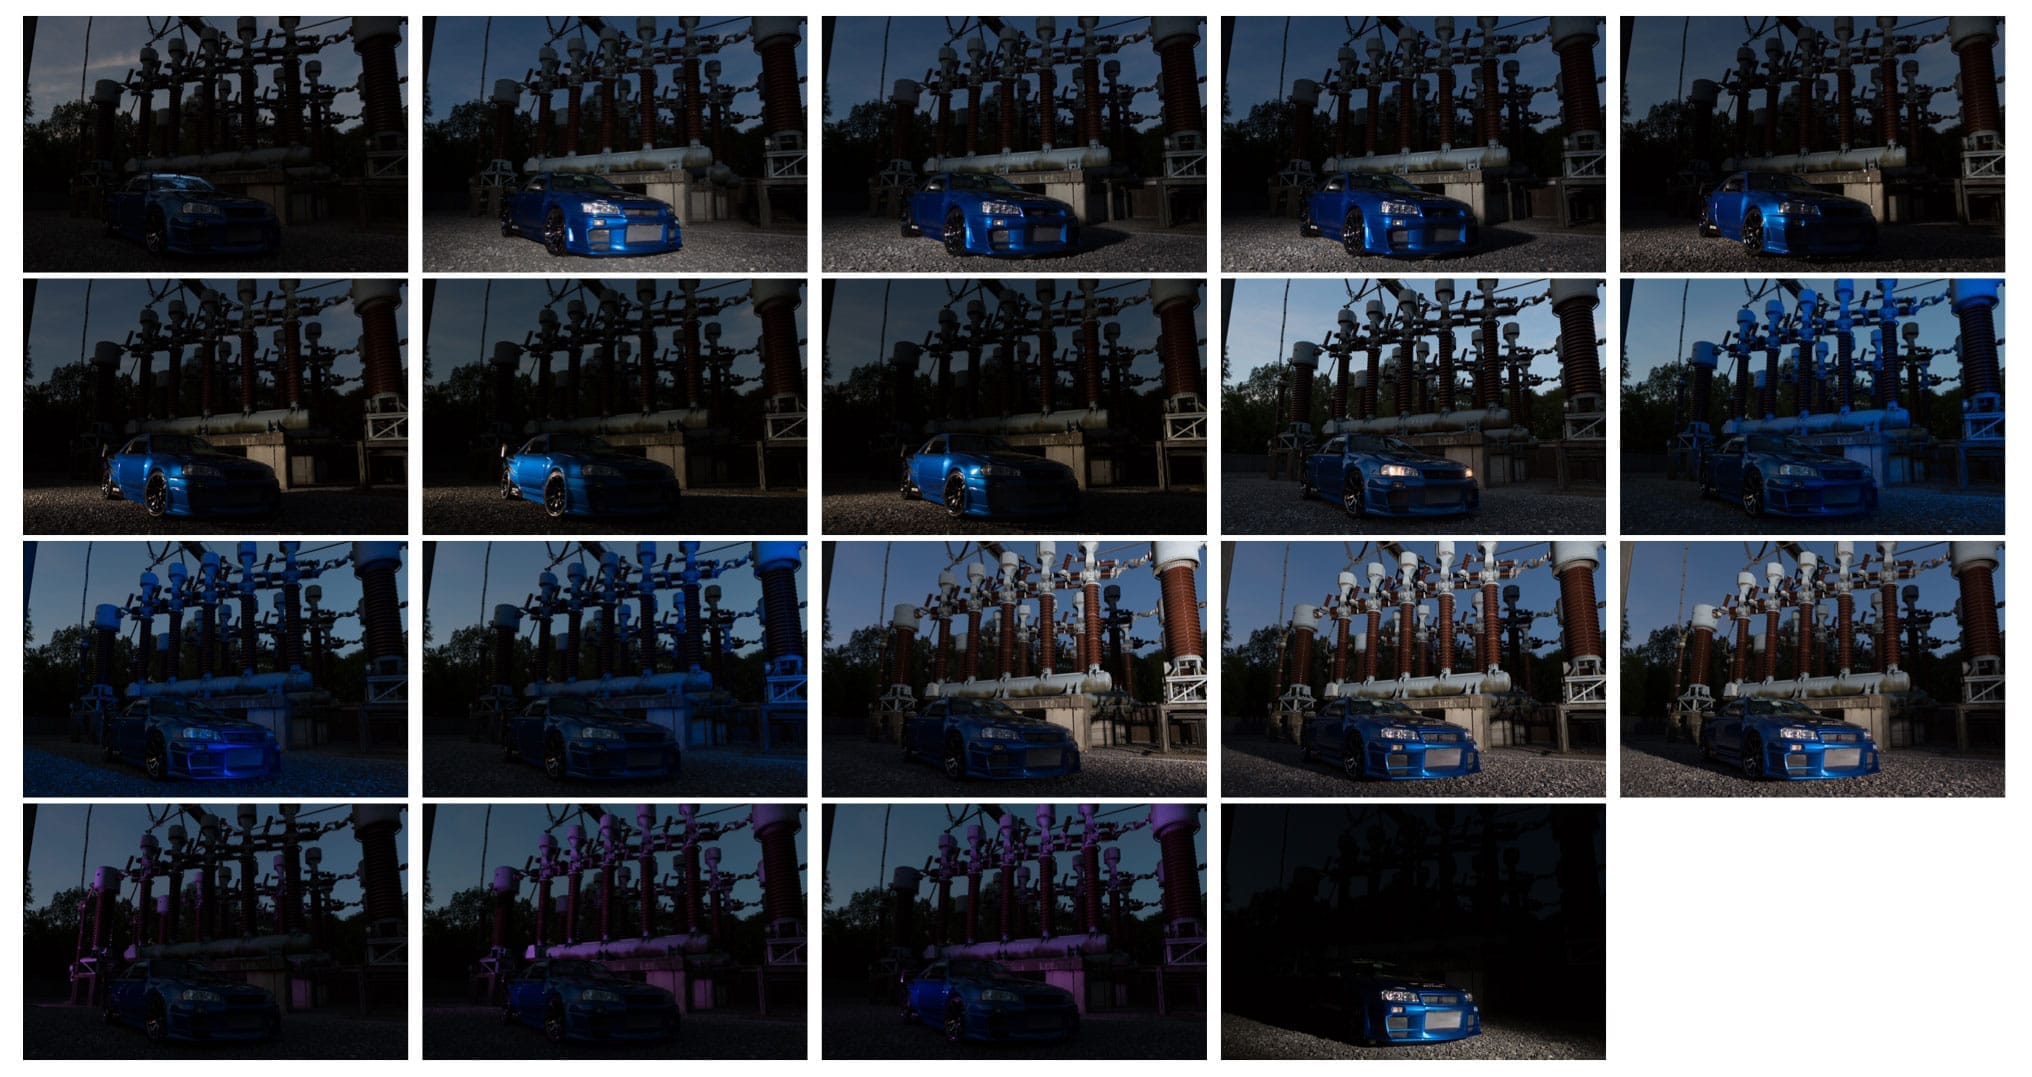
Because I was working with just one strobe, I had the camera locked in position on a tripod as I walked around the car lighting each panel individually with a fairly tight beam of light from a Maxi Spot reflector. The plan was always to shot lots of individual images and then layer them in Photoshop afterwards. To save me walking back and forth between the camera and the light I was using a wireless shutter release to speed things along.
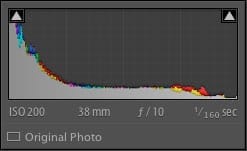
As for camera settings, if you look at the selection of images below you can see I was under exposing the ambient light by about 3 stops and letting the flash do its work. I also shot an exposure just for the headlights and another one with more ambient light in case I needed some fill for the deeper shadows. Then finally I lit the background, gelled purple from the left and blue from the right to give a little theatre.
Once I knew I had all everything I could possible need in the camera, off to Photoshop I went. I painted in the lit areas of of the using layer masks and then went to town on a Frankenstein style background. Here’s a screen capture of the final build up.
This week’s photo comes from an advertising campaign I shot a couple of years ago for the insurance company Performance Direct. It was piece of work that was born out my ethos of working for free to build relationships but that’s another blog post…
The brief was to shoot a range of images to be used in adverts across a range of magazines, from prestige and classic to performance and modified. The lovely Hayley here was the face of classic insurance.
The whole shoot took place in a classic car club in east London, basically a large building filled with a vast array of amazing cars.
Definitely not a studio so in order to minimise clutter in the background of the shots I underexposed the ambient light by quite a bit. My sync speed of 1/160th (the 5D MKII would have managed 1/200th, but the cheap eBay triggers I used at the time were more reliable at 1/160th ) and f/10 did the job nicely without taxing the my pair of Elinchrom BRXi500’s. In this case, the main light is camera right in a 50″ Westcott Apollo softbox and there’s a gridded separation light coming from camera left to lift Hayley’s dark hair and right shoulder off the background.
As you can see above, the shot I delivered to the client was left pretty much how it came out of the camera as they had a team of designers who would be working with the image. All I did was remove a few specular highlights from various bit of chrome trim on other cars off in the distance.
For my portfolio I wanted something a bit more striking so I dropped in a city skyline to finish the image off. Once the tones were matched, the trickiest part was distorting the image so everything looked in perspective. Here is my version of the final image.


 Shooting at 1/4 of a second meant I could keep the ISO nice and low for a clean file and meant that anyone moving would be slightly blurred, both obscuring their faces and giving a busy feel to the image.


Recent Comments